
With Windows, you can automate most tasks that would otherwise take up a lot of time and energy. One such feature is the Snap Layouts feature (previously known as Snap Assist), which automatically resizes one or more windows to fill the screen upon dragging. You can choose from six different types of layouts to adjust up to 4 windows on your screen at a time.
This feature is customizable, which means you can enable or disable it according to your personal preferences. In this guide, we will show you how to do that in a few minutes.
How to Use Windows 11’s Settings to Enable or Disable the Snap Layouts Feature
The first method of enabling or disabling the Snap Layouts feature is via Windows Settings. We will be heading over to the Multitasking section of the Settings and making the desired changes there.
For this method, you do not need to be logged into Windows as an administrator. Here is how you can proceed:
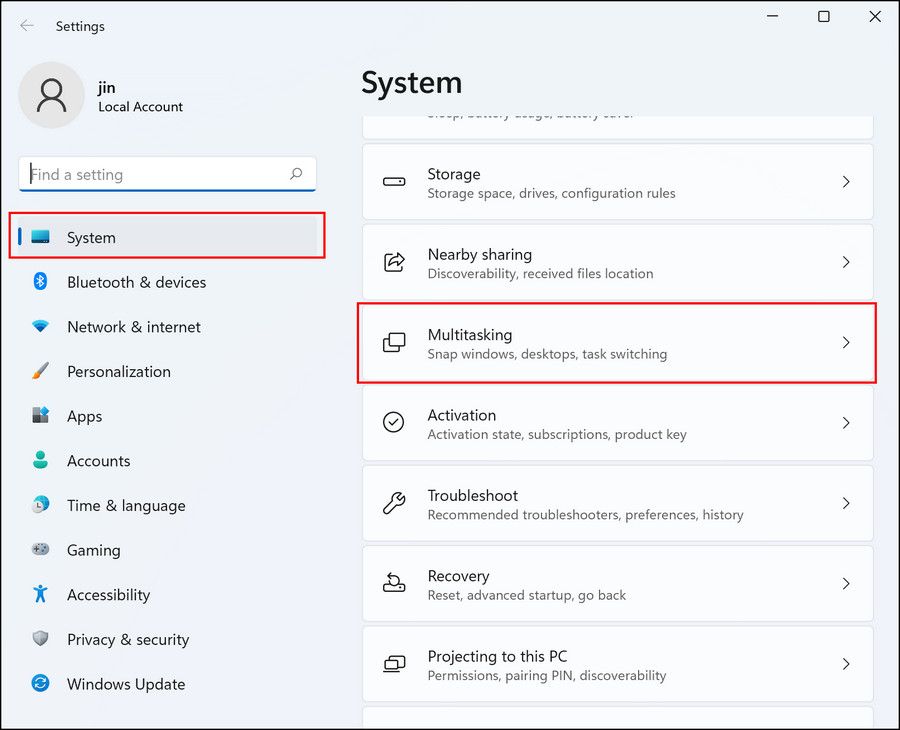
- Press Win + I to open Windows Settings.
-
Select System from the left pane and click on Multitasking on the right side of the window.
-
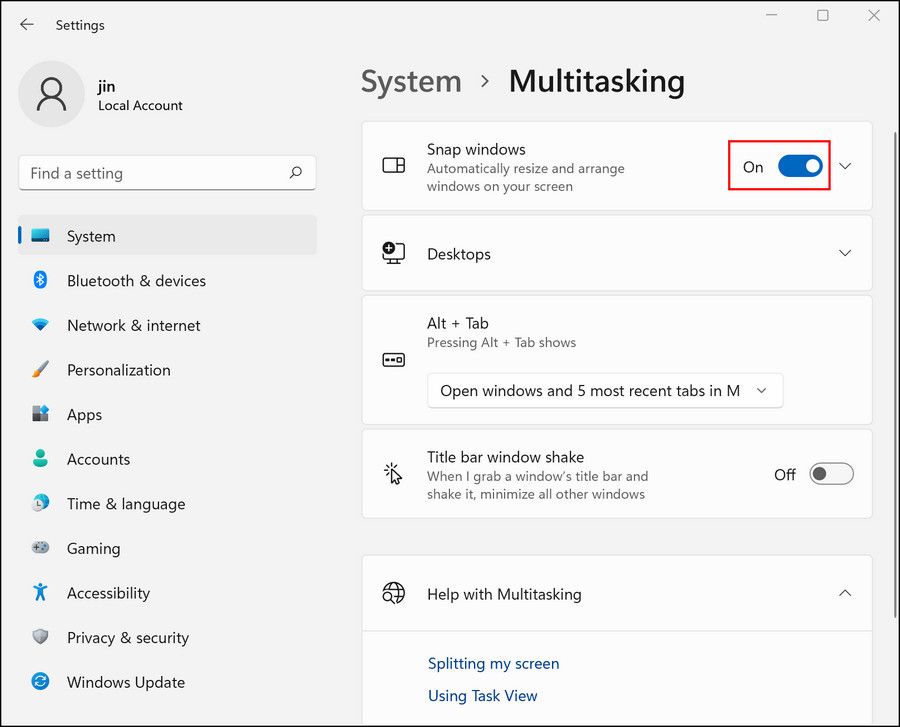
In the following window, look for Snap windows option and turn the toggle associated with it on or off, according to your preferences.
-
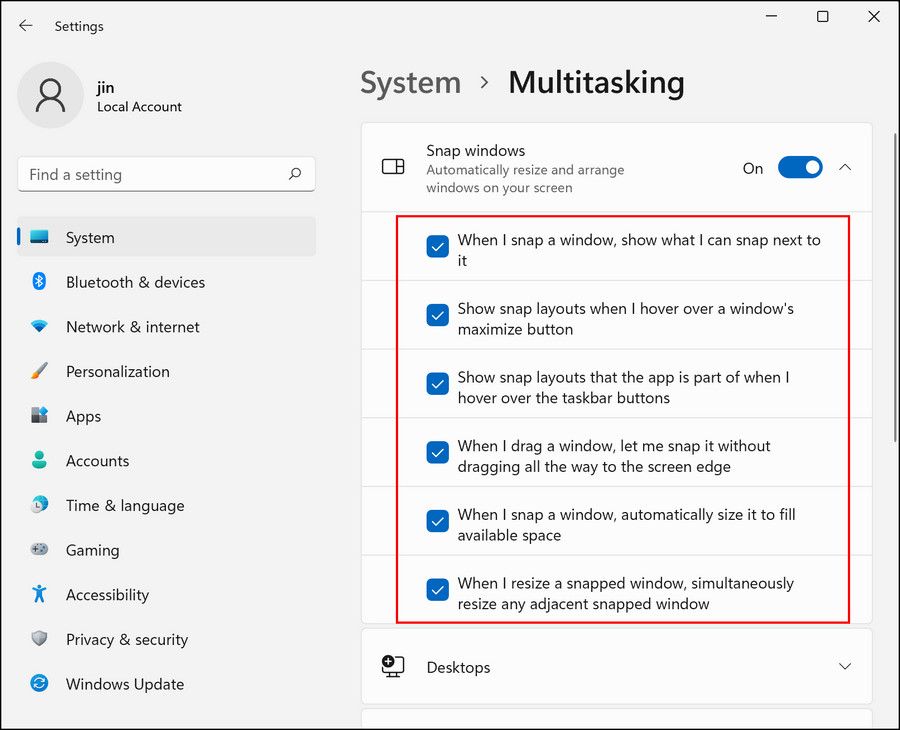
If you are enabling the feature, then expand the dropdown for Snap windows and uncheck/checkmark the options there to customize the feature further.


If you have enabled the Snap Layouts feature, then you must know that it allows you to choose from the following six layouts:
- Two windows
- 80/20 screen split
- Three equally sized windows
- Three unequally sized windows
- 50:25:25 screen split
- Four equally sized windows (25:25:25:25)
If you do not find these options to be suitable for your needs, you can create a custom snap layout with FancyZones.
How to Use the Windows Registry to Enable or Disable the Snap Layouts Feature
If multiple people use your PC and you want to make administrative-level changes for all the user accounts, then you can use the advanced utilities like the Registry Editor to enable or disable the Snap Layouts feature.
The Registry is where Windows stores information about its programs and processes in the form of keys and values. To make changes within the Registry, you need to modify these values according to your preferences. In this method, we will be modifying the values related to the Snap Layouts feature.
Before we proceed, make sure you are logged into Windows as an administrator and then create a Registry backup. This will help you restore the current working state of the Registry if anything goes wrong during the steps.
Once done, proceed with these methods below:
- Press Win + R keys together to open Run.
- Type regedit in the text field of Run and click Enter.
- Click Yes in User Account Control prompt.
-
Inside the Registry Editor, navigate to the location below if you want to disable Snap Layouts:
HKEY_CURRENT_USER\Software\Microsoft\Windows\CurrentVersion\Explorer\Advanced
-
Right-click on the Advanced key and select the New > DWORD (32-bit) Value option.
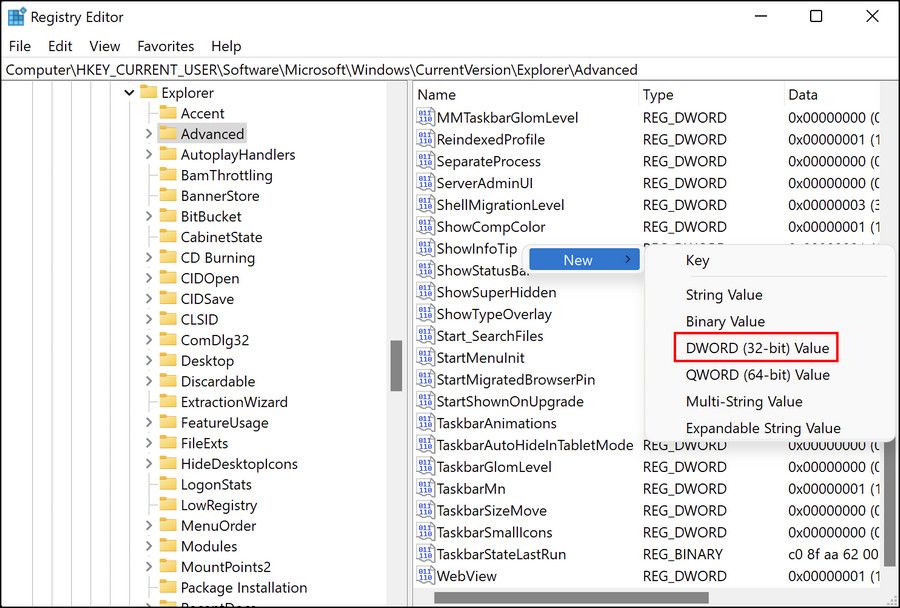
- Rename this value as SnapAssist.
-
Double-click on SnapAssist and under Value data, type 0.
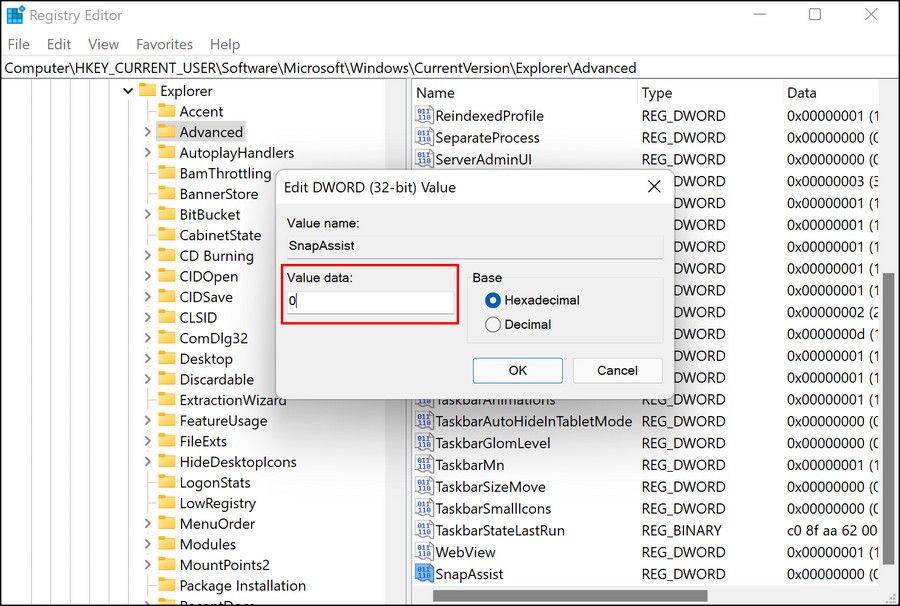
- Click OK to save the changes.
- If you want to enable Snap Assist, then type 1 under Value data of SnapAssist and click OK.
-
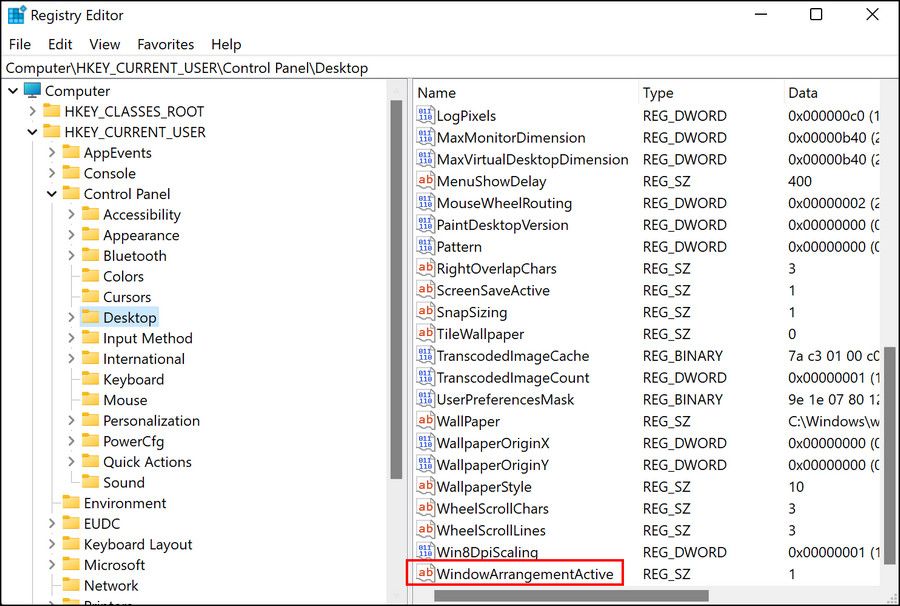
Once done, navigate to the following location in Registry Editor:
HKEY_CURRENT_USER\Control Panel\Desktop
-
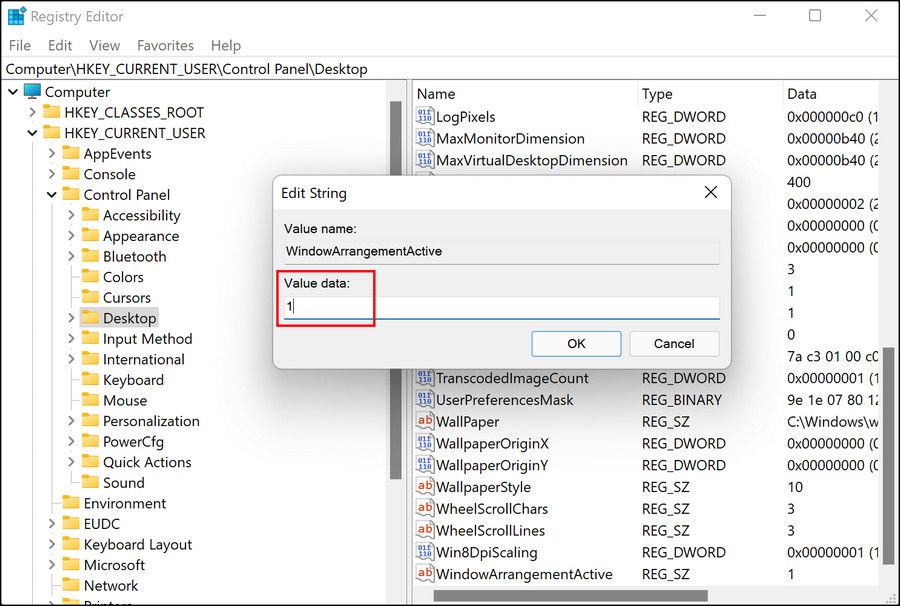
Locate WindowArrangementActive in the right pane and double-click on it.
-
Type 1 under Value data and click OK.
- In case you cannot locate WindowArrangementActive, right-click on Desktop and choose New > DWORD (32-bit) Value.
- Rename this value as WindowArrangementActive and then make the changes above.


This should successfully enable or disable the Snap Layouts feature in Windows 11.
Is the Snap Layouts Feature Not Working in Windows 11? Try These Fixes
While the Windows 11 Snap Layouts feature is more advanced than its predecessor and offers additional functionalities like Snap Groups, it is not uncommon for the users to run into errors related to it now and then. If the Snap Layouts feature is not working after enabling it, then here are the troubleshooting methods you can try:
1. Check App Compatibility
There are certain applications that do not support the Snap Layouts feature in Windows 11. If you are using such an app, you will not be able to Snap layouts effectively or at all.
While there is no single-click method of finding out which apps are compatible with the Snap Layouts feature, often the apps that control window sizes using their own functionality are incompatible. If you are using such an app, you can try switching to another and see if the snaps work fine there.
2. Check for Similar Third-Party Apps
There might also be third-party applications running on your PC that offer the same functions as Snap Layouts, preventing you from using it. The simplest solution, in this case, is to uninstall the third-party application and then try using Snap Layouts.
You can also try switching to another third-party application since the issue can also be related to just the app you are using.
3. Update Windows to the Latest Build
If your Windows is outdated, certain features are likely to become incompatible with the operating system version, leading to issues like the one at hand.
If there are pending updates in the system, we suggest you take your time to install them and update Windows to the latest available version. Hopefully, this will fix incompatibility issues in no time.
4. Use Keyboard Shortcuts
You can also try using the default keyboard shortcuts Windows offer for Snap Layouts.
To begin, press the Windows icon + Left Arrow or Windows icon + Right Arrow to snap the window to either side. To position the window somewhere else, press the Windows icon + Arrow Keys or use the Windows icon + Top Arrow/ Windows icon + Bottom Arrow shortcut.
You can also use your mouse to hold the title bar of the window and drag it around the screen.
Snap Windows Using Snap Layouts
Resizing multiple windows on your screen can be a tedious task. To help you perform this action in a single click, Microsoft Windows (both Windows 10 and 11) comes with the snap assist or snap layout feature, which is customizable.
If the nature of your work requires you to work on different windows at a time, we recommend keeping this feature enabled. However, if you are not going to use it often and would rather adjust multiple windows manually, then you might want to disable it.