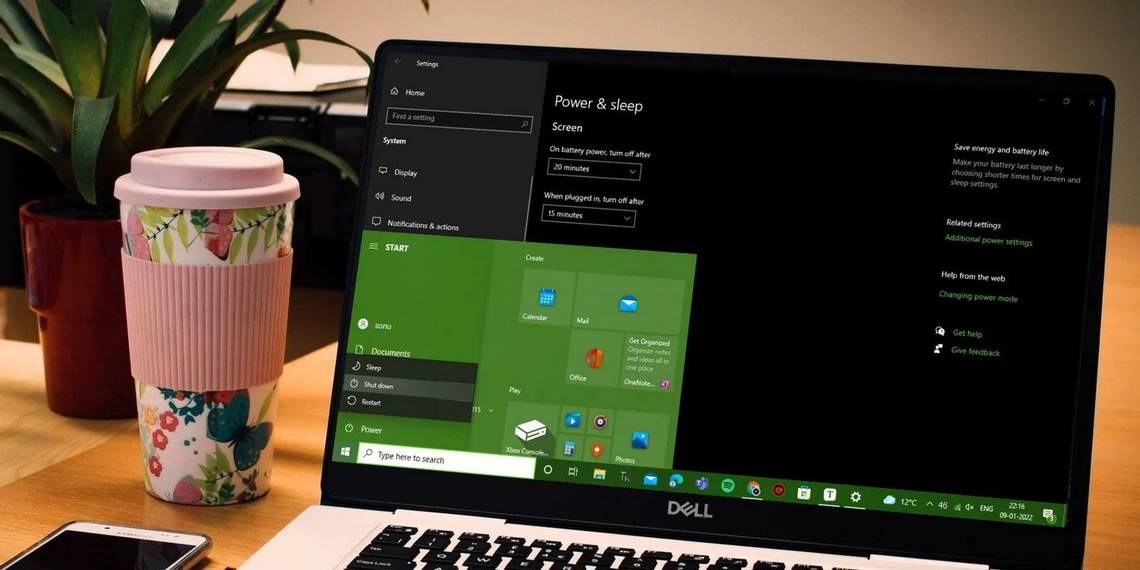
Windows' sleep and hibernation modes are great for taking quick breaks from your work or browsing when you know you’ll resume it in a short while. With these modes, you can pick up where you left off while saving energy.
However, some Windows 11 users have reported that their computers shut down instead of going into sleep mode. With this guide, we will examine this issue more deeply and explore some troubleshooting methods other users have found successful.
Why Does a Windows PC Shut Down Instead of Going to Sleep?
The issue under discussion is typically caused when the users try to switch to the Sleep mode but their PC shuts down instead. Here are some potential reasons why this might be happening:
- Problematic power settings: The power settings of your operating system might be configured incorrectly, causing your PC to switch off instead of going into Sleep mode.
- Outdated or corrupt drivers: If the relevant drivers installed on your PC are outdated or corrupt, they will become incompatible with the system and fail to do their jobs properly.
- Hibernation mode: This mode puts your open documents and applications on the hard disk and switches your computer off. This mode looks almost identical to a turned-off computer, which causes people to erroneously think their PC keeps turning off.
- Power plan: A setting in your chosen power plan might also be forcing the PC to shut down. If this scenario is applicable, you can switch to a different power plan to fix the problem.
Having identified the possible causes for the issue, let's move to the troubleshooting steps that helped other affected users resolve the problem.
1. Modify Advanced Power Settings
Apparently, your PC is likely to shut down instead of going into Sleep mode if the Hard disk settings in the Advanced Power Settings of Sleep mode are configured incorrectly. Several users managed to fix the issue after increasing the time at which the hard drive is turned off in Sleep settings. Here is how you can do it:
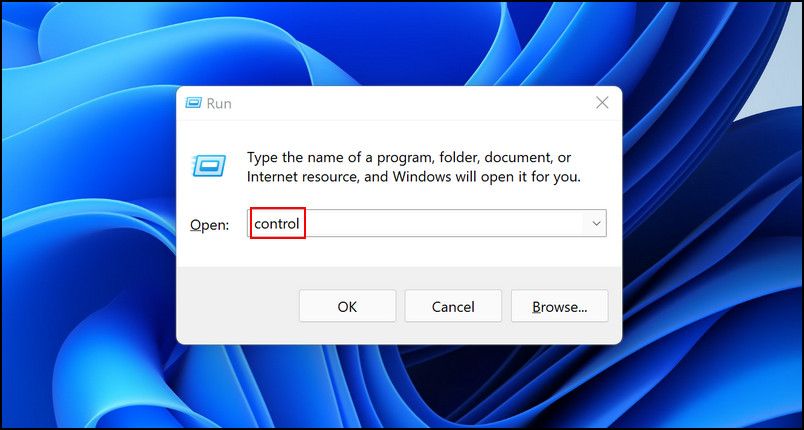
- Press Win + R simultaneously to open a Run dialog box.
-
Type control in the text field of the dialog box and hit Enter.
-
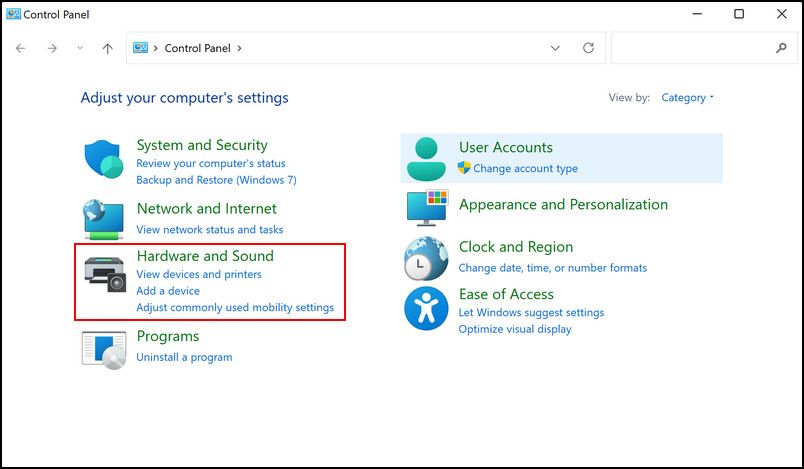
Inside the Control Panel window, click on Hardware and Sound.
-
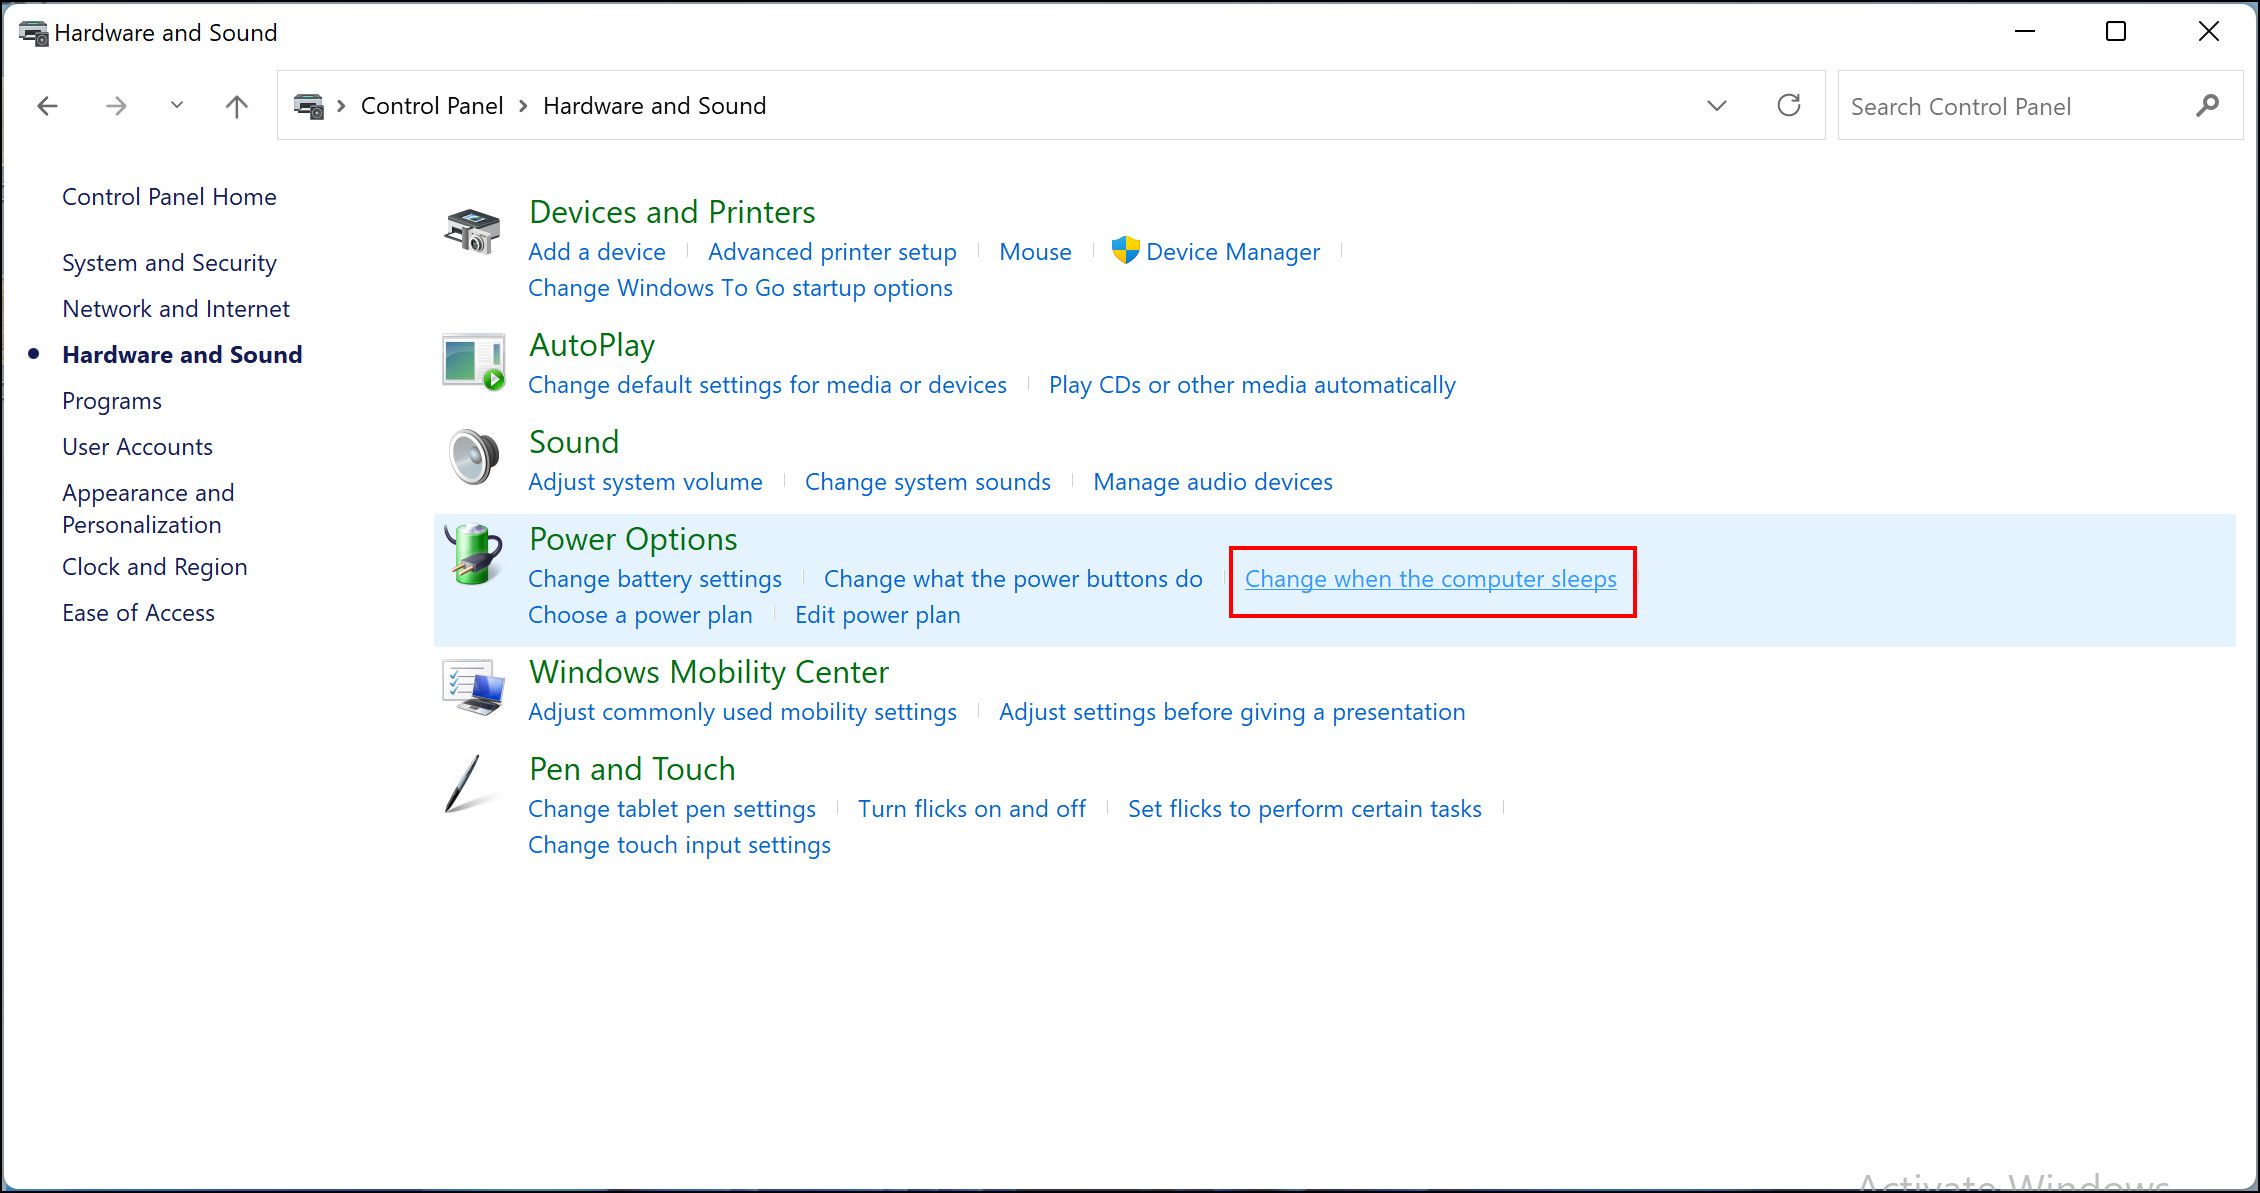
Then, choose Power Options and select Change when the computer sleeps as shown below.
-
Click on Change advanced power settings. This should launch a dialog box on your screen.
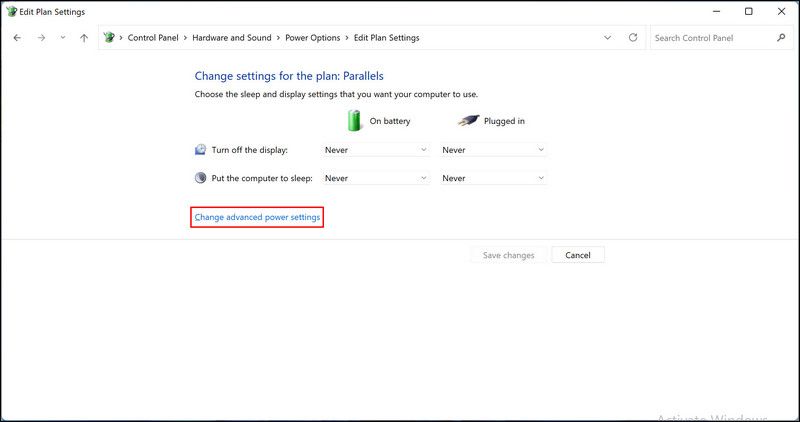
-
Enter 1500 (or any other large number) in the text field associated with On battery under the Turn off hard disk after option.


Once done, check if your sleep mode works now. And if you're interested, why not learn how to fully customize your Windows 10 sleep settings too?
2. Disable Hibernation
Some PCs are set up to go into hibernation after they've been in sleep mode for a set time. A computer in hibernation will act very similarly to a PC that's turned off; for example, you can't wake it by wiggling the mouse or pressing a key on the keyboard. The only way you can wake it back up is by pressing the power button.
Because of this, some users get the impression that their PC automatically turns off mid-sleep, when in fact it's just hibernating. And this means that some fixes for a PC that turns off when it goes to sleep won't work, because it's not actually turning off in the first place.
As such, it's a good idea to double-check that your PC isn't going into hibernation. To do that, you can double-check your PC's hibernation habits by going into the power settings of the Control Panel:
- Press Win + R simultaneously to open a Run dialog box.
- Type control in the text field of the dialog box and hit Enter.
- Inside the Control Panel window, click on Hardware and Sound.
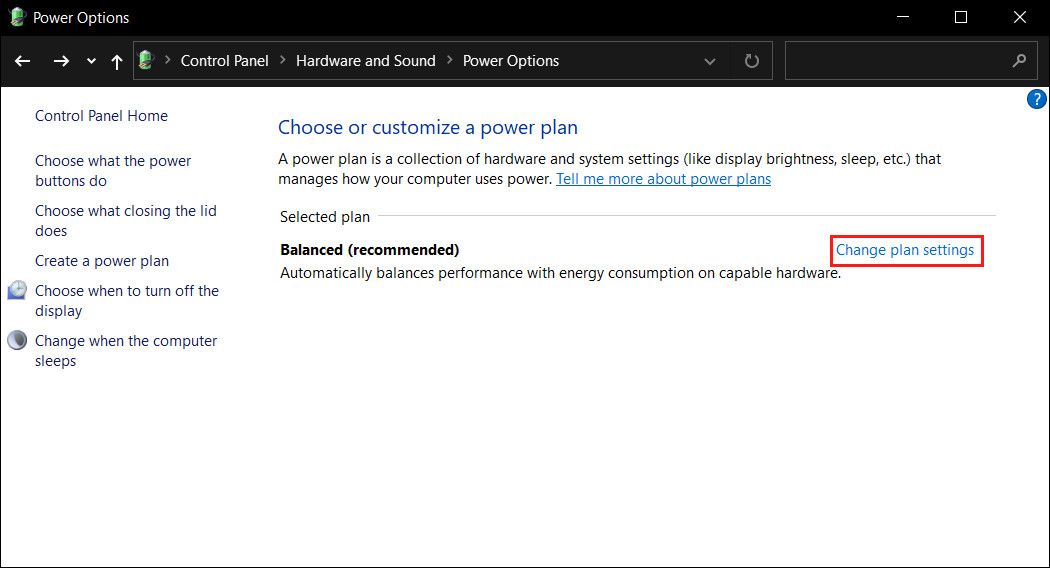
-
Next, choose Power Options and then click on Change plan settings.
-
Select Change advanced power settings.
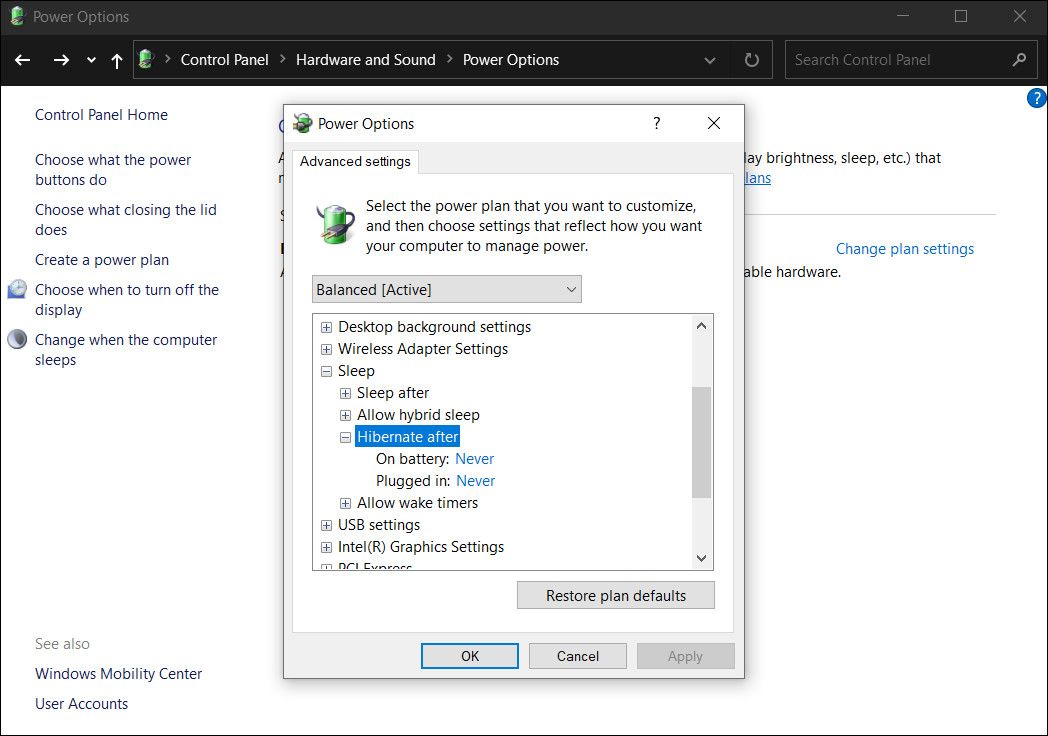
- In the dialog box that has popped up on your screen, expand the Sleep option.
-
Now, expand Hibernate after and select Never.


You can now close the window and see if your PC still "turns off" when it goes to sleep.
3. Update Or Rollback Drivers
As we mentioned earlier, outdated or corrupt relevant drivers can also cause problems within the operating system. As per our research, Intel’s Management Engine Interface (IMEI) driver is often responsible for power plan issues on Windows.
In this situation, updating the driver through Device Manager is the best approach. However, if this does not work, you can also roll back the driver to an older version and see if that fixes the issue. Here is how you can update your driver:
-
Type Device Manager in the search area of the taskbar and click Open.

-
In the newly launched window, expand System devices and right-click on Intel Management Engine Interface.
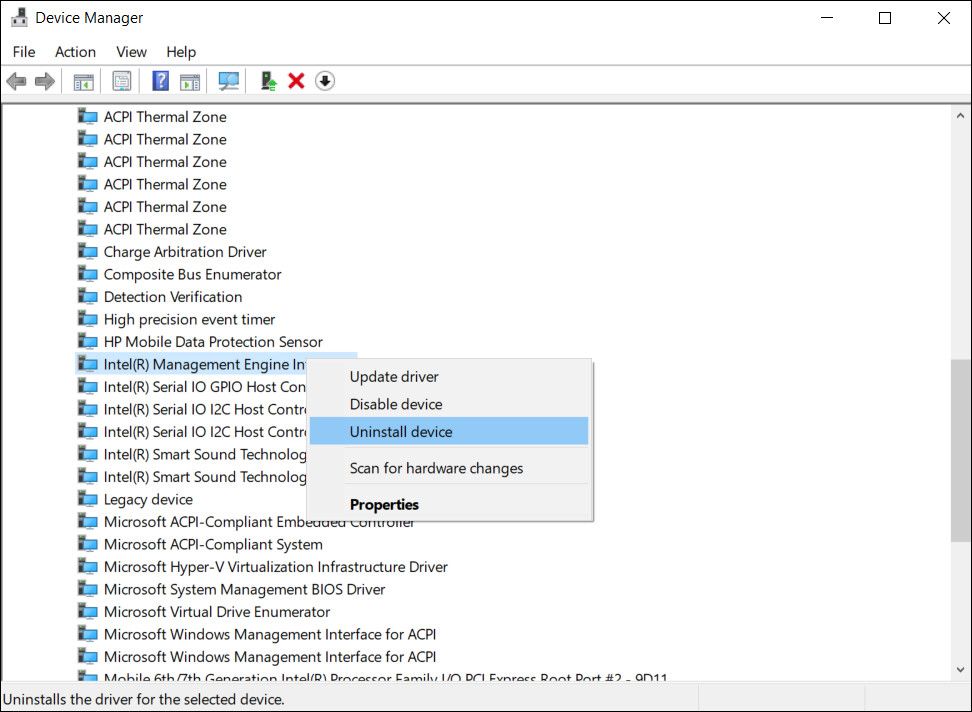
- Select Uninstall device and follow the on-screen instructions to proceed.
- Once the driver is uninstalled, install a new driver from the manufacturer’s website.


Alternatively, you can also update your driver via Windows Settings. The steps listed below will guide you through that process.
- Press Win + I simultaneously to open Windows Settings.
-
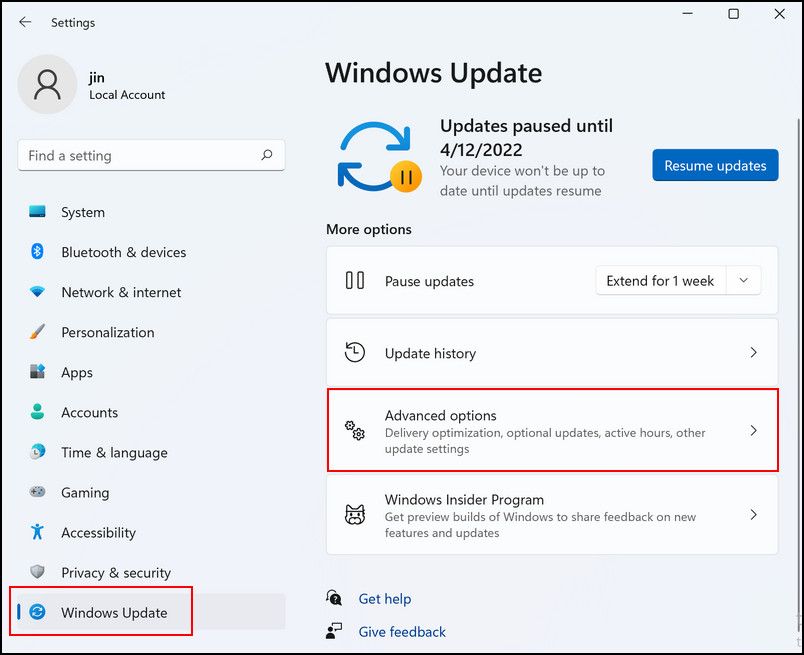
Select Windows Update from the left panel and click on Advanced options on the right-hand side of the window.
-
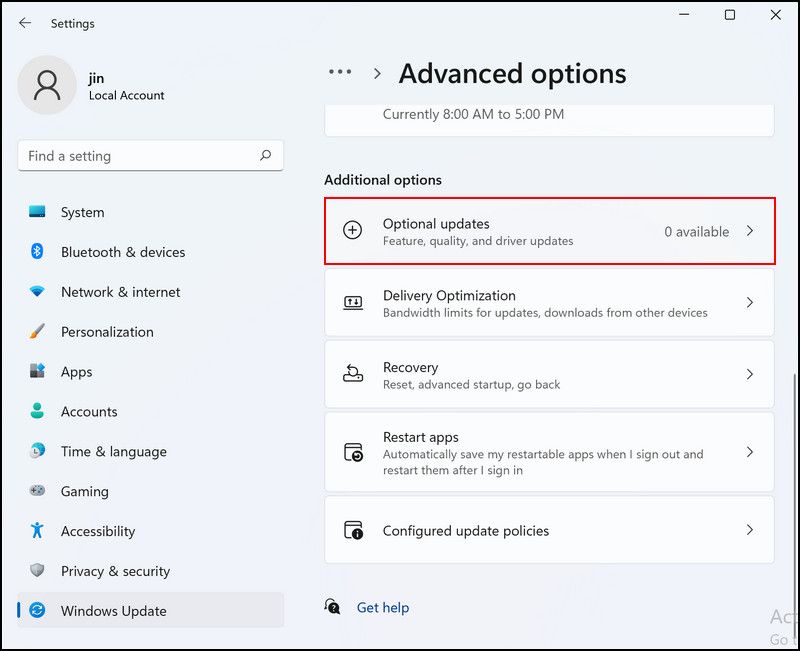
Next, click on Optional updates and expand the Driver updates section.
-
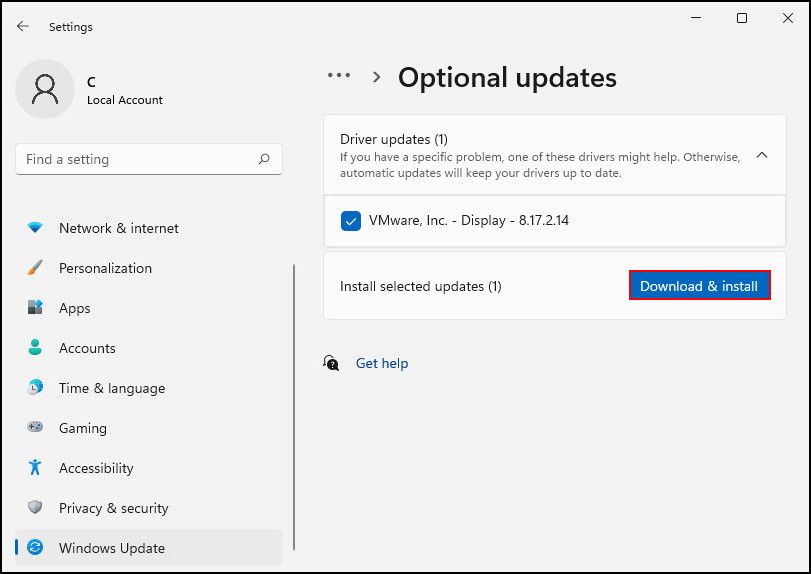
Checkmark the boxes associated with available updates and click on the Download and install button.
- Once the updates are installed, reboot your PC and check if the problem is fixed.


4. Switch to a Custom Power Plan
Several users confirmed that their current power plan was causing the issue, and they managed to fix it by switching to a custom plan. If the steps mentioned above did not work for you, then we encourage you to change your power plan and see if that makes any difference. Here is how you can do that:
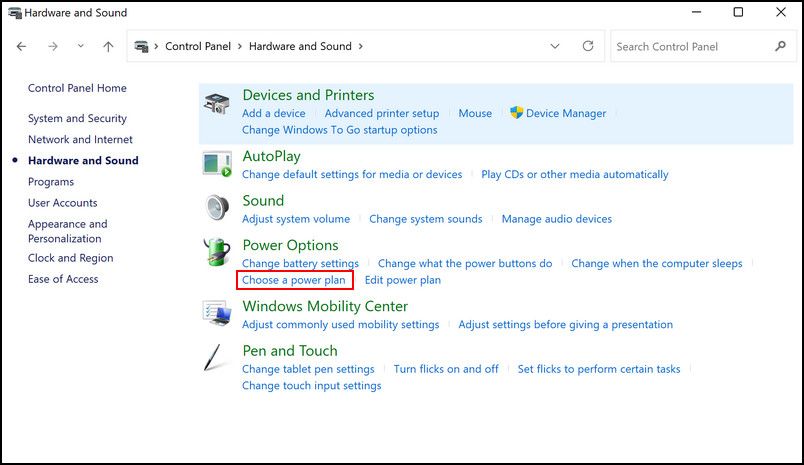
- Launch Control Panel and click on Hardware and Sound.
-
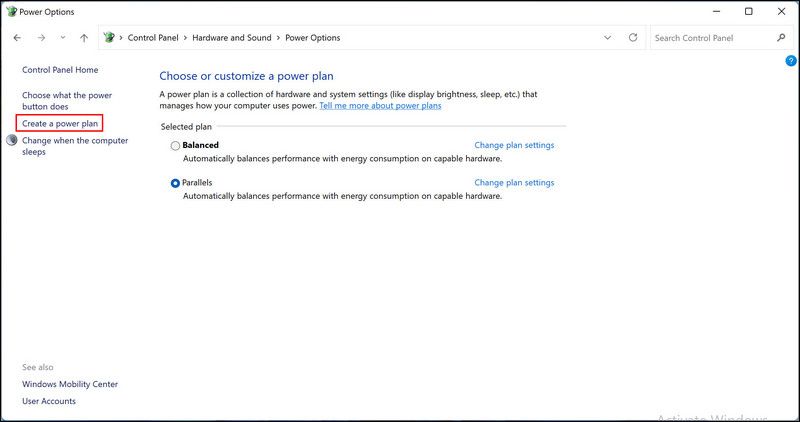
Next, click on Choose a power plan under Power Options.
-
Select Create a power plan from the left pane.
-
Choose High performance and click Next.
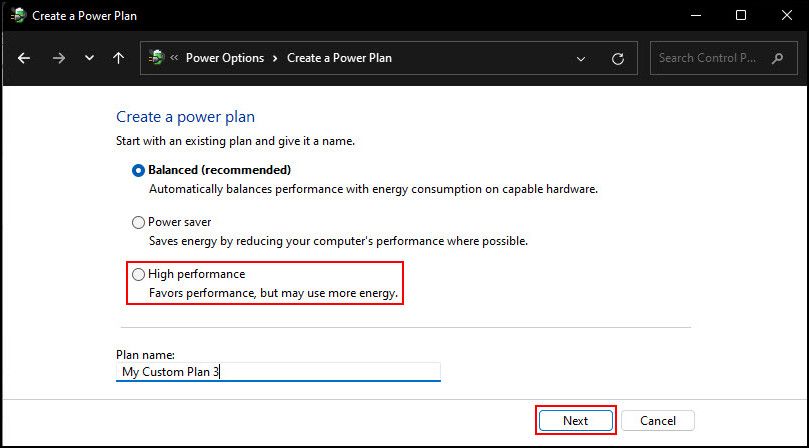
- In the following window, adjust the settings according to your preferences and click on the Create button to proceed.


Once done, your PC will successfully switch to a custom power plan.
Windows 11 Sleep Issues, Resolved
Hopefully, you can now use the sleep mode on Windows 11 without any problems. And with sleep mode now fixed, you can enjoy its power-saving abilities when you leave your PC alone for a period of time.