A priority level determines the proportion of system resources, more specifically CPU time and RAM allocation, set for Windows software. Windows 11/10 automatically assigns priority levels to programs. Most standard user apps will have normal or lower priority levels, and the OS reserves higher levels for more important system processes and services.
However, you can change the priority levels for programs yourself by adjusting a Set priority option. By doing so, you’ll be giving certain software more or less system resource priority. This is how to change a program’s priority level in Windows 11.
How to Select a Priority Level for a Program With Task Manager
The Set priority option is a well-hidden Task Manager setting you can select to change the processor priority of a process. That’s a context menu option available within the Details tab of Task Manager. It includes six priority levels for users to choose from.
You can select a priority level for a running program with this option as follows.
- First, launch the software you want to set a priority level for. If it’s a game you launch, you’ll probably need to return to the desktop by pressing the Win key or Ctrl + Alt + Delete to select Task Manager.
-
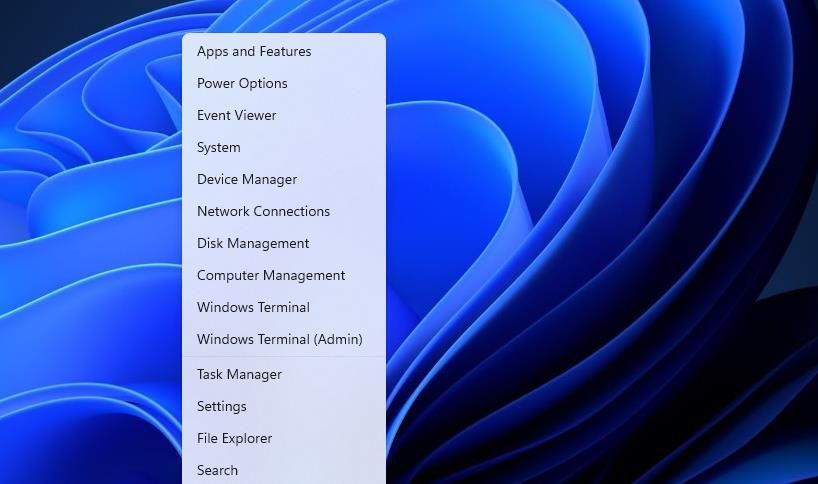
Click the Start menu's taskbar icon with the right button on your mouse to select a Task Manager option.
- Select Task Manager’s Details tab.
-
Then right-click the EXE process for the software you just started to select Set priority.
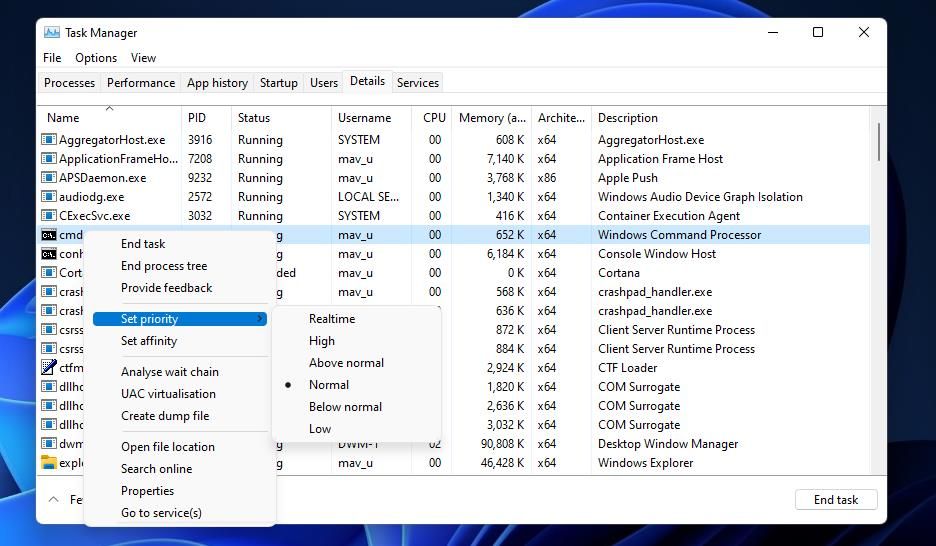
- Choose a Realtime, High, Above Normal, Normal, Below Normal, or Low option on the Set priority menu. Don't ever select the highest Realtime setting, which is primarily for hardware-related processes.
- A confirmation prompt will then pop up. Click the Change priority button on that dialog box.


Now your selected software is running with a different priority level until you close it. Note what the confirmation prompt says about how changing priority levels for programs can generate system instability. So, don’t get carried away and start setting high priority levels for loads of third-party software processes within the Details tab. It’s best to set a higher priority level for one system-resource heavy software only, such as a game or image editor.
How to Select a Permanent Priority Level for a Program
The Task Manager’s Set priority level option isn’t a permanent setting for any program. A program you changed the priority level for will revert to default when restarted. That’s not ideal if you always want to run certain software at a different priority level.
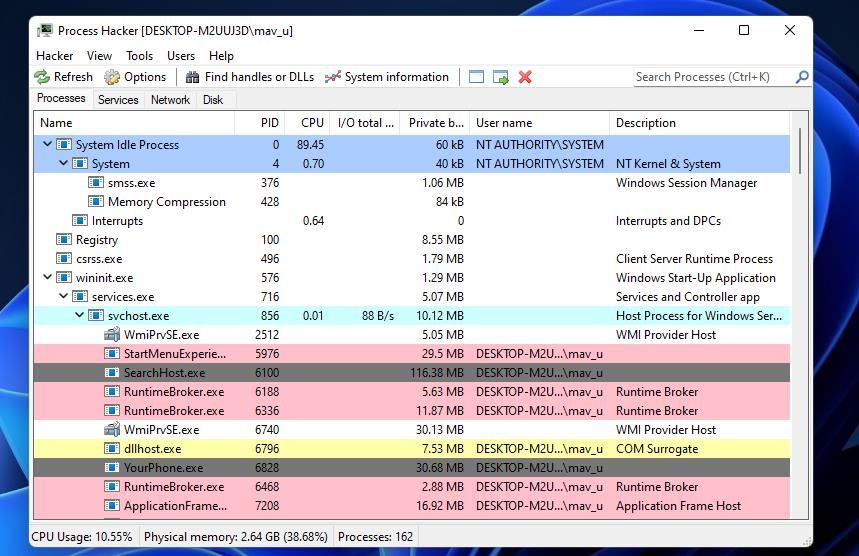
To save yourself having to always manually change priority for a program, check out Process Hacker. Process Hacker is a Task Manager alternative with which you can select to save a chosen priority level for a running program.
Here is how you can select a permanent priority level with Process Hacker.
- Open Process Hacker’s Softpedia page.
- Click Download Now and the External mirror options.
- Then open File Explorer’s window, and navigate to the folder that includes Process Hacker’s ZIP archive.
-
Click Process Hacker’s ZIP file with the right mouse button to select Extract All.

-
Select the Show extracted files option, and click the Extract button.

- Click the x64 subfolder in Process Hacker’s folder to open it.
-
Then double-click the ProcessHacker.exe to open the window in the screenshot directly below (no installation required).
- Launch software for which to change the priority level.
- Then right-click a program’s process in Process Hacker to select Priority. If you can’t find the software there, enter a keyword for the process in the search box.
- Select a priority level on the submenu.
-
Right-click the same software process again to select the Priority > Save for options.
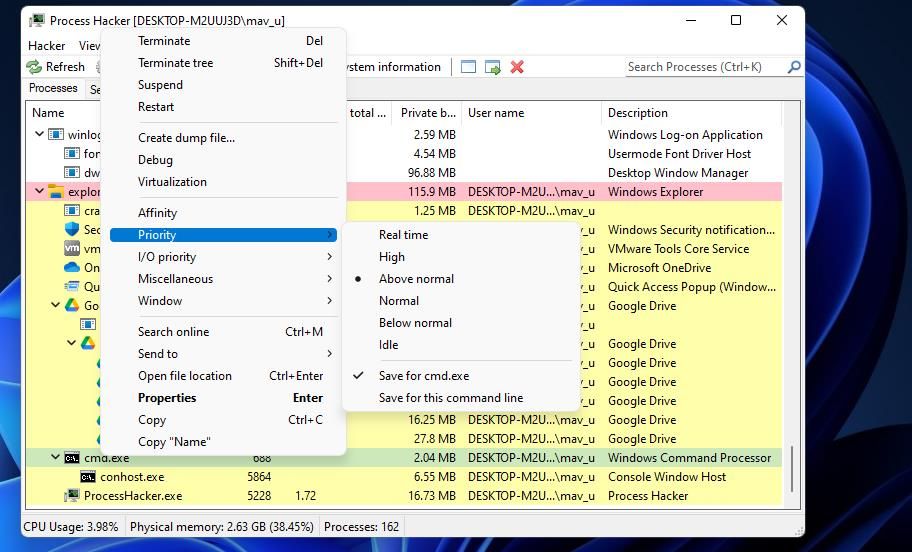
- Now close the software for which you just saved the priority level. When you restart the software, you’ll see in Process Hacker that the program has the same priority level you configured and saved it to start with.


How to Select a Priority Level for a Program From the Context Menu
You can also add a Run with priority shortcut to Windows 11’s context menu with Winaero Tweaker. Such a shortcut will enable you to start software packages with different priority levels. Then you won’t need to rummage through Task Manager to change priority levels for processes. These are the steps for adding a Run with priority submenu to the context menu.
- Bring up the Winaero Tweaker download page.
- Select the Download Winaero Tweaker link to save a ZIP file for the software.
- Open the folder in which you downloaded Winaero Tweaker’s ZIP archive within Explorer.
- Then extract Winaero’s ZIP as covered in the fourth and fifth steps of the previous method.
- Double-click WinaeroTweaker-1.33.0.0-setup.exe in Winaero’s extracted folder to launch that setup wizard.
- Select Next two times, and click the I accept the agreement radio button.
-
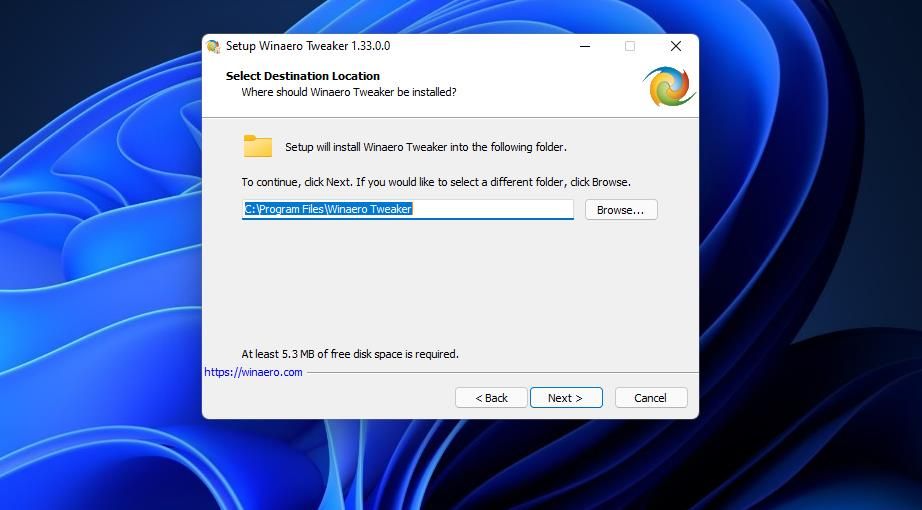
Click Next and Browse to select a different folder for the software if you prefer.
- Then you can keep clicking Next until you get to the Install option. Select Install to complete the installation.
- Make sure you’ve selected the Run Winaero Tweaker checkbox, and click the Finish option.
- Scroll down to and double-click the Context menu category in Winaero Tweaker’s left sidebar.
-
Select the Run with Priority option shown directly below.
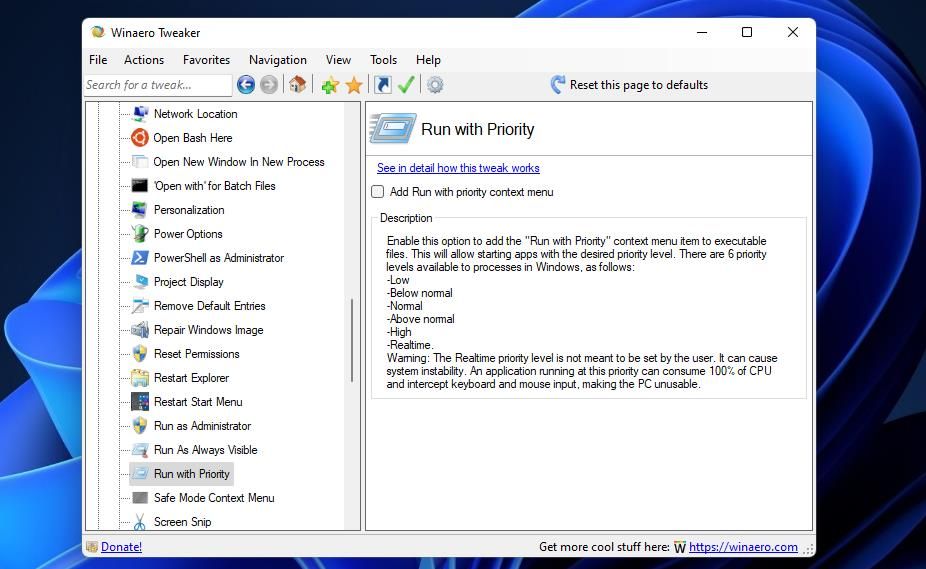
- Then click the Add Run with priority context menu checkbox to select it.


Check out the new Run with priority submenu on Windows 11’s context menu. Right-click a software shortcut on your desktop to select Show more options, which opens a classic context menu. Then select the new Run with priority menu option there to view settings. Choose one of the five priority options (excluding Realtime) to launch the software.

You can always remove that Run with priority submenu from the context menu with Winaero Tweaker. To do so, open the Run with Priority option in Winaero. Then click the Reset this page to defaults option for that setting. You can restore all the Winaero options to default by clicking Actions > Reset all Tweaks.
Give System Resource Heavy Software a Higher Priority Level
The Set priority option is mostly useful for selecting higher levels for system-resource intensive software. For example, you can get better performance from a game with high system requirements by choosing a higher priority level. Raising the priority level can even sometimes fix games crashing. So, raising the priority level is a good way to give your software a bit of a boost when needed.