File extension tells you the type of file you are dealing with. In short, they enable your operating system to determine the apps that are associated with a file.
In some cases, your files' extensions might be hidden. While that's not a problem in itself, knowing about the file extensions can help you figure out what you’re dealing with. Let’s look at the methods you can use to figure out the file extensions in your Windows 11 PC.
1. How to See File Extensions With File Explorer
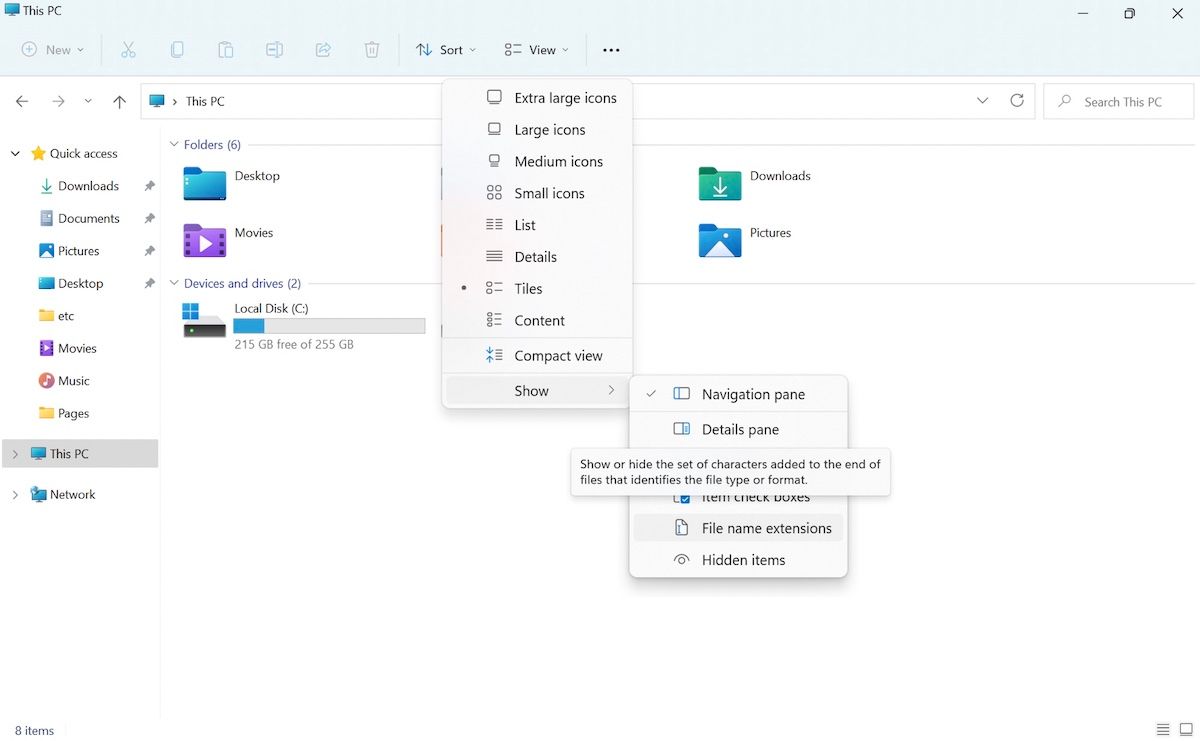
The File Explorer is a Windows component that lets you access and manage the files of your operating system. You can also use it to display the file extensions of your computer. To do that, follow the steps below:
- Open the File Explorer. Go to the Start menu bar, type in ‘file explorer,’ and select the Best match.
- Click on View from the top.
- Now click on Show.
- Then select File name extensions.
Finally, check the File name extensions option, and you’re all set. As soon as you click on File name extensions, your PC will be refreshed and extensions of all your Windows 11 files will become visible.
2. How to See File Extensions With Command Prompt
If the above approach fails for some reason, don’t panic, as you can turn to Command prompt. First up, go to Start menu search bar, type in ‘cmd,’ and select the Best match.
When you've launched the Command prompt, type in the following command and hit Enter:
reg add HKCU\Software\Microsoft\Windows\CurrentVersion\Explorer\Advanced /v HideFileExt /t REG_DWORD /d 0 /f.
Complete the above steps, and the file extensions will be visible from here on.
3. How to See File Extensions With File Explorer Options
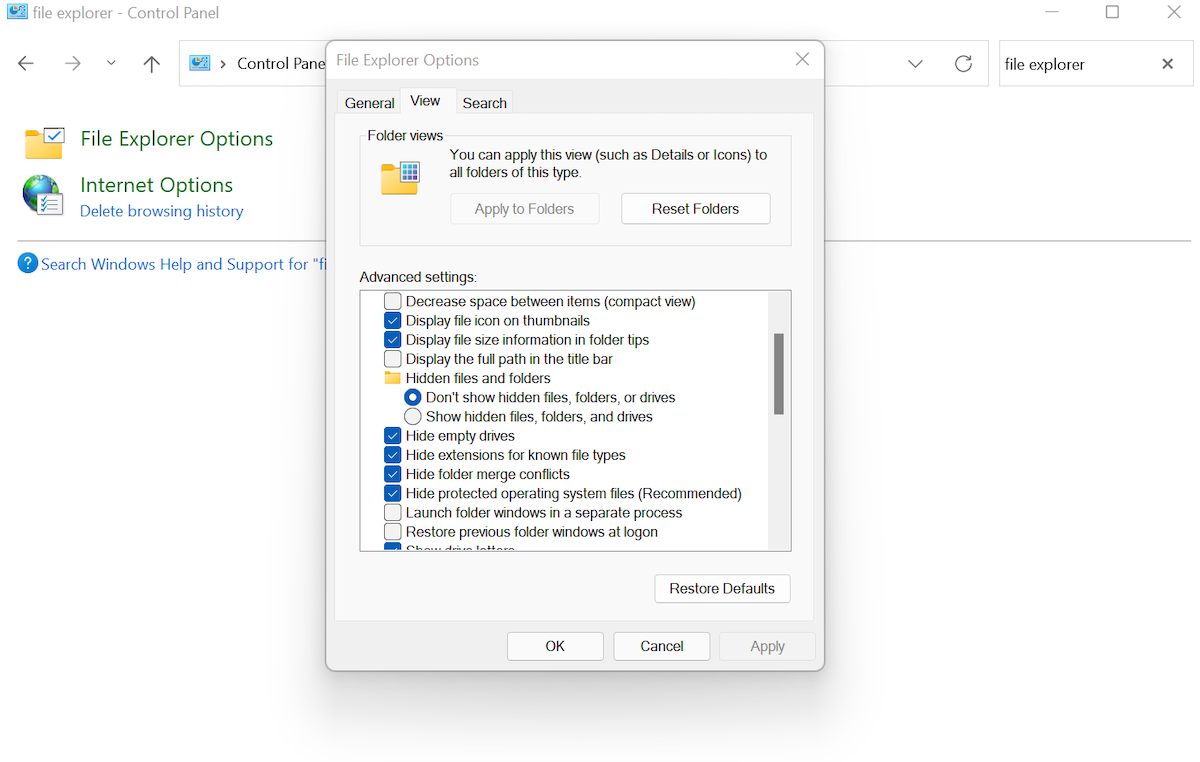
File Explorer options is the central hub from where you can fiddle with the settings of your File Explorer. You can also use it to show file extensions of your Windows files. Here’s how you can get started:
- Go to the Start menu search bar, type in ‘control panel,’ and select the Best match.
- Head to the search option, type in ‘file explorer option,’ and select the Best match.
- Now choose the View tab.
- Under the Advanced settings option, go to Files and Folders section and uncheck the Hide extensions for known file types options.
Finally, click on OK and your settings will be saved. As soon as you complete the above steps, all the hidden extensions in your Windows 11 PC will become visible again.
Viewing File Extensions in Windows 11
A file extension sets the icon for a PC’s file, while at the same time influencing the app that will be used to open your file. We hope at least one of these methods listed above helped you view the file extensions in your Windows.


