Have you just bought a new scanner, but you're having trouble connecting it to Windows 11? No worries; you're not the only one. Windows 11 is not perfect, so you may encounter various errors while connecting your scanner to your computer.
While simply replugging the scanner cables might fix the connection issues, you need not worry if you're still unable to fix it yourself. We've put together a list of some tested ways to fix your scanner when it's not working in Windows 11.
Why Is My Scanner Not Working on Windows?
There are many reasons your scanner might fail to connect correctly with your PC or laptop. However, there are a few common reasons that pop up the most:
- Loose or damaged cables: If the wires are worn out, it might prevent you from connecting to your scanner.
- Missing drivers: Your computer can't properly "talk" to your scanner if the right drivers aren't installed. If you haven't done this yet, you won't be able to connect to your scanner properly.
- A disabled Windows Image Acquisition (WIA) service: If this service is disabled on your computer, you can't scan anything. You must enable this service to get your scanner working again.
Now that we know the common culprits behind this issue, let's get stuck into the details. However, do note that the steps mentioned below are exclusively for Windows 11.
1. Restart the Windows Image Acquisition Service
The Windows Image Acquisition service is responsible for receiving images from a hardware device, so it can display the pictures on your screen. This includes devices such as your scanner or a camera.
If this service is disabled, your PC can't get images from your scanner or camera. If you've disabled this service by mistake, here's how to restart the Windows Image Acquisition service:
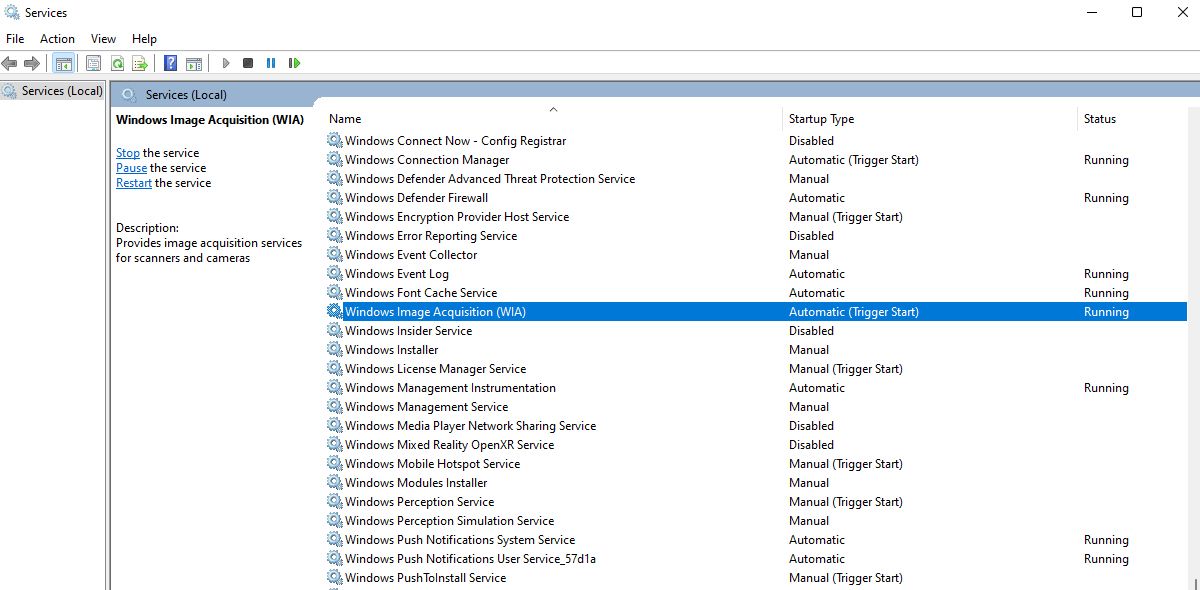
- Click the Windows search bar and type Services.
- Select the best match from the results and scroll down.
-
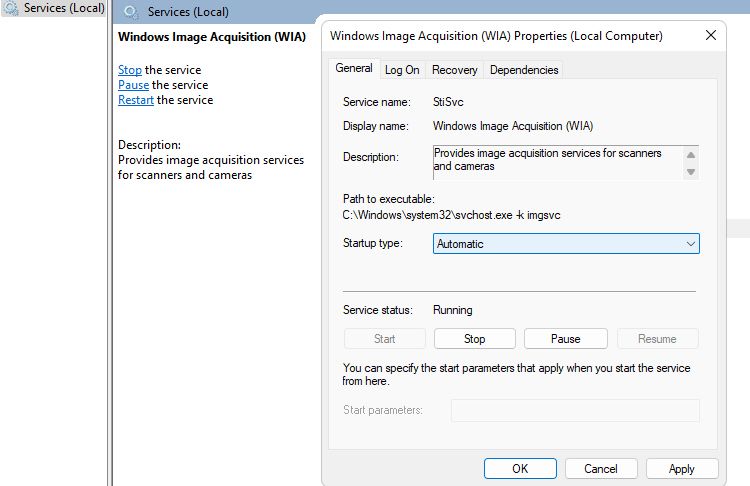
Find Windows Image Acquisition (WIA) and double-click on it.
-
Change or toggle the Startup type to Automatic.
- Under Service status, click Start to restart the WIA service.
- Once done, click OK and restart your computer.


This simple troubleshooting method should fix your issue after a restart.
2. Run the Hardware and Devices Troubleshooter
Are you facing connectivity or functioning issues with any other hardware device? Don't worry, Microsoft has a tool called the Hardware and Device troubleshooter that can fix any problems with your hardware.
While Microsoft has officially depreciated the Hardware troubleshooter in Windows 11, there's still a way to access it using a command.
Follow the below-given steps to run the Hardware and Devices troubleshooter:
- Press Win + X to open the power user menu.
-
Click Windows PowerShell (Admin) and paste in the following command:
msdt.exe -id DeviceDiagnostic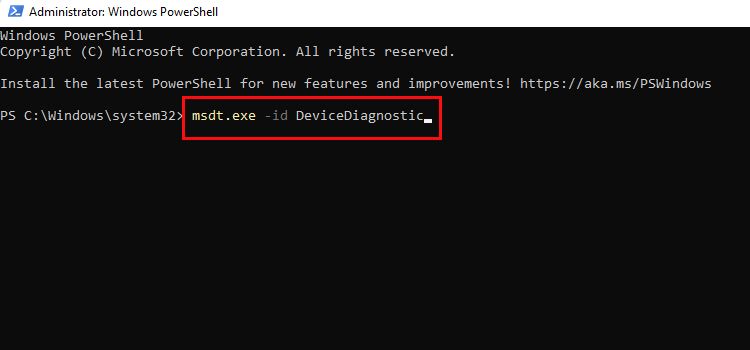
- When the troubleshooter appears, click Next to proceed further.
-
Wait for the troubleshooter to diagnose issues related to your scanner. Once the troubleshooting has been completed, click Close to exit the troubleshooter.
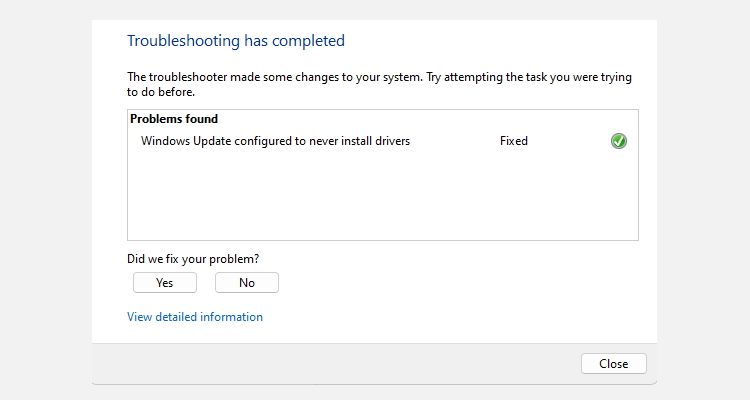
- Finally, restart your PC and re-check whether your scanner is now working as intended or not.


Hopefully, running the troubleshooter and applying the recommended fixes will do the trick.
3. Update Your Scanner's Drivers
Drivers are required for any external hardware device you connect to your computer. The same holds true for a scanner. If you have attempted to connect your scanner but have not yet installed any drivers or software, this is likely the primary cause of your woes.
If you installed the drivers long ago, there's a good chance they are out-of-date or corrupt, preventing the system from establishing a proper connection with your scanner.
To resolve this, you can visit your scanner manufacturer's website and download the latest update. You can also tell Windows to do the hard work:
- Press the Win + S keys to bring up the Windows search.
- Type Device Manager and select the best match.
-
Under Imaging devices, right-click on your scanner's name.
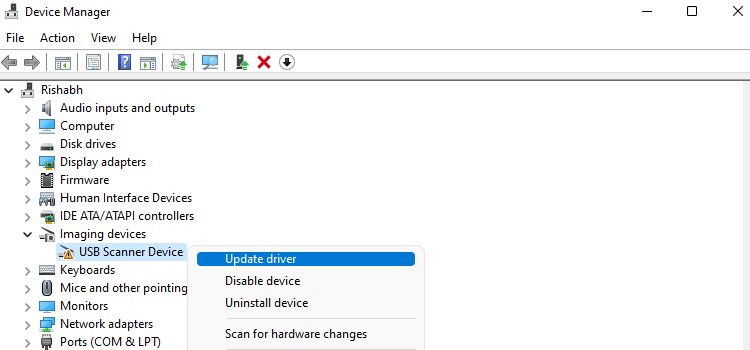
- Now click Update driver > Search automatically for drivers.
- Now, wait for a few minutes and let Windows find the suitable updated drivers for your device. Once done, click Close.
- Finally, restart your computer to install the updated drivers properly.

If you'd rather not go through the hassle, why not try a free driver updater for Windows?
4. Repair Any Corrupted System Files Using the SFC Tool
Sometimes, Windows system files get corrupted, which can cause bugs in your system. This includes apps random crashes, external devices not connecting, sudden shutdowns, and more. In this case, you should use the System File Checker (SFC) tool to properly scan the Windows operating system and fix the corrupted files.
Here are the steps you're required to perform to repair corrupt Windows files:
- Press Win + X and click PowerShell (Admin) from the list.
-
Copy the command below and paste it into the command prompt. Once complete, hit Enter to execute:
        DISM /Online /Cleanup-Image /ScanHealth
DISM /Online /Cleanup-Image /RestoreHealth
This command will restore all Windows image file corruptions automatically. Note that you should not restart or shut down your computer at this time.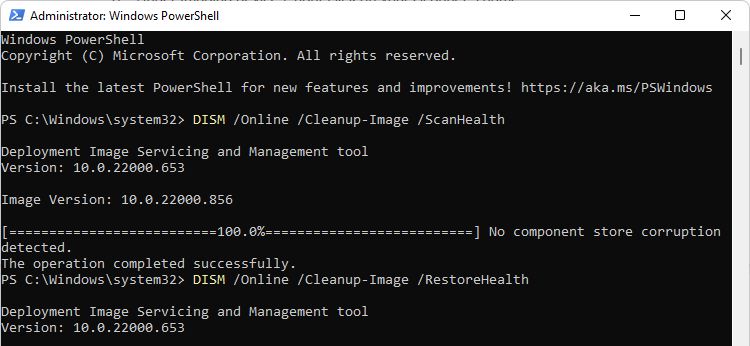
-
Copy and paste the following command into the Command Prompt:
SFC /scannow4. Wait till the SFC tool has finished scanning. Once complete, restart your computer.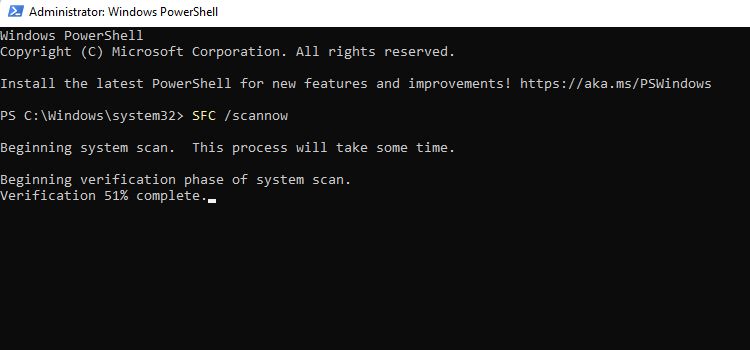


That's it. Now, you've to connect your scanner once more, and hopefully, it will now function.
5. Check the Connection Between the Scanner and Your Computer
If you've already tried all the above methods, you might have forgotten to connect the cables correctly, or the cables are quite loose. If Windows doesn't recognize your scanner, you may need to reconnect the cables. Also, you have to make sure that the cables are connected to the correct ports and that none of the cables are worn out.
If you're using a wireless scanner, ensure you're connected to the same WiFi network as your computer. Once the PC and the scanner are on the same network, your scanner should appear on your computer's devices list.
6. Add Your Scanner Manually via the Settings
In most cases, setting up a scanner is as simple as connecting it to your device. Once you plug in the scanner, your PC should set it up all by itself.
However, sometimes this process fails for no obvious reason. In such a case, here's how to manually add your scanner from the Windows Settings app:
- Open the Windows Settings app by pressing Win + I.
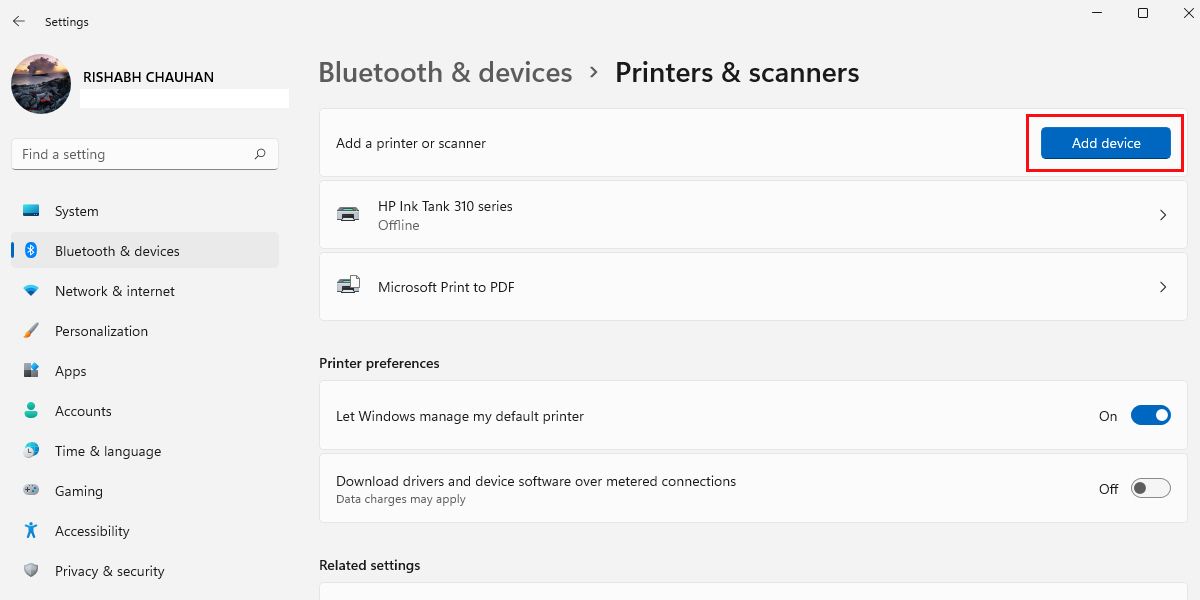
- Click Bluetooth & devices > Printers & scanners.
-
Now click Add device to start searching for your connected scanner.
- Allow it a few minutes to locate nearby scanners. It will then automatically include your scanner in the list of devices.

While the steps are tested with a wired scanner, wireless scanners should also work the same way. Moreover, if you're finding it hard to connect your wireless scanner to your home network, you should consult the scanner's manual or the manufacturer's website for more information.
Get Your Scanner Working Again on Windows 11
In general, the above-said solutions should help you resolve scanner problems quickly. However, if none of the provided instructions resolves your scanner issue, there may be a problem with the device itself.
In that case, you can find specific troubleshooting information on the website of the scanner's manufacturer. In addition, you can also contact the support team for suitable solutions to fix the error.