
The background apps permissions option in Windows 11 lets you configure Windows Store apps to run in the background. Depending on your power plan, you can allow or block an app from running in the background.
However, what if this option is missing? Here's how to restore the background apps permissions settings in Windows 11.
Before We Start...
Before we get started, do a quick double-check to see if the option is totally gone. You can access the background app permissions by navigating to Settings > Apps > Apps & features. Next, click the three-dots menu next to the app name and select Advanced Options.
If it's not there, it's time to get into troubleshooting. However, before you get stuck in, some apps may have their background app permission within the app settings. Make sure to check your app's settings before proceeding with the steps below.
1. How to Enable Background App Permissions Using the Registry Editor
You can modify the AppPrivacy subkey in the Registry Editor to enable and disable background apps in Windows 11.
Note that modifying your registry entries involves risk and can cause your system to malfunction. Make sure to create a restore point before proceeding with the steps below. You can use the restore points to undo any system-level changes made to your computer resulting in a breakdown.
To enable background apps permissions using the Registry Editor:
- Press Win + R to open Run.
- Type regedit and click OK. Click Yes when prompted by User Account Control to open the Registry Editor.
-
In the Registry Editor, navigate to the following location:
Computer\HKEY_LOCAL_MACHINE\SOFTWARE\Policies\Microsoft\Windows -
In the left pane, click on the AppPrivacy key.
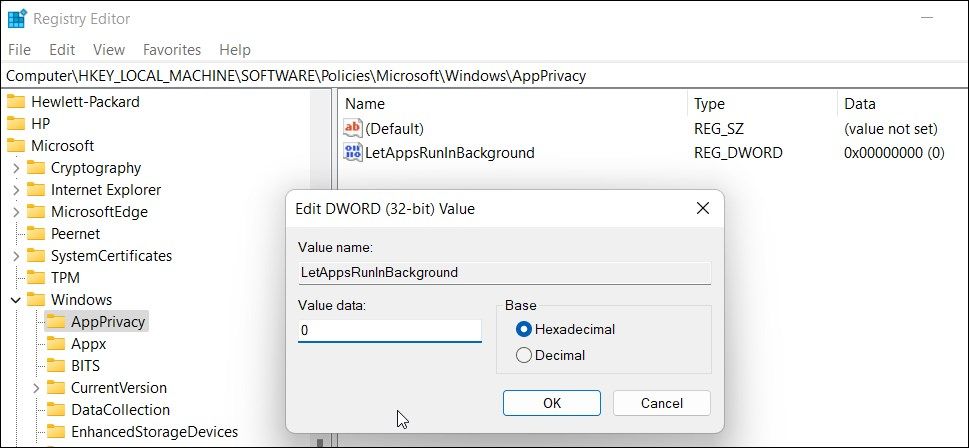
- In the right pane, right-click on the LetAppsRunInBackground value and select Modify.
- Set the value in the Value data field to 0.
- Click OK to save the changes.

If the AppPrivacy key does not exist, then do the following:
-
Right-click on the Windows key and select New > Key.
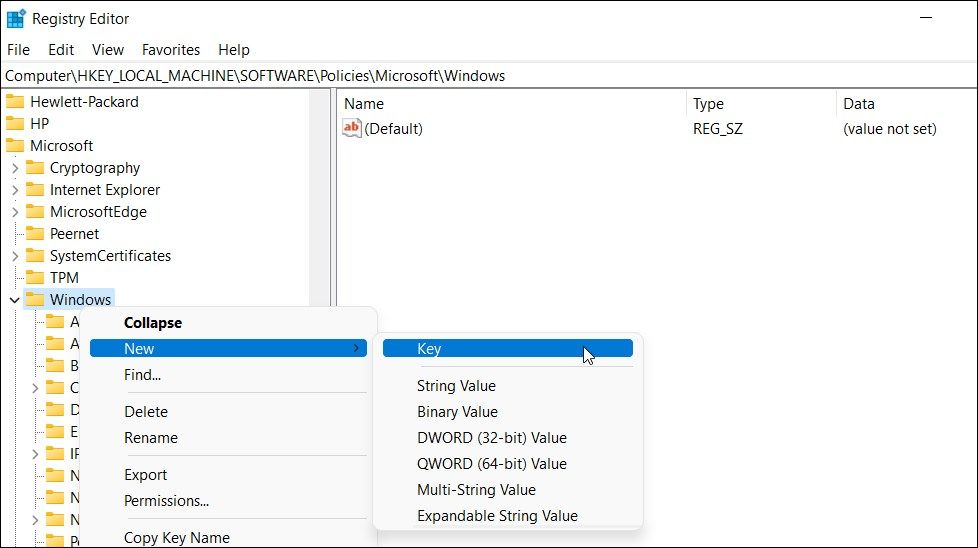
- Rename the key as AppPrivacy.
-
Right-click on the AppPrivacy key and select New > DWORD (32-bit) Value.
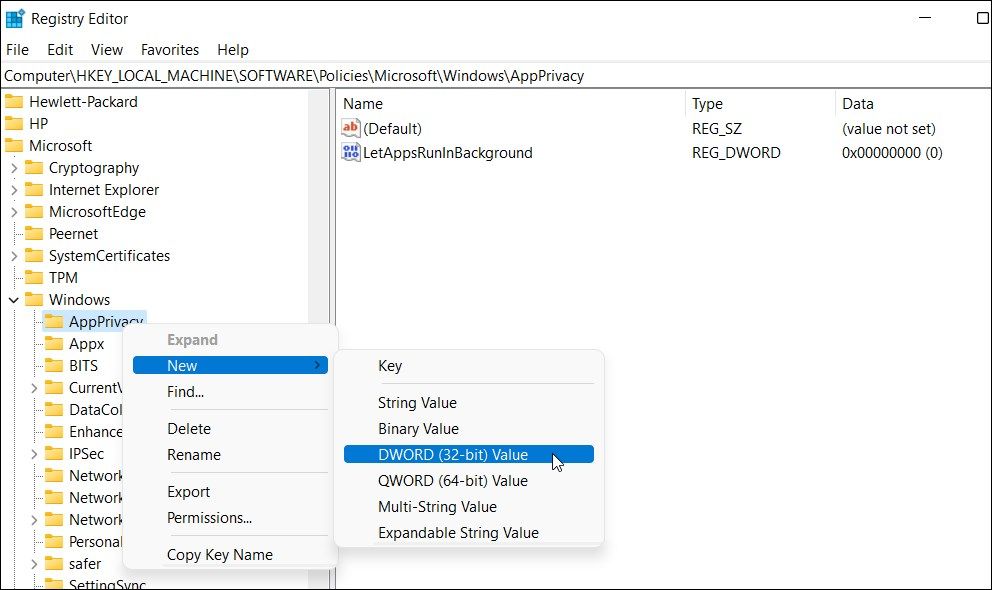
- Rename the value as LetAppsRunInBackground
- Right-click on the LetAppsRunInBackground value and select Modify.
- Set the value to 0 and click OK to save the changes.


Now exit the Registry Editor and restart your PC. After the restart, you can access the background apps permission option for Microsoft Store apps on the Settings page.
2. How to Fix the Background App Permission Option Using the Group Policy Editor
If you are using a work computer, it is possible that the background apps permissions option has been disabled via the Group Policy Editor. If so, you can tweak your Group Policy setting to enable the background apps permissions feature in Windows 11.
Group Policy Editor is only available in the Pro, Enterprise, and Education edition of the Windows operating system. If you are on Home, here's how to enable Group Policy Editor in Windows Home.
Follow the below steps to enable background apps permissions in GPEdit:
- Press Win + R to open Run.
-
Type gpedit.msc and click OK to open Group Policy Editor.
-
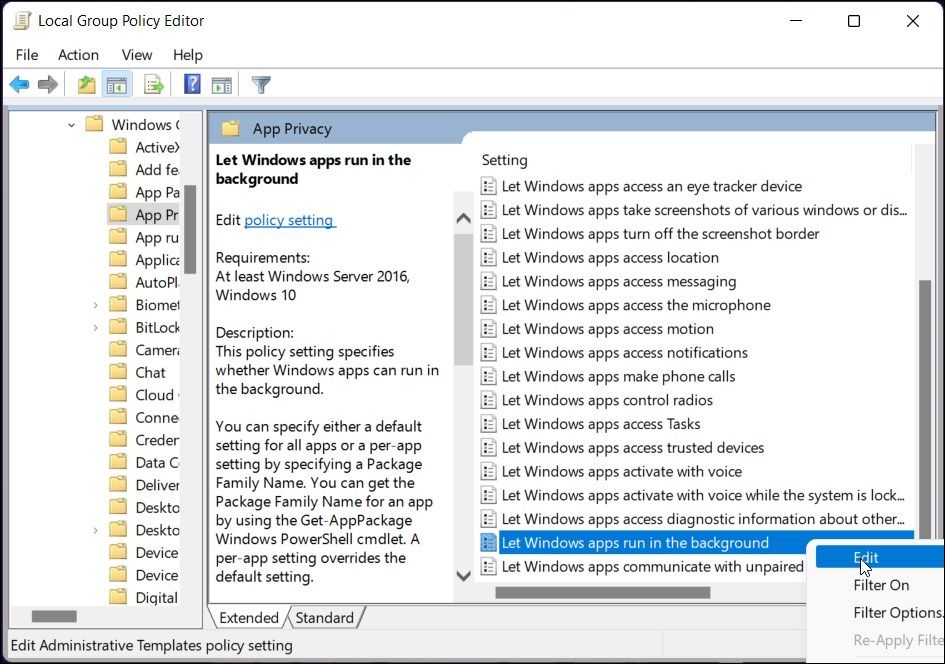
In Group Policy Editor, navigate to the following location:
Computer Configuration\Administrative Templates\Windows Components\App Privacy - In the right pane, locate and right-click on the Let Windows apps run in the background policy.
- Select Edit from the context menu.
-
Here, select Enabled.
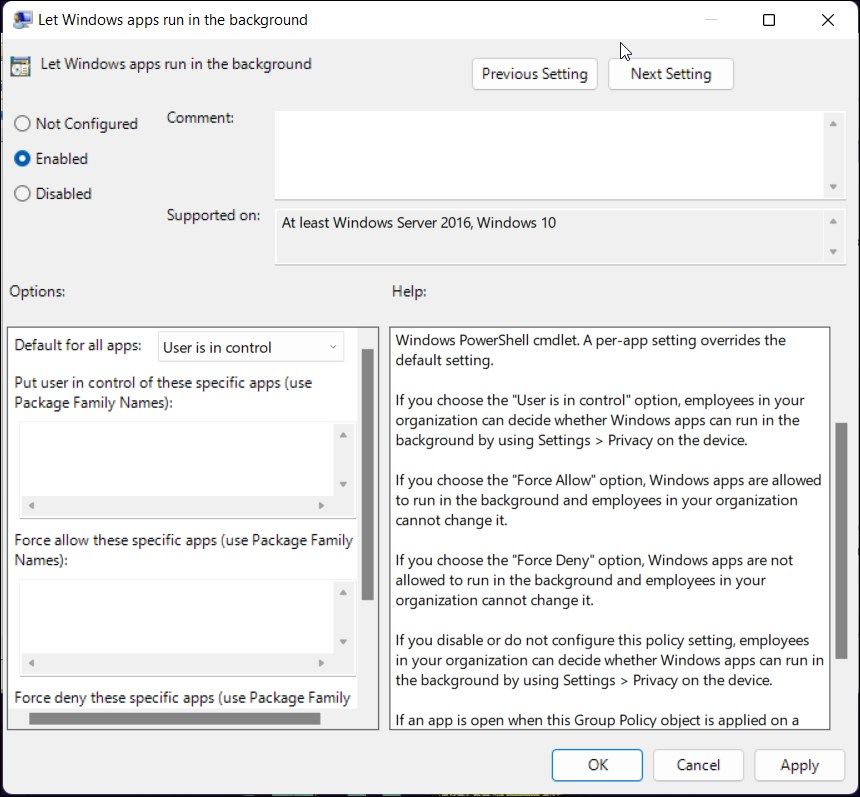
- Next, under Options, click the drop-down for Default for all apps and set it to User is in control.
- Click Apply and OK to save the changes.
- Close the Group Policy Editor.


Next, you need to force apply the recent changes using the command prompt. Here's how to do it.
- Press the Win key and type cmd. Right-click on Command Prompt and select Run as administrator.
-
In the Command Prompt window, type the following command and hit Enter to execute:
gpupdate /force - Upon successful execution, you will see the Computer Policy update has been completed successfully message. Close the Command Prompt.
Now you need to restart your PC. After the restart, you will be able to configure your app for background permission.
3. Check Your PC for System File Corruption
System file corruption can leave your system broken completely or in parts with some features not working. You can use native tools to repair your Windows installation and get it back on track.
Follow these steps to run the System File Checker and Deployment Image Service and Management tool:
- Press the Win key, and type cmd.
- Next, right-click on Command Prompt, and select Run as administrator.
-
In the Command Prompt window, type the following command to run the System File Checker tool:
Sfc /scannow - System File Checker will scan the system for missing or corrupt files and try to repair them accordingly. This process may take some time, so wait till the verification is 100% complete.
-
If the System File Checker tool doesn't find any error, execute the following command to repair your Windows 11 image:
DISM /Online /Cleanup-Image /RestoreHealth -
If corruption is detected, DISM will connect to Windows Update to download the missing or corrupt files and restore your system health. This requires a working Internet connection.
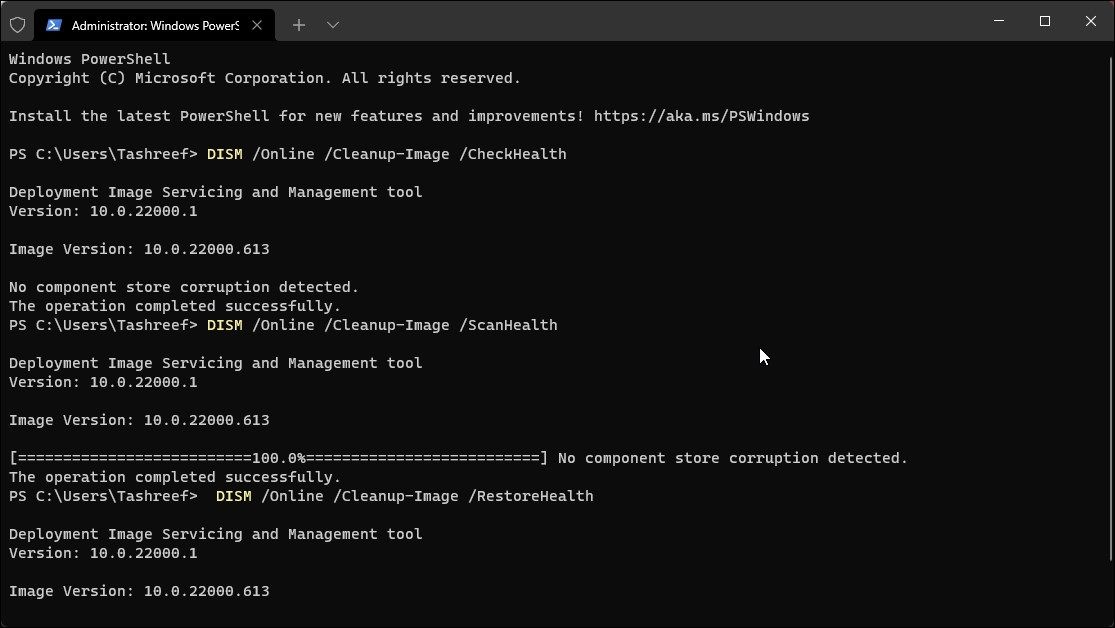
- Close the Command Prompt window once the verification is 100% complete and restart your PC.

4. Clean Install Windows 11
As a last resort, you'll need to perform a clean install of Windows 11 to fix the issue. If you don't want to reinstall all the apps and move your files, consider performing an in-place upgrade to reinstall Windows 11 without deleting apps.
If the issue persists, you'll need to perform a clean install by deleting all the apps. To perform a clean install, download a fresh copy of the Windows 11 ISO image and create a bootable USB flash drive.
Restore the Background App Permission Option in Windows 11
You can tweak the registry entries or Group Policy settings to bring back the missing background apps permissions option. If that does not work, run the built-in system repair tools to fix corrupted system files.
As a last resort, you will be left with the clean install option. If an in-place upgrade doesn't work, use an ISO image to clean install Windows 11.