
Local security policy is a powerful feature on Windows that lets you control the security of a computer on a local network. It allows you to restrict the use of certain features or allow only particular users to access them. However, you might need to reset your local security policy if you're having trouble with a specific feature or if you want to change the way your computer behaves.
In this article, you'll learn how to reset your local security policy to the default settings in Windows 11.
How to Reset Local Security Policy to Default in Windows 11
If your local security policy has been changed in a way that you no longer like, or if you want to set up a fresh policy but don't know where to start, this guide will provide you with the information you need. So, follow the below steps:
- Open the Run command dialog box (see how to open Run on Windows for more info).
- In the text box, type cmd and press Ctrl + Shift + Enter on the keyboard to open the Command Prompt. See how to open the Command Prompt for more ways to do this.
-
If User Account Control appears on the screen, select Yes to grant privileges.
-
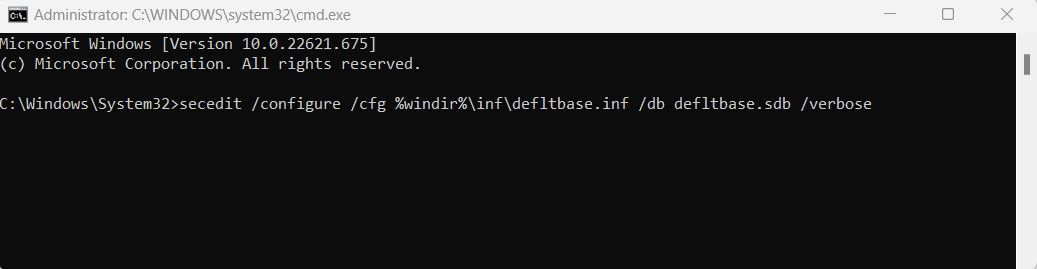
In the command prompt window, copy and paste the following command.
secedit /configure /cfg %windir%\inf\defltbase.inf /db defltbase.sdb /verbose - Now press Enter to run the command.

After running the above command, restart your computer for the changes to take effect.
Reset the Local Security Policy Without a Hitch
Resetting your Security Policy settings in Windows 11 is a quick and simple process that you can carry out using Command Prompt. This can be useful if you have made changes to your security policy that you no longer want.