
Passwords are an essential security tool and can keep unauthorized lurkers away. But sometimes, you may feel that a login password for your Windows 11 is unnecessary; as such, you can remove the Windows 11 sign-in password.
There are several ways to remove or disable the Windows 11 login password easily. Read on as we guide you through the process of removing the login password on Windows 11.
1. How to Remove the Windows 11 Lock Screen Password Through the Settings App
The simplest way to remove the lock screen password on Windows 11 is through the Settings app. However, if you’re using a Microsoft account to sign in, you will first have to sign in using a local account instead.
To remove the lock screen password on Windows 11 for a Microsoft account:
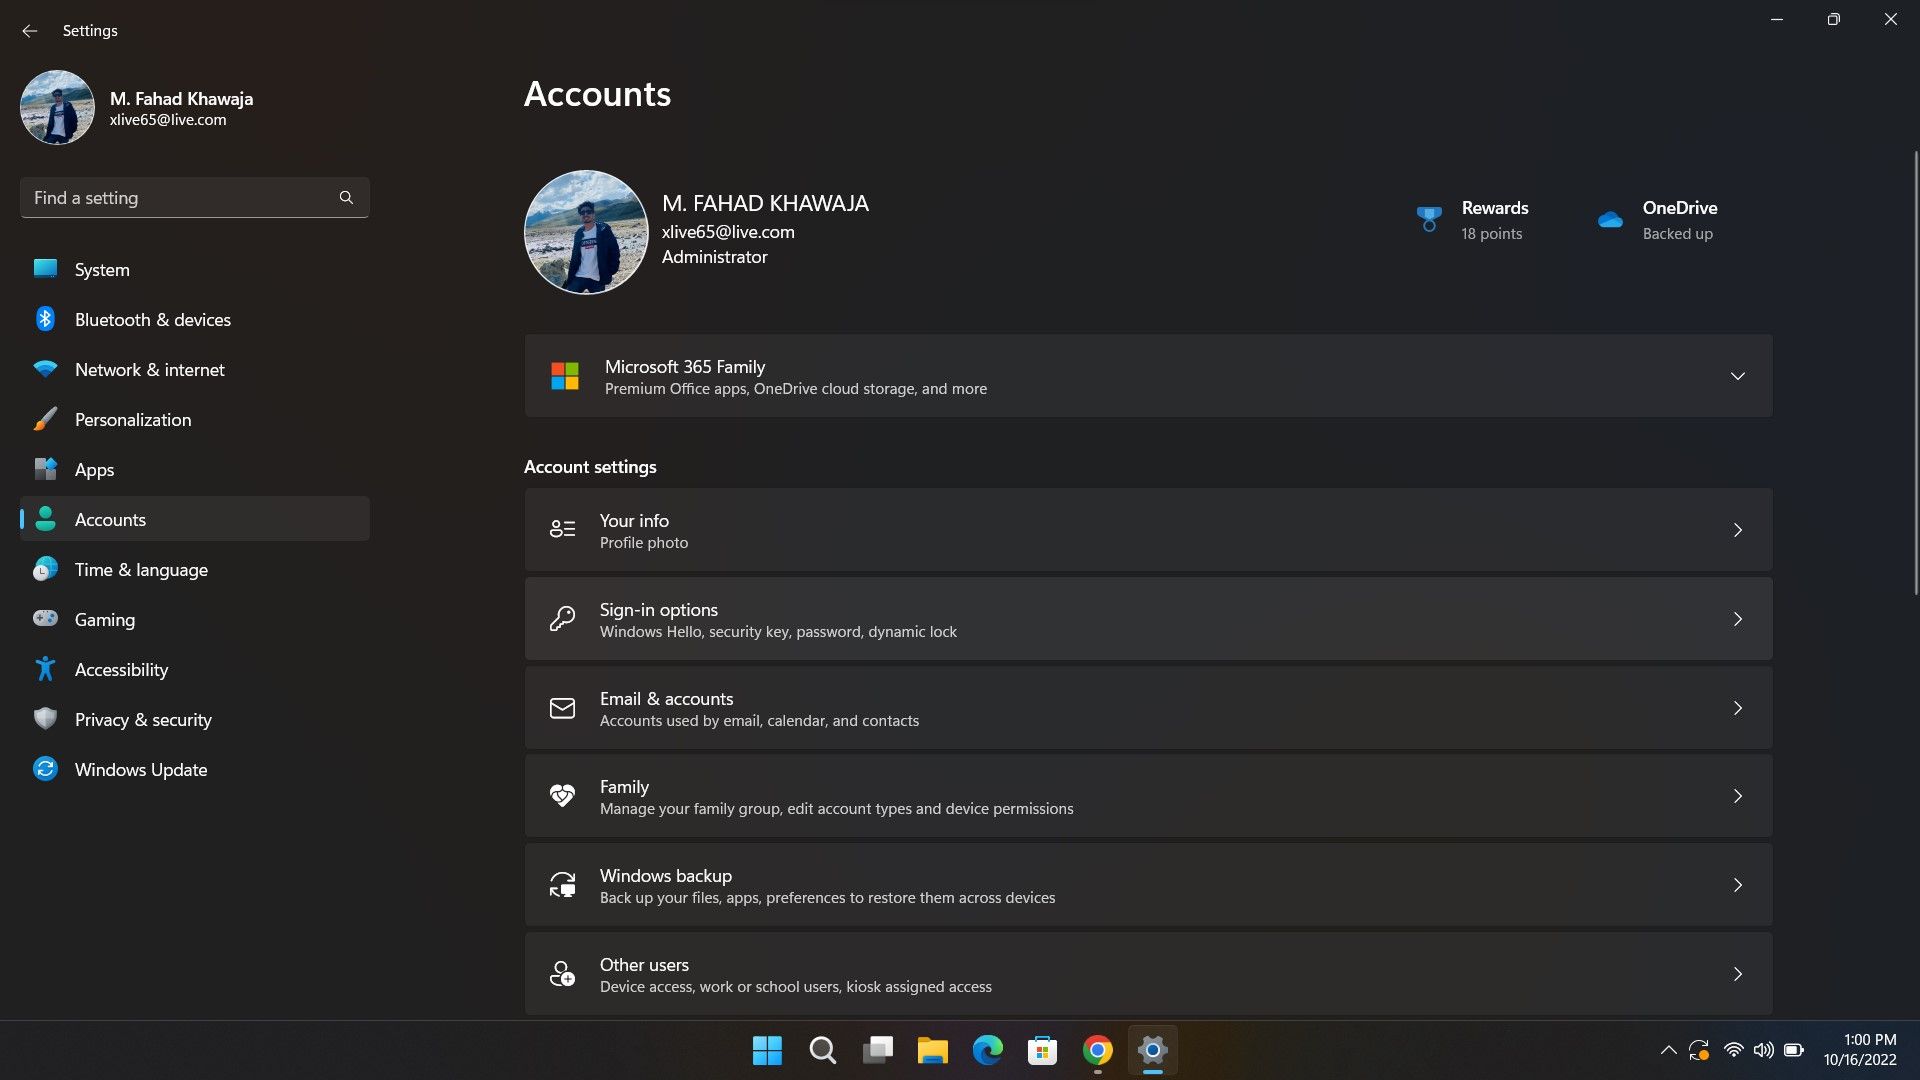
- Launch the Start menu, search for Settings and select the Best match.
-
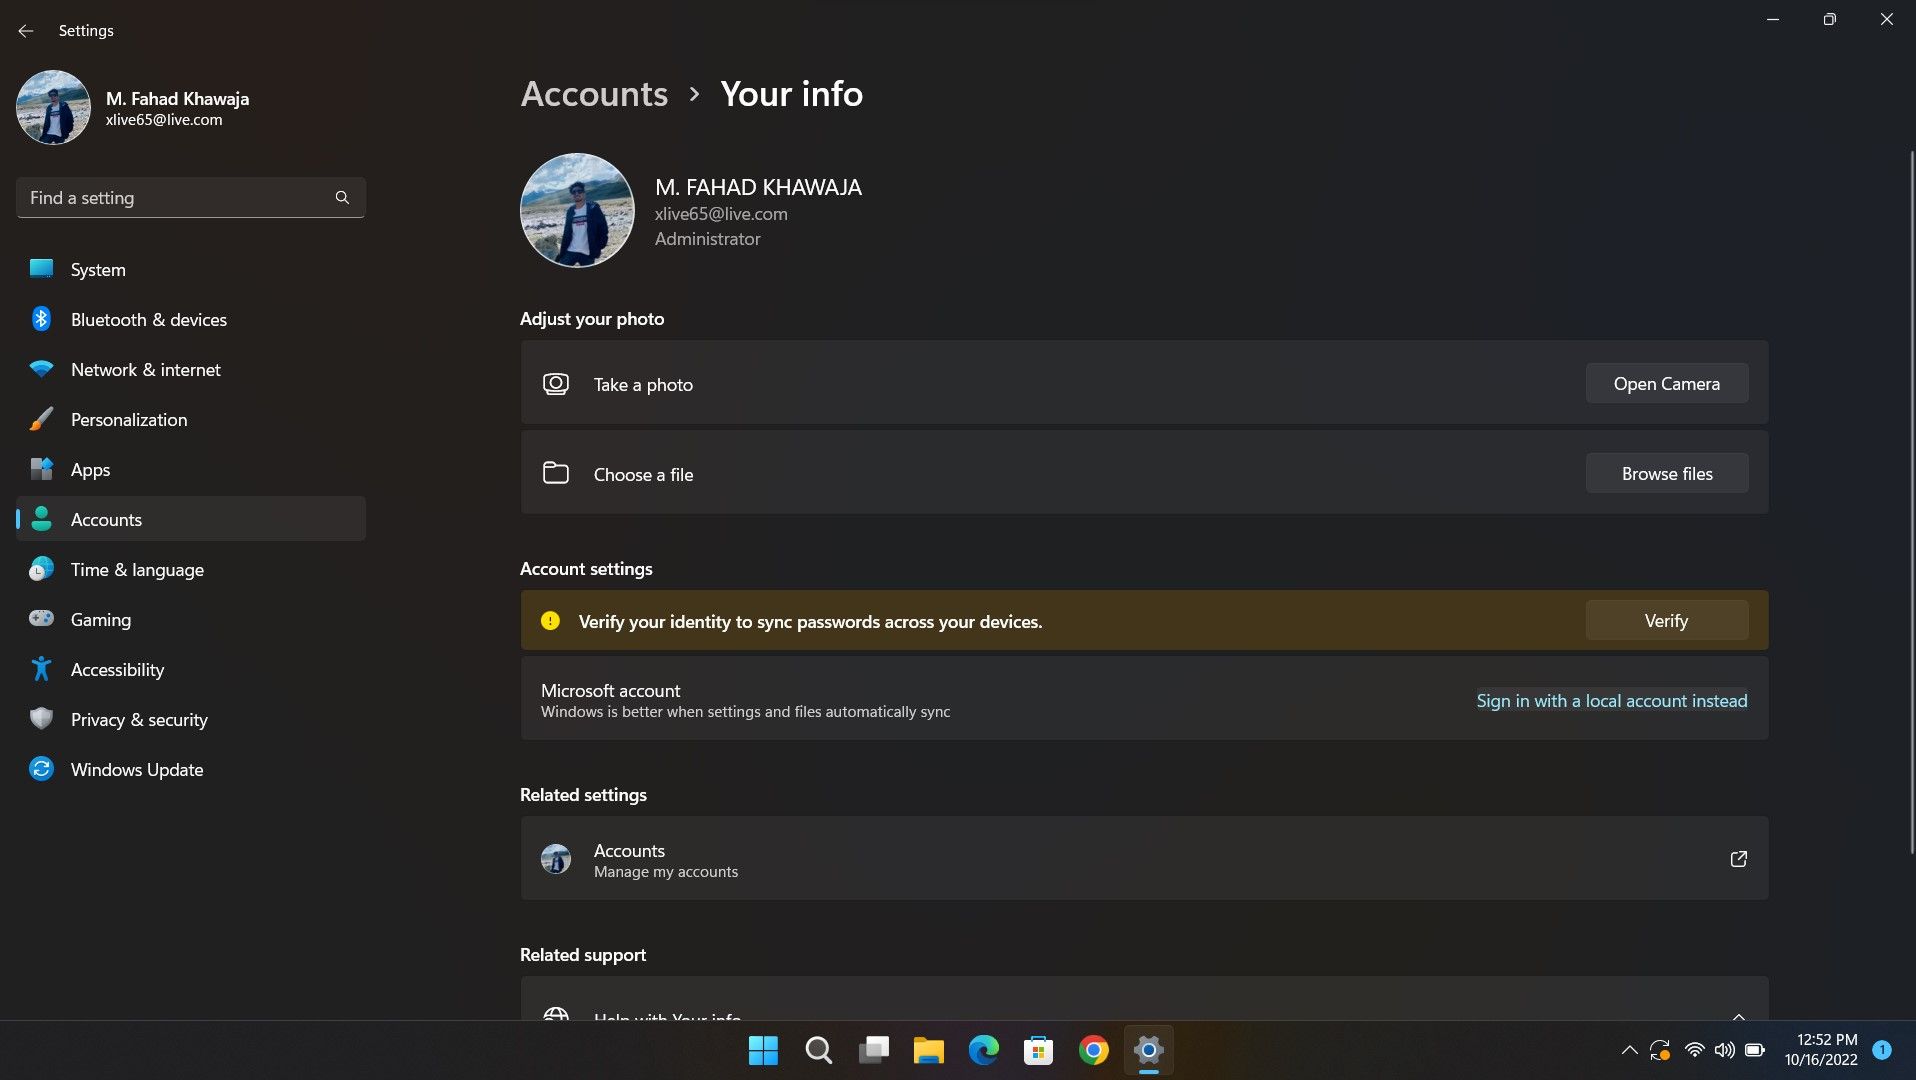
From the sidebar, select Accounts and then click the Your info tab group.
-
Under Account settings, select Sign in with a local account instead.
-
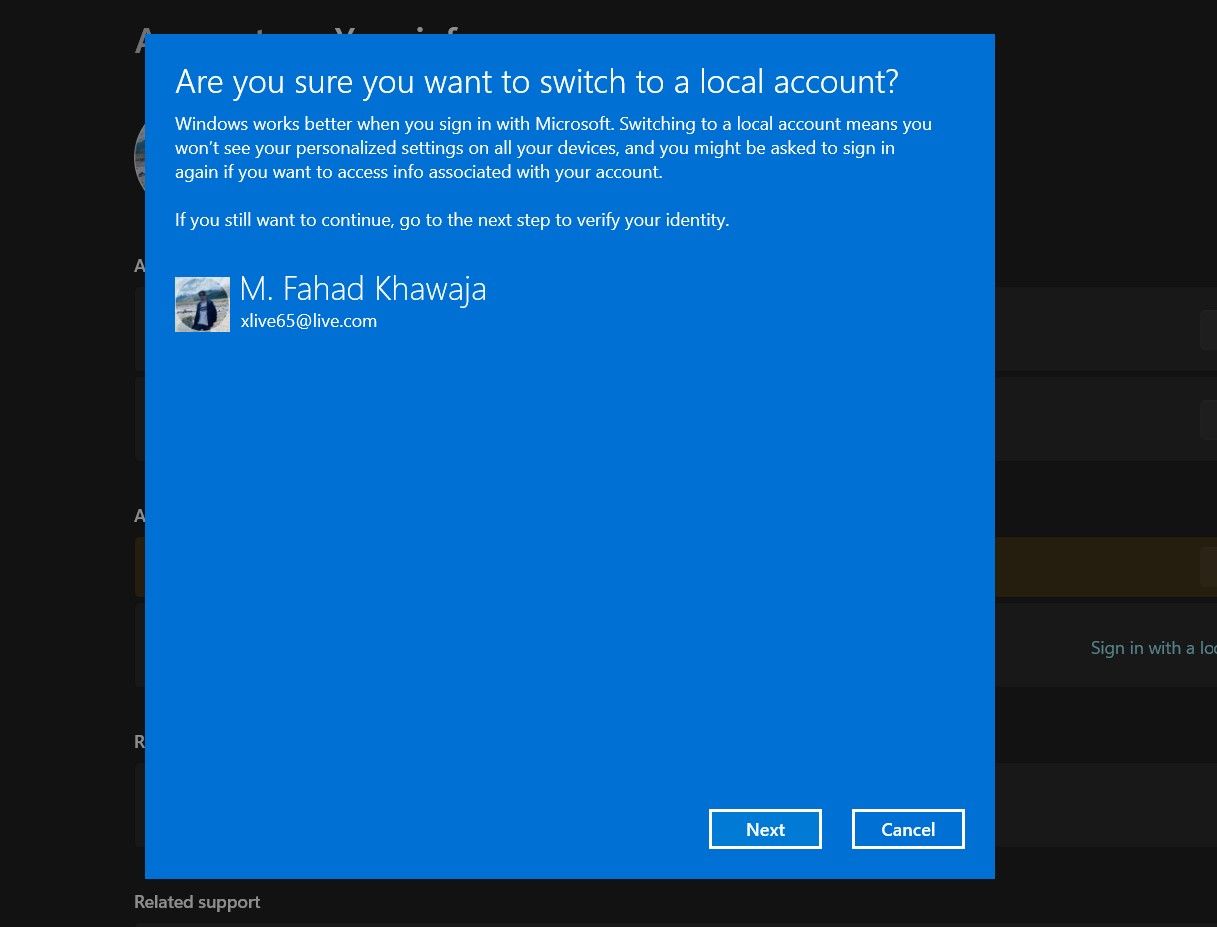
Windows 11 will then prompt you to confirm if you want to switch to a local account; doing so may require you to sign in again on Microsoft apps. Once you’re ready, click Next.
- When prompted, enter your current sign-in password or PIN.
-
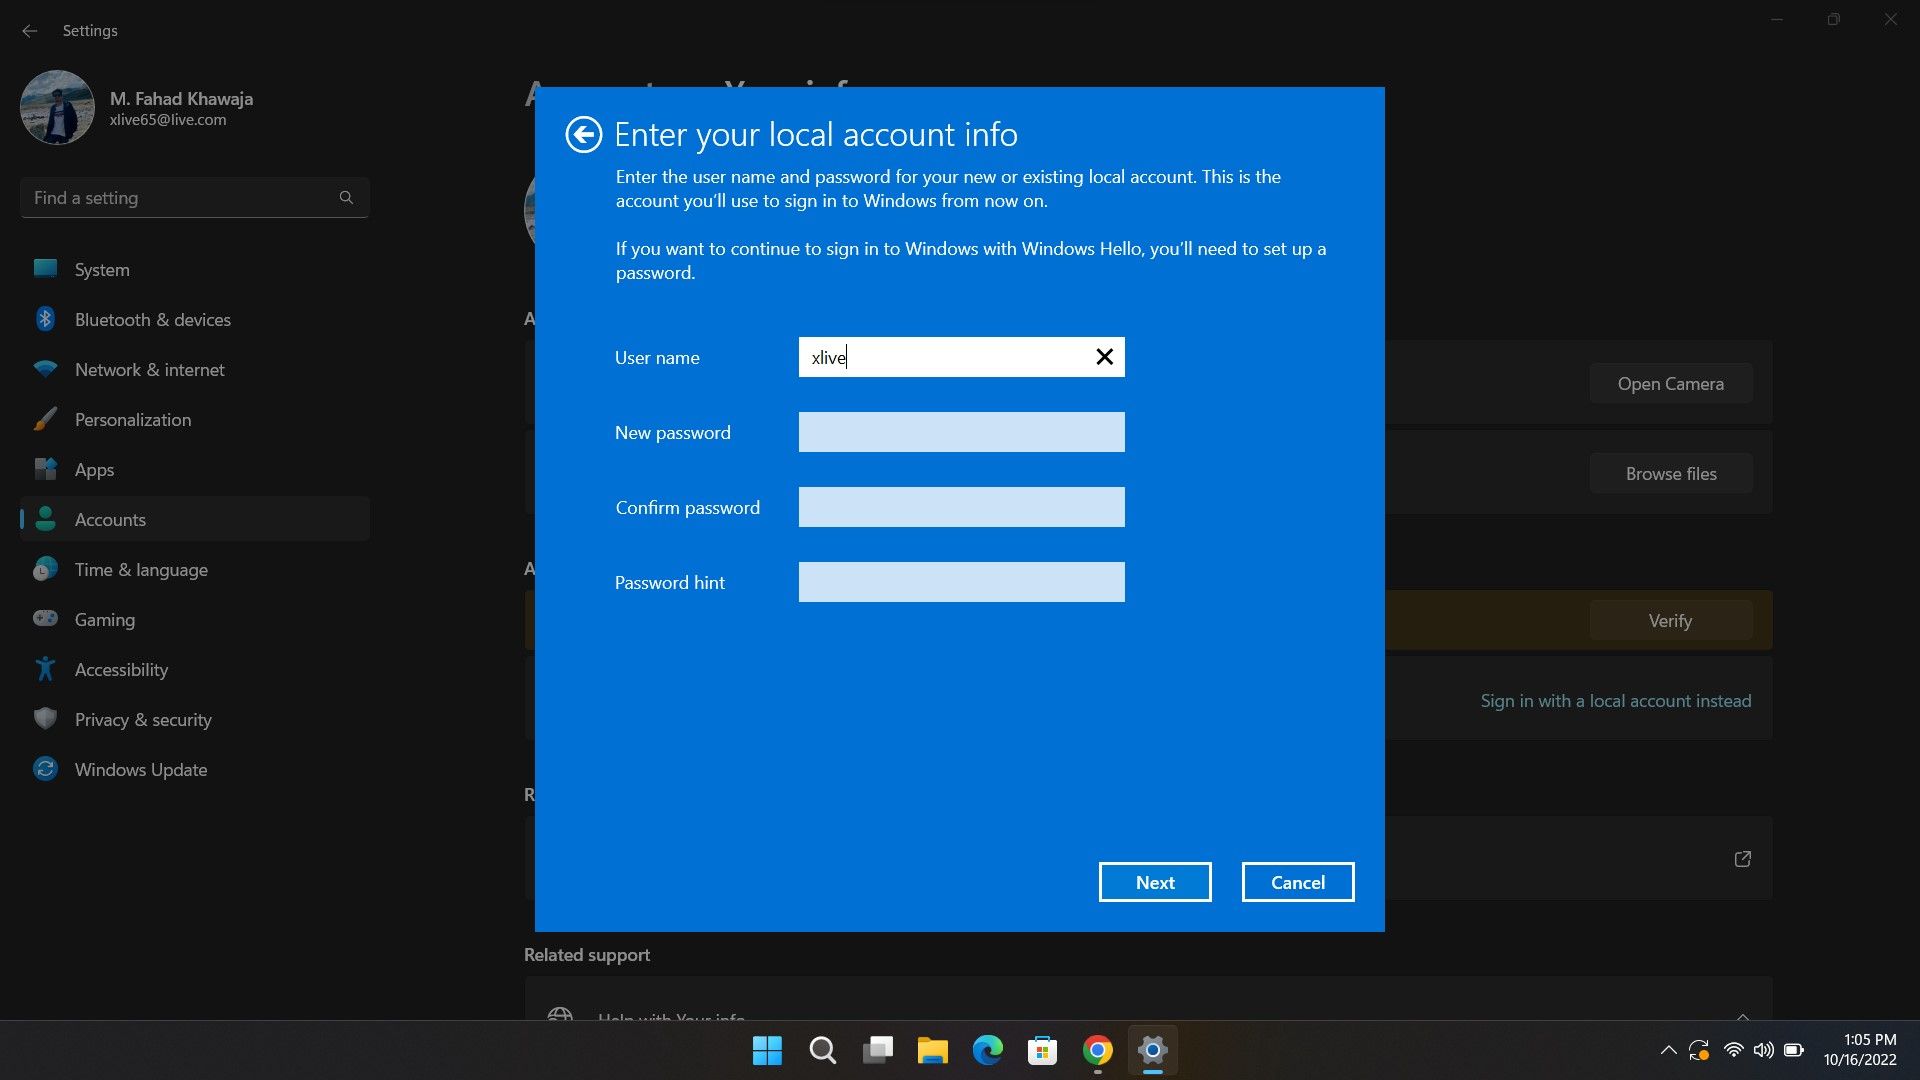
In the next screen, enter a username for your account and leave the New Password and Confirm Password fields blank.
- Click on Next and then Sign out and Finish to confirm your changes.
- You can now log in without a Windows 11 lock screen password.


Alternatively, if you’re already using a local account, here’s how to remove the Windows 11 password:
- Launch the Start menu, search for Settings and select the Best match.
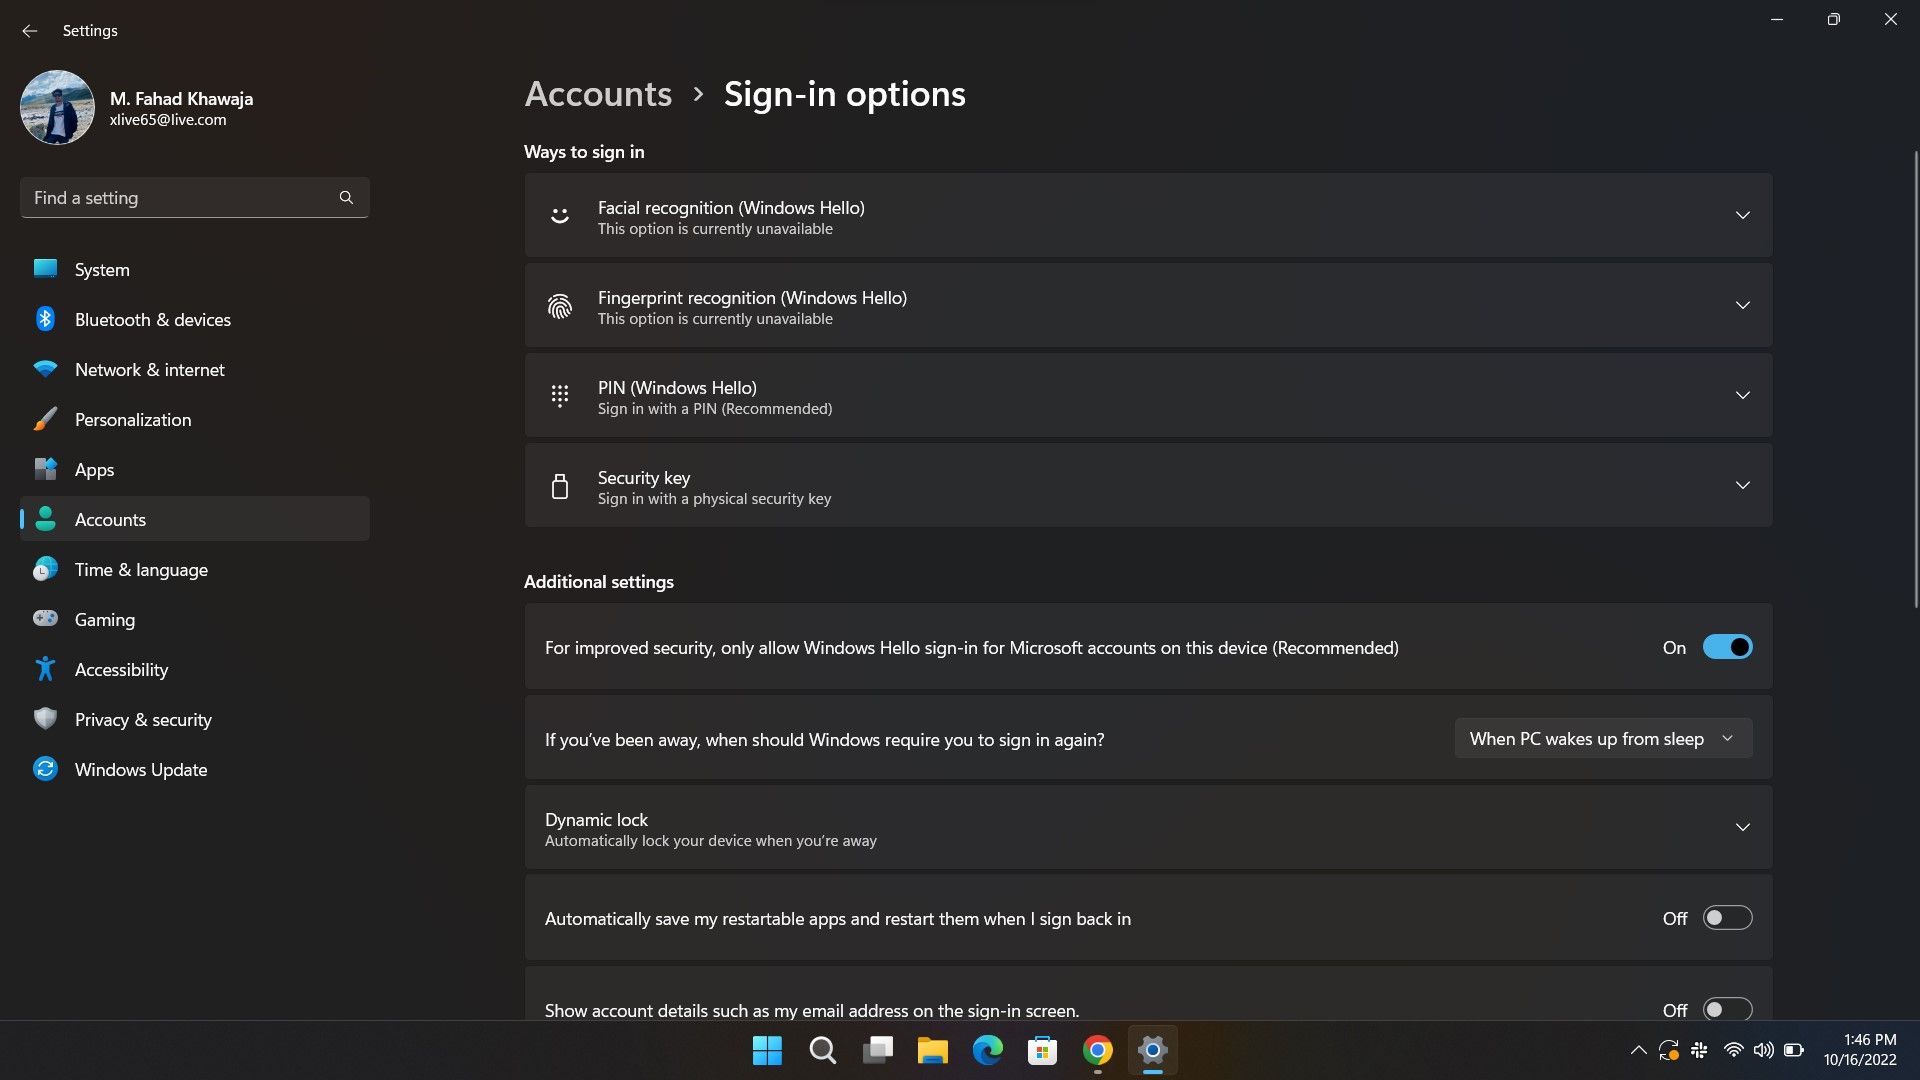
- Select Accounts from the side menu and then click on Sign-in options.
- Under Ways to sign in, select the Password tab, and then click on Change.
- Enter your current password when prompted, and then click on Next.
-
Leave the New Password and Confirm Password fields blank and click on Next.
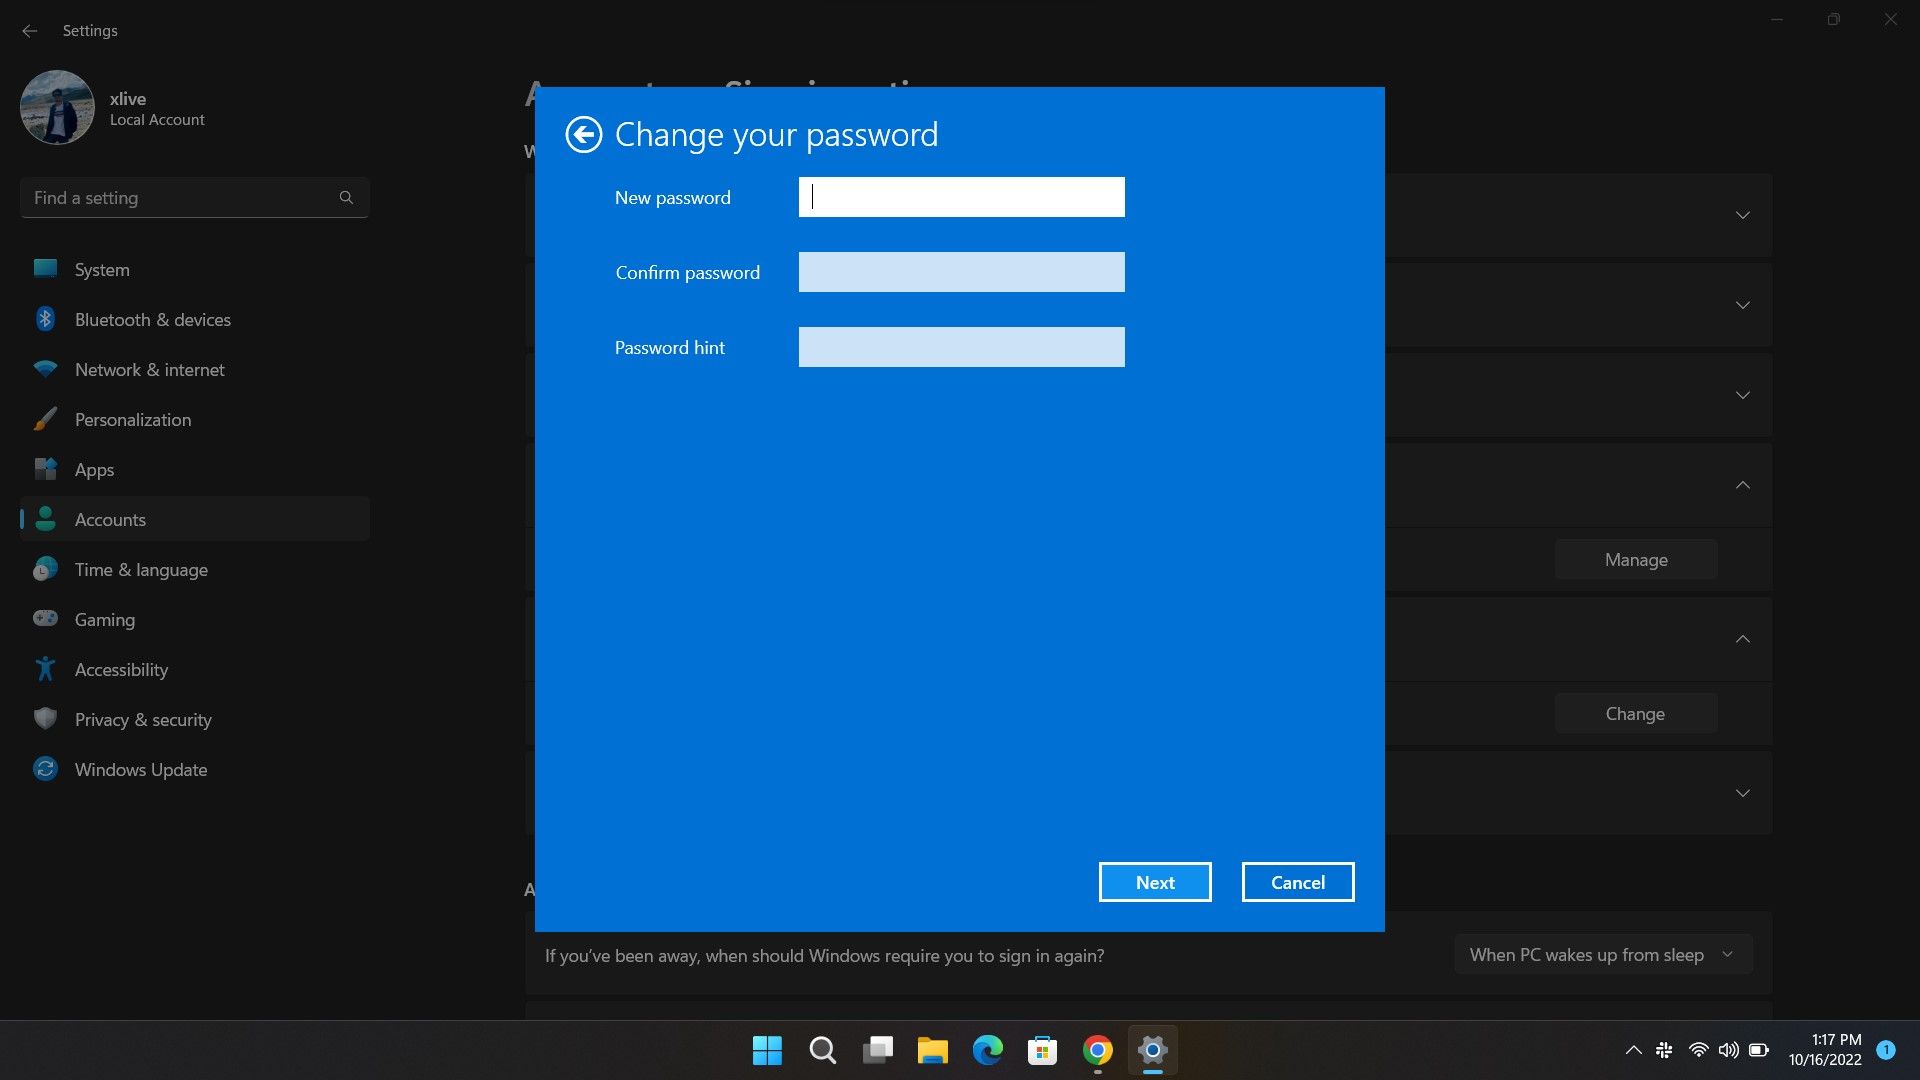
- Finally, click on Finish to remove the Windows 11 lock screen password.

2. How to Disable the Windows 11 Login Password From the User Accounts Panel
If you don’t want to switch to a local account, you can disable the Windows 11 lock screen password through the User Accounts Panel. This won’t remove your password, but it will disable it. It's one of the ways to automatically log into Windows, as the operating system won't ask for a password anymore.
To disable the Windows 11 login password:
- You will first have to ensure Windows Hello sign-in options are disabled for the user account. You can do so via Settings > Accounts > Sign-in options.
-
Deselect the For improved security, only allow Windows Hello sign-in for Microsoft accounts on this device (Recommended) option.
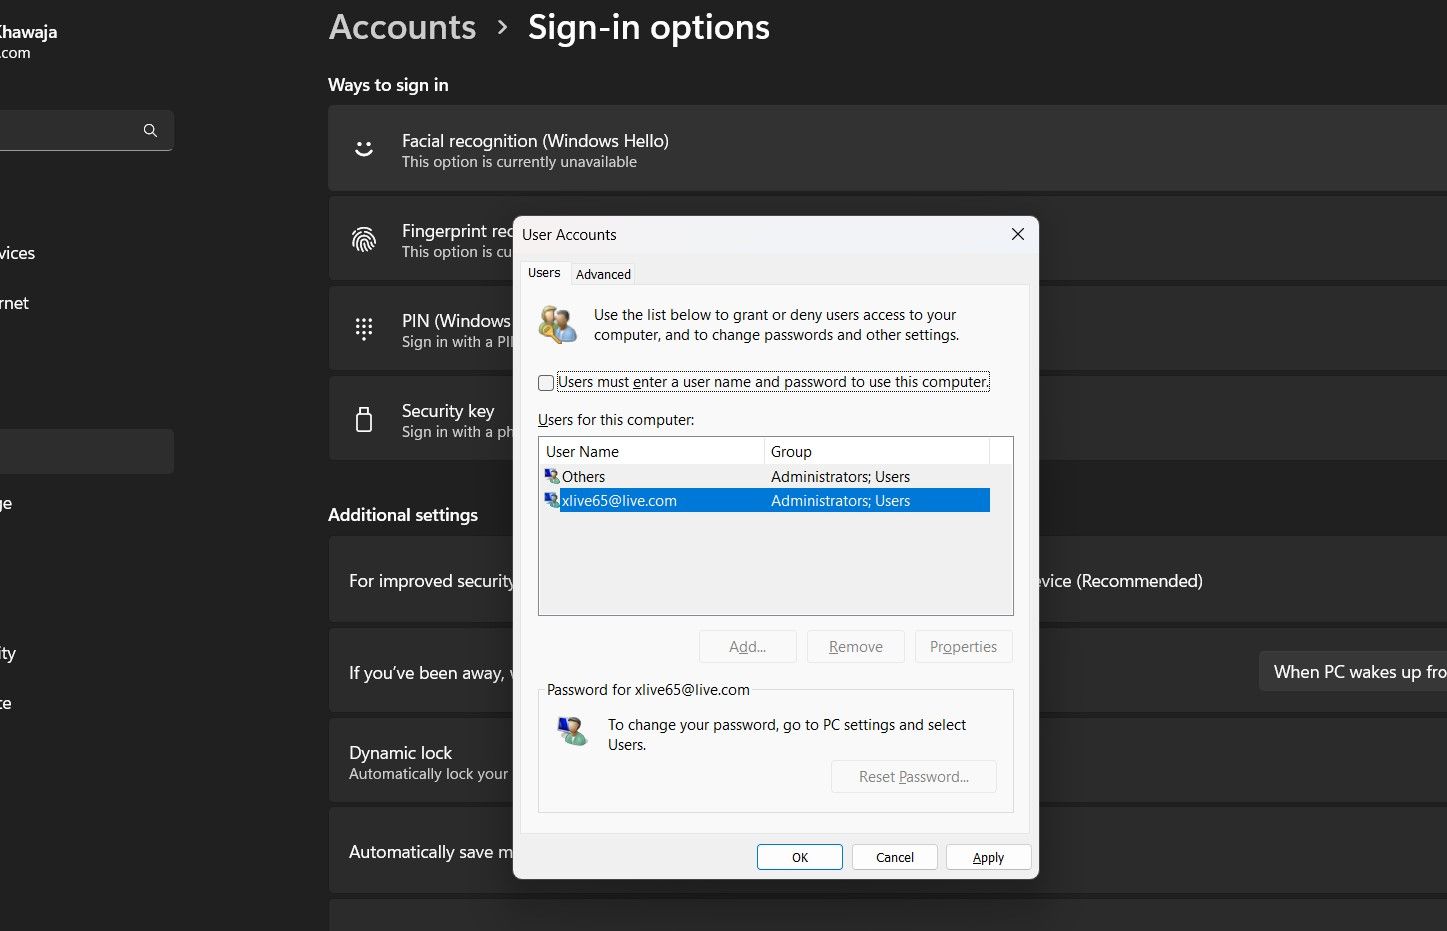
- Launch the Start menu, search for netplwiz and select the Best match.
-
Select the required account under Users for this computer and uncheck the Users must enter a user name and password to use this computer checkbox.
-
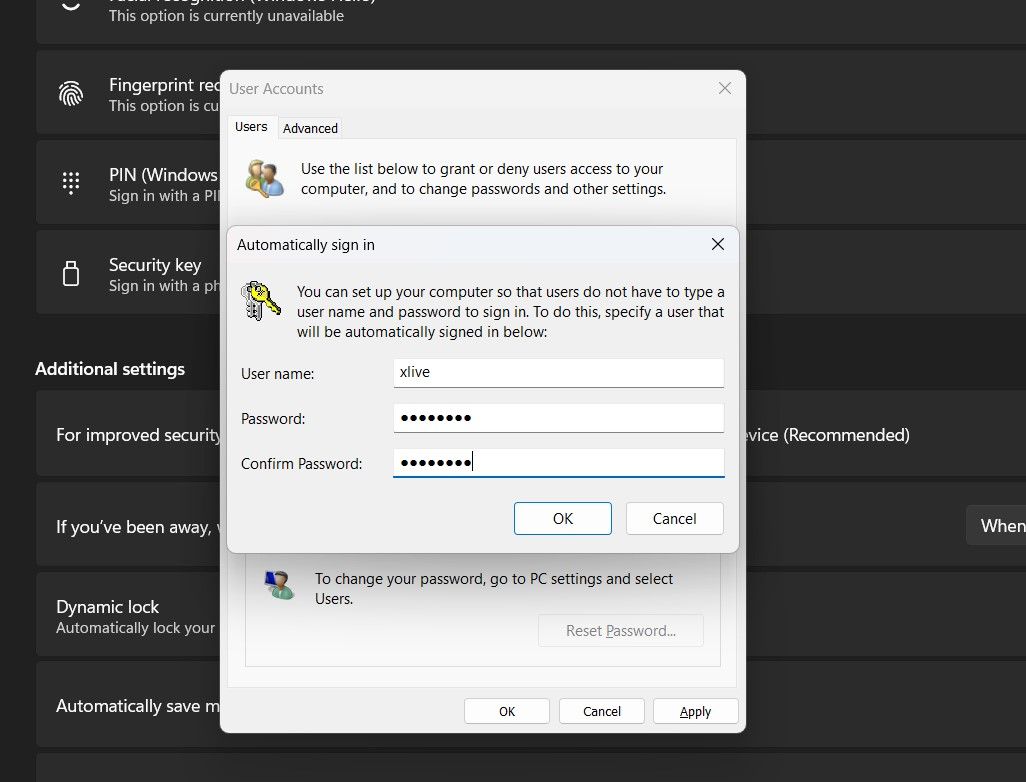
Click on Apply, confirm your Microsoft account (or local account) credentials, and select Ok.
- Finally, click on Ok once again to disable the Windows 11 login password.


It’s important to note that the above steps will keep your account secure through a password but will automatically sign you in the first time the computer boots up. So if you lock your account, you will still have to enter your password or PIN.
Log In Automatically to Windows 11
It’s essential to have a secure lock screen password or PIN. Not only does this keep unauthorized lurkers away, but it also gives you an added layer of security. Either way, Windows 11 makes it very easy to change account settings like profile image, password, etc.