The remote desktop feature of Windows allows you to use your computer on another device such as an Android phone or a Mac over a network. You can access applications, edit the files, transfer documents—basically everything that you can do on the computer that is in front of you.
To use this feature on Windows 11, you need to first enable it and then connect the client computer to your device. Below, we show you how to do that in detail.
1. Enable the Remote Desktop Feature
To set up and use the Remote desktop feature in Windows 11, you must first enable it. There are quite a few ways of going about this, enabling the feature via Windows Settings being the easiest one.
Follow these steps to enable the Remote desktop feature:
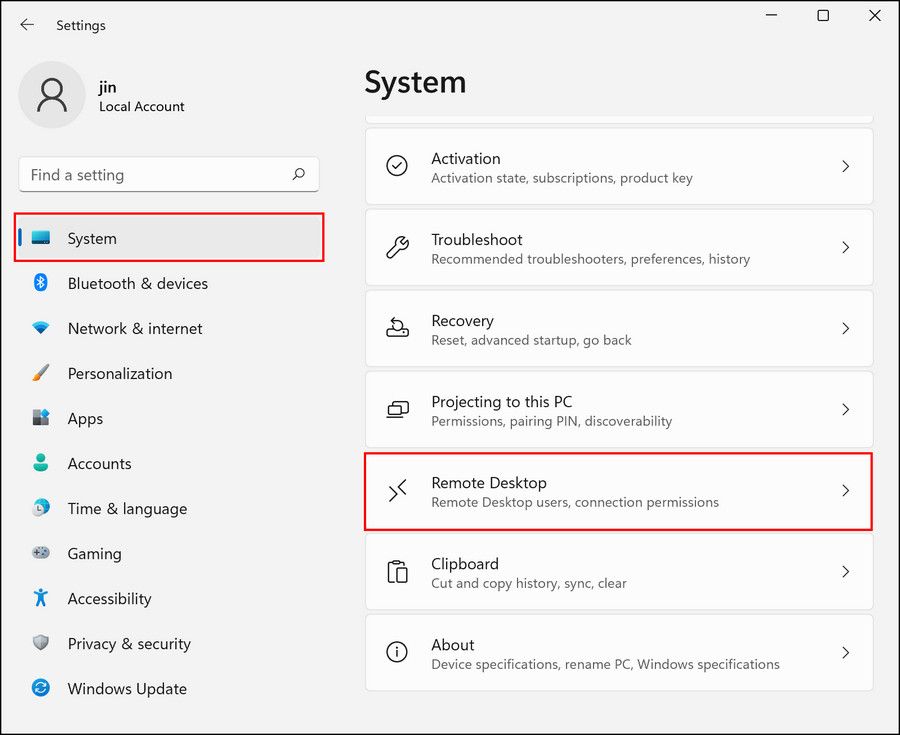
Press Win + I together to open Windows Settings. In the following window, head over to System > Remote Desktop.
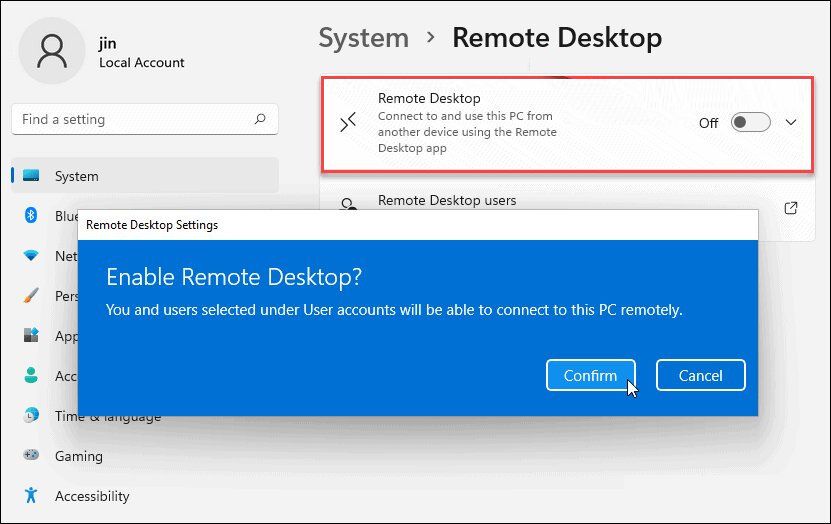
Turn the toggle on for Remote Desktop and checkmark the box associated with Require devices to use Network Level Authentication Connect (Recommended). Click on the Confirm button to proceed.
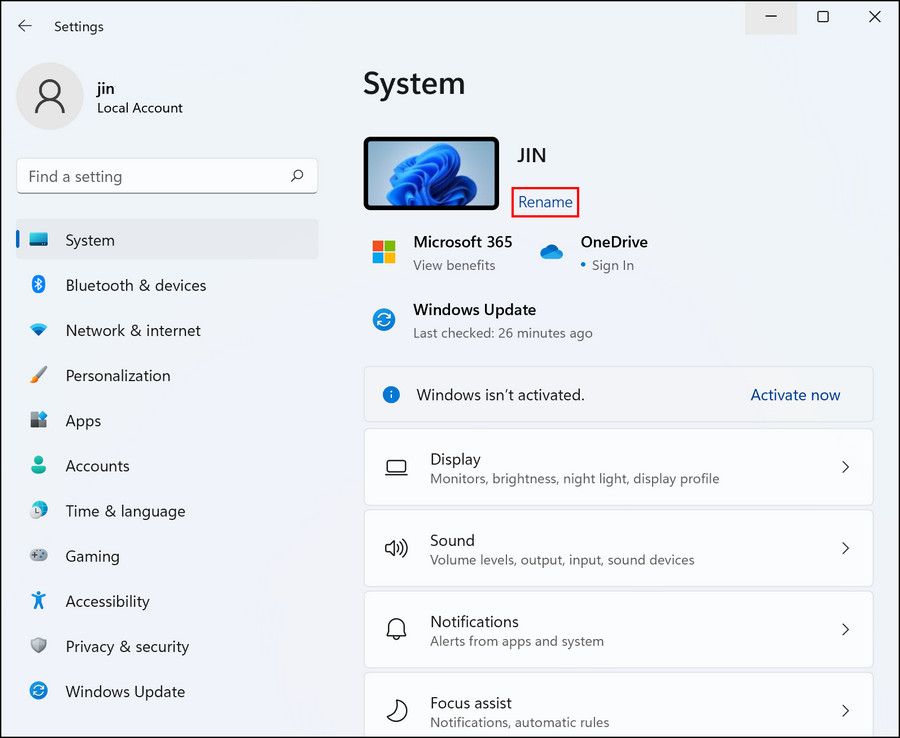
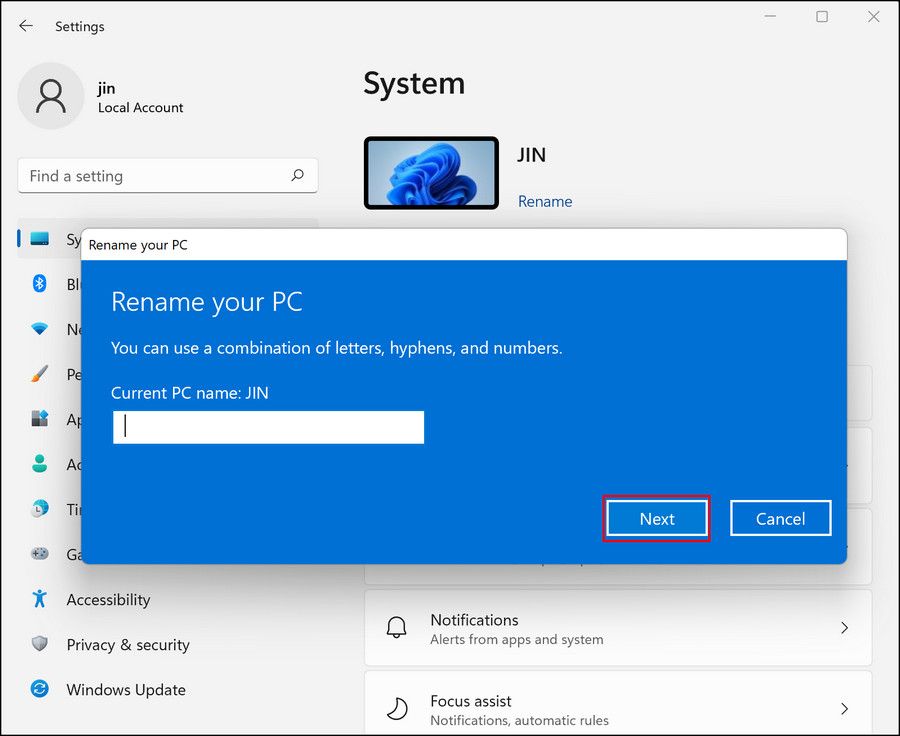
In the same window, you should now see a name against the PC name option. Note this down as we will use it later in the steps of setting up a remote desktop. To change this name, head back to Settings > System. Click on the Rename link and type a new name for your PC in the following dialog.
Once done, hit Next. You will most likely be asked to restart your system to implement this change.
You are now ready to set up a Remote Desktop and start using it. However, if the Remote Desktop feature was grayed out in Windows Settings, you can enable it via Control Panel. Here is how:
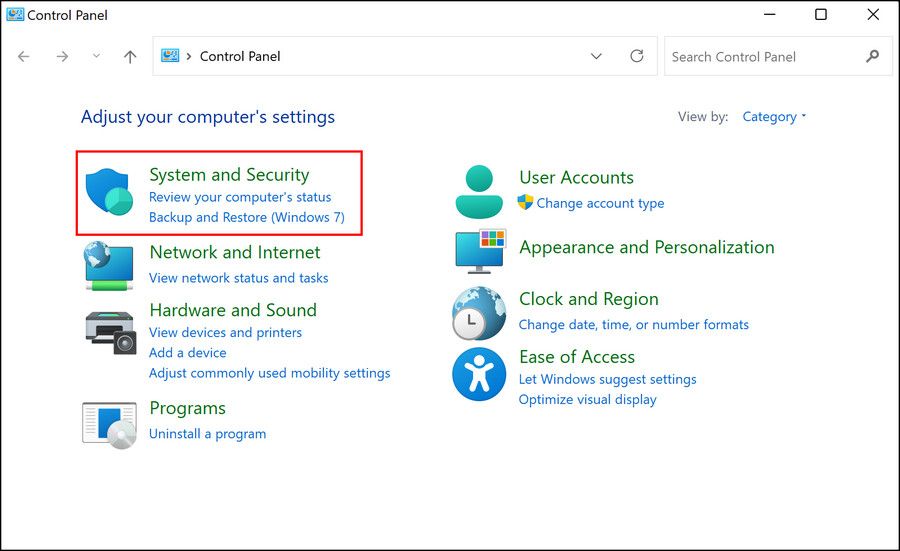
Type Control Panel in Windows search and click Open. Choose System and Security from the list of options available.
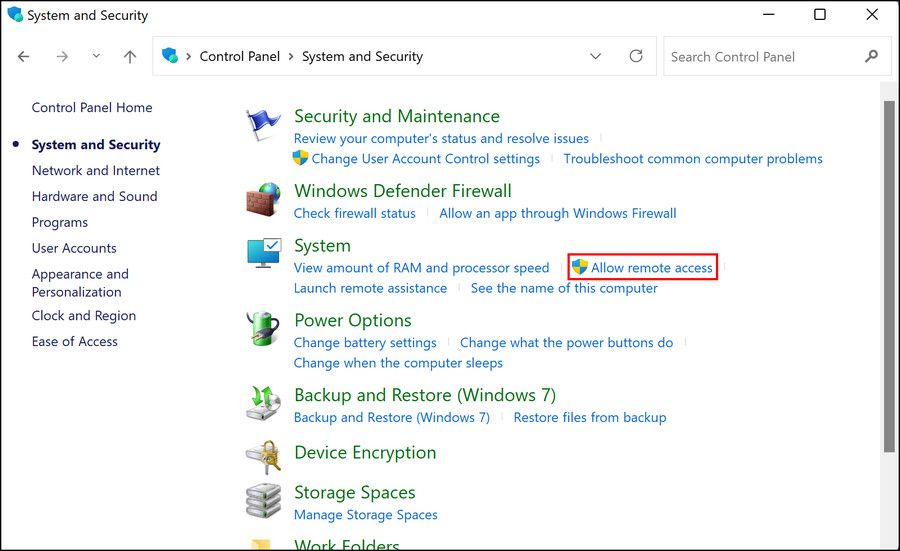
In the following window, click on Allow remote access under System. This should open a System properties dialog.
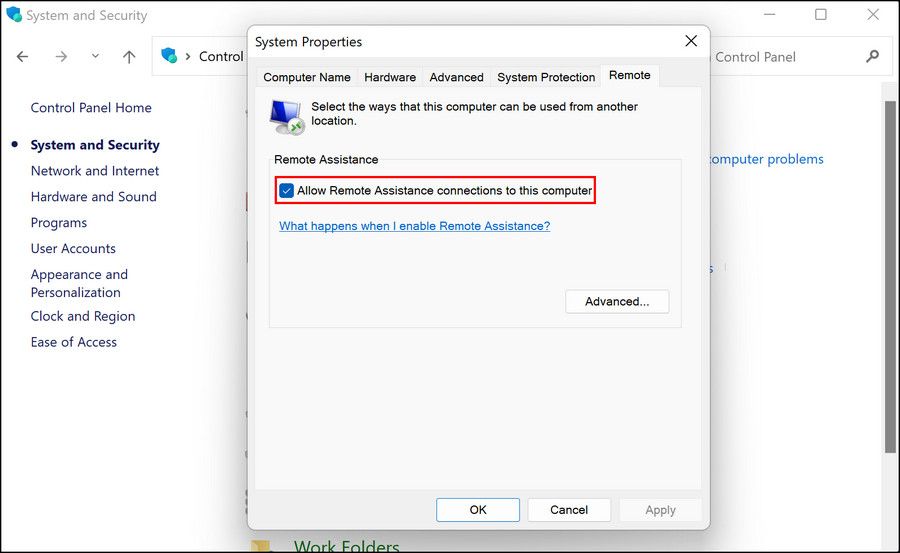
Head over to the Remote tab and checkmark the box for Allow remote connections to this computer.
Click Apply > OK to save the changes.
That’s it. This should enable the feature on your Windows device. You can also open a Remote Desktop connection via Command Prompt if you are looking for a 2-step method.
2. Use the Remote Desktop App
Now that you have successfully enabled the Remote Desktop feature, it is time to set it up for usage. Below, we have listed two methods; one for using the Remote desktop connection in Windows and one for using it on Android, Mac, and iOS.
Go for the method that suits your requirements the best.
1. Use Remote Desktop Connection in Windows
If the client computer is a Windows PC as well, then the connection process is fairly simple. We will be using the Remote Desktop Connection app that is built into Windows. If you do not like its functionality, you can try using a third-party app as well.
Follow these steps to set it up within a few minutes:
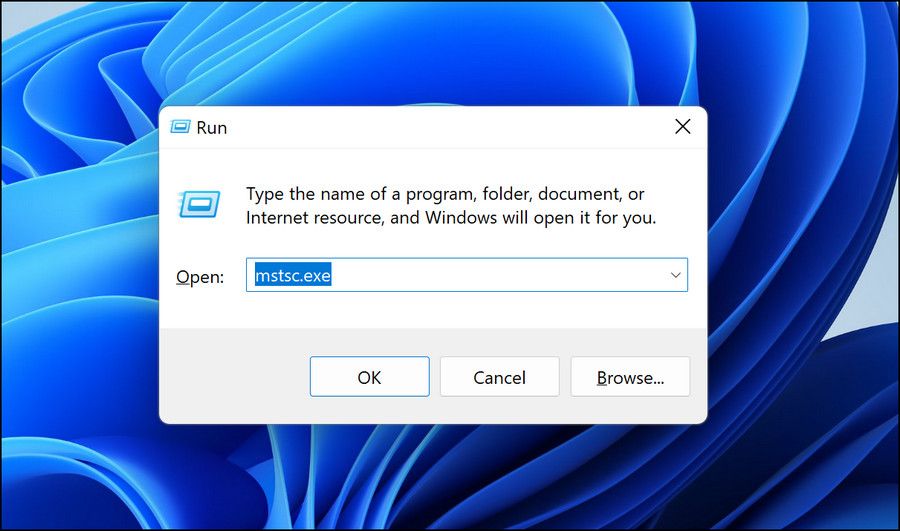
On the client PC, type Remote Desktop Connection in Windows search and click Open. Alternatively, you can also open Run by pressing Win + R together.
Type mstsc.exe in Run and click OK. This should launch the Remote Desktop Connection.
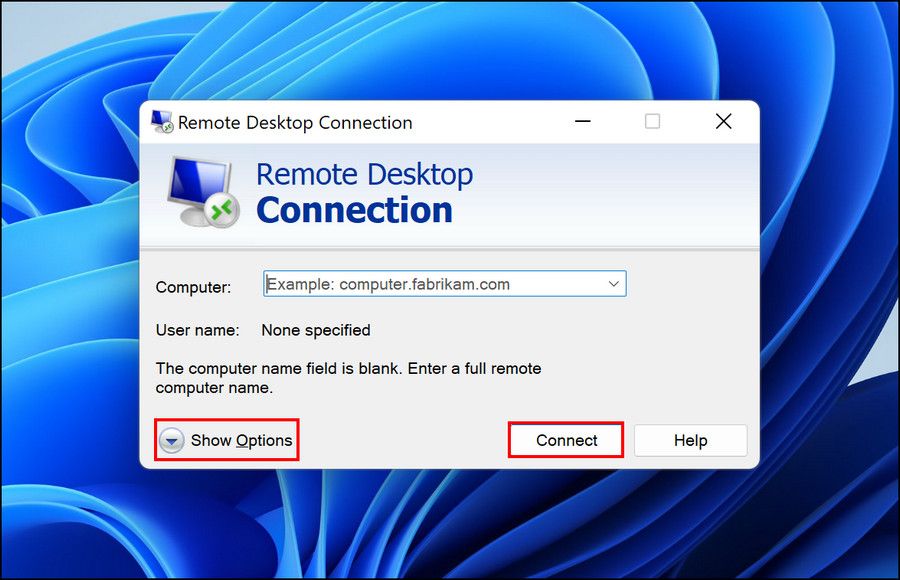
Enter the name of the computer you want to connect to.
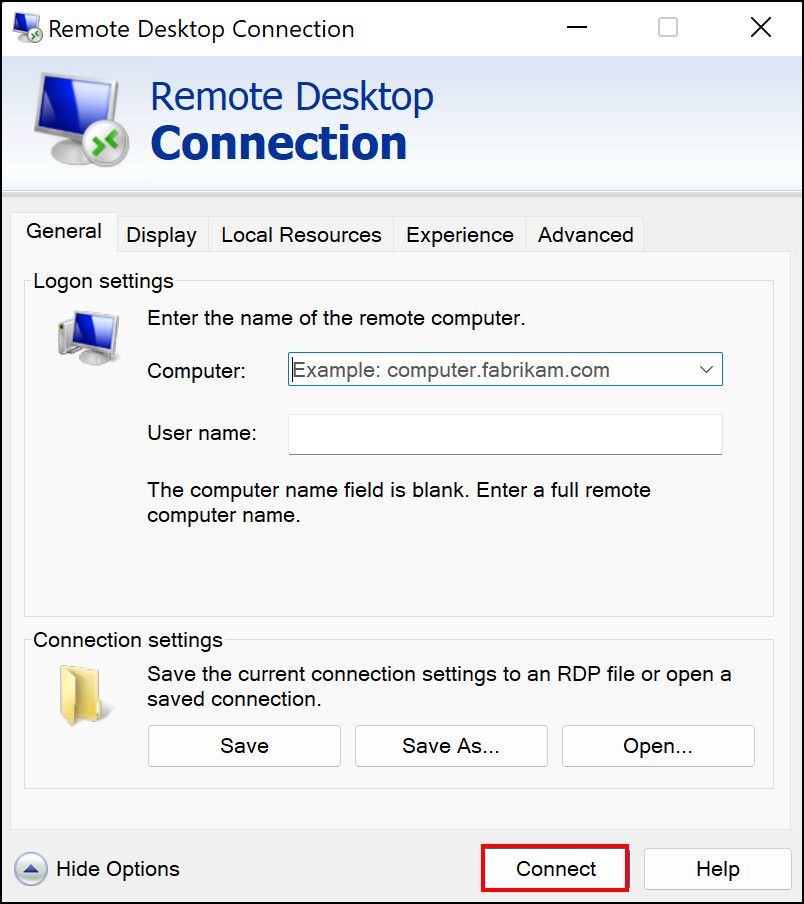
Once the dialog is launched, you have two options to move forward. Either you can click on the Connect button and set up the connection instantly, or you can customize the remote desktop experience by expanding the Show options dropdown.
When you select the first option, the default settings will be applied. If you go for the latter, you can customize the display, sound, and performance settings.
Make the changes according to your preferences and head over to the General tab. Add the username and password of the PC you want to connect to, and hit the Connect button.
Your connection should now be successfully established. To exit the remote desktop, click on the Close icon in the top-right corner of the window. Click OK to confirm the departure.
2. Use Windows 11 via Android, iOS, and Mac Devices
If you want to use your Windows 11 via Android, iOS, and Mac devices, you must first install Microsoft Remote Desktop Client. You can download them with these links:
For demonstration purposes, we will be using an Android device to connect to a Windows 11 PC remotely:
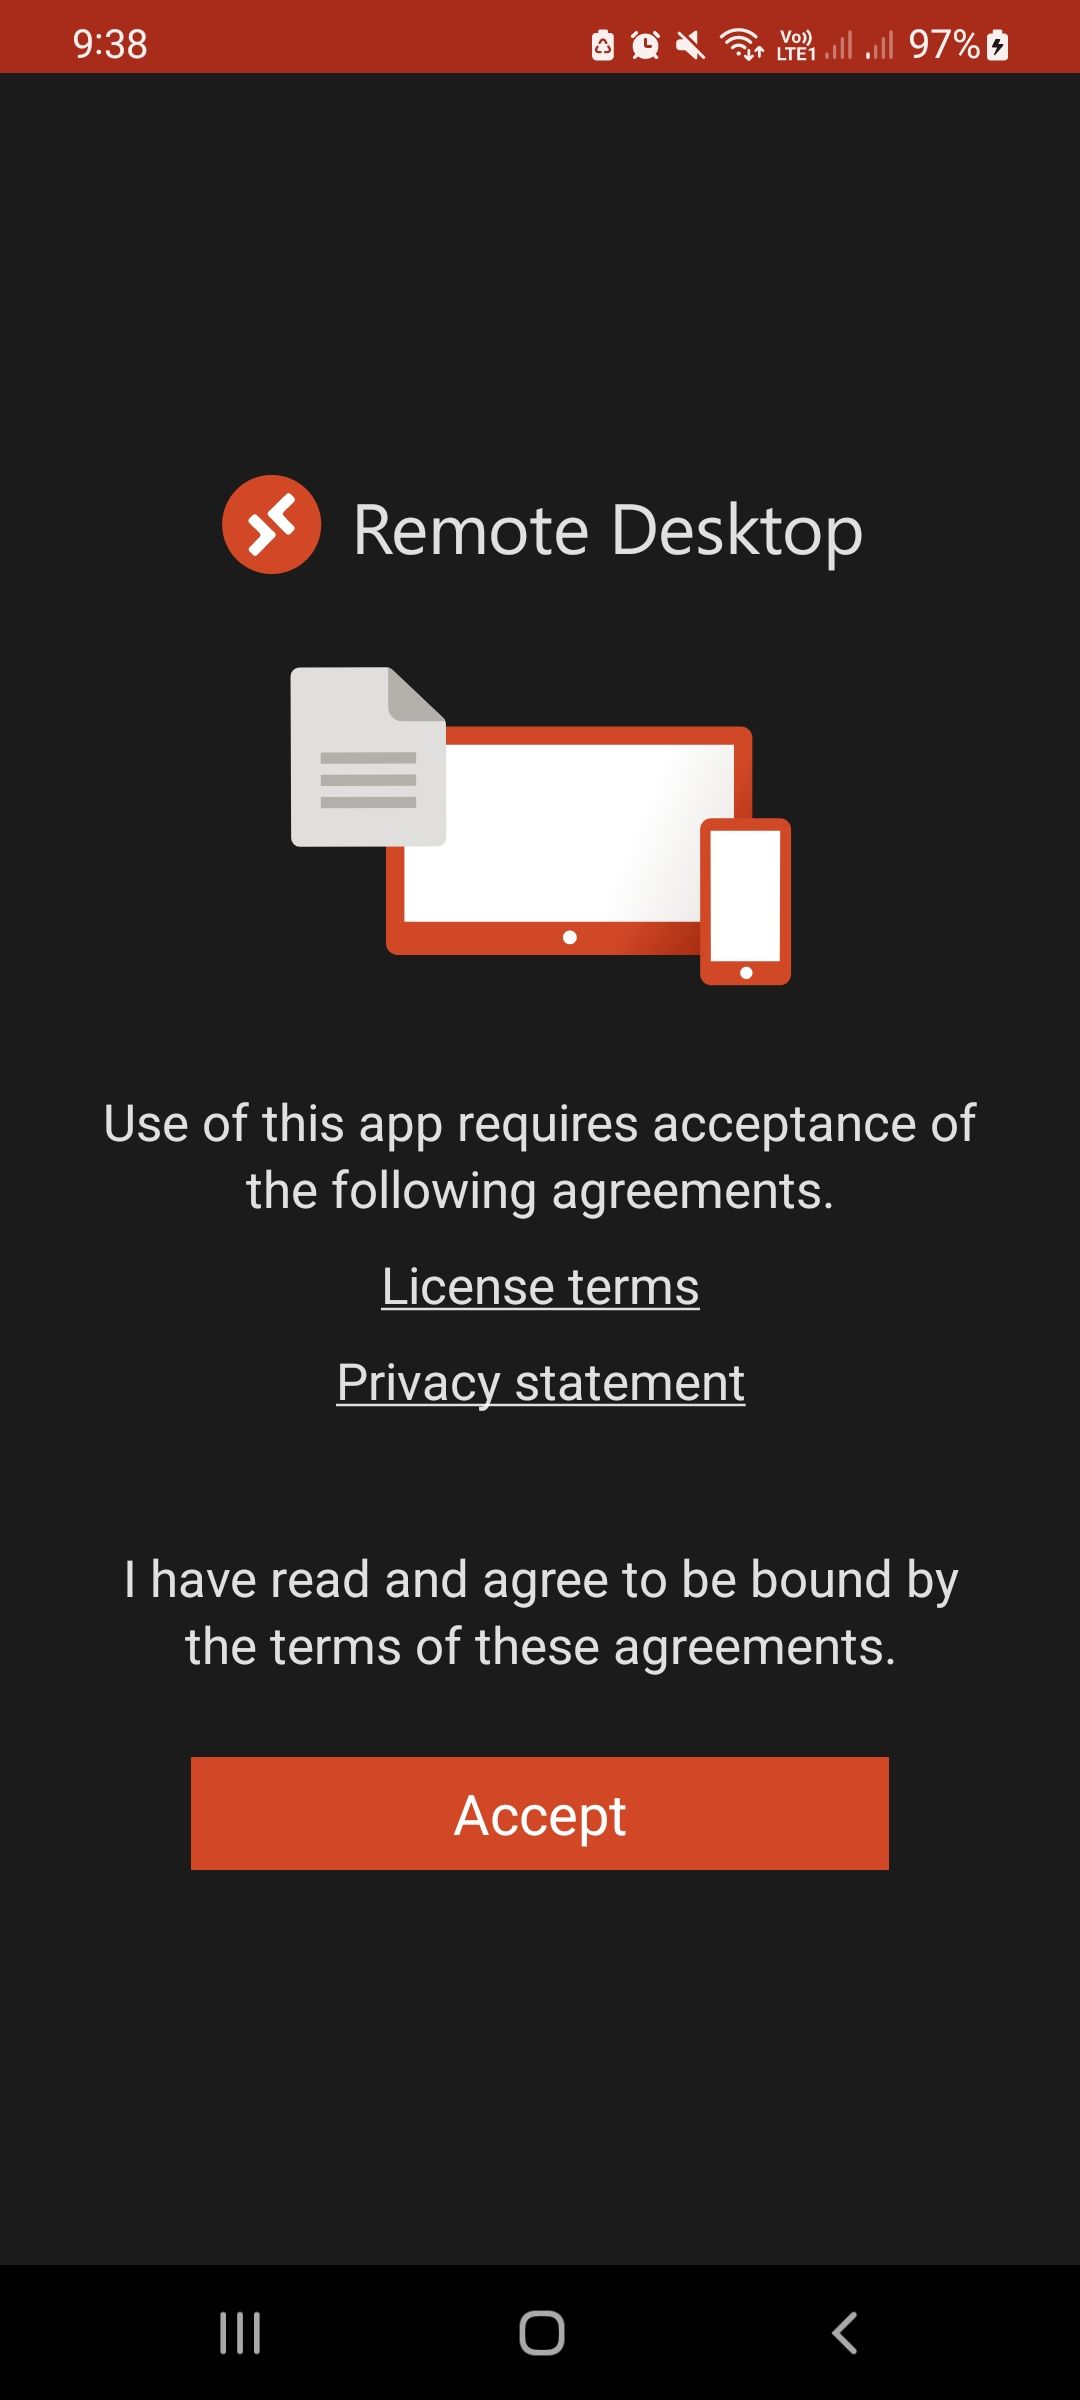
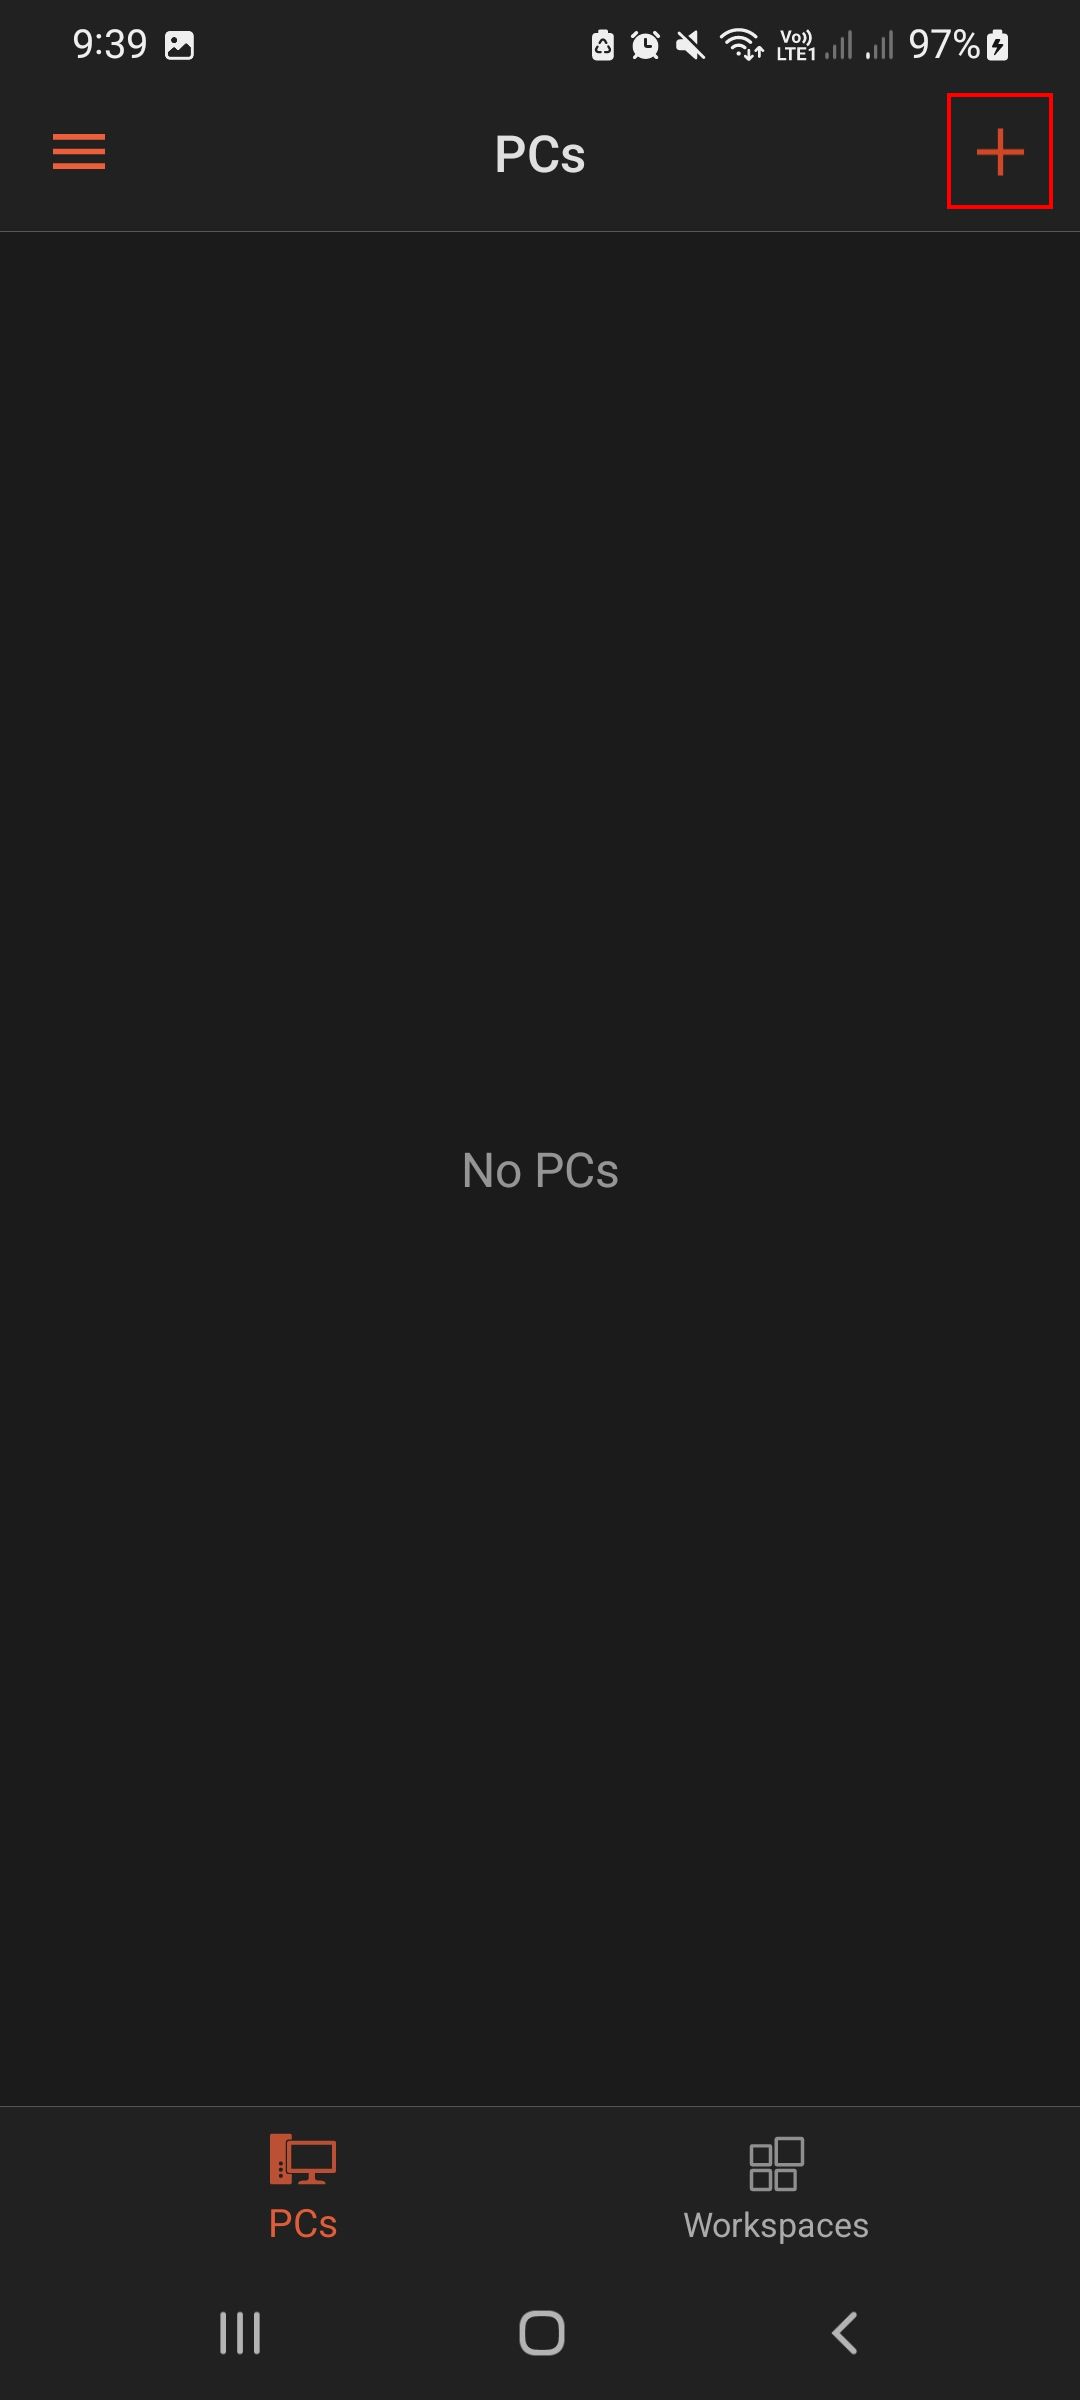
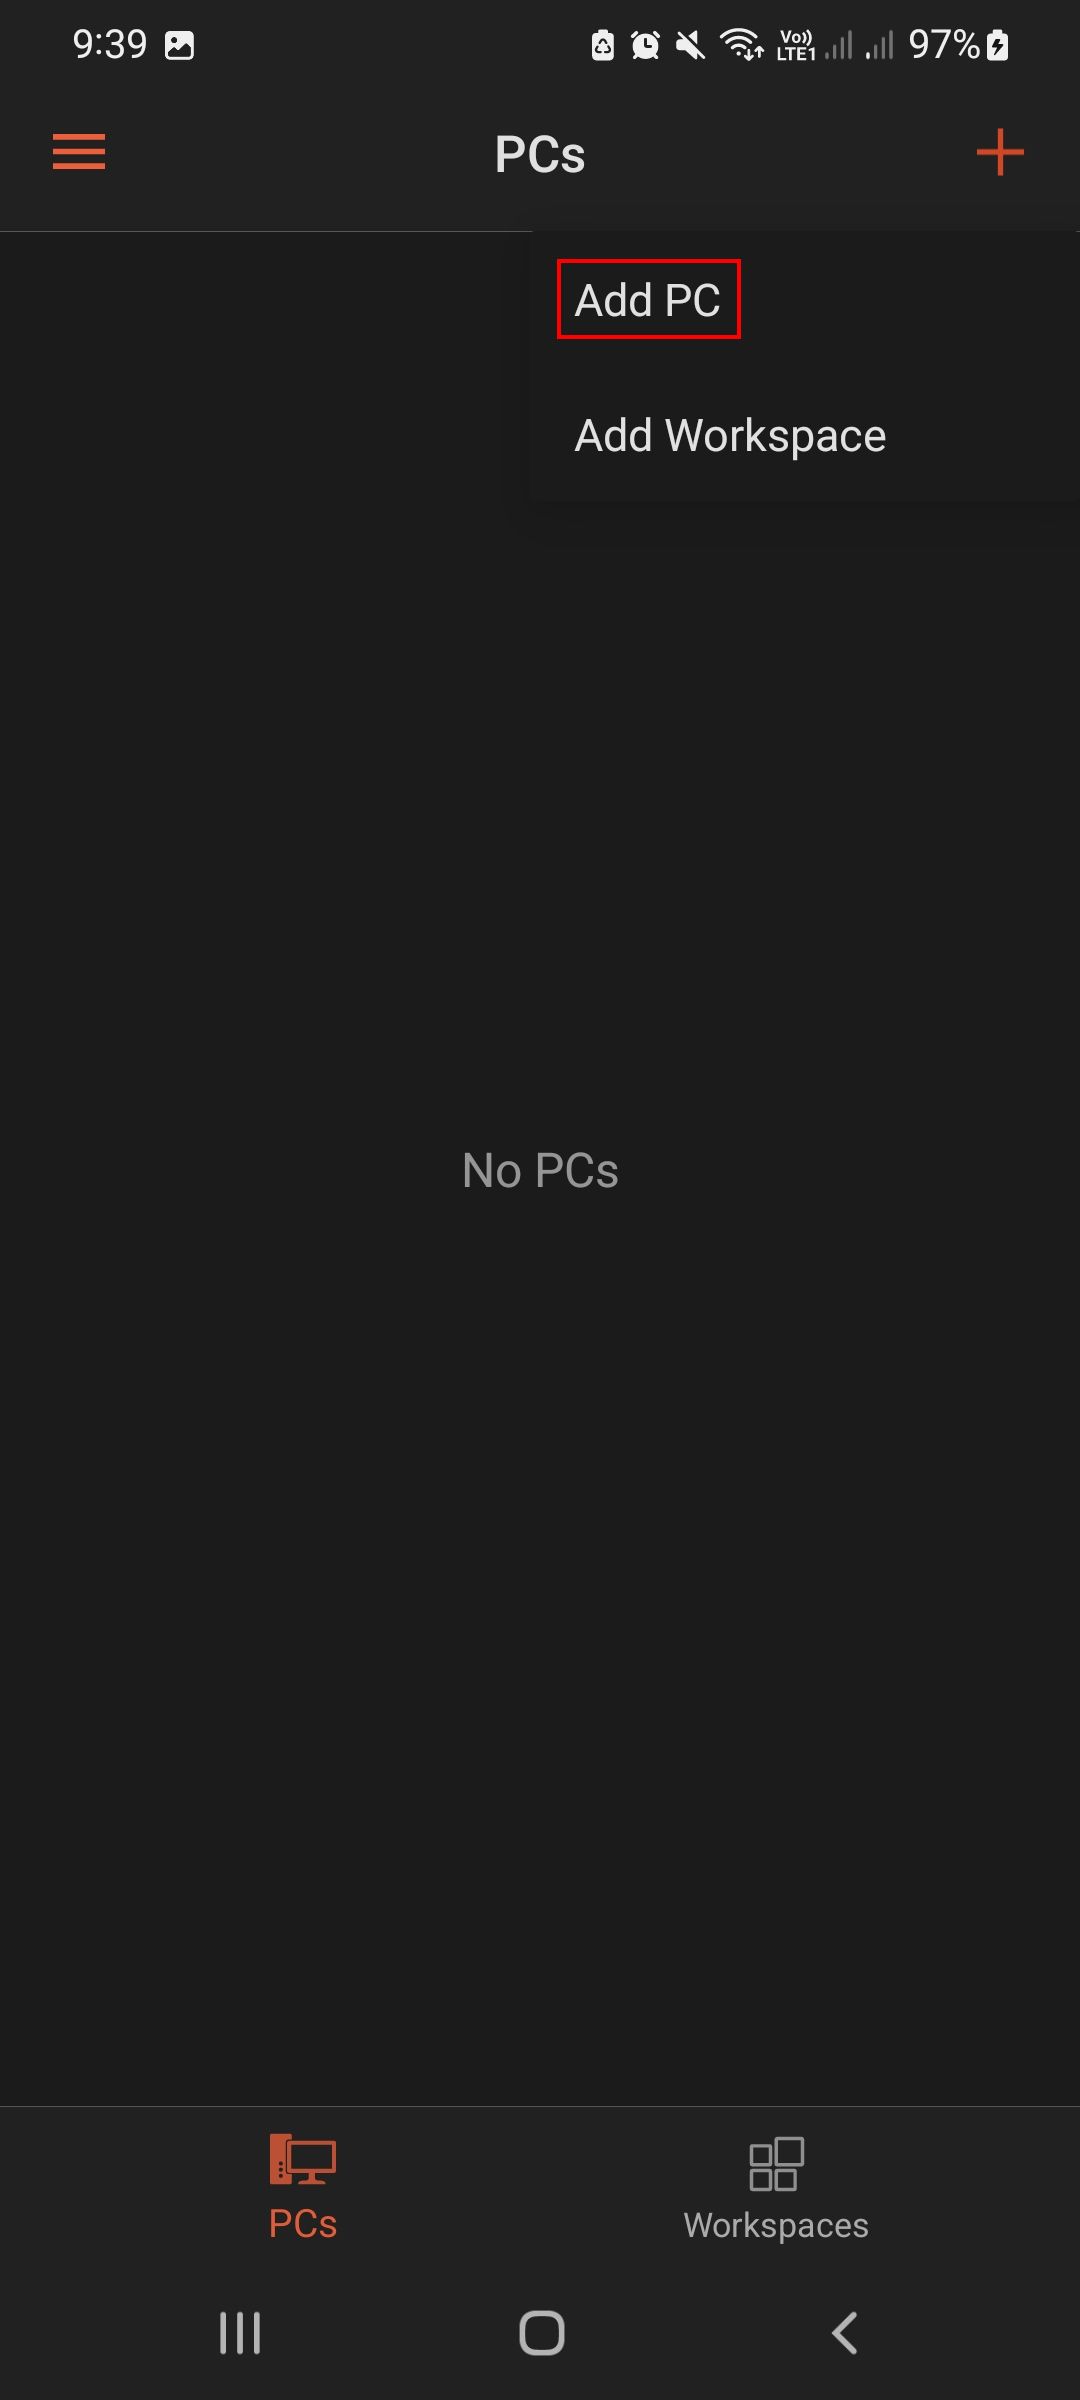
Once the app is downloaded and installed, click on it to launch it. Click on the plus icon in the top-right corner and choose Add PC.
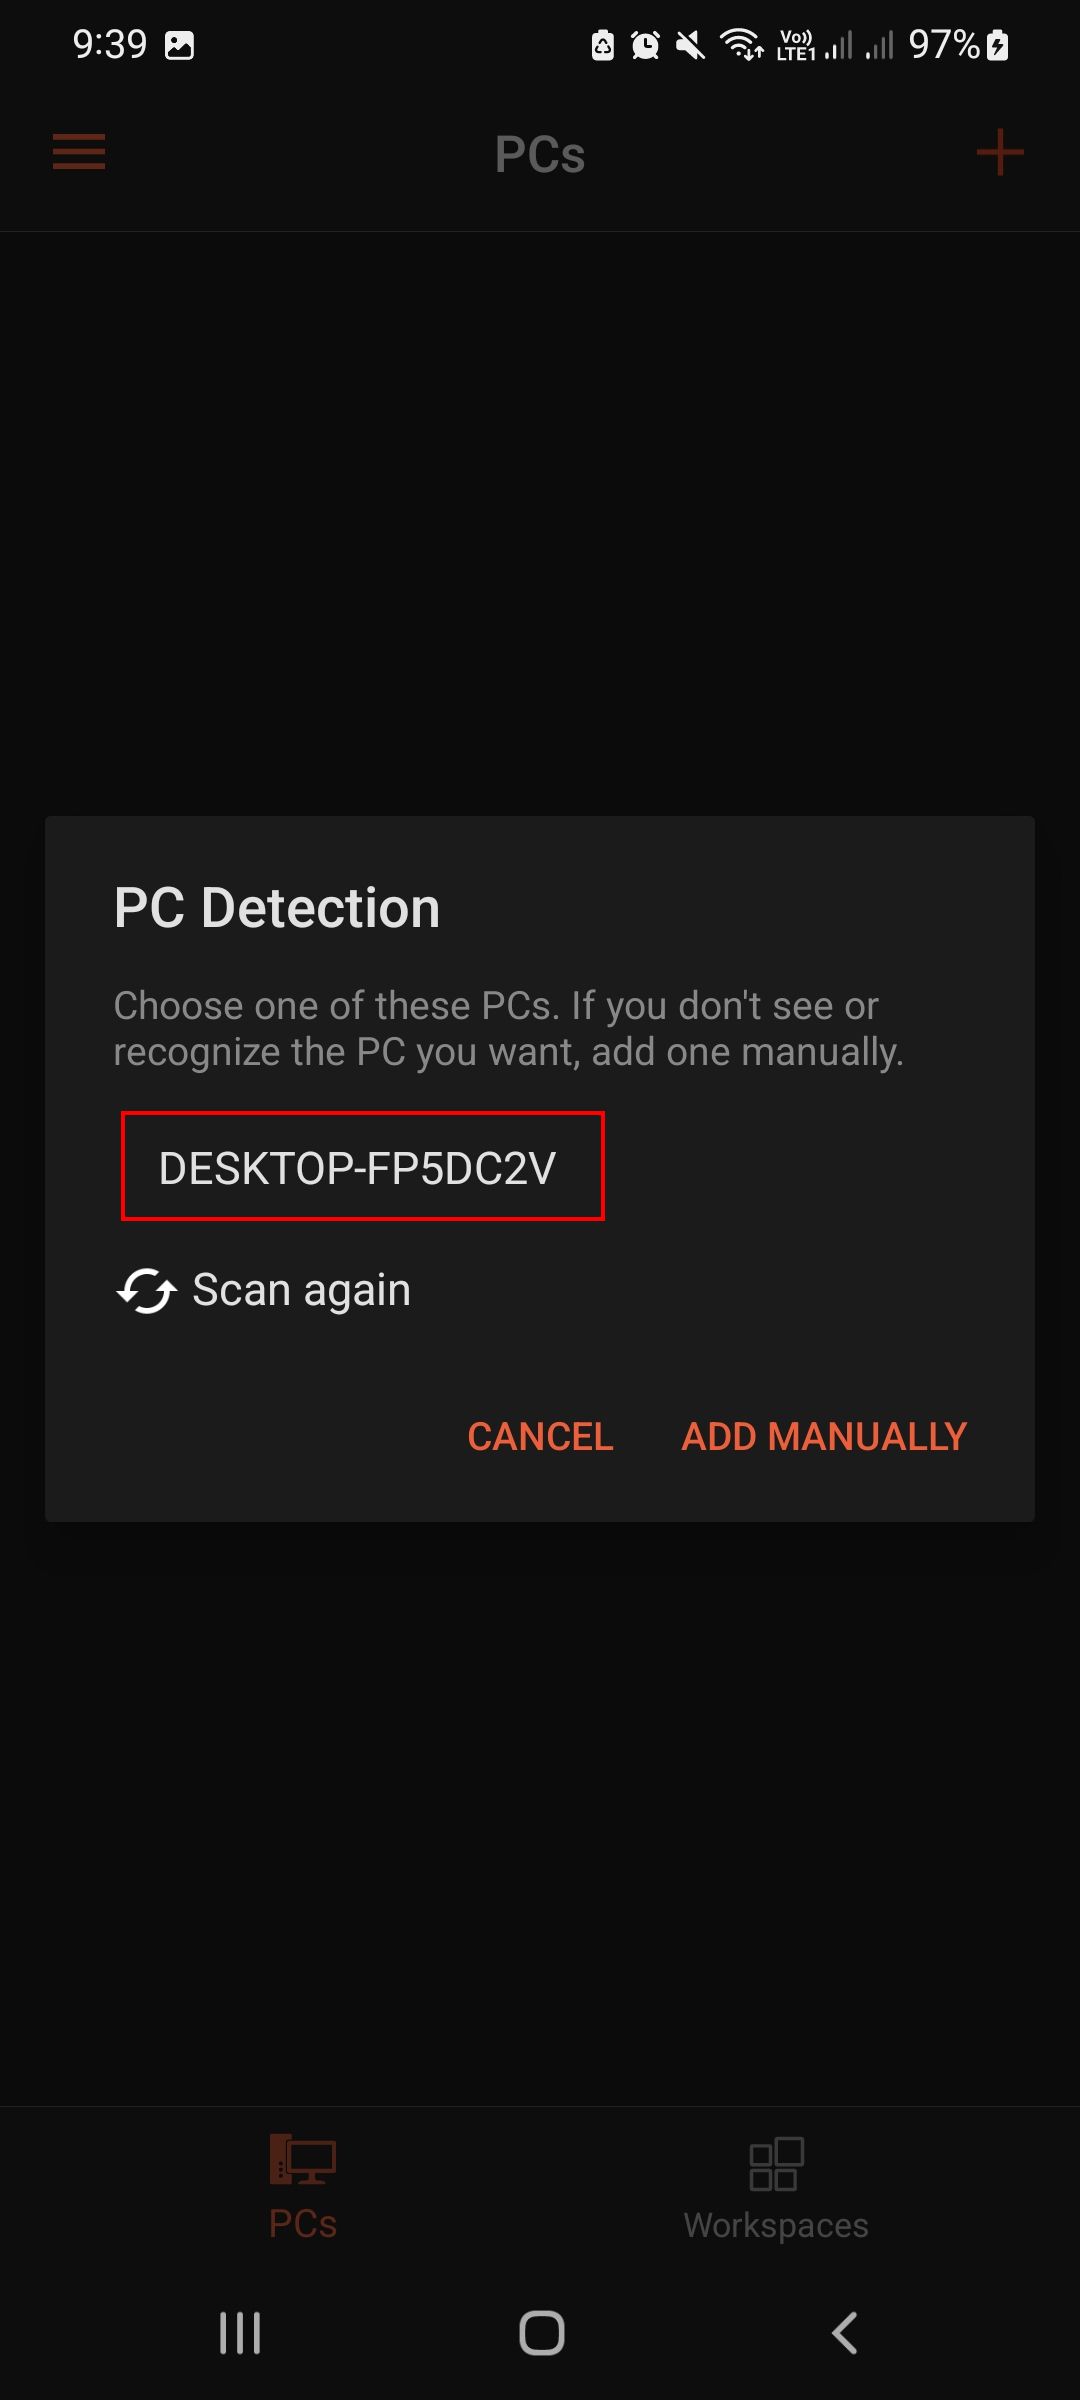
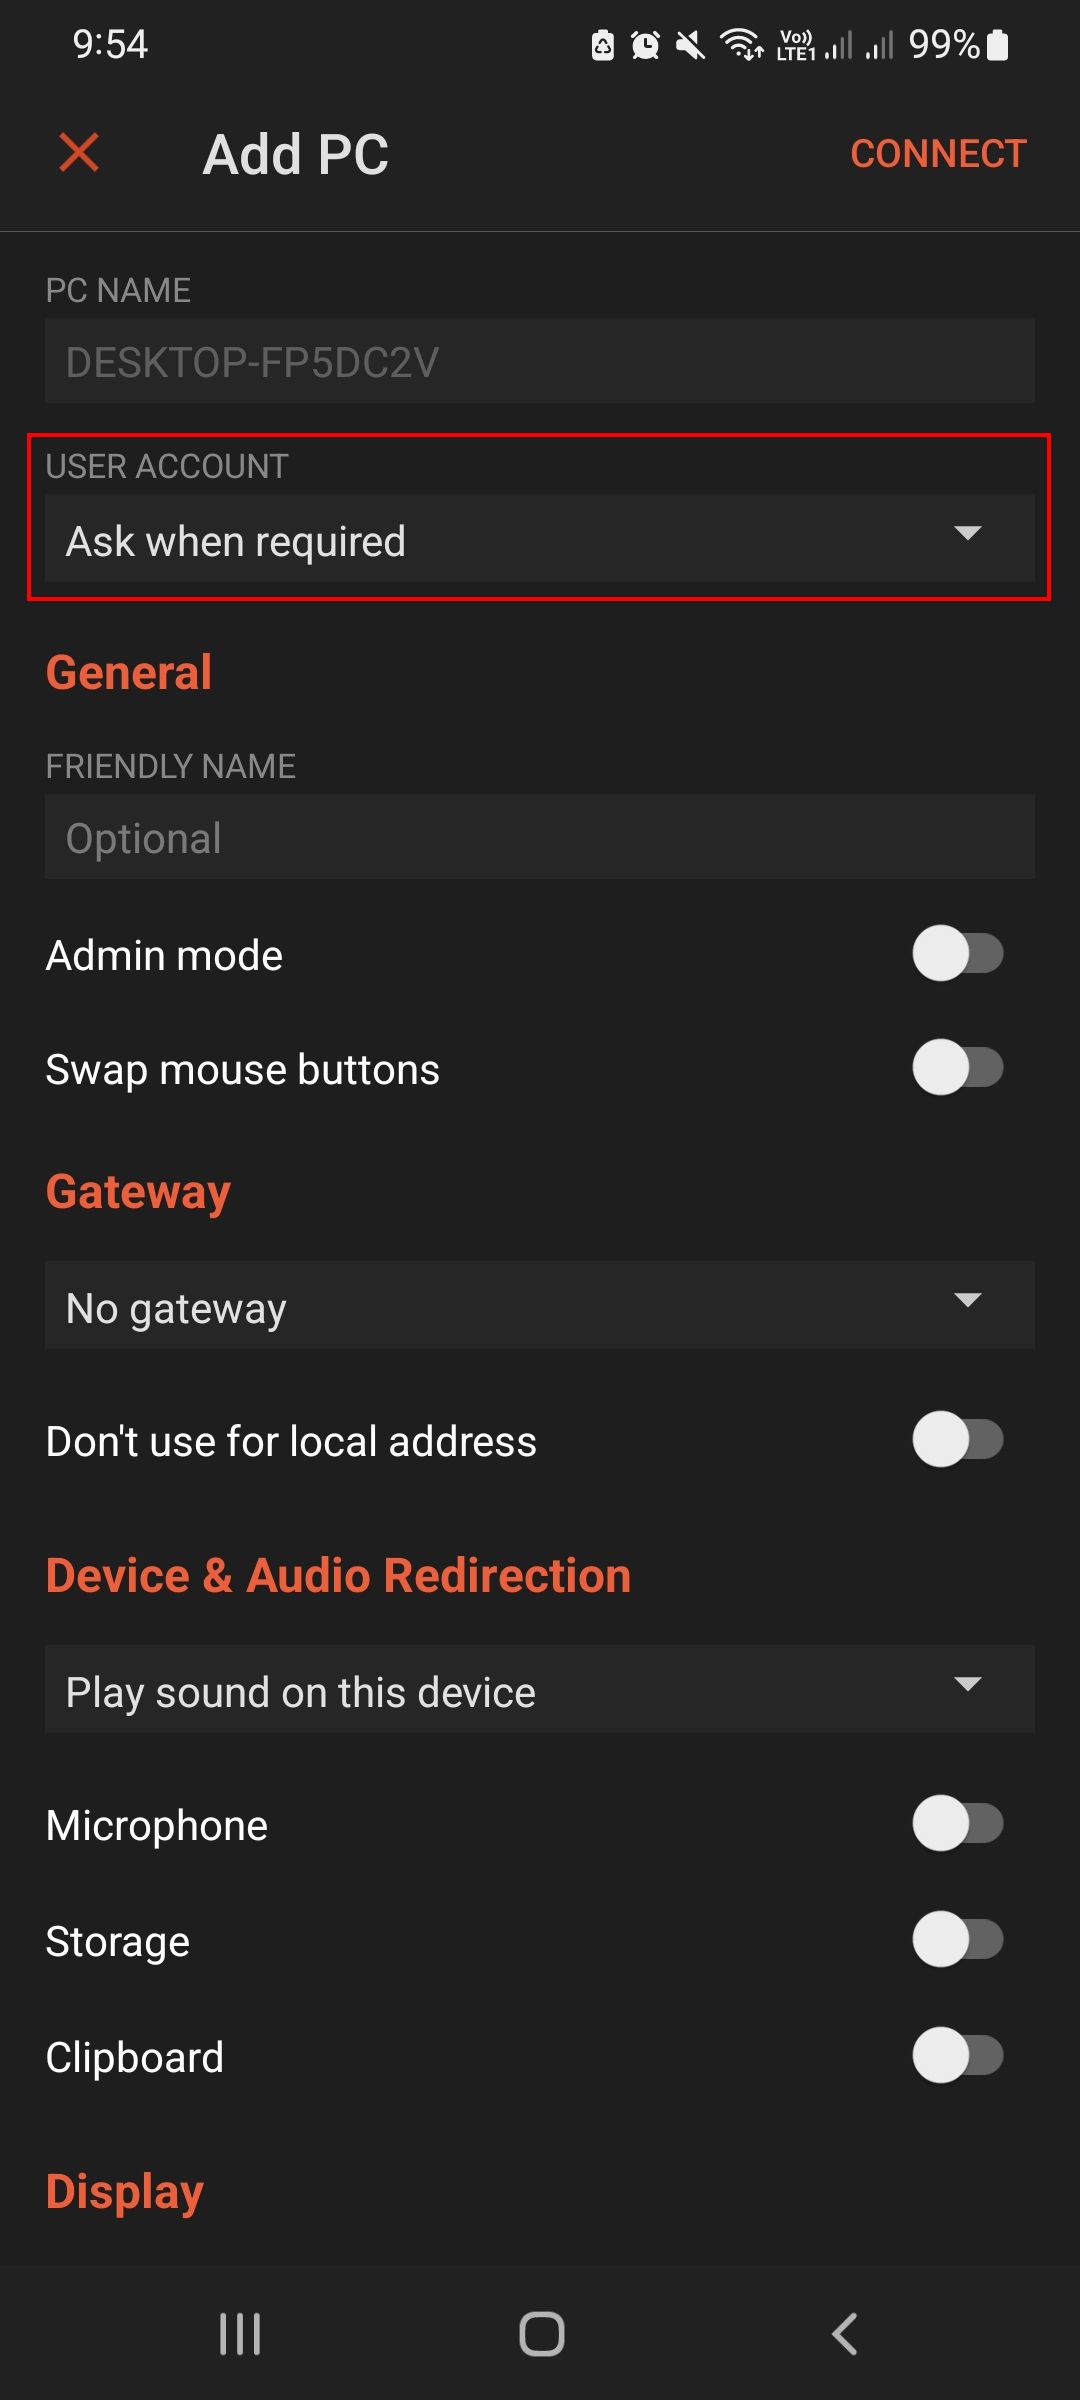
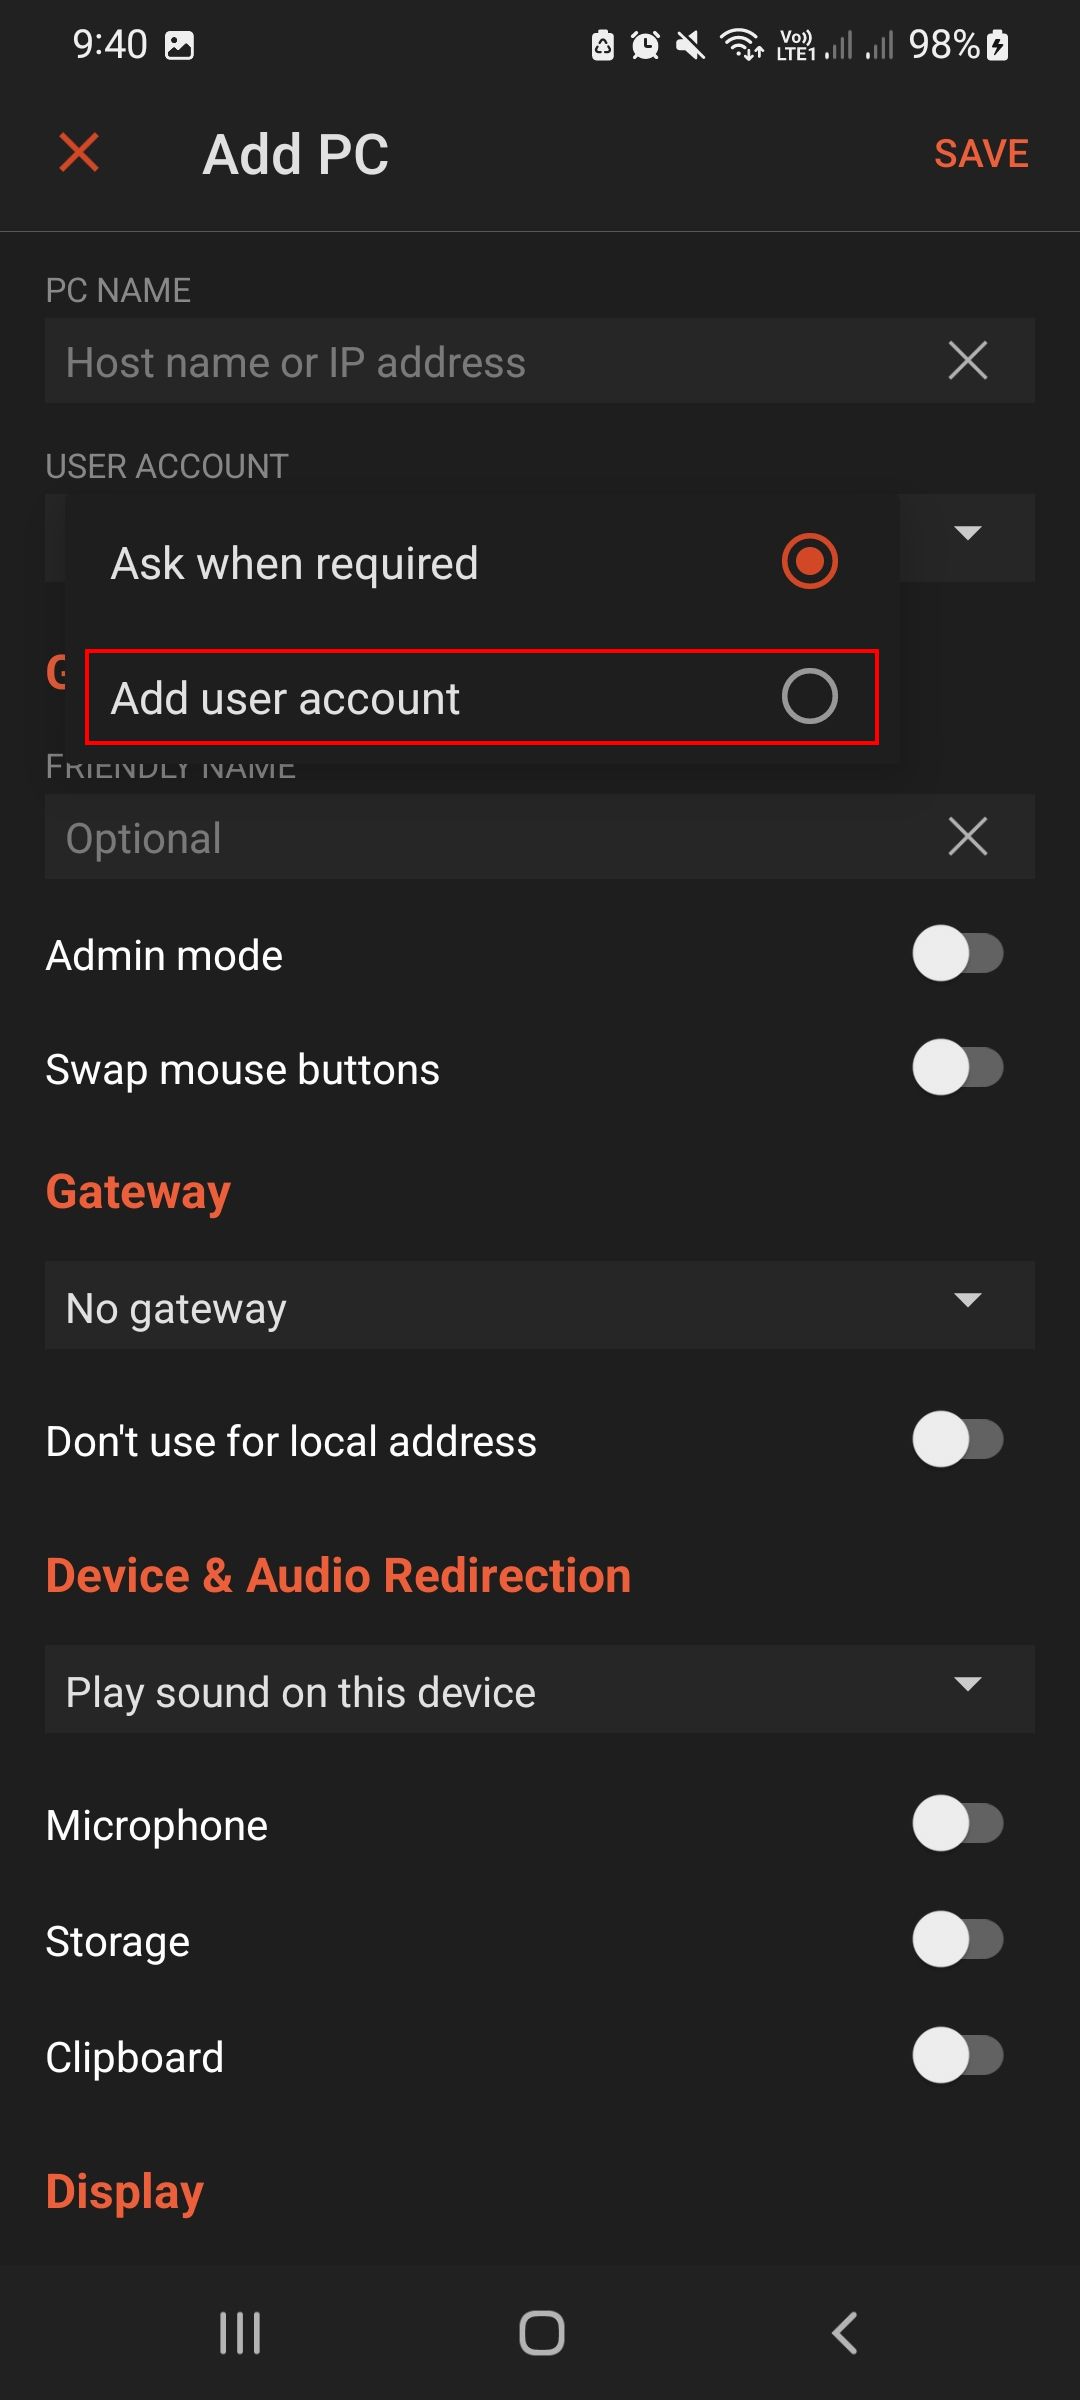
In the following window, type the name of the targeted PC (the one we identified in the first method) or IP address under the PC name option. Then, expand the dropdown under User account and click on Add user account.
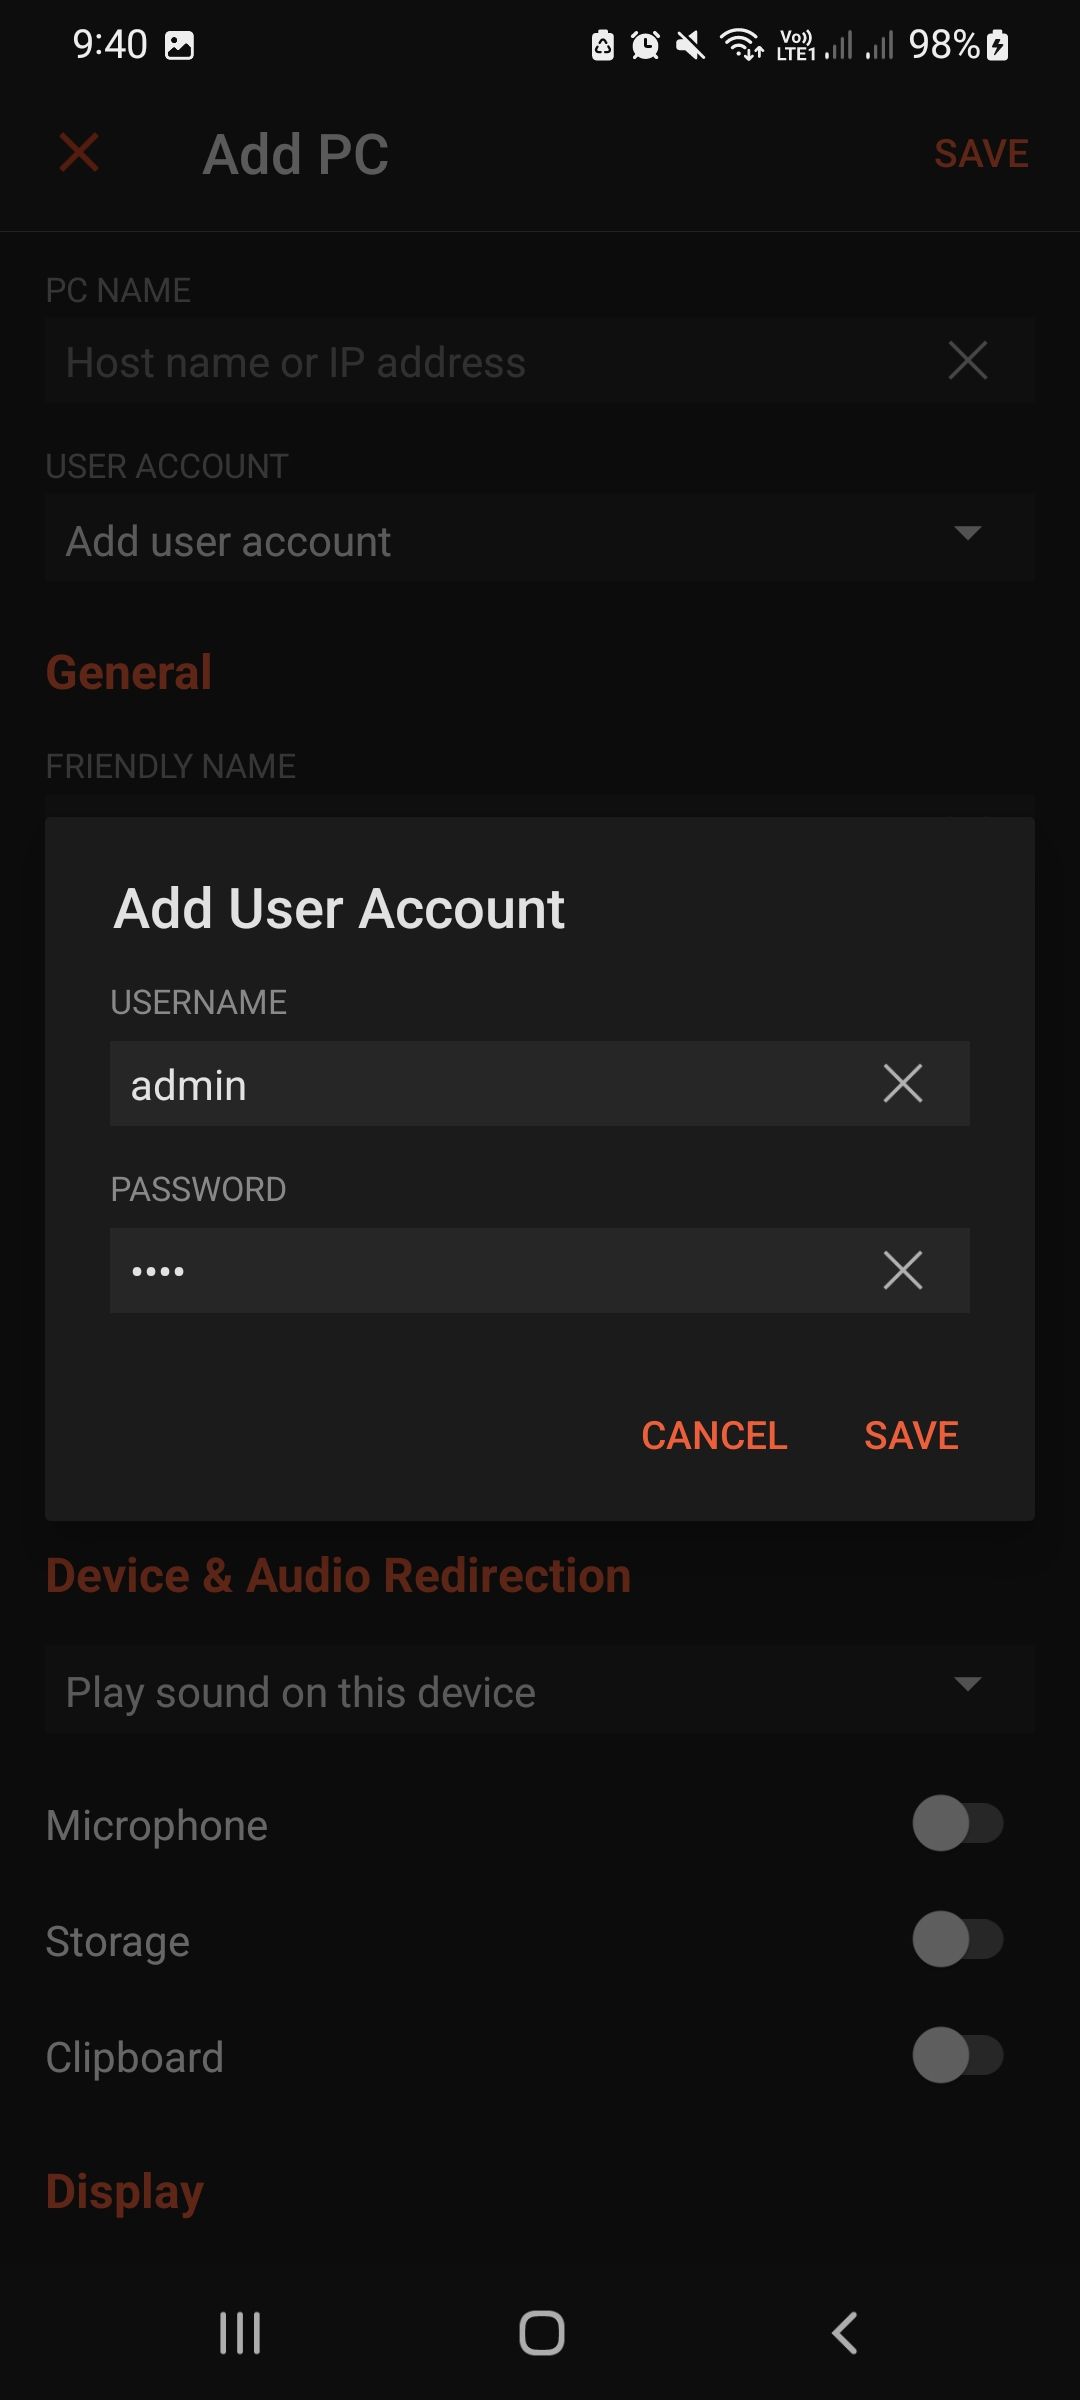
Enter the Microsoft email address associated with the account on which you enabled the Remote desktop feature on your computer earlier. Enter the password of your account and click Save.
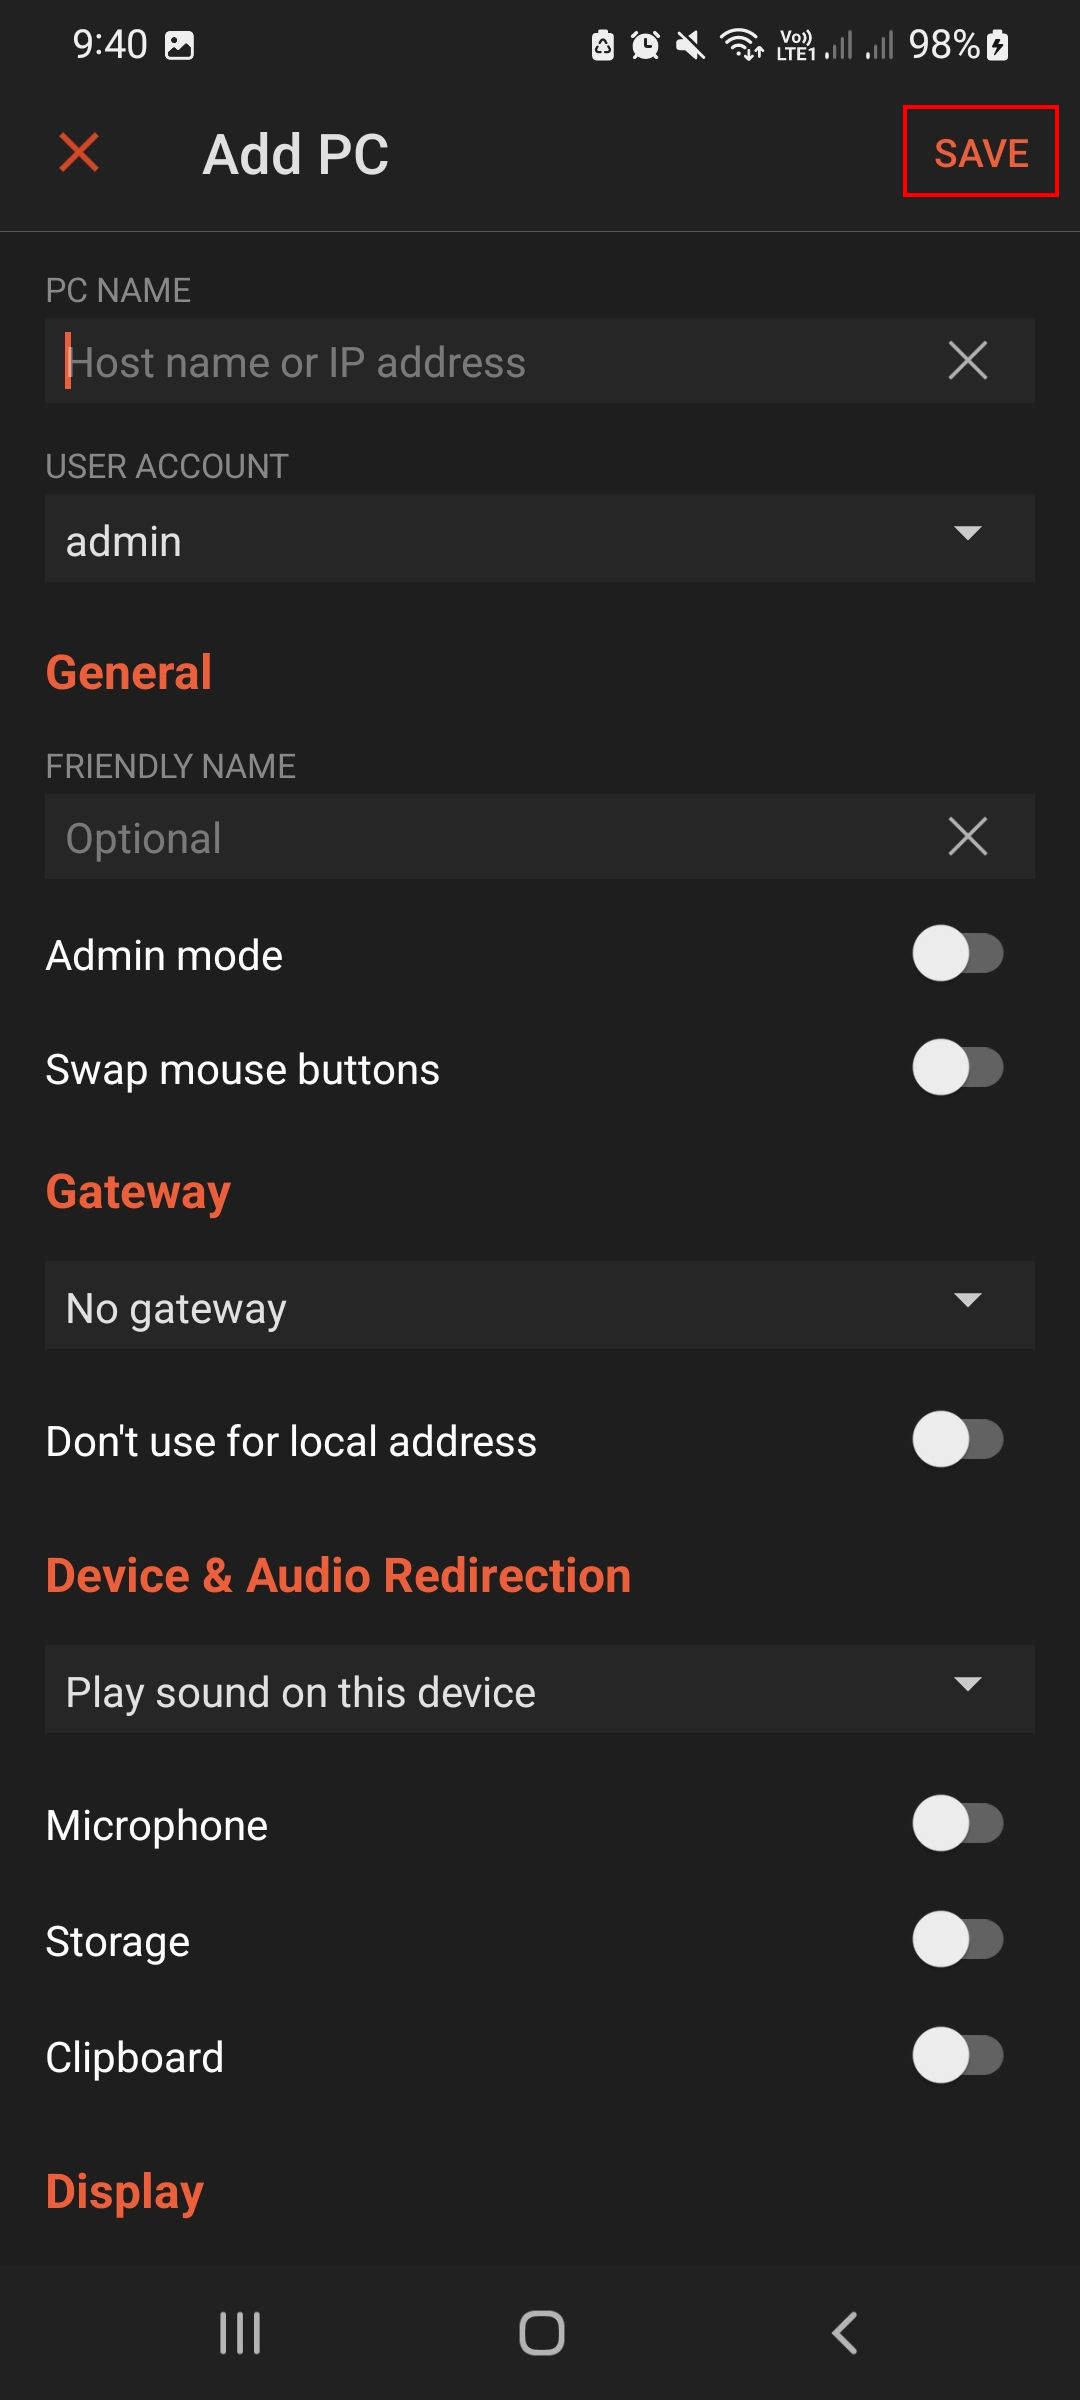
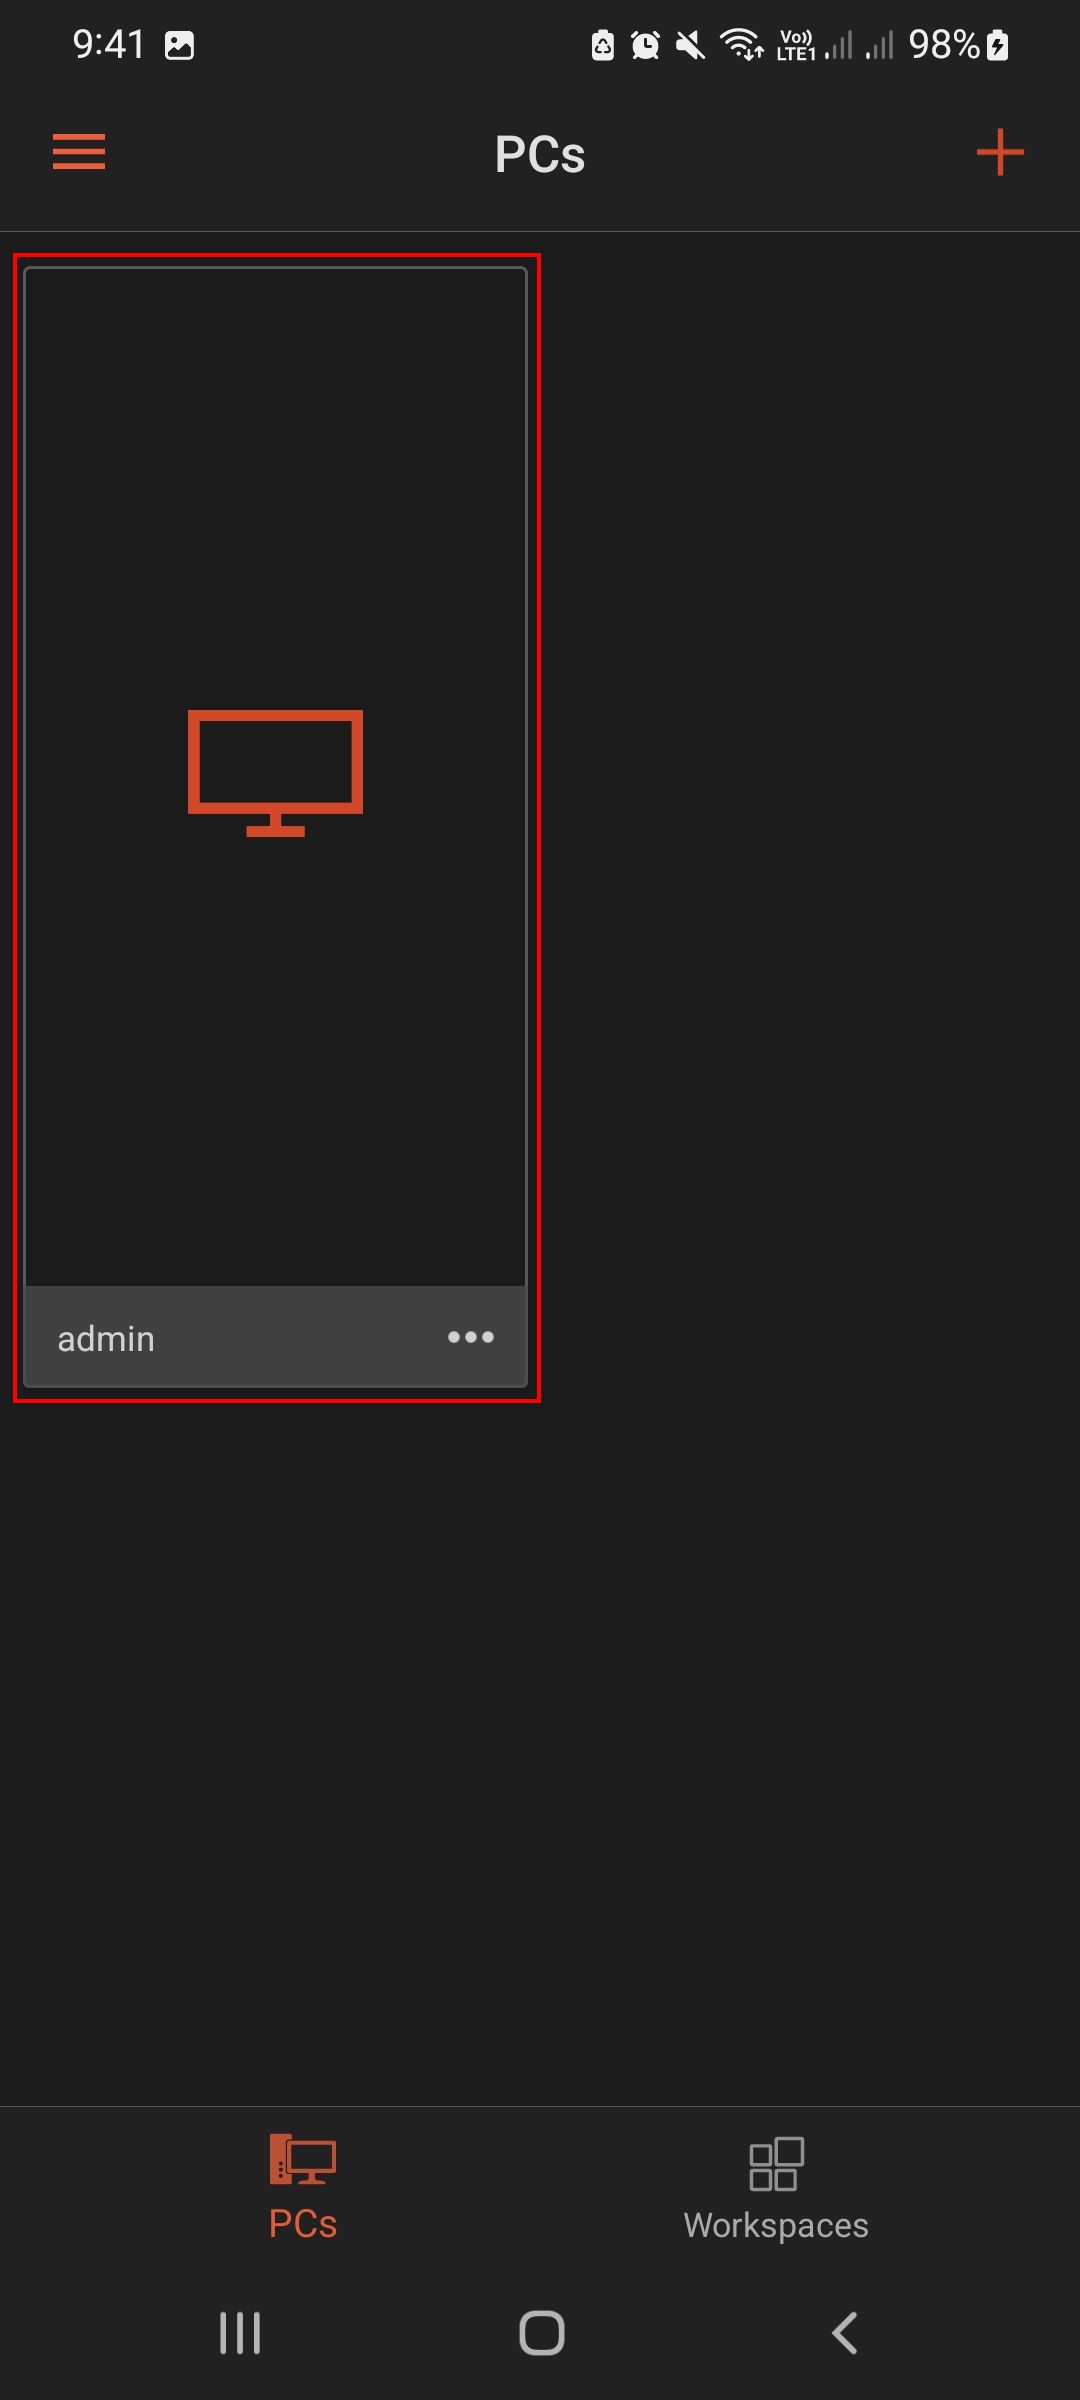
Click on Save again. This will create a PC ID that you can connect with. Click on the ID.
Checkmark the box associated with Don't ask me about this certificate again and click Connect anyway.
You should now be able to use Windows 11 on your Android, iOS, or Mac device. To exit the remote desktop, click on the Close icon in the top-right corner of the window. Click OK to confirm.
Adjusting the Other Options
Overall, the built-in Windows Remote Desktop features do a good job, but if you are looking for alternatives that offer more advanced functionality and a few extra options, you can check out our guide on the best remote desktop alternatives. We have discussed both free and paid options that you can make use of.
Use Your Windows 11 Device from Anywhere
The steps outlined above should help you enable the feature and prepare the device to be accessed from anywhere in the world. You can also set up more than one client connection if you want to have the option to access your Windows PC from all the devices you have.

