Whether it's sharing your presentation or streaming Netflix from your laptop, there are multiple reasons why you'd want to project content on a much larger TV screen. And there are also a multitude of things that can go awry and disrupt the entire screen mirroring process.
If that's the case, we've compiled a list of things you need to know to project your Windows 11 laptop to your TV successfully.
1. Your Windows 11 Laptop Fails to Identify Your HDMI or 4K TV
Coming across error messages as soon as you plug an HDMI cable into a Windows 11 laptop isn’t a rare occurrence. In fact, many users report their Windows device fails to identify their 4K TV, leading to unsuccessful screen mirroring.
It may sound like a head-scratcher, but figuring it out isn’t complicated. Here are a few ways you can get to the bottom of this issue:
Checking Compatibility Between Devices

Even though all new gadgets have screen mirroring abilities baked right into them, some old ones don’t. But it doesn’t mean it’s impossible to display your Windows 11 content on a bigger screen; just trickier.
So remember, error messages on Windows 11 laptops don’t always signal hardware issues. It may just be a lack of compatibility between the devices, and here’s how you confirm that.
First, we'll run a check on the laptop:
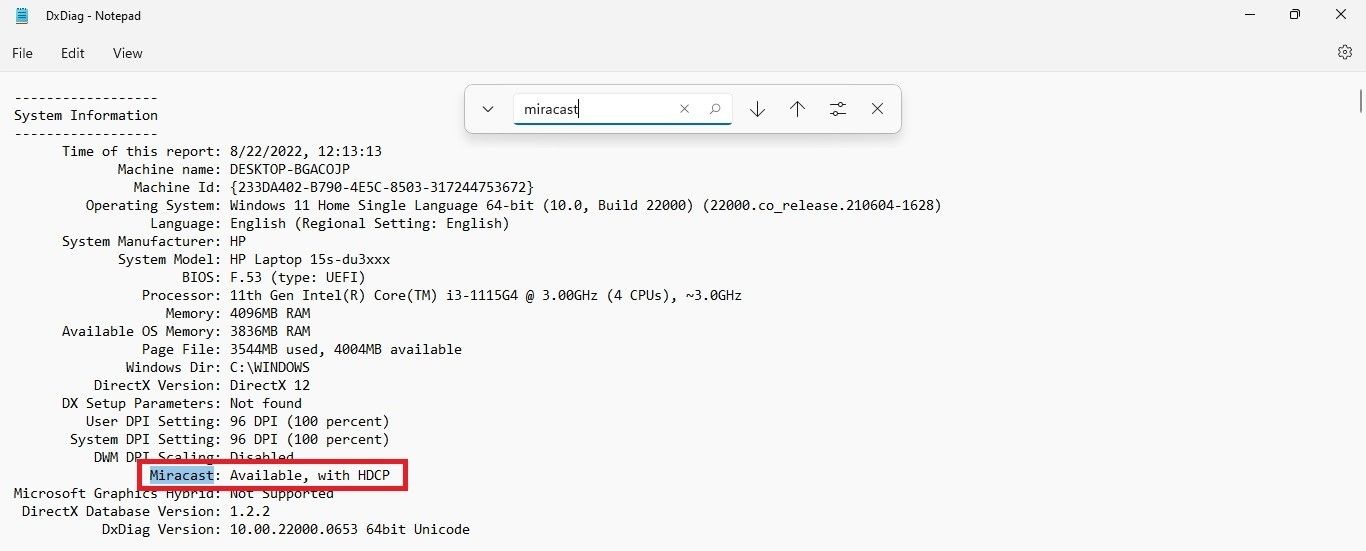
- Use Win + R keys to launch the Run command dialog box.
- Type dxdiag and hit Enter to prompt open diagnostic tools, then click Save All Information > Save.
-
Next, use a text editor like Notepad to open the document and search for Miracast. The message next to it will either read Available with HDCP or Not Available.

Next, the Original Equipment Manufacturer (OEM) support is an effective way to evaluate the TV's compatibility as many Smart TVs are manufactured with Miracast or Chromecast in mind. We recommend you begin by checking the following places: your TV's manual, the manufacturer's website, or a retailer that specializes in Smart TVs.
Change the Display Settings
Windows 11 offers compatibility with a wide range of devices, including older monitors and TVs. However, in some cases, Windows may have difficulty detecting the display automatically, which may be why you're unable to project the contents of your Windows 11 laptop on your TV.
To resolve this, here are a few easy-to-implement steps that you should follow:
- Open the Setting by pressing Win + I
-
Next, head over to System > Display > Multiple displays.
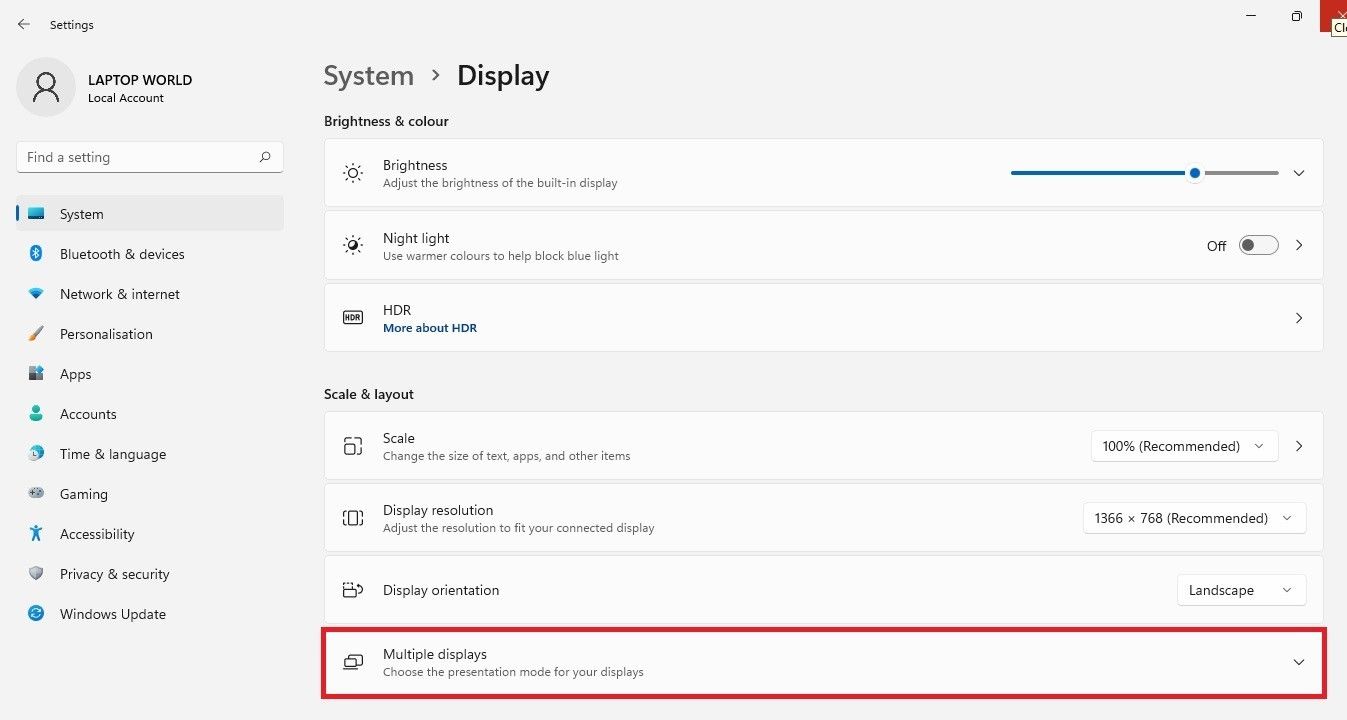
- Here, locate Detect other display and hit Detect to find different additional screens you can project your Windows 11 screen on.

Update Your Display Drivers
There is a chance you’re not using the latest display drivers on your Windows 11 laptop. If that’s the case, these outdated drivers will brew trouble with the screen mirroring process, and so, updating them is necessary to fix this issue.
Here’s how you update your Windows 11 display drivers:
- Launch the Run command dialog box by pressing Win + R
- Type devmgmt.msc and hit OK.
- Once it prompts open the device manager, locate Display drivers and click on it once.
- Now, right-click on the display driver > Update driver > Search automatically for drivers.
This will let Windows run a search and update the best available driver for your device.
If Windows fails to find anything, check out our guide on how to update your graphics driver on Windows for alternative methods you can try.
2. Chromecast Fails to Project Windows 11 Onto Your TV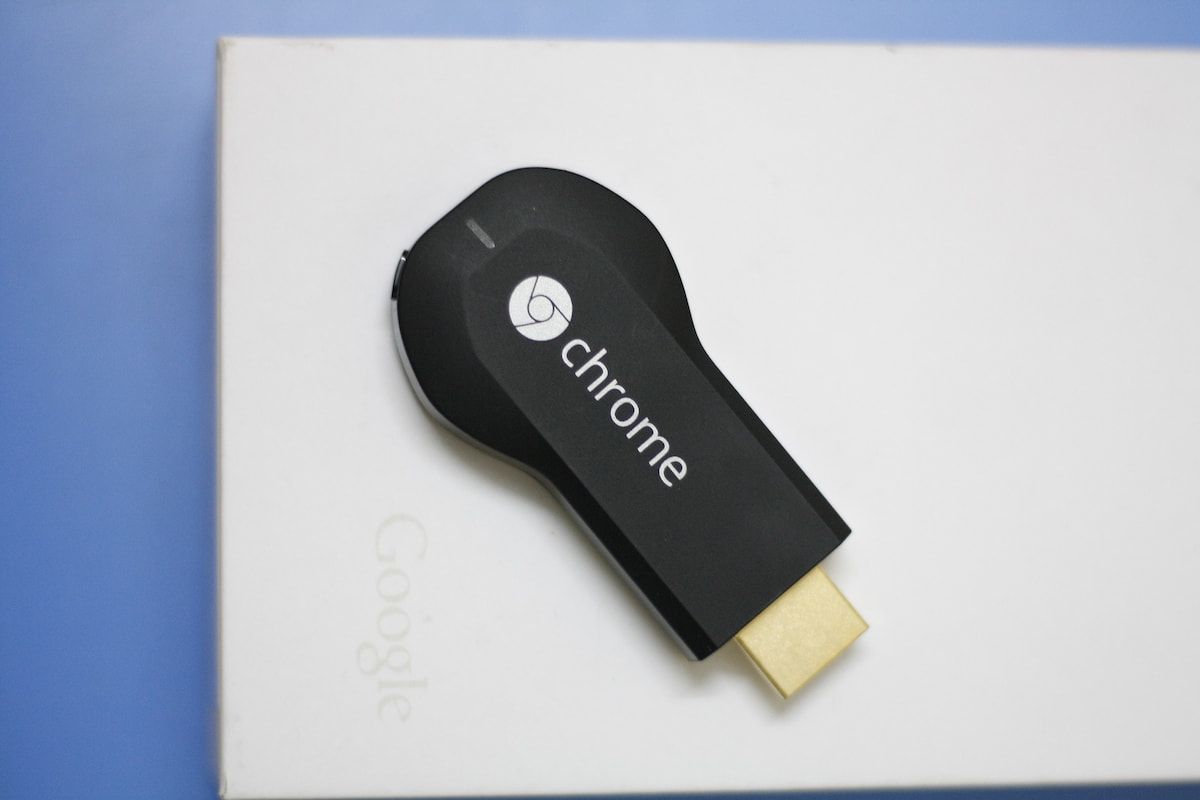
If you connect your Windows laptop to a TV through an HDMI cable, you can’t move it too far away. It isn’t always possible to have a computer set up so close to the TV either. Therefore, alternates like Chromecast seem more practical to project contents from a small screen to a much bigger one wirelessly.
Chromecast is a handy media streamer that allows you to share Windows 11 laptop screen onTV. It works buttery smooth for some users, but others complain about facing a black screen displaying a “Source not supported” error; this could happen for many reasons, ranging from new updates to unstable network connections.
Thus, here are a few ways to fix whatever is interrupting your wireless mirroring experience:
Enabling Wireless Display
Chrome has a set of advanced, experimental settings where you can initiate mirroring from your Chrome browser. All you have to do is:
- Head to the Chrome flags page by opening a new Chrome tab and typing chrome://flags in the address bar; this will display a list of all experimental features.
- Search for Mirroring in the Search flags bar.
-
Here, locate Allow all sites to initiate mirroring from search results. From the drop-down list on its right, select Enabled.
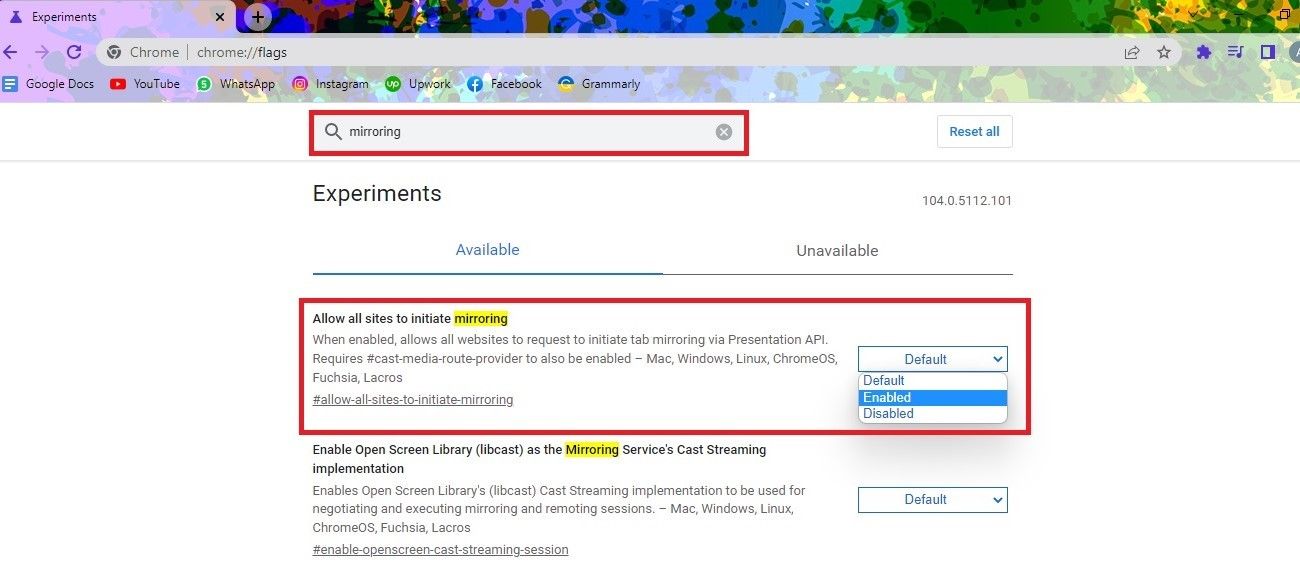
- Restart your Chrome browser to see if your Windows 11 laptop contents are projecting on your TV.

Temporarily Disable Your VPN
If you're still unable to project a Windows laptop to your TV, try disabling VPN and Real-Time Protection next; this may sound counterintuitive, but sometimes these security features can interfere with the Chromecast's ability to connect to your TV.
To disable real-time protection, navigate to Settings > Privacy & Security > Windows Security > Virus & threat protection. Here, go to Manage settings > Real-time protection and switch off the toggle. This will disable real-time protection, but remember that it also makes your computer vulnerable to malware and viruses, so do this when absolutely necessary.

Next, to disable the VPN:
- First, open up the VPN software that you're using. This can typically be done by clicking on the icon on your taskbar.
- Once the software is open, look for a button that says Disable VPN. Click this button.
- You may be prompted to confirm that you want to disable the VPN. Click Yes or Confirm to continue.
Update Chromecast
Many users find that this common issue arises due to Chromecast not being up-to-date. To update Chromecast:
- Open the Google Home app and select the device you want to update.
- Then, select Check for updates and follow the prompts.
Once your Chromecast is updated, try projecting Windows 11 again and check if your issue is fixed.
Get Back to Casting on Windows 11
While watching something on the phone comes with its own perks, there are times when its contents need to be shared with everyone else in the room. There's so much you can share, whether it's gaming, a movie, or pictures, on a big TV screen. Hopefully, these fixes helped you get your screen sharing working once more.