There is no shortage of PC cleaner and maintenance apps for Windows. Even if you are an older Windows user, you might remember apps like AVG Tuneup or CCleaner. These apps helped you clear out unnecessary clutter and even improve the overall performance by a tiny bit.
Microsoft realized that Windows users could benefit from an official PC Manager app that could help maintain the PC. And so, the Microsoft PC Manager was born. PC Manager is an app that lets you perform 1-click system maintenance along with a bunch of useful features. Here’s how to install and set up Microsoft PC Manager on your Windows 11 PC.
What Is the Microsoft PC Manager?
Microsoft began testing a PC Manager app for Windows users in 2022. Before that, CCleaner and a few other apps ruled the PC Cleaner app segments. Microsoft always warned against the usage of third-party system management apps as they could damage the registry files. Now, we have a full-fledged official app that competes with other such apps.
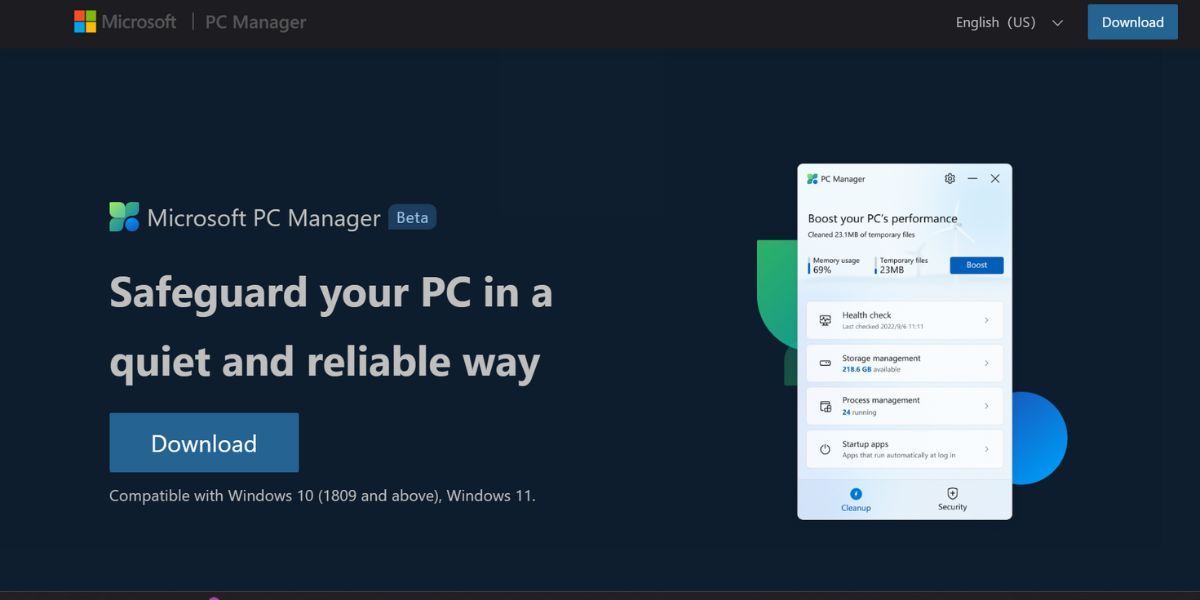
At the time of writing, Microsoft PC Manager is still in the beta testing phase. The official webpage informs that the app is compatible with Windows 10 (1809 and above versions) and Windows 11 only. So, if you use Windows 8.1 or 7 (Microsoft dropped support for Windows 7), chances are that it won’t work.
The app acts as a central spot to access all the useful system management tools of Windows. Apart from that, it brings many essential tools such as health checks, memory management, pop-up management, and more. We will cover each of these tools later on in this post.
How to Install the Microsoft PC Manager on Windows 11
Firstly, you need to download the beta version of the Microsoft PC Manager app from the official website. Then you need to install it on your system. Here’s how to do it.
- Visit the official Microsoft PC Manager website.
- The website can load up in Mandarin. Google Translate will pop up asking your permission to convert the webpage. Or you can click the language button on top bar and change the language to English.
-
Click the Download button to download the setup file on your system.
- Once the file downloads, visit the download location and right-click on the Microsoft PC Manager installer file. Select the Run and administrator option from the context menu.
- UAC will pop up. Click on the Yes button to continue.
-
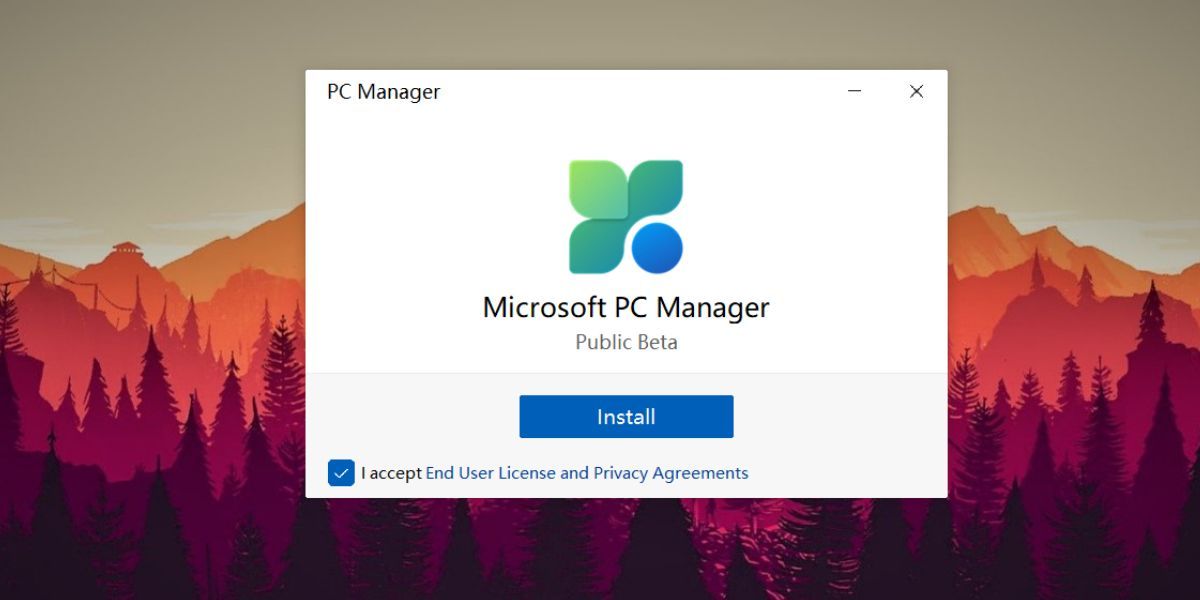
PC Manager installation window will launch. Click on the I accept End User License and Privacy Agreements check box. Then click on the Install button.
- App installation will begin. It requires internet connectivity to download files from the server.
- Once the installation completes, click on the Launch Now button to open the app.


Make note that the app is still in a public beta. So, it could act finicky on your system. Moreover, accessing the official website is another sad story. It is unresponsive most of the time and downloading a measly 4 MB installer file can take time. We faced a server downtime issue while installing this app.
Since it needs an internet connection to download files and the website was inaccessible at that time, the installation couldn’t complete. If you face a similar situation don’t worry, just close the installation window, restart your Windows PC, and retry after a few hours.
How To Configure and Use Microsoft PC Manager
We covered the installation method in the above section. This section will highlight all the tools available in the app and how you can use them to improve your system’s performance.
Microsoft PC Manager divides the tools into two sections. The first one is Cleanup tools and the second one is Security tools. When you launch the app, it always opens up the Cleanup tools list.
1. Cleanup Tools
Boost your PC’s Performance is basically a memory management tool that ends all the unnecessary programs and cleans up the temporary files. The app displays the total memory in use currently and the space occupied by Temp files. Click on the Boost button to free up the memory and clear the temp files.
You cannot use the Boost feature repeatedly, though. The app displays a message that “Your PC is already running well.” However, you can use the boost feature after a few minutes.

The Health Check tool presents a comprehensive roundup of problems that need attention. Once you click on the feature, it finds and lists all the potential issues which include cleanup items such as browser cache, temp files, and system logs. It also lists out potential security issues and the Startup items that you can disable to decrease loading time.

Click on the Proceed button to perform all the actions listed by the Health Check tool. Then click on the Done button to return to the home page of the PC Manager app.
The Storage Management section contains four tools that help you improve the storage device's health and clean the junk. It showcases the current stats of the C drive (used space and total size). Below that, there are four tools.
The first one is Deep Cleanup which identifies all the items that you can delete to free up some space. Think of it as an advanced version of the Health check tools because it lists out Clipboard files, DirectX Shader cache, Windows upgrade logs, and Recycle Bin files. Click on the Proceed button to perform Deep Cleanup.

The Manage large files tool helps you identify all the big files taking up space on the C drive. You can adjust the file type as well as the size you want to identify using this tool. The only drawback is that it can only identify C-drive items. Click on the View in File Explorer button to allow the app to list all the files in an explorer Window. You can manually move or delete these files.

The other two tools are shortcuts to system apps present on Windows. One is Storage Sense and the other opens up the Installed App list. Check out our guide on How to Use Storage Sense on Windows 11 for more information.
Process Management lists out the top apps in use that consume the most RAM on your system. Click on the End button to close a process without opening up Task Manager every time.
Like process management, Startup Apps showcases the list of apps that slow down system startup. You can disable apps from there or open Task Manager for a more comprehensive view of all startup apps.
2. Security Tools
You can scan for threats present in your system using the Scan option in the security tab. It performs a quick scan on the C drive only. Similarly, you can check and install all the available updates for Windows without leaving the Microsoft PC Manager app.
The Browser Protection tool prevents malicious apps from changing the default browser. Our system has Chrome as the default browser, but the app offered subtle hints to change it to Edge. It is part of Microsoft’s strategy to compel users to switch to Edge. There’s no harm in doing that, but it all boils down to personal preference. Click on Change the default browser option and set it to your favorite browser.

The Pop-up Management tool prevents Windows apps from showing unnecessary pop-up windows while using the app. Click on the Enable Pop-up block toggle, and it will list all the apps that indulge in this activity.

A Free, Official Tool to Manage Your Windows PC
Microsoft PC Manager is an impressive tool. It frees up memory and storage and manages system security all within one app. You will notice a few hiccups because it is the beta phase. One such issue is that it doesn’t switch to dark mode on Windows. It auto-starts every time you boot up Windows, but you can disable that using the app settings.