
A microphone is an essential peripheral device that you may use to attend a Zoom call, lay down some tunes, or do all sorts of other tasks. However, your PC’s microphone can also be a privacy concern. Hence, it's a good idea to turn it off when not in use.
If you’re using an external microphone, you can simply unplug it once you're done using it. However, if you have an internal microphone (like on a laptop), there are several methods for muting it. Here we show four easy ways to mute your microphone on Windows 11.
1. How to Mute Your Microphone Using the Settings App
The quickest way to mute your microphone on Windows 11 is via the all-new Settings app. Here’s how to do it.
- Press Win + I to open the Settings app.
- In the System tab, click on Sound.
- Under Input, select your microphone device.
-
Click the Don’t allow button next to Audio.
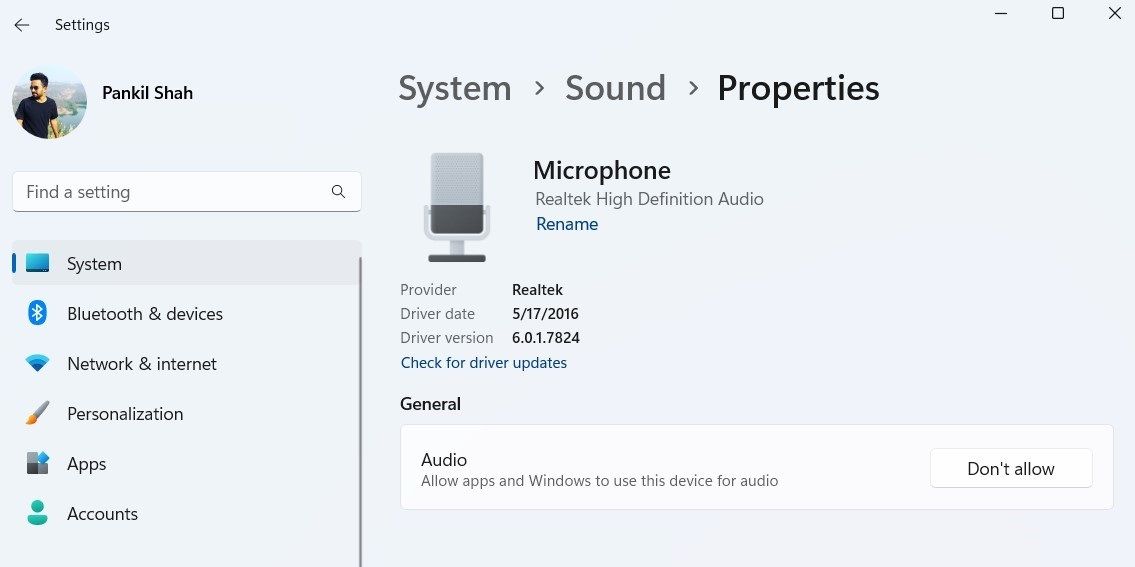

That’s it. Your microphone is now turned off. After you disable the microphone, the Allow button will appear next to Audio. You can use it to re-enable your microphone at any time.
2. How to Disable Your Microphone via Device Manager
Device Manager is a handy utility that lets you view, configure, and manage all the hardware devices connected to your PC. You can also use it to quickly disable your microphone.
Follow these steps to disable the microphone using Device Manager:
- Press the Win + X shortcut to open the Power User menu.
- Select Device Manager from the list.
- In the Device Manager window, expand the Audio inputs and outputs section.
-
Right-click on your microphone and select Disable device.

- When the warning message appears, click Yes to proceed.

Again, you can re-enable your microphone at any time by following the same steps and selecting Enable device.
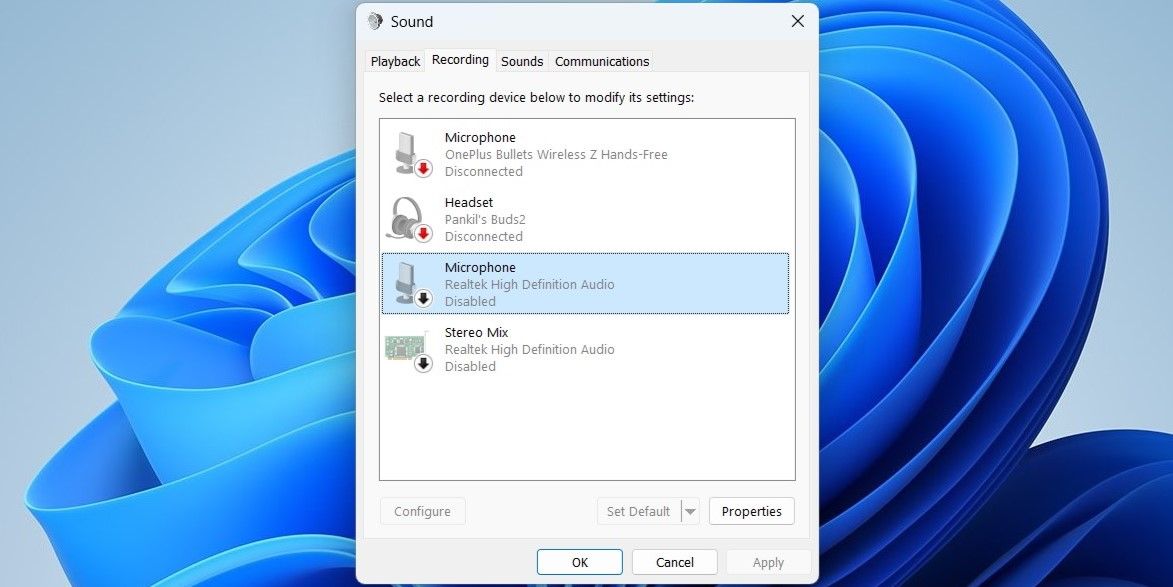
3. How to Disable Your Microphone From the Control Panel
Another way to disable the microphone on Windows 11 is via the Control Panel. Although Microsoft intends to retire Control Panel at some point in the future, you can use it to make various system-level changes for now.
To mute your microphone via the Control Panel:
- Press Win + S to open the search menu. Type Control Panel and press Enter.
- Click on Sound.
- Switch to the Recording tab.
- Right-click on your Microphone and select Disable.
-
Click on OK.

4. How to Mute Your Microphone for Specific Apps
While the methods described above allow you to turn off the microphone across the entire system, Windows 11 also lets you control microphone access for individual apps. This way, you can pick and choose which apps can access your microphone.
To manage microphone permissions for each app individually, you'll have to access the privacy settings on Windows 11. Here’s how to do it.
- Open the Start menu and click on the gear-shaped icon to open the Settings app.
- Use the left pane to switch to the Privacy & security tab.
- Scroll down to the App permissions section and click on Microphone.
-
You can enable or disable microphone access for apps by using the toggles next to them. Alternatively, you can toggle off the Microphone access option to disable the microphone for all apps at once.
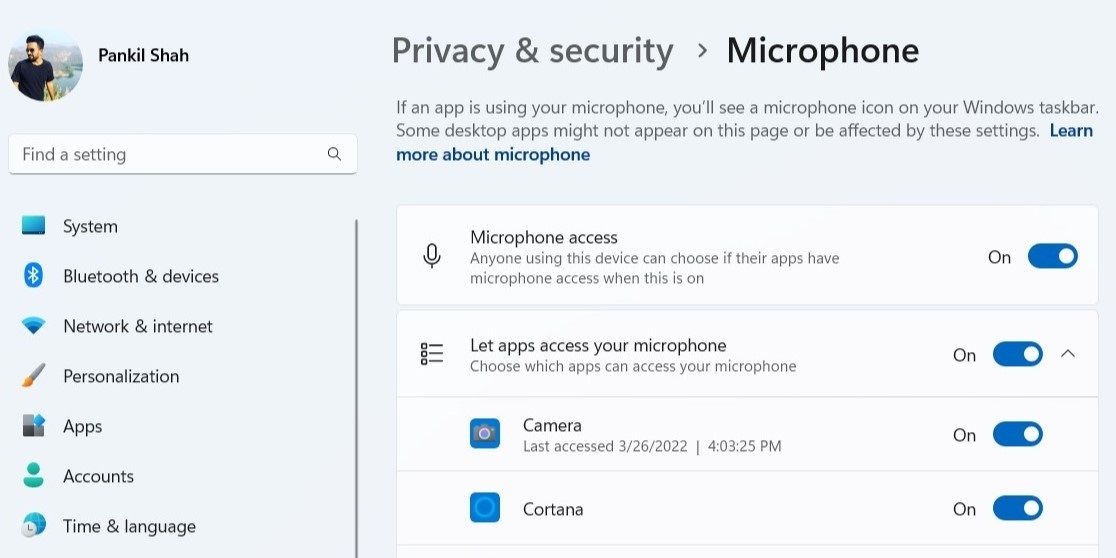

If you're curious, you can expand the Recent activity menu to see which apps have used your microphone in the last 7 days.

Easily Mute Your Microphone on Windows 11
Your computer's microphone can be used to spy on you, without you even knowing it. So, if you're concerned about privacy or simply don't need to use the microphone, you should disable it using one of the methods listed above. However, if you prefer to leave your microphone turned on, it’s worth checking what apps have access to it.
Listening to your private conversations isn’t the only way hackers can invade your privacy. You may also want to turn off your computer's webcam.