
Key Takeaways
- Use the built-in troubleshooter: Run the Internet Connection or Network Adapter troubleshooter to scan and fix common network problems in Windows 11.
- Manually enable Wi-Fi adapter: If the Wi-Fi option is missing, go to Network and Sharing Center, click on Change adapter settings, right-click on the Wi-Fi adapter, and select Enabled.
- Update network adapter drivers: Install the latest drivers for your Wi-Fi device by going to Device Manager, expanding Network adapters, right-clicking on your Wi-Fi device, and selecting Update driver.
Your Windows 11 computer may not show a Wi-Fi connectivity option due to various reasons. Corrupt Wi-Fi drivers, hardware issues, and even problems with the Windows OS can be the potential causes for this problem. You may also notice frequent Wi-Fi connection drops.
Here are a few troubleshooting steps to help you fix the Wi-Fi not working problem in Windows 11.
1. Run the Internet Connection Troubleshooter
Windows 11 provides built-in troubleshooters to fix common issues with computer peripherals and network devices. You can run the Internet Connection troubleshooter to scan the system for common network problems and fix them automatically.
To run the Internet Connection troubleshooter:
- Press Win + I to open Settings.
-
Open the System tab in the left pane.
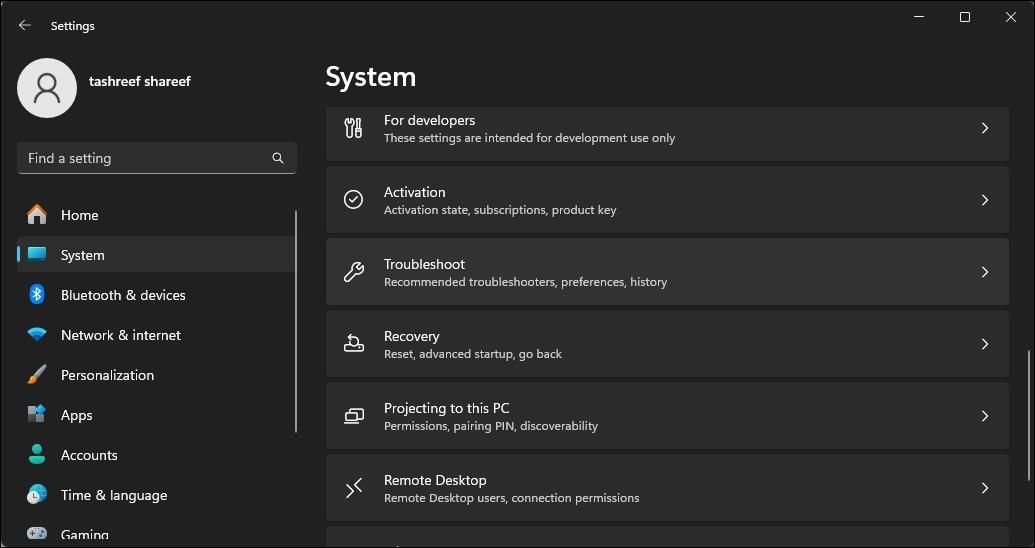
- In the right pane, scroll down and click on Troubleshoot.
-
Under Options, click on Other troubleshooters.
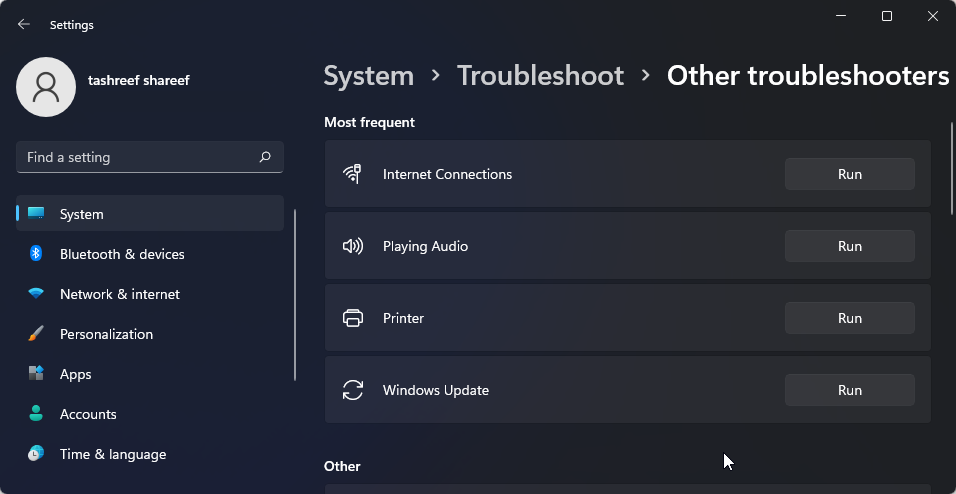
- Click the Run button for Internet Connections. Windows will launch the troubleshooter and show the issues that Windows can troubleshoot.
- Click on Troubleshoot my connection to the Internet. The troubleshooter will scan the system for issues and recommend potential fixes. Apply the fixes and check for any improvements.


If the issues persist, run the Network Adapter troubleshooter. Here’s how to do it.
- Press Win + I to open Settings.
- In the System tab, go to Troubleshoot > Other Troubleshooters.
-
Scroll down and click the Run button for the Network Adapter.
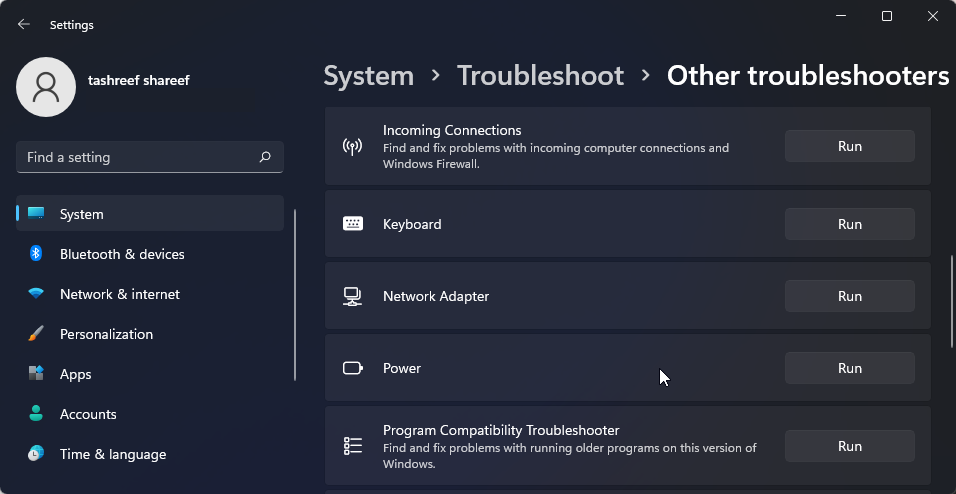
- In the troubleshooter window, select All network adapters and click Next.

Select the appropriate option and follow the on-screen instructions. If available, apply the recommended fixes to restore your Wi-Fi connectivity.
2. Enable the Wi-Fi Adapter in Network Connections
Windows 11 will not display the Wi-Fi option if the Wi-Fi adapter is disabled. You can manually enable or disable the network devices in the Control Panel.
- Press Win + R to open the Run dialog.
-
Type control and click OK to open the Control Panel. You can also search for the Control Panel in Windows search and open it from the search results.
-
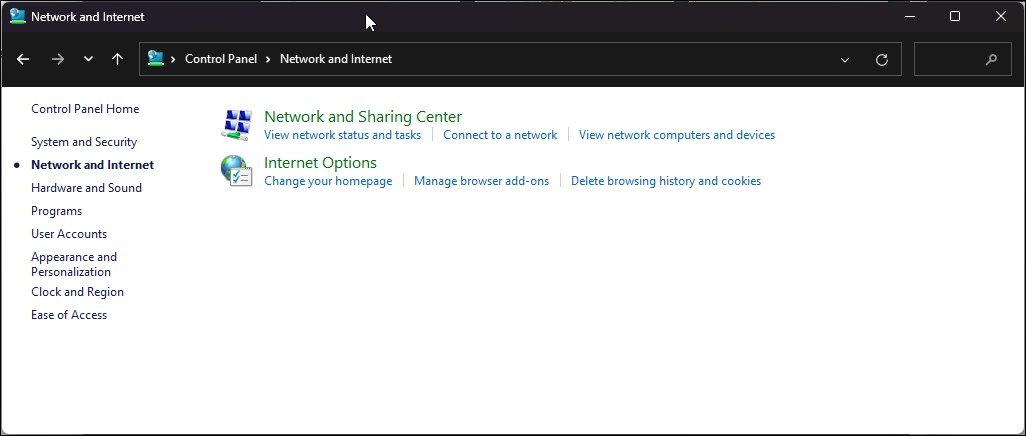
In the Control Panel, go to Network and Internet > Network and Sharing Center.

-
Click on Change adapter settings to view all the installed network devices in the left pane.
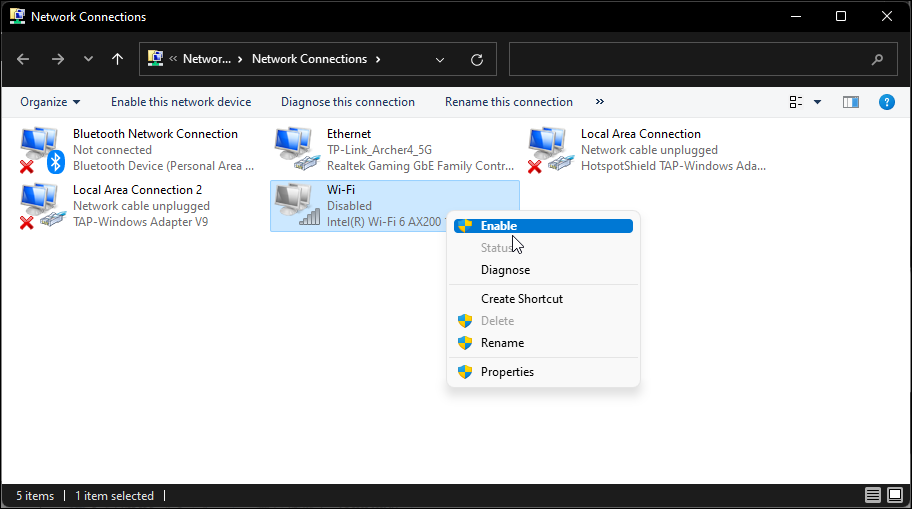
- Right-click on the Wi-Fi adapter and select Enabled.


Run the network diagnostic to troubleshoot the driver if it is already enabled. Right-click on the Wi-Fi adapter and select Diagnose.
Windows will scan the device for issues and recommend a potential fix. Click on Apply this fix to resolve the problem. If not, follow on-screen instructions to try additional recommendations.
3. Update the Network Adapter Drivers

Windows may not have the latest network drivers installed if you have recently performed an upgrade. Corrupt or glitchy network adapter drivers can also cause the Wi-Fi connectivity to malfunction. You can update the network adapter drivers to the latest version to resolve this problem.
- Press the Win key to open Windows search. Type device manager and open it from the search result.
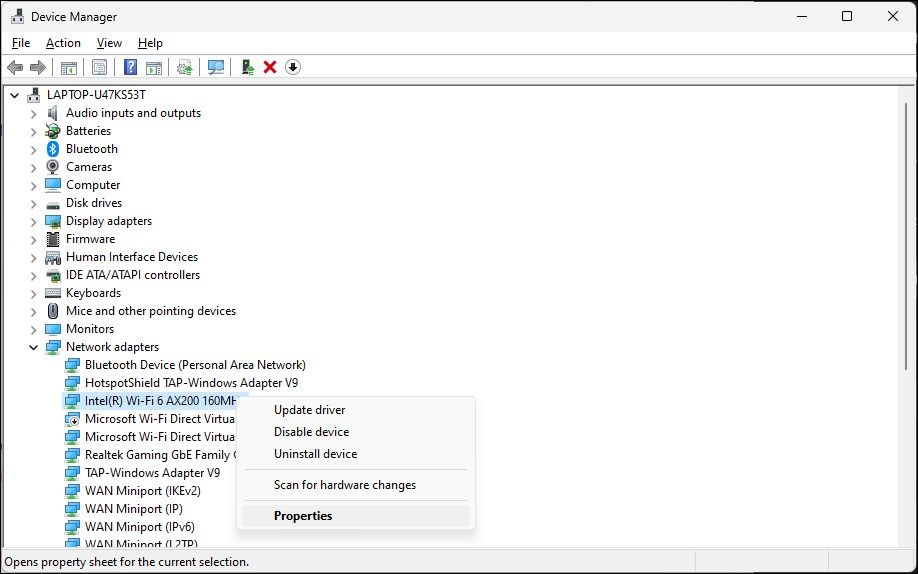
- In the Device Manager, expand the Network adapters section.
- Right-click on your Wi-Fi device. For example, Intel (R) Wi-Fi AX200 and select Update driver.
- Select Search automatically for drivers. Windows will scan for new drivers and install them if available.
- Close the Device Manager and check if the Wi-Fi option is restored.
If you cannot locate your network adapter in Device Manager, follow this guide to fix a missing network adapter in Windows and try again.
4. Configure the Network Adapter Power Management Settings
By default, Windows can turn off your network adapter to save power when your computer enters sleep mode. However, this setting can cause Wi-Fi connectivity issues. You can quickly fix this by turning off the power management settings for your network adapter.
- Open Device Manager and expand Network Adapters.
-
Right-click on your Wi-Fi adapter and select Properties.
-
Open the Power Management tab in the Properties dialog.
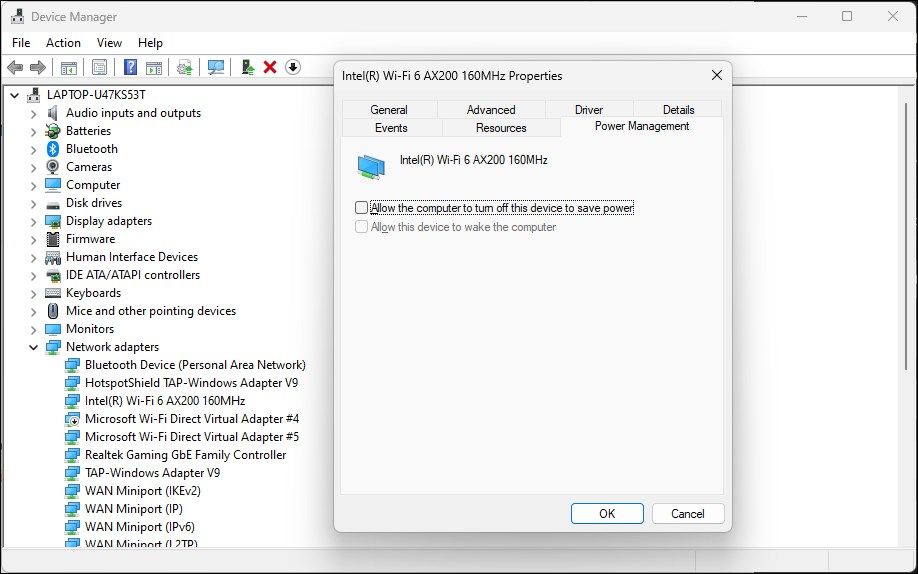
- Uncheck the Allow the computer to turn off this device to save power option.
- Click OK to save the changes and restart your computer to see if the issue is resolved.


5. Enable the WLAN Auto Config Service
The WLAN Auto Config is a critical service for your wireless network connections. Check if the service is stopped and restart it to fix issues with your Wi-Fi.
- Press Win + R to open Run.
-
Type services.msc and click OK.
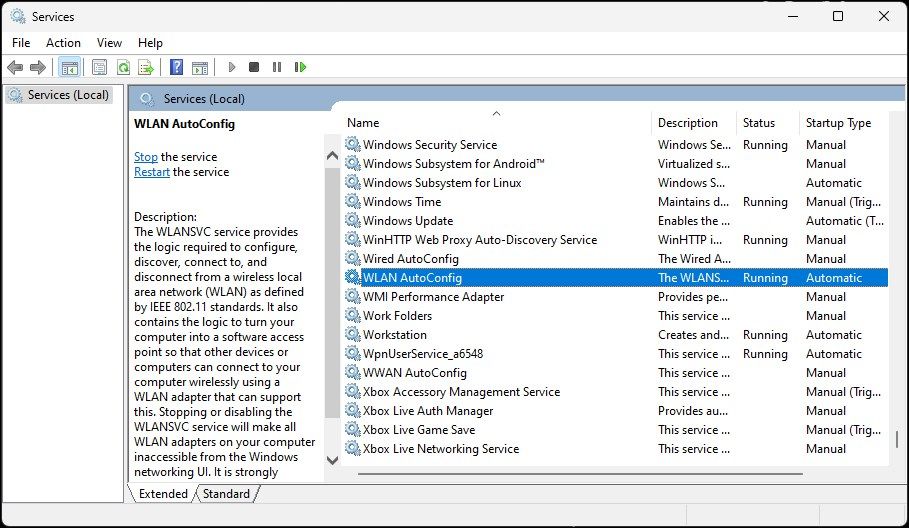
- In the Services snap-in, locate the WLAN AutoConfig service and check if it is running. If not, right-click and select Properties.
-
In the Properties dialog, click the Startup type drop-down and select Automatic.
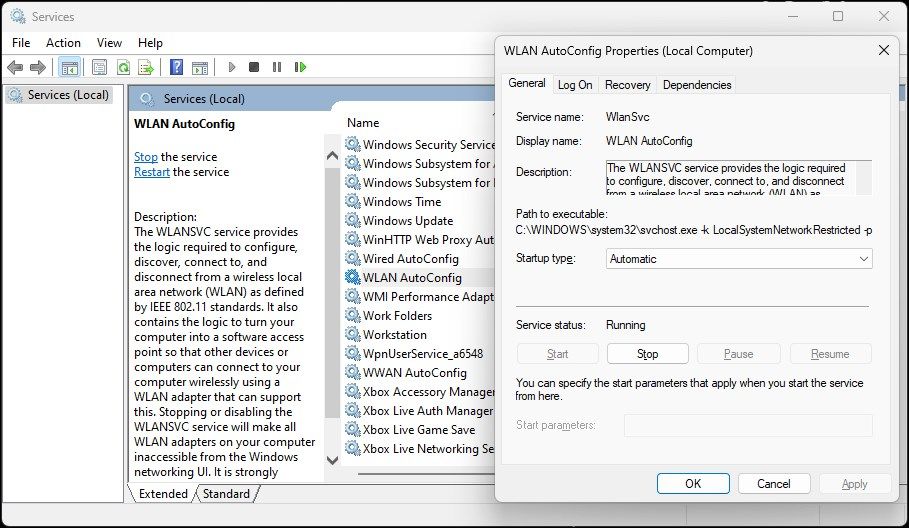
- Select Start.
- Choose Apply and OK to save the changes.


6. Enable All Services in the System Configuration Tool
The System Configuration utility allows you to configure startup services to troubleshoot a Windows computer. If you have recently used it to troubleshoot your computer, ensure all the services are enabled.
- Press Win + R to open Run.
- Type msconfig.msc and click OK.
- Next, open the Services tab in the System Configuration dialog.
-
Click Enable all to enable all the services.
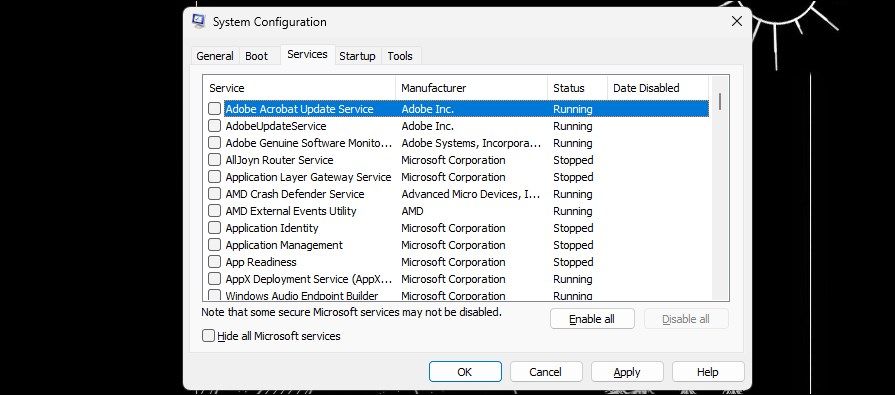
- Click Apply and OK to save the changes. Restart your computer to enable all the services.

5. Reinstall the Network Adapter Driver
You can also reinstall the network adapter device. This process will remove and reinstall the network device drivers to fix the common issues.
- Open Device Manager and expand the Network adapter section.
-
Right-click on the Wi-Fi device and Uninstall device. Click the Uninstall button to confirm the action.
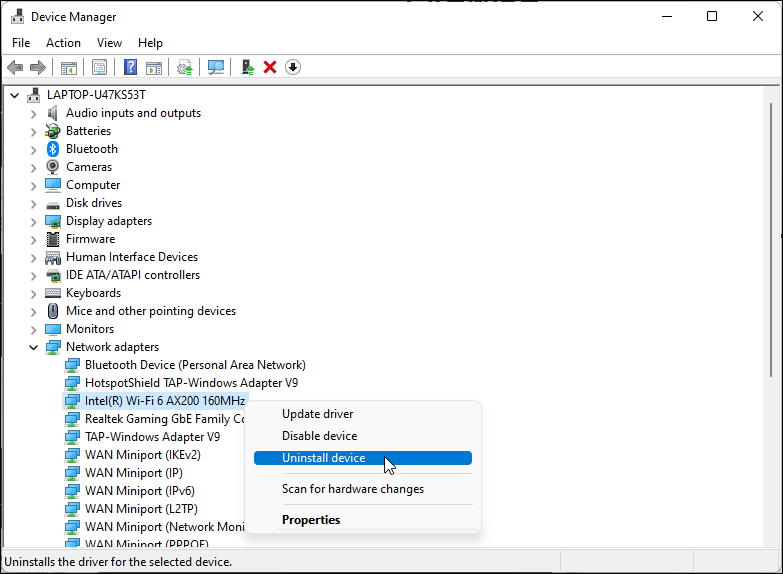
- Once uninstalled, click on Action in the Device Manager toolbar and select Scan for hardware changes. Windows will scan for missing but connected devices and reinstall the necessary drivers.

If the issue persists, follow these steps:
- Make sure to save any unsaved work or documents.
- Open Device Manager and uninstall the Wi-Fi adapter driver.
- Once uninstalled, press the Win key and type cmd.
-
Right-click on Command Prompt and select Run as administrator.
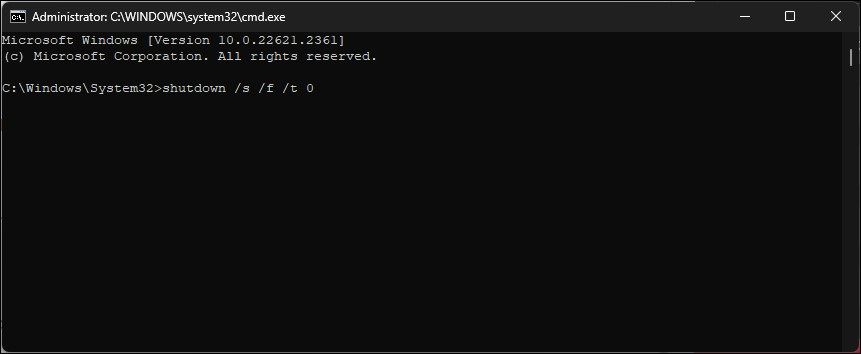
-
In the Command Prompt window, type the following command to perform a total shutdown of your computer:
shutdown /s /f /t 0 - After the restart, Windows will automatically reinstall the Wi-Fi device driver and restore Wi-Fi connectivity.

6. Manually Reinstall the Wi-Fi Device Driver
You can manually install the Wi-Fi device driver to restore a missing Wi-Fi option. Here’s how to do it:
- Open Device Manager and expand the Network Adapters section.
-
Select and right-click on your Wi-Fi adapter and select Update Driver.
-
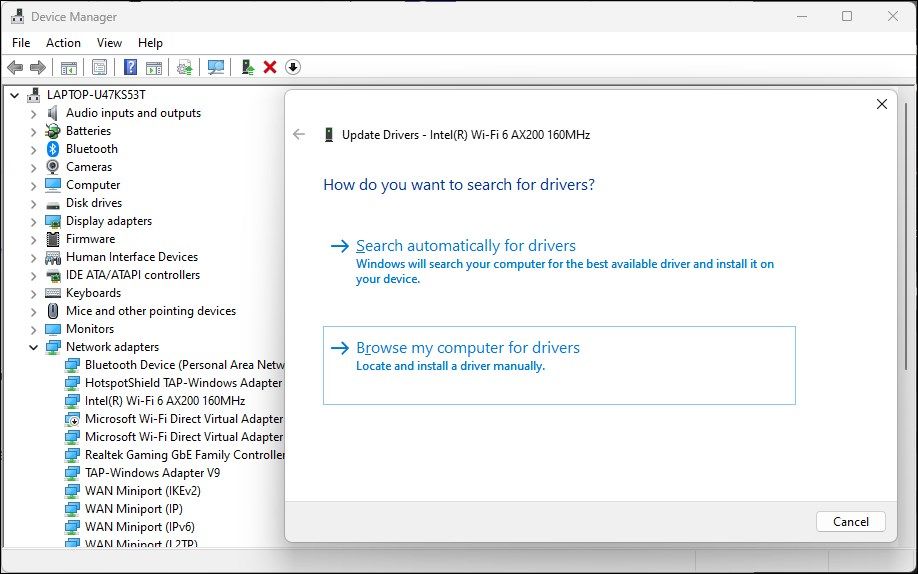
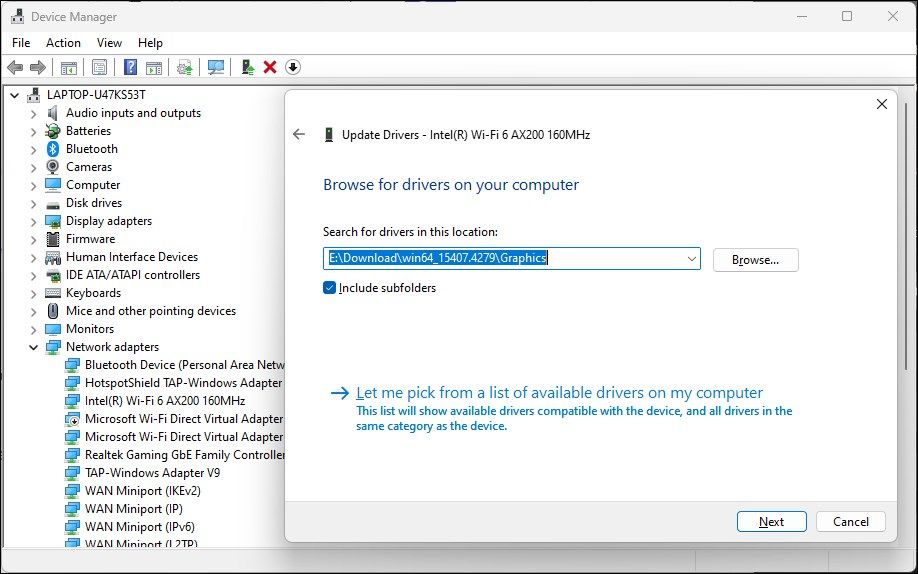
Select Browse my computer for drivers.
-
Select the Let me pick from a list of available drivers on my computer option.
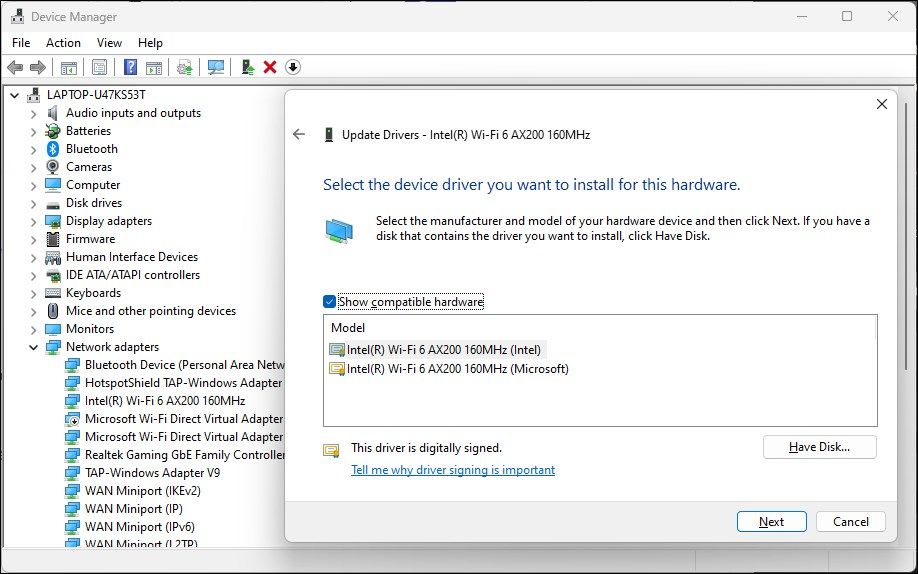
- Select the first driver in the list and click Next. Device Manager will start installing the selected driver. Once completed, check if your Wi-Fi is working.


7. Perform a Network Reset
Windows 11 offers a built-in option to perform a network reset. This process will remove and reinstall the network adapters. In addition, other networking components will reset to their default settings to fix problems triggered due to incorrect network configuration.
- Open Settings and click on the Network & Internet tab in the left pane.
-
Scroll down and click on Advanced network settings to view all network devices and the network reset option.

-
Scroll down to the More settings section and click on Network reset.
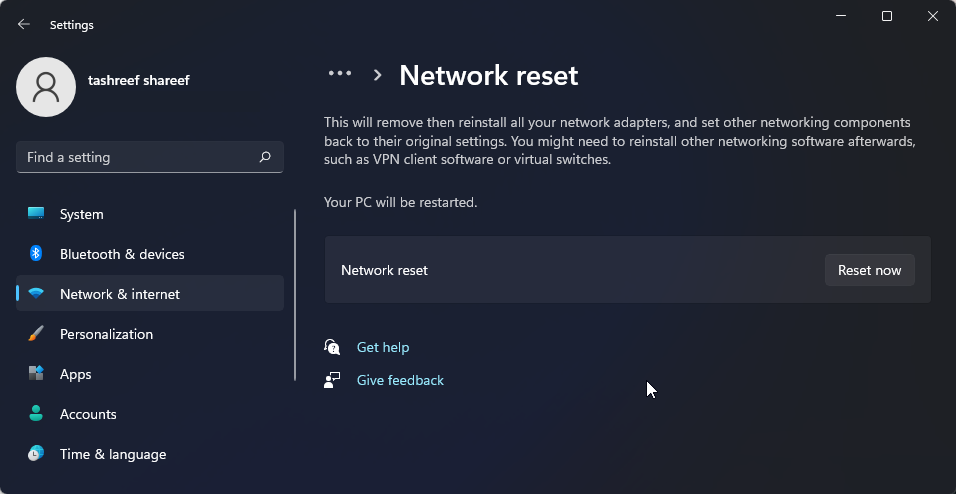
- Click the Reset now button for Network reset. Click Yes to confirm the action.
- Once the reset is complete, you should have the Wi-Fi connection restored. However, after the reset, you might need to reinstall and reconfigure other networking devices and software.


8. Reset the Network Device and Network Stack Using the Command Prompt
You can use the Command Prompt to reset your network devices. These commands will reset TCP/IP, restore advanced firewall settings, and Winsock reset.
Execute all the commands below in order, even if you encounter errors during execution.
-
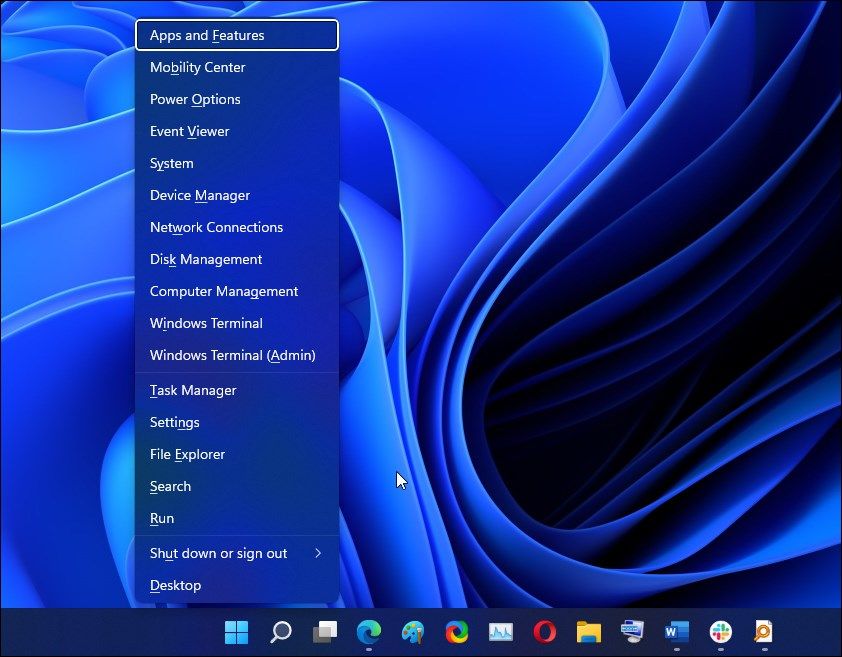
Press the Win + X key to open the WinX menu.
-
Next, click on Windows Terminal (Admin). Click Yes if prompted by User Account Control.
-
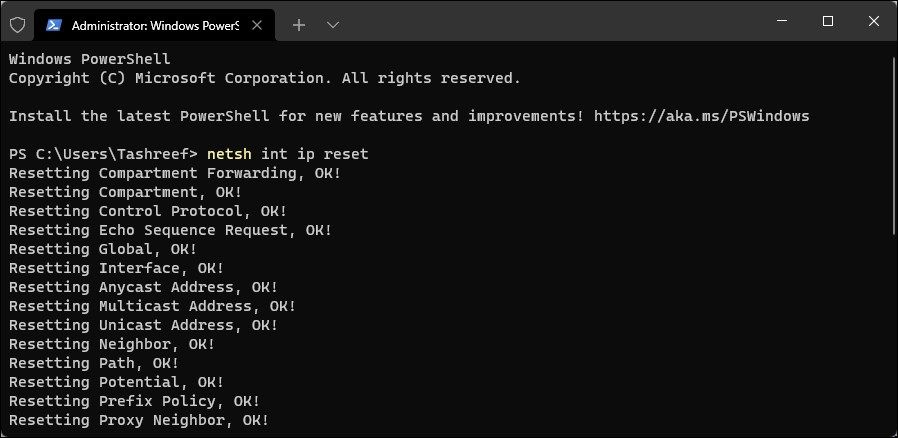
In the Windows Terminal window, type the following command in the given order:
        netsh int ip reset
netsh advfirewall reset
netsh winsock reset
ipconfig /flushdns
ipconfig /release
ipconfig /renew - Once all the commands are executed, restart your computer. After the restart, check if the Wi-Fi option is restored.


9. Check For Windows Updates
This is another fix for PCs with a fresh Windows installation. If you haven't already, run the Windows Update tool to check for pending Windows and third-party vendor updates. These updates can contain bug fixes and essential driver releases for the network devices.
- Press Win + I to open Settings.
-
Open the Windows update tab in the left pane.
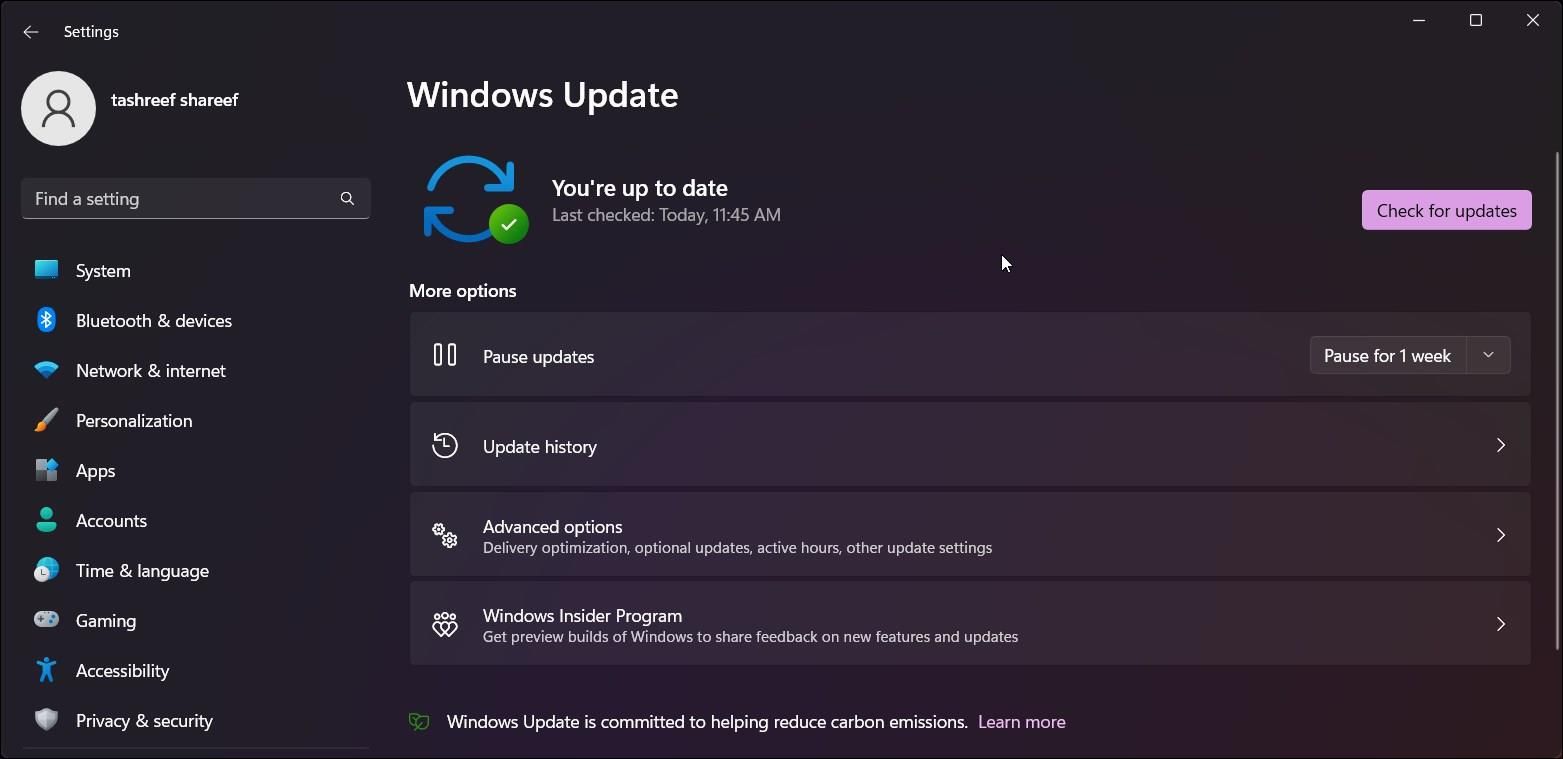
- Click on Check for updates. Windows will take a few seconds to look for new updates. Download and install them and restart your PC to apply the changes if available.
-
Next, on the Windows update page, click on Advanced options.
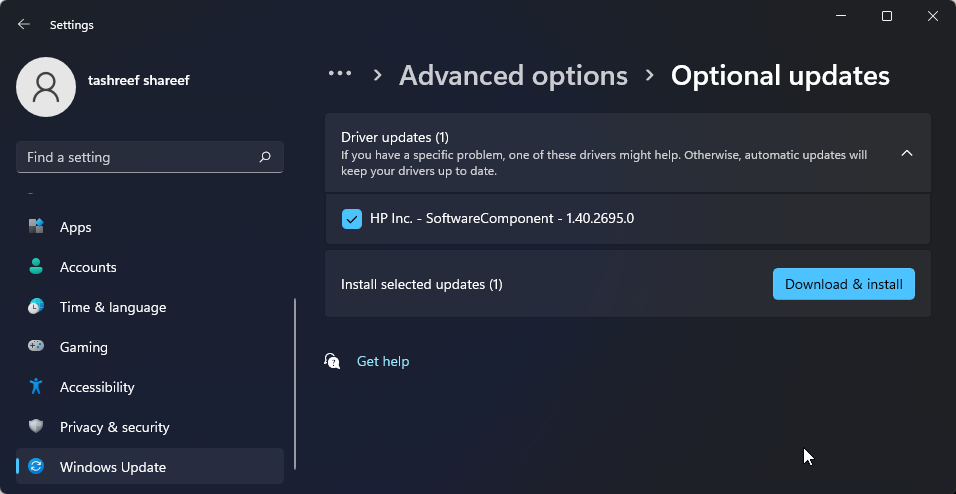
- Scroll down and click on Optional updates.
- Click on Driver updates to view all the available updates. Select any update from your system manufacturer and click Download & install. Restart your PC to apply the changes.


If you don't have access to a wired Internet connection, use your smartphone's tethering capabilities.
Finally, if the problem persists, consider going back to the previous version of Windows 11. This is particularly useful if the Wi-Fi connectivity issue occurs after performing an upgrade.
To do this, open Settings > System > Recovery. Under Recovery options, click the Go back button and follow on-screen instructions to restore the earlier version of Windows.

This feature, however, is time-sensitive and only available for ten days after performing an upgrade. You can extend the 10-day rollback period to 60 days in Windows 11.
Restore the Wi-Fi Connectivity in Windows 11
Wi-Fi in Windows 11 can stop working for several reasons. However, you can often fix it using the built-in network troubleshooter. Additionally, reinstall or update the network drivers to fix the problem.
Check your Wi-Fi card for hardware issues if the system still refuses to see your wireless network. You can replace the faulty Wi-Fi card or opt for a Wi-Fi dongle as a quick plug-and-play solution.