
Since the internet is the fastest way to connect with people, having the fastest possible connectivity is more important than ever. A fast internet ensures that you enjoy lag-free streaming and instant downloads.
As such, here are different changes you can make to increase your internet speed in Windows 11.
What Causes a Slow Internet Connection?
There can be multiple reasons why you're experiencing low connectivity on Windows 11. But among all, some of the common culprits are listed below.
- One of the significant reasons behind slow connectivity is the bad router position.
- A slow internet connection can result from misconfigured bandwidth.
- Unnecessary tabs and applications open in the background can also cause the problem.
- VPNs are often the primary culprit behind a slow internet connection.
It's pretty easy to boost the internet speed on Windows 11. Let's check out how to do it.
1. Update to the Latest Windows Update
Before performing any of the below changes, ensure that you are using an updated system. Each Windows update comes with performance improvements and can affect the internet connectivity.
Here's how to download the latest Windows 11 update.
- Open Settings using Win + I.
- Choose Windows Update from the left pane.
- Click on Check for updates.
- Windows will look for and download any available update.
After updating the system, check if there's any improvement in the internet speed.
2. Change Router Position
A poor router position is another culprit for a slow internet connection. The range of the Wi-Fi signal depends on the specs and design of the router. But the further the signal has to travel, the weaker it will get. Additionally, the signal strength can get affected by physical objects like walls and floors.
So, make sure the system is near the router and no major physical obstruction exists between the source and the receiver.
3. Close Unnecessary Background Running Applications
A slow internet speed often results from unnecessary background running applications. As it turns out, these applications constantly keep consuming bandwidth, leaving the main application with limited resources. You will have to close all such applications to fix the problem.
Here's how to do it.
- Open the Task Manager using Ctrl + Shift + Esc.
- Switch to the Performance tab.
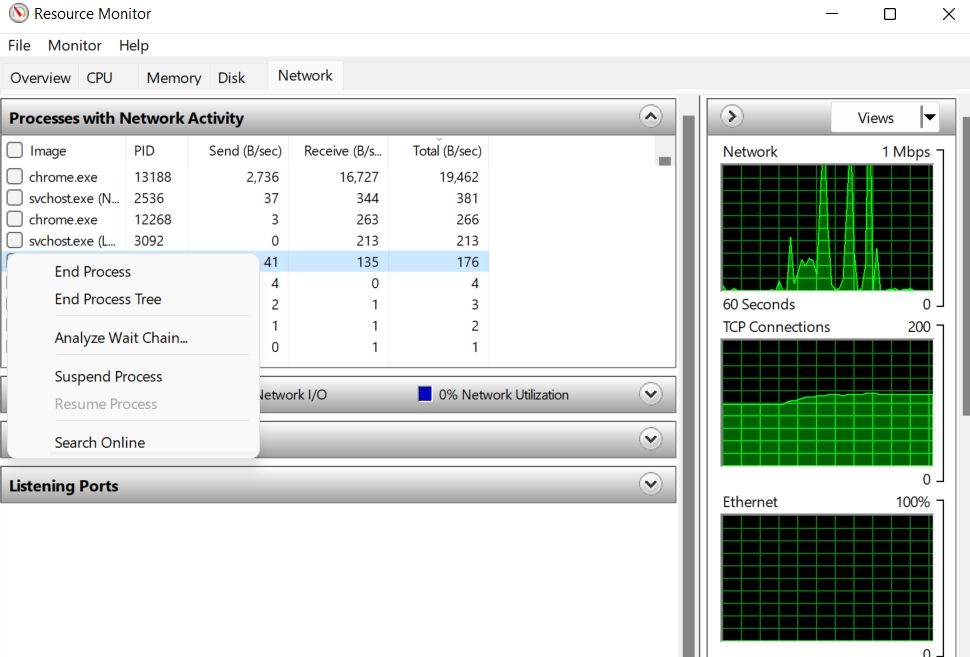
- Click on Open Resource Monitor.
- In the Resource Monitor window, switch to the Network tab.
- Look for the services that are consuming the maximum bandwidth/second.
-
Right-click on the services and choose End Process.

Check if there's an improvement in the internet speed or not.
4. Disable the Metered Connection
Windows 11 comes with a metered connection functionality. It helps to save the internet data. But on the negative side, it can be a primary reason behind a slow internet connection. You will have to disable metered connection on Windows 11 to increase the speed.
Here's how to do it.
- Open Settings on your system.
- Choose Network & Internet from the left panel.
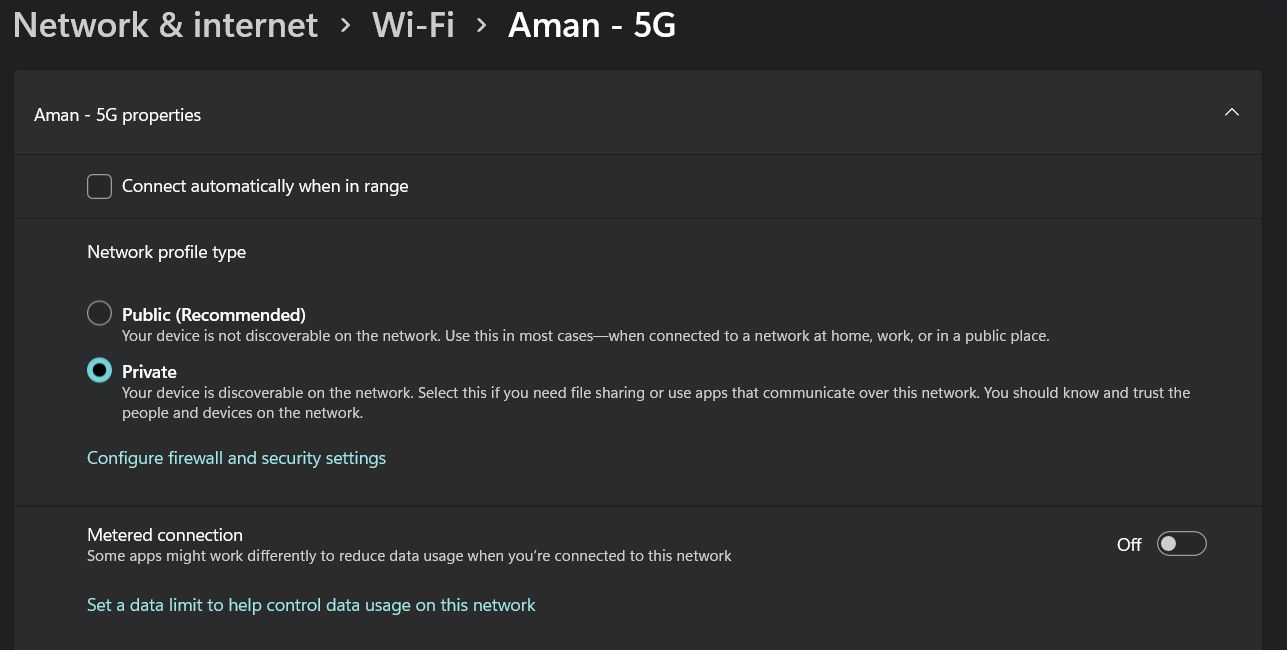
- Click on Wi-Fi.
- Click on your Wi-Fi connection.
-
Disable the toggle next to the Metered connection.

Restart the system and check if there's any improvement in the internet speed.
5. Change the DNS server
By default, the DNS Server is set to automatic, which can be the reason behind the slow internet connectivity. You will have to connect to an open-source DNS server to enjoy fast internet speed.
Here are the steps to change the DNS server on Windows 11.
- Open the Run dialogue box using Win + R hotkeys.
- Type Control Panel and click on OK.
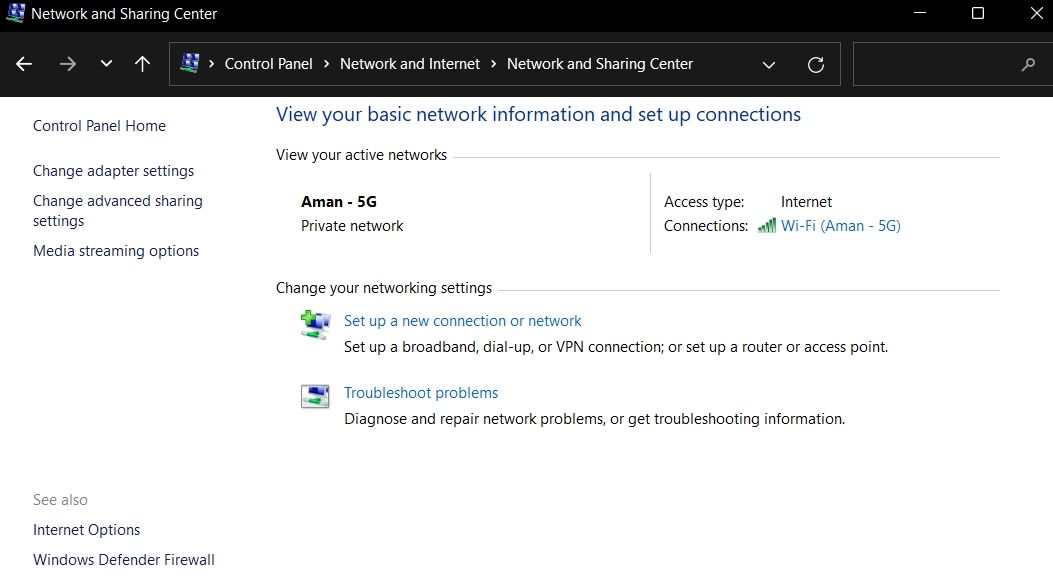
- Choose Network and Internet.
- Click on Network and Sharing Center.
-
Click on Change adapter settings from the left pane.
- Right-click on the connected network and choose Properties.
- Double-click on Internet Protocol Version 4 (TCP/IPv4).
- Click on Use the following IP address bulletin.
-
Enter 8.8.8.8 in the Preferred DNS server and 8.8.4.4 in the Alternative DNS server.
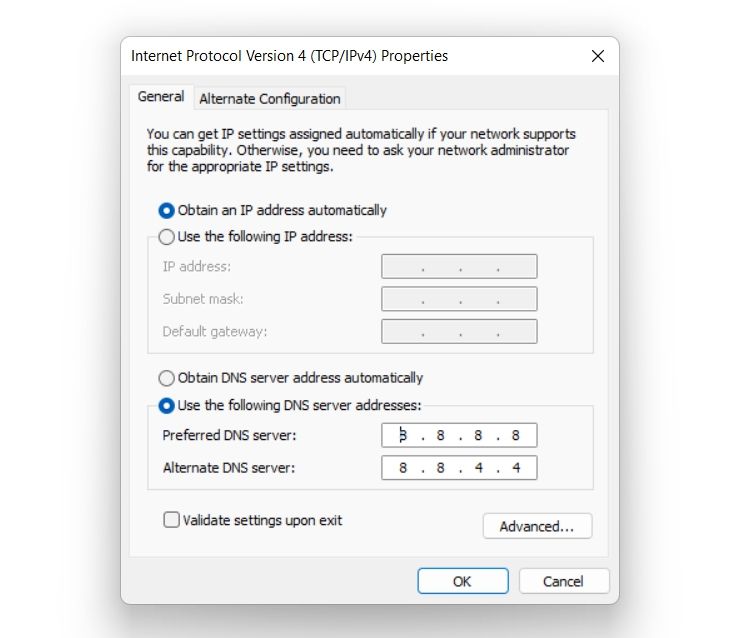
- Click on OK to save the changes.


Reboot the system, and check the internet speed using an internet speed checking website.
6. Change the Limit Reservable Bandwidth
On Windows, 20% of the internet bandwidth is reserved for Windows-related services, whereas the rest, 80%, is used for general tasks. But you can change the bandwidth to increase internet speed.
Here's how to do it.
- Open the Run dialogue box.
- Type gpedit.msc and click on OK.
- Choose Administrative Templates under Local Computer Policy.
- Open the Network folder.
-
Double-click on QoS Packet Scheduler.
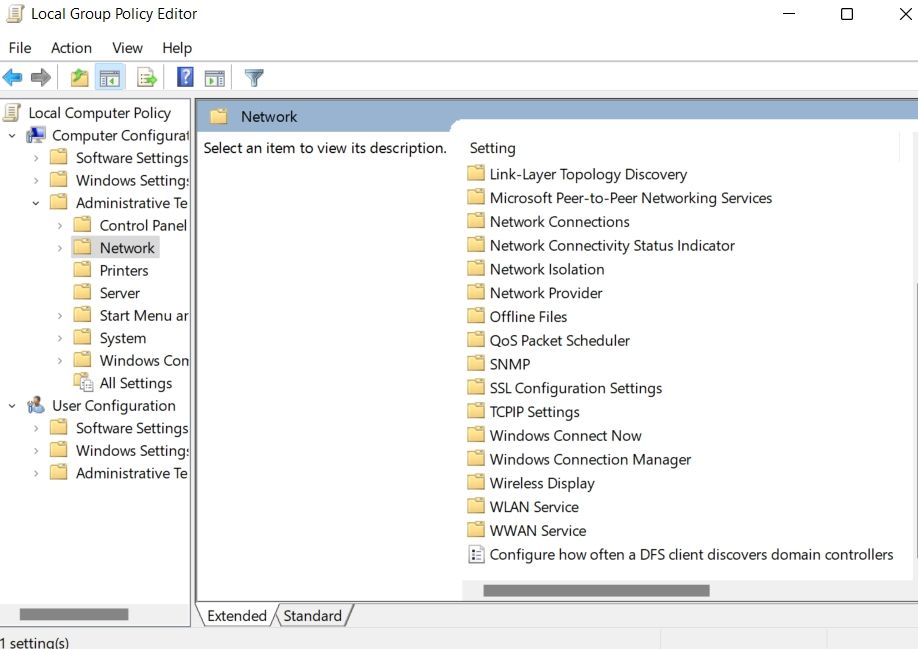
- Right-click on Limit reservable bandwidth and choose Edit from the context menu.
-
Click on Enabled.
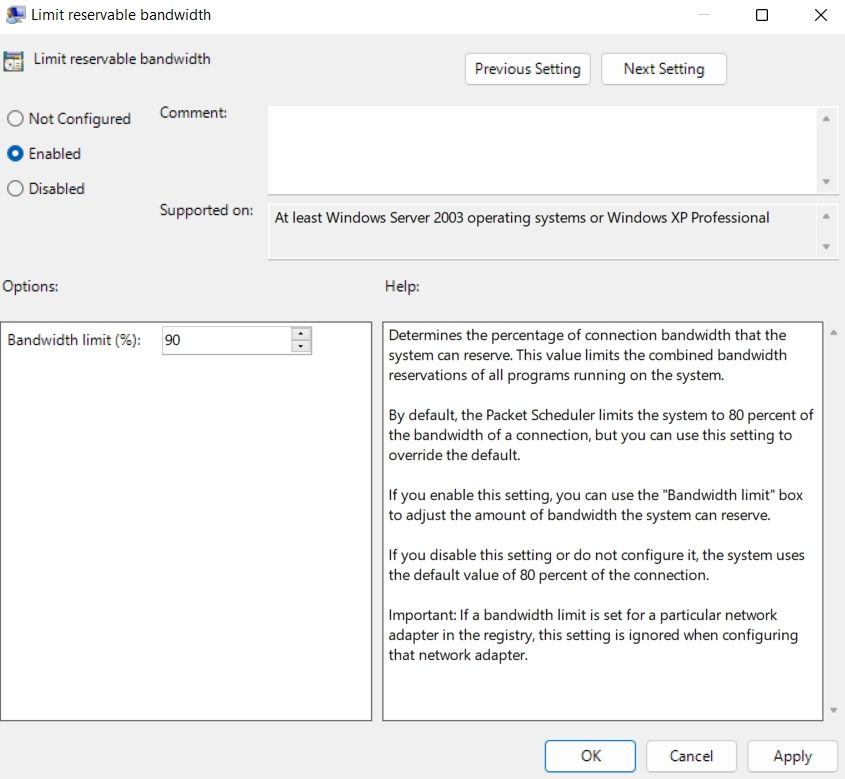
- Change the Bandwidth limit as per your convenience. We recommend keeping the limit under 90%.
- Click on Apply > OK.


7. Disable the Windows Update Services

Windows constantly look for and download the new OS update. But while Windows Update is being downloaded in the background, it can directly affect the internet speed for general tasks. You'll have to disable Windows Update services in this situation.
Below are the steps to disable Windows Update services.
- Open the Run dialogue box and type service.msc and press Enter.
- Locate Windows Update service.
- Right-click on the Windows Update service, and choose Properties from the context menu.
- Change the Startup type to Disabled.
- Click on Stop under the Service status.
- Click on Apply > OK to save the changes.
8. Flush the DNS Cache
A corrupt DNS cache can also result in weak internet connectivity. You'll have to clear the DNS cache to fix the issue.
Here's how to flush the DNS cache on Windows 11.
- Open Command Prompt in administrator mode.
- Type ipconfig /flushdns and press Enter.
- You'll see the message – Windows IP Configuration. Successfully flushed the DNS Resolver Cache.
- Close the Command Prompt window.
Reboot the system and check the connectivity.
9. Temporarily Disable Windows Defender Firewall
Sometimes Windows Defender Firewall is also why you are experiencing slow internet connectivity. You will have to temporarily disable the Firewall to fix the issue.
Here's how to do it.
- Open Start Menu, type Windows Security and press Enter.
- Choose Firewall & network protection from the left panel.
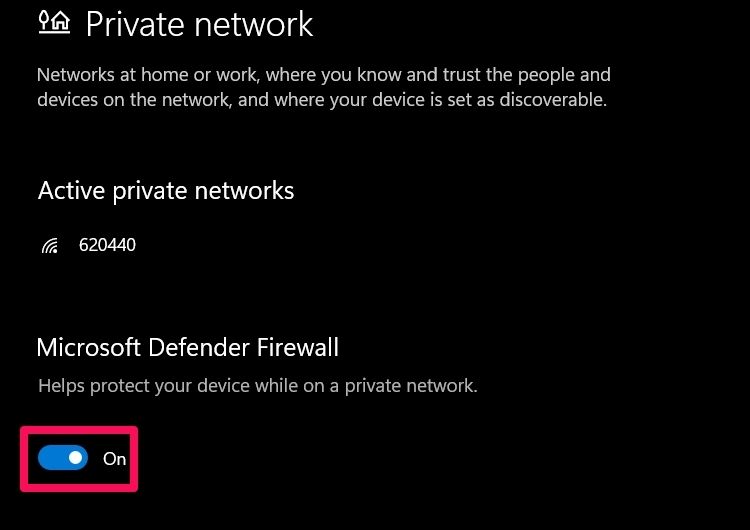
- Click on Private network.
-
Disable the toggle under Microsoft Defender Firewall.

Enjoy High Internet Speed On Windows 11
A high internet speed lets you download stuff within seconds and enjoy uninterrupted video calls. But if you are getting a lower internet speed, you can make the above-mentioned changes.