Microsoft created a massive uproar when it first released the exorbitant system requirements for Windows 11. However, it did so for good reason; the new system requirements allow Windows 11 to up its security game.
While the new hardware is undoubtedly a game-changer for Windows security, it isn't everything. In this article, we’ve laid down some of the best ways you can tighten your security settings in Windows 11 even more. So let’s get started.
1. Keep Your Windows Updated
Although we take them for granted, Windows updates are what keep our computer from getting overrun by random bugs and new security threats that appear on the internet almost daily.
When you update your Windows, you let your computer install the latest changes and upgrades introduced by Microsoft. Although in modern Windows, the Windows update comes enabled by default, there's a simple way you can check for updates manually. Here’s how:
- Click on the Start menu search bar, type in 'settings,' and select the Best match. Alternatively, press the Win + I to launch the settings.
- Select Windows Update.
- Click on Check for updates.
As soon as you do this, the operating system will start looking for all the latest updates it can find and start installing them one by one.
2. Turn Windows Security On
Windows Security, formerly Windows Defender, is the default antivirus solution provided by Microsoft for keeping your Windows system safe.
In fact, over time the Windows Security suite has become so good that it has completely removed the need for an additional, third-party antivirus. To check if your computer has enabled the Security settings, follow the steps below:
- Head to the Start menu search bar, type in 'security,' and select the Best match.
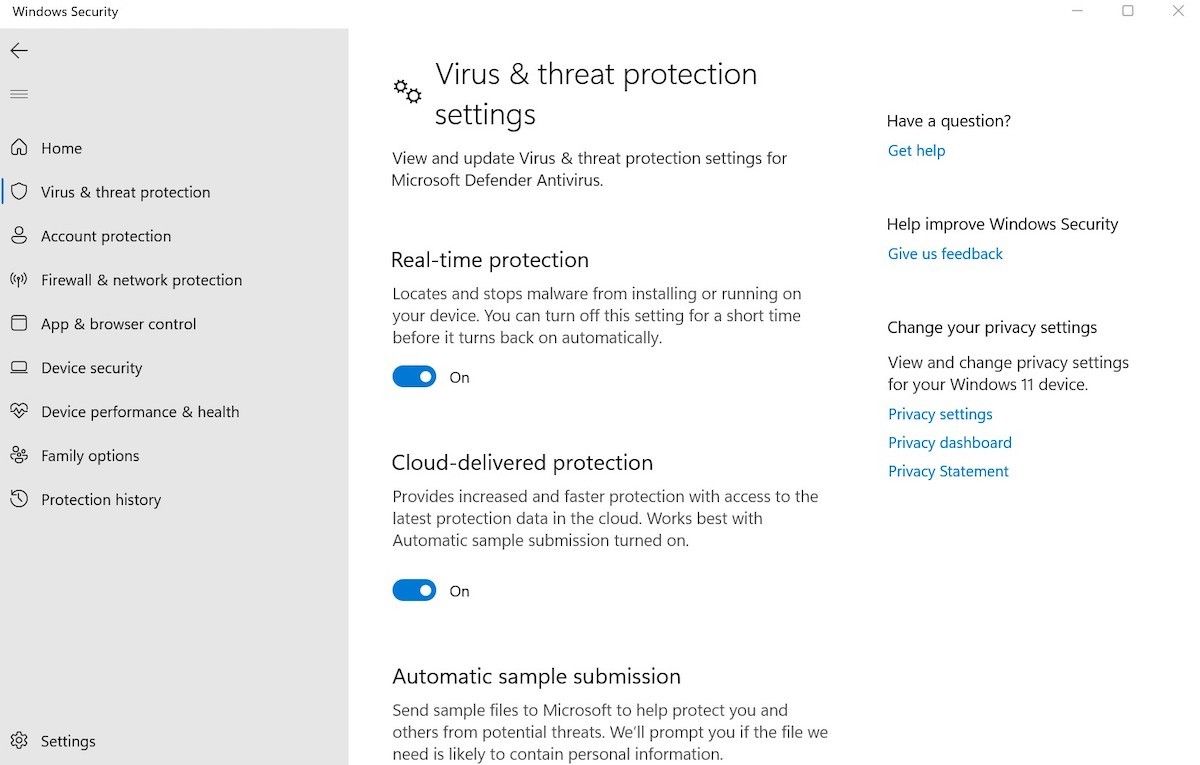
- Click on Virus & threat protection, then locate and click on Manage settings.
- Now, look at Real-time protection. If it's turned off, turn it on.
By keeping the real-time protection feature on at all times, you help protect your PC from all the problems that might try to attack it in the future.
3. Set Up a Sign in Password
By default, you can sign in to a Windows computer without a password. However, doing so leaves your PC vulnerable to unauthorized access by people around you.
Thankfully, Microsoft lets you fix this quandary by allowing you to set a password that must be entered every time you try to sign in.
To set up an account sign-in password, go to the Windows Settings (press Win + I). From there, follow the steps below:
- Go to the Accounts section.
- Head to the Password option.
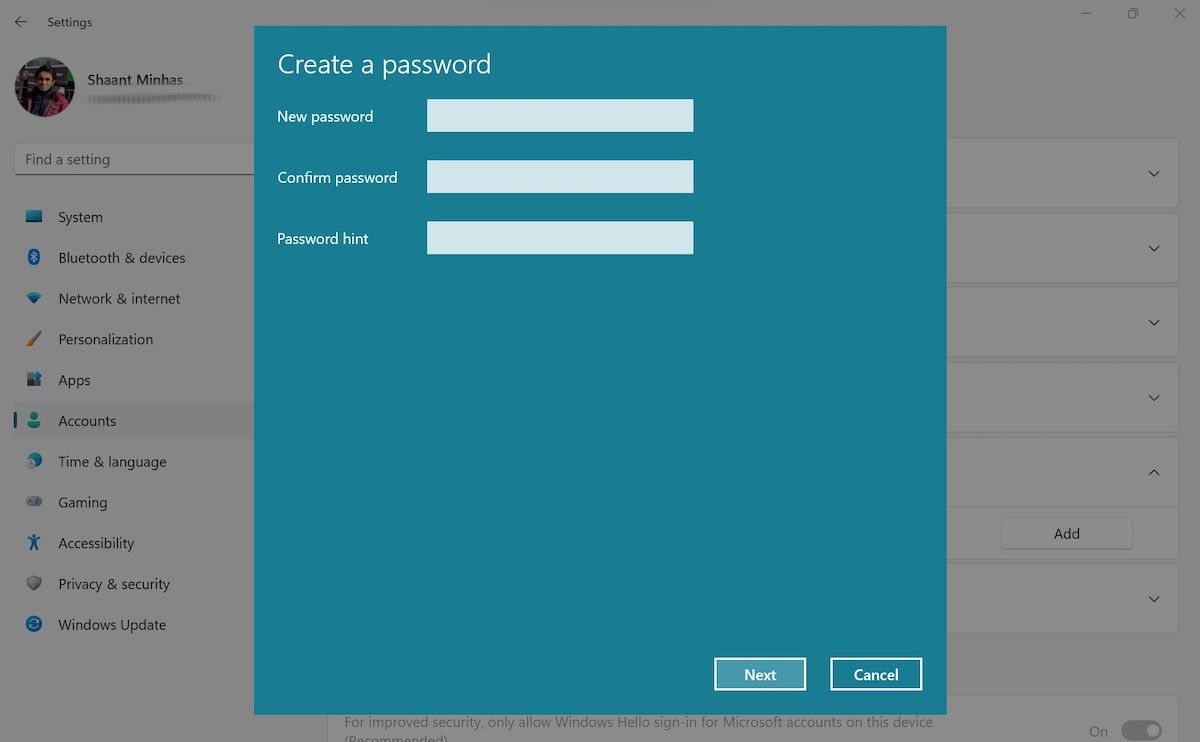
- Click on Add.
- Set a new password, and fill in the relevant information in the new dialog box.
- Click on Finish.
That's it. Your account will now require a new password for logging into the device. You can confirm it by restarting your PC.
4. Check Your Firewall Settings
Windows Firewall is an essential application necessary for keeping your PC secure. It acts as a shield of your PC while you're online and protects it from any unauthorized access from outside threats.
The firewall works by providing a complex set of rules that block all unauthorized communication to and from your system. In the words of Microsoft (from their blog post):
“By providing host-based, two-way network traffic filtering for a device, Windows Defender Firewall blocks unauthorized network traffic flowing into or out of the local device.”
In other words, the firewall is like a diligent guard, letting in only the people that it knows to be trustworthy, and stopping anyone suspicious right at the gates. So make sure you have it enabled. Here's how you can do that:
- Open the Settings (Win + I).
- Head to Privacy & security > Windows Security.
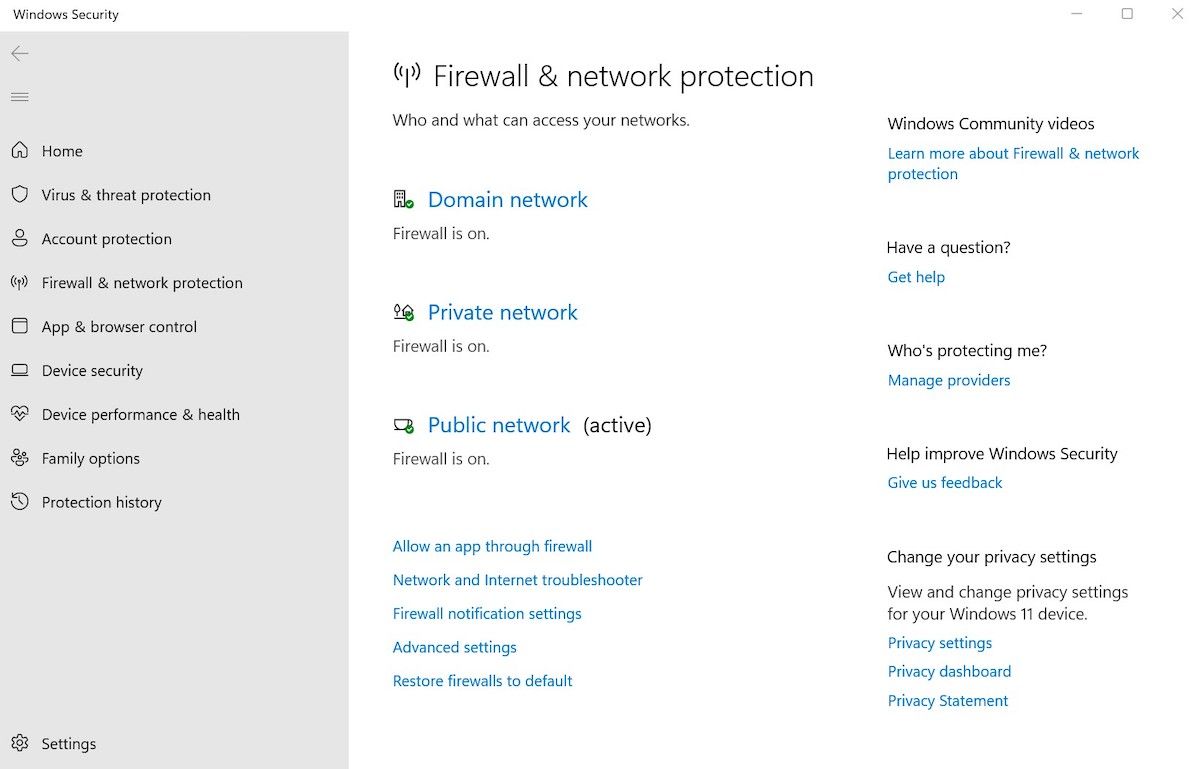
- Click on Firewall & network protection.
Once you're in the Firewall settings, see to it that the Domain network, Private network, and Public network is turned on. If everything is on, then all your settings are set.
5. Set Up Proper User Accounts
Is your PC accessed by multiple people? If so, then it might not be a bad idea to keep it protected from random actions of others, thanks to separate Windows accounts.
Here’s how you can do that:
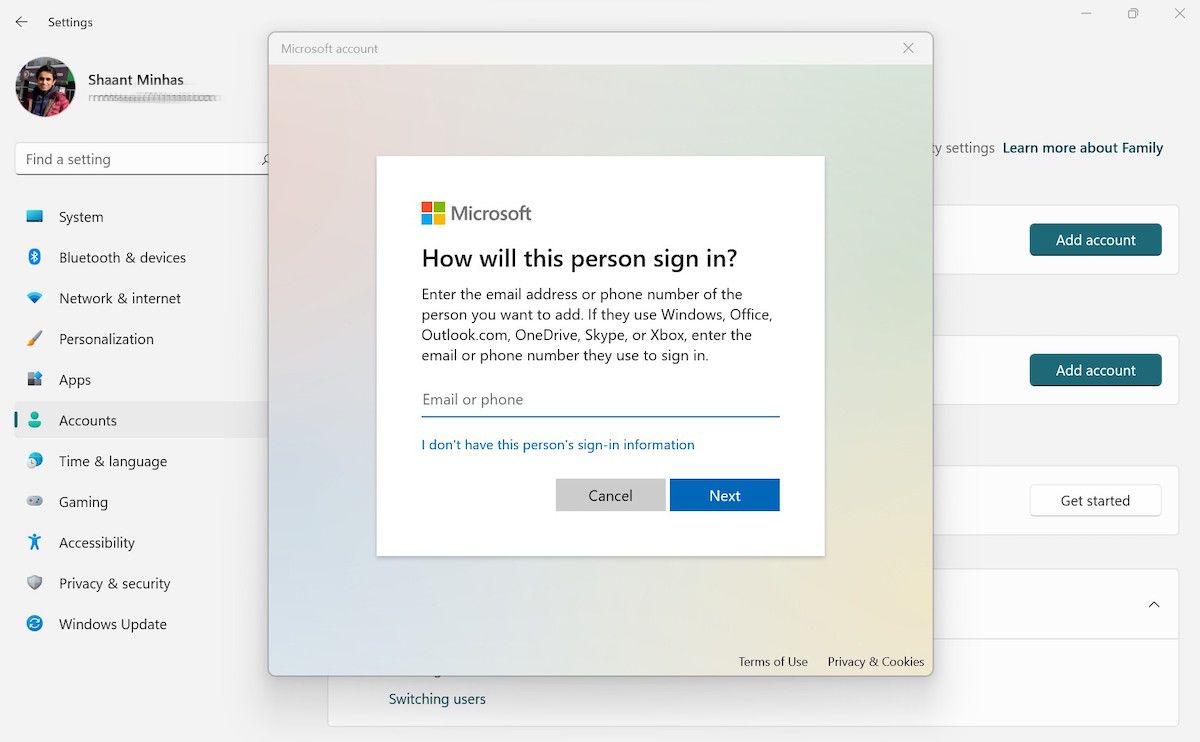
- Go to the Start menu search bar, type in ‘settings,’ and select the Best match. From the Settings menu, select Accounts > Family & other users.
- Now head to Add other user > Add account.
Enter the relevant Microsoft account details and follow the steps until the end, and your account will be created. In this way, you can separate the way different people access your Windows account.
6. Enable BitLocker
BitLocker is a Windows feature that encrypts your whole operating system and files within it. So in the off chance that you lose your PC, your Windows settings and information will still stay protected.
At present, the BitLocker feature is only available in the Pro and Enterprise Edition of the Windows operating system. So if you're only using the Basic version, you can skip this step.
On the other hand, if you're using the Pro or Enterprise version, then you can follow our guide on encrypting your hard drive in Windows 11, where we've laid down how to go about enabling BitLocker.
7. Use Dynamic Lock
Dynamic Lock is a Windows feature that works by connecting your PC with a device—usually a smartphone—through Bluetooth.
So you pair up your PC and smartphone through Bluetooth, and whenever you get away from the PC (with your smartphone in your pocket or hand), the signal will weaken, causing the Dynamic Lock to get activated. As soon as this happens, your computer will get locked.
To enable Dynamic Lock, you have to turn on your Bluetooth and pair up your devices. Here's how:
- Go to Windows Settings (press Win + I).
- Select Bluetooth & other devices.
- Now toggle on the switch for Bluetooth and connect your smartphone.
After you've successfully paired your computer, it's time to turn on the Dynamic Lock feature. Follow the steps below:
- Again, go to the Settings menu, and select Accounts.
- Click on Dynamic Lock in the section under Additional Settings.
- From there, click on the checkbox for Allow Windows to automatically lock your device when you're away.
As soon as you do this the Dynamic Lock will get activated, providing an additional layer to your security.
Make Cybersecurity Your Priority
The world is a dangerous place; it's only natural that the world of cybersecurity—built on top of it—isn’t much different. Security perils are everywhere—with all kinds of scams and cyber attacks happening every day. For Windows users, this is a cause of concern. Because the Windows operating system is the biggest market for desktop users, naturally, the threats and security attacks it encounters are also more recurring.
And that’s why the methods we've discussed above are crucial to up your Windows 11 security game and keep yourself safe.

