Windows 11 has a Deployment Image Servicing and Management (DISM) command utility for scanning and repairing the Windows image file. Its RestoreHealth command can fix a corrupted image and all the issues that arise from it. The command can also fix the System File Checker tool when it’s not working, because the SFC tool utilizes files from the system image to do its job.
To run a DISM repair scan, you’ll usually need to manually bring up the Command Prompt and input the RestoreHealth command. However, you can also set up different types of shortcuts for running a Windows image repair scan with these methods.
How to Set Up a Windows Image Repair Scan Desktop Shortcut
To set up a desktop shortcut for running a Windows image repair scan, you’ll need to create a batch script that executes its RestoreHealth command first. Then you can add a shortcut for that batch file to the desktop. This is how you can create a Windows image repair scan batch file with Notepad:
- Open up the Notepad app for editing text. Our guide to opening Notepad includes nine ways you can launch that app.
-
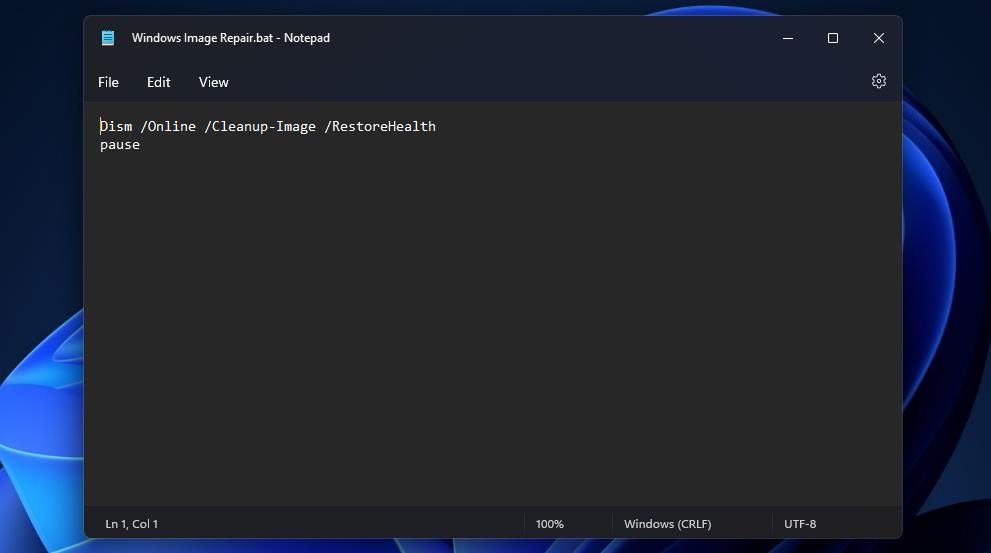
Copy this batch file script by selecting the text for it and pressing the Ctrl + C keys at the same time:
        Dism /Online /Cleanup-Image /RestoreHealth
pause -
Select Edit > Paste to add the script’s contents to Notepad.
-
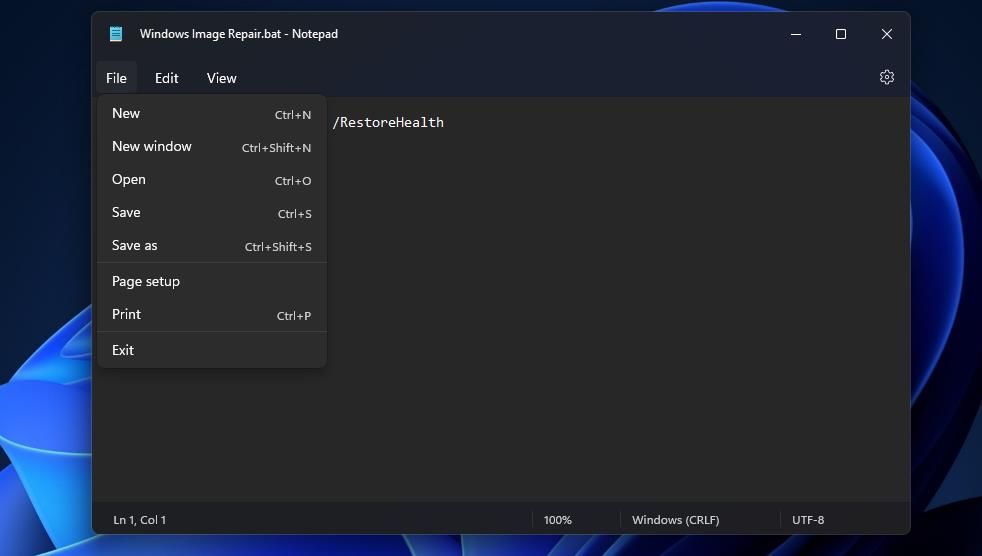
Click the File menu button, and select Save as from there.
-
Then click All files from the Save as type drop-down menu.
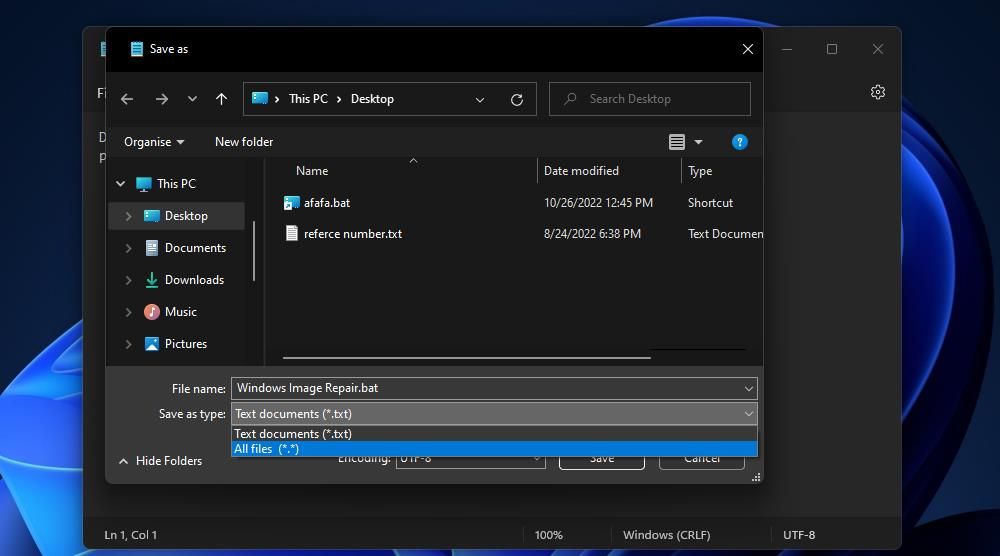
- Input Windows Image Repair.bat in the File name box.
- Select a folder to include the batch file in, and click the Save option.
- Close the window for the Notepad app.


Now you can set up a desktop shortcut for running the Windows Image Repair.bat file. You can do that with the Create shortcut wizard as follows:
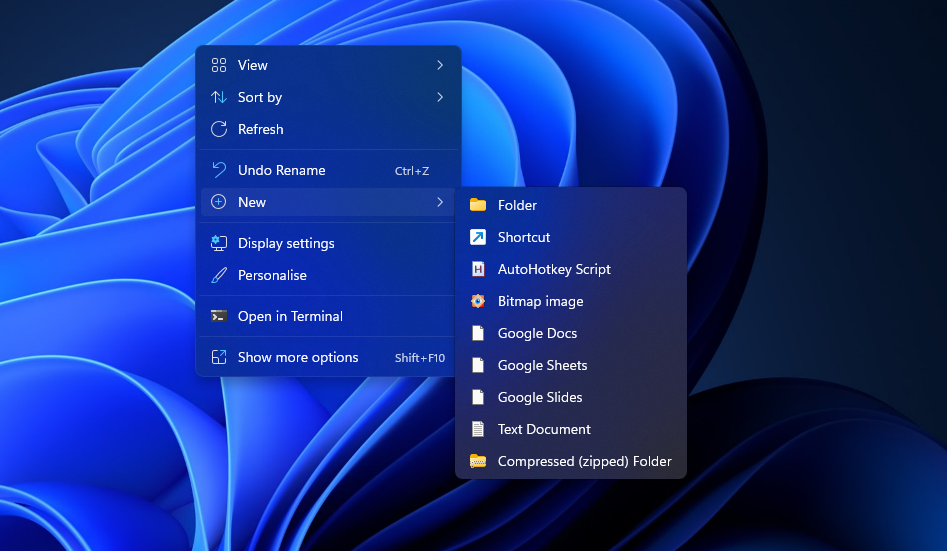
- Click an empty area of your desktop with the mouse’s right button and select New.
-
Next, select the Shortcut option.
- Press the Browse button.
- Select the Windows Image Repair.bat file from whatever folder you saved it in.
-
Then input cmd /c in the location box before the batch file’s path as follows:
cmd /c “full batch script folder path”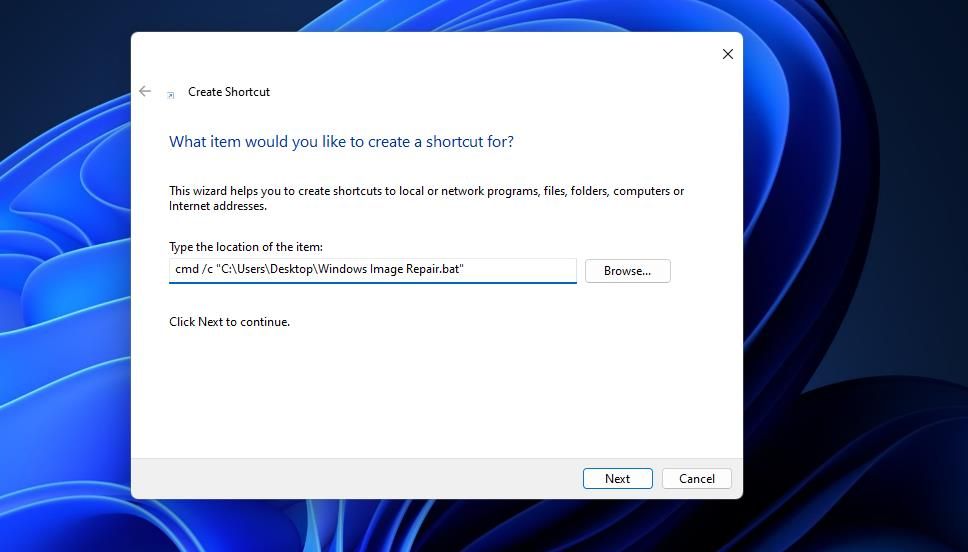
- Click Next to go to the Type a name box.
- Input Windows Image Repair in the text box.
- Select Finishto add the Windows Image Repair desktop shortcut.


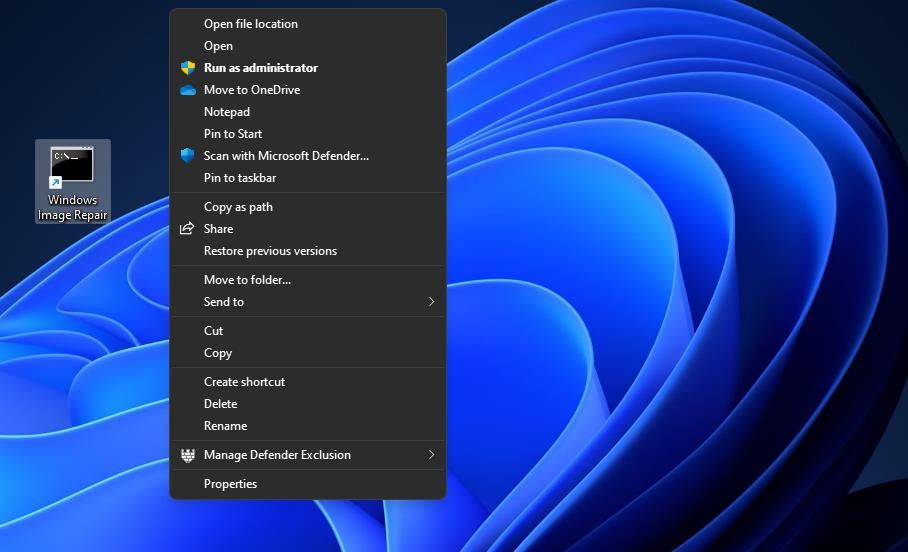
Now try out the new Windows Image Repair shortcut on the desktop. Right-click that shortcut’s icon to select Run as administrator (the RestoreHealth command only works in an elevated Prompt). Then a Command Prompt window will open, and the ResoreHealth scan will do its stuff.

How to Set Up a Windows Image Repair Scan Taskbar Shortcut
Or would you prefer to have a Windows Image Repair scan button on Windows 11’s taskbar? If you would, you’ll need to create a RestoreHealth command desktop shortcut exactly as outlined for the method above. When you’ve done that, you can pin that shortcut to the taskbar as follows:
- Right-click the Windows Image Repair shortcut and select Properties.
- Press the Advanced button.
-
Select the Run as administrator checkbox within the Advanced Properties window.
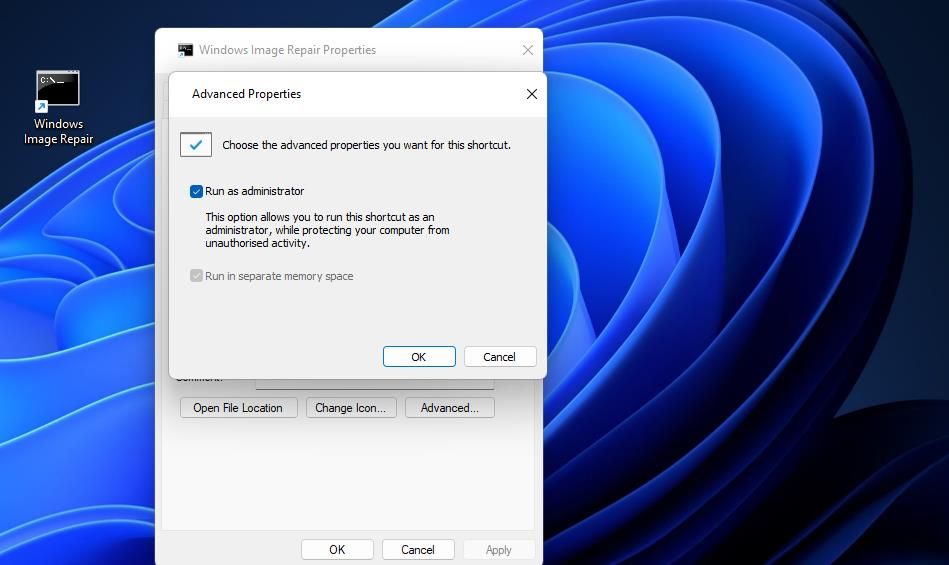
- Click the Advanced Properties window’s OK option.
- Select Apply to save the new admin setting.
- Press the OK button to exit the window.
- Then right-click Windows Image Repair on the desktop again and select Show more options.
-
Select the Pin to taskbar option on the classic menu.


You can now press the Windows Image Repair button on the taskbar anytime you need to run a RestoreHealth scan. It was necessary to configure the desktop shortcut to run as administrator before pinning it because you can’t select that option on the taskbar button’s right-click menu. You can remove the Windows Image Repair desktop shortcut by right-clicking its icon and selecting Delete.
How to Set Up a Windows Image Repair Scan Keyboard Shortcut
Adding a Windows Image Repair desktop shortcut enables you to create a hotkey from it. Then you’ll be able to run the RestoreHealth command by pressing a Ctrl + Alt key combination assigned to the Windows Image Repair shortcut on the desktop. You can add a hotkey to a desktop shortcut as instructed in our guide for assigning keyboard shortcuts to programs.

A Ctrl + Alt program hotkey depends on its desktop shortcut. If you delete the desktop shortcut, you’ll also erase an assigned key combination for it. So, you’ll need to keep the Windows Image Repair scan shortcut on the desktop for an assigned hotkey to work.
Also, note that the Windows Image Repair desktop shortcut needs to be configured to run with admin rights for an assigned RestoreHealth command hotkey to work. If it’s not, you’ll see a command error in the Command Prompt window. So, set the desktop shortcut to run with admin rights as outlined in steps one to six of the previous taskbar method.
How to Set Up a Repair Windows Image Context Menu Shortcut
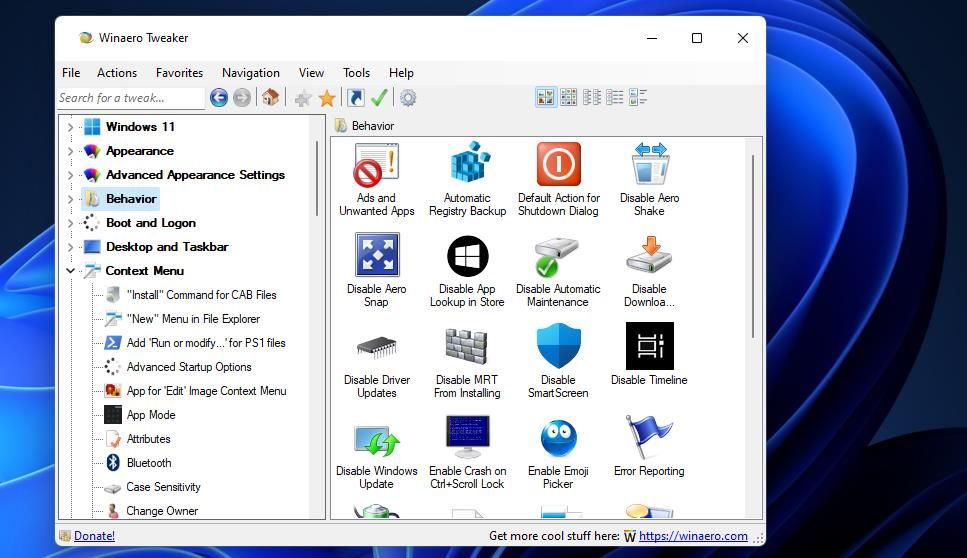
Windows 11’s desktop context menu is another good place to add command shortcuts, but it’s a pity there aren’t any built-in options for customizing it. However, you can still add a Repair Windows Image option to that right-click menu with the freeware Winaero Tweaker customization app. This is how to add a RestoreHealth command shortcut to the context menu with Winaero Tweaker:
- Open the Download Winaero Tweaker webpage.
- Then select the Click here to download the file link option.
- Install the Winaero Tweaker software. Our Winaero Tweaker guide for customizing Windows 11 tells you how to extract and install that software.
- Run Winaero Tweaker to view its window.
-
Double-click the Context Menu options category in Winaero Tweaker’s navigation bar.
-
Select the Repair Windows Image option.
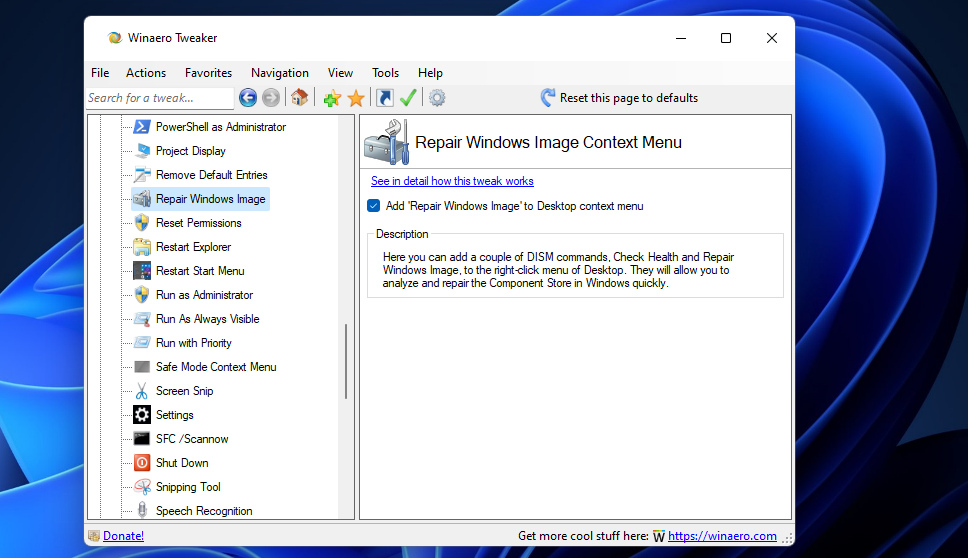
- Then click the Add ‘Repair Windows Image’ to Desktop context menu setting.


Now you can see the new context menu option for running the RestoreHealth command. Right-click a part of the desktop area and select Show more options. Move the cursor over the Repair Windows Image submenu, which includes two options. Selecting Repair Windows Image will execute the RestoreHealth command.

The alternative Check Health of Windows Image option runs a Deployment Image Servicing Management CheckHealth command. That option checks the system image and reports any issues detected. However, the CheckHealth scan doesn’t apply any repairs.
Give Yourself Quick Access to the Windows Image Repair Command
You probably won’t need to run RestoreHealth Windows image repair scans that often. However, that’s still an important troubleshooting command to use in tandem with the SFC whenever Windows or third-party software errors arise.
So, it’s a good idea to set up a shortcut with which you can quickly run the DISM RestoreHealth command whenever needed. Such a shortcut will save you from having to look up that command’s syntax and manually execute it.