
Is your Windows 11 desktop a disorganized mess? If so, you can organize it better by grouping shortcut icons into category boxes. Windows 11 doesn’t have any feature that enables you to group icons into boxes on the desktop.
Some users stump up for Stardock Fences to organize their desktop icons better. However, you can group desktop shortcut icons with the freeware iTop Easy Desktop and ToolBox software packages for Windows 11.
How to Group Desktop Icons With iTop Easy Desktop
The iTop Easy Desktop software for Windows 11, 10, 8.1, and 7 enables you to add transparent boxes with different titles to the desktop. Then you can organize your software shortcuts into distinct groups by moving them into the category boxes. This is how you can group desktop shortcuts with iTop Easy Desktop:
- Open the iTop Easy Desktop webpage in your browser and click the Download Now button.
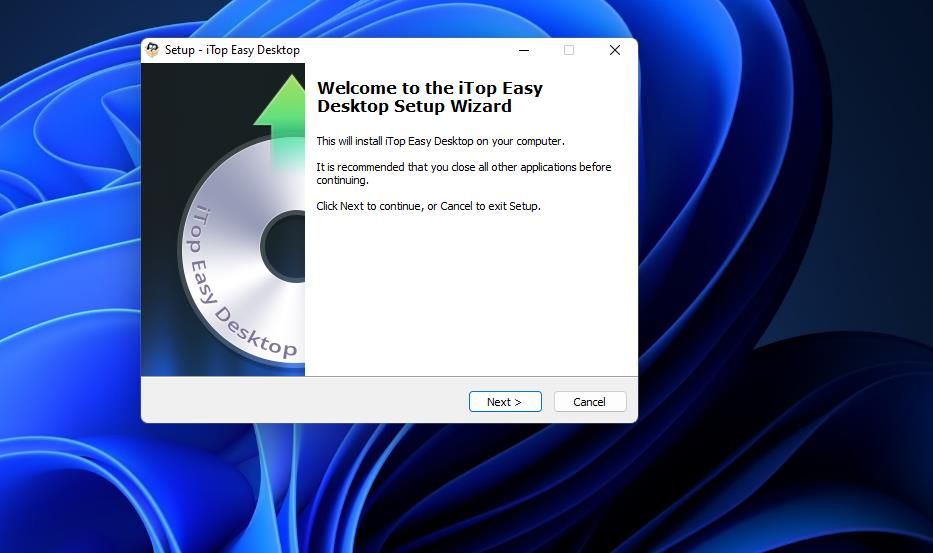
- Once it's done, run the itop-easy-desktop-setup.exe file.
-
Select Next to install iTop Easy Desktop.
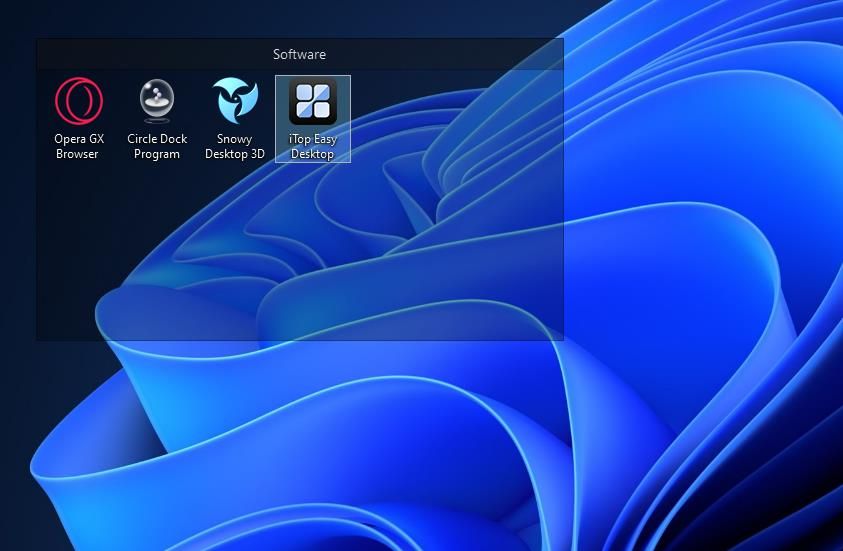
- Click Finish with the Launch iTop Easy Desktop checkbox selected.
- Move the iTop Easy Desktop window that opens to the side of the desktop to make some space for adding boxes.
- Left-click on the desktop, hold the mouse button, and then drag an outline for a box with the cursor.
-
Release the mouse button and select Create a Box. You can further adjust the size of the box after adding it by placing the cursor along its border and dragging the mouse.

-
Double-click the top of the box to add a category title for it. For example, you could enter titles for software categories like games, browsers, productivity apps, multimedia, system maintenance utilities, etc.
- Repeat steps eight to 10 to add more boxes to the desktop.
- Then drag-and-drop icons on the desktop into the category boxes to group them.


You can access options for the boxes by clicking the Menu buttons on their top left corners. Move the cursor over the Sort by option to select one of several options for organizing the icons in their respective boxes. There you can also select to rename and remove boxes.

The View submenu on that menu also includes a Roll up box option. Selecting that option rolls up the box to its title bar, as shown below. That’s a handy feature for preserving desktop space. To unroll a box when you need to access it, deselect the same option.

You can customize the appearance of all desktop boxes or individual ones from the Appearance tab on the iTop Easy Desktop window. There you can customize colors by selecting All Boxes or an individual one on the drop-down menu and selecting colors on the palette. Drag the Transparency bar’s slider to make boxes more or less transparent.

The Quick Actions tab on that window shows iTop Easy Desktop’s hotkeys. The Win + F3 hotkey listed there is a particularly noteworthy one. Pressing the Windows + F3 key combination opens (and closes) a search tool in the middle of the desktop. You can search for and find apps, documents, and files in Windows 11 with that utility.
If you ever want to disable the desktop boxes, uncheck the Enable iTop Easy Desktop checkbox on the Guide tab. Deselecting that setting will restore all your shortcuts on the desktop as they originally were before you grouped them in boxes. Reselecting the same option will display all boxes you added.
How to Group Desktop Icons With ToolBox
ToolBox is older software for grouping desktop shortcuts that dates back to Windows 3.1. So, you can utilize it on a wide range of Windows platforms, including the most recent addition to the series. ToolBox isn’t actively updated anymore, but it packs in more customization settings than iTop Easy Desktop. You can group shortcuts on your desktop with ToolBox as follows:
- Open the ToolBox homepage and download the file from the Download section at the top right of that page.
- Click the tbox285.zip to open the ZIP file, and select Extract all at the top of File Explorer.
-
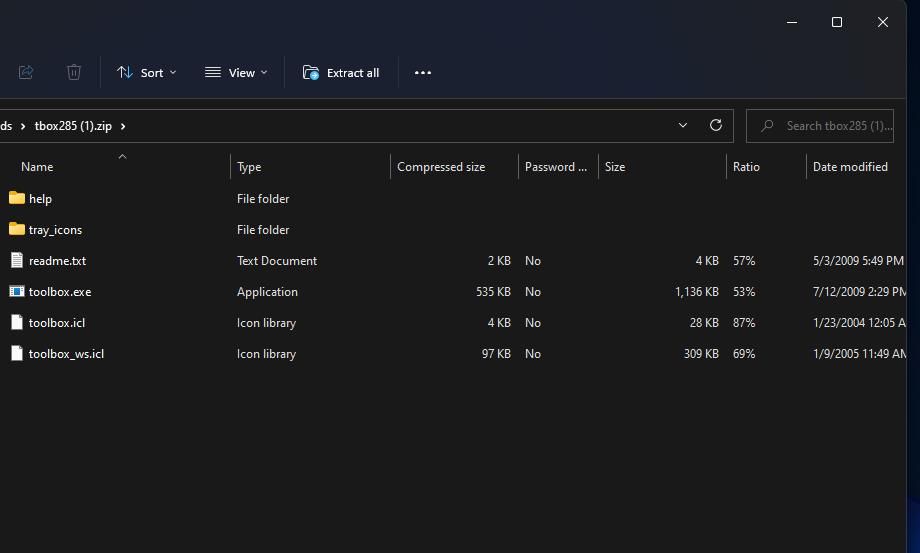
- Click the Show extracted files option’s checkbox to select it.
-
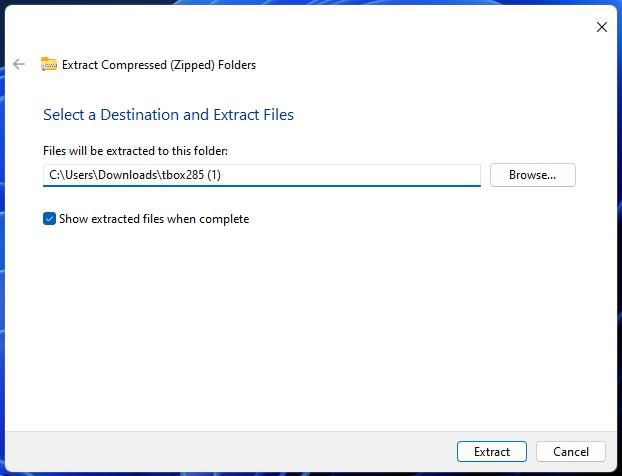
Next, select Extract to open an extracted tbox285 directory.
- Double-click toolbox.exe to start ToolBox.
-
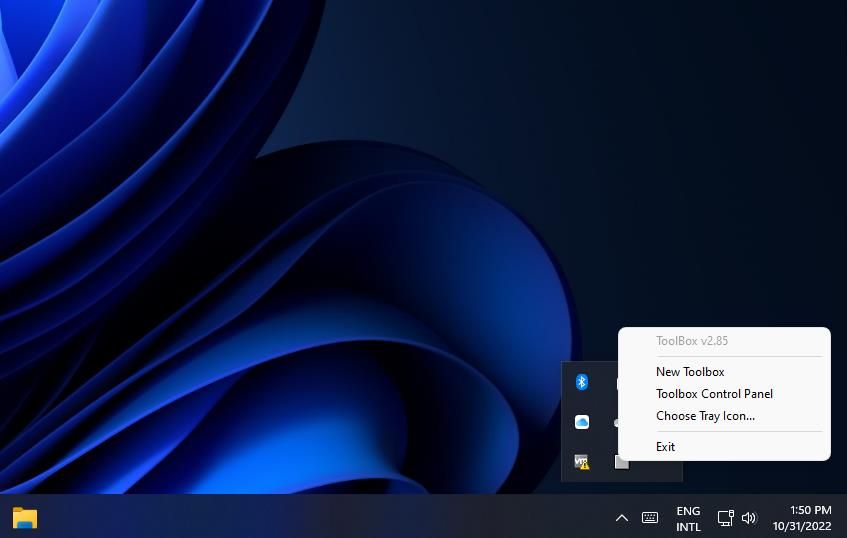
To add a new box, right-click the ToolBox system tray icon and select New Toolbox.
-
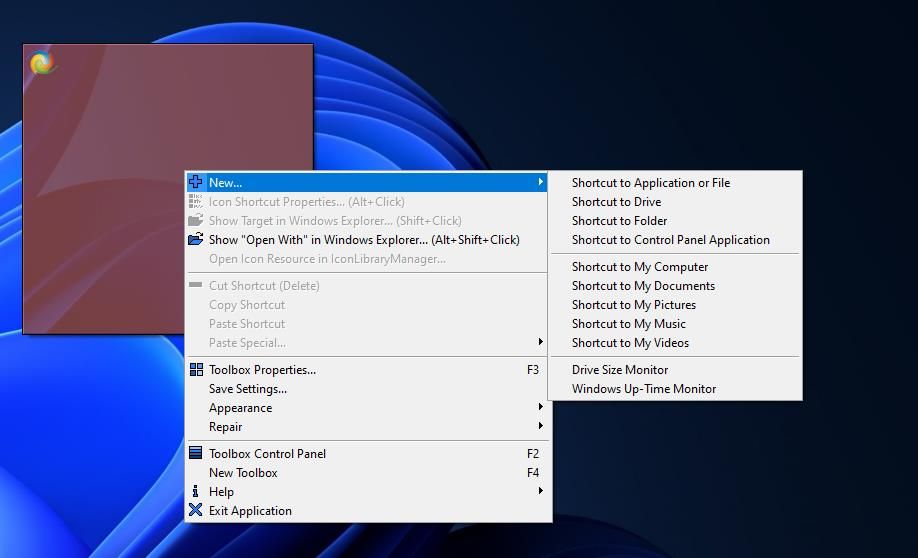
Right-click the box and select New > Shortcut to Application or File.
- Select a program EXE file to include in the box and click Open.
-
Repeat steps nine to 11 to add more boxes and software shortcuts.


You can customize a desktop box by right-clicking it and selecting Toolbox Properties. The Toolbox Properties window includes options for resizing boxes. Drag the Tile Width and Tile Height bars’ sliders to make a box bigger or smaller. Alternatively, drag the Row or Column bars’ sliders to change the number of rows and columns a box has for its shortcuts.

If you want to add a title to the box, select the Title Bar Visible checkbox. Then input a title for the box in the Toolbox Name box. You can further configure the title by clicking the Font and Size button. Choose a different font, style, and size option on the window that appears.
The boxes are transparent by default. You can adjust the transparency level by moving the Tint bar’s slider left and ride. Click the Transparency Effect drop-down menu to choose one of the four effect options there.
To change the color of a box, press the click to change button for the Color option; then select an alternative on the Color Picker window and click OK. Press the Apply Changes button to save the new color.

There are more options available on the ToolBox control panel. Right-click the program’s system tray icon and select ToolBox Control Panel. The ToolBoxes tab there displays a list of your boxes. You can remove a box from the desktop by right-clicking it and selecting Delete ToolBox.

Select the Application Settings tab to view more general ToolBox software settings. Select the Start Toolbox when Windows starts setting there if you want the program to run automatically. There you can also add two pre-made boxes to the desktop by clicking Wizard and selecting Create System Folders Toolbox or Create Toolbox for Drives.
Organize Your Desktop Better in Windows 11
ToolBox and iTop Easy Desktop are ideal for organizing the Windows 11 desktop more efficiently. It’s quick and easy to group your desktop’s software, folder, and file shortcuts into different box categories with both those software packages. They're decent alternatives to Fences that pack in a good range of options and features.