
You can show off your greatest gaming moments by capturing screenshots. Some players take in-game snapshots of their record scores or post-match reports and stats to share with friends. Screenshots from games with beautiful 3D graphics can also be good desktop wallpapers.
Taking in-game snapshots in Windows 11 is relatively straightforward. Windows 11 incorporates tools for capturing screenshots. Some third-party software packages also provide screen-capturing options for games. These are six different ways you can take in-game screenshots in Windows 11.
1. How to Capture Game Screenshots With the Game Bar
The Xbox Game Bar is Windows 11’s pre-installed app for capturing snapshots of games. Game Bar is an overlay app you can activate with a hotkey. It packs in options for taking screenshots, recording games, adjusting audio, and viewing performance info. You can capture in-game snapshots with Game Bar like this:
- Open and start playing a game you want to capture screenshots from.
- Press the Game Bar’s Win + G key combination to view its overlay.
-
Click Capture on the overlay’s toolbar.
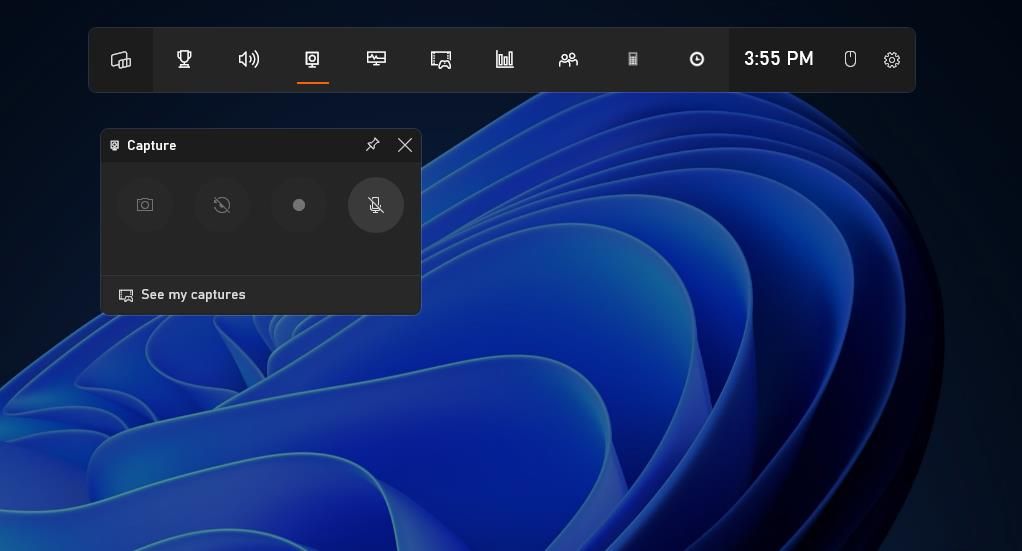
- Press the Take screenshot button. Then you’ll see a screenshot saved notifier quickly pop up.
- To view the snapshot, click See my captures in the Capture box. You’ll see a thumbnail for your captured screenshot in the Gallery window.

You can open the folder that stores screenshots with the Game Bar by selecting a thumbnail in Gallery and clicking Show file location. Click Continue to open the folder. Then you can double-click the images in Explorer to open them with Photos or alternative default software.

As we mentioned earlier, you can use the Game Bar to record your gameplay, too. Check out our guide on how to record gameplay on Windows 11 for more information.
2. How to Capture Game Screenshots With Windows 11’s Hotkeys
Windows 11 has a clipboard that enables you to capture full-screen screenshots from games. Launch a game and press the PrtSc key to capture a snapshot. The clipboard will temporarily store the image. So, you’ll need to open Paint (or an alternative app), paste the image into that app by pressing Ctrl + V, and then save it.
The clipboard can store multiple captured screenshots (with its history feature enabled). However, taking in-game snapshots with PrtSc is not ideal since you must manually paste each one of them into an image editor for saving. A better method is to press the Win + PrtSc hotkey whilst playing a game. That will take a snapshot and automatically save it in a Screenshots folder with this directory path:
C:\Users\<user folder>\Pictures\Screenshots
3. How to Capture Game Screenshots With GeForce Experience
GeForce Experience is an optimization app for NVIDIA graphics cards. It enables users to adjust graphical settings, update NVIDIA drivers, and take in-game screenshots. NVIDIA GeForce Experience has an overlay you can open whilst playing that includes its screen-capturing tools.
The GeForce Experience software usually comes pre-installed on PCs with supported NVIDIA GPUs. So, you shouldn’t need to install that software if your PC has a supported NVIDIA GPU. This GeForce Experience system requirements page lists all the supported GPU series for that software.
If your PC meets those system requirements but doesn’t have that NVIDIA software installed, you can download it from this GeForce Experience page. Click the green Download button to save the setup wizard for GeForce Experience. Double-click the GeForce_Experience_v3.25.1.27.exe to bring up the setup wizard, and select the Agree and Install option.
When you’ve got GeForce Experience installed, you’ll find its overlay to be a good alternative to the Xbox Game Bar. However, that feature also needs to be enabled for you to utilize it. This is how you can capture in-game snapshots with GeForce Experience:
-
Right-click the NVIDIA icon in the Windows system tray to select NVIDIA GeForce Experience.

- Log in to your NVIDIA account on the sign-in box. If you don’t have one, click the Create account option to set one up and then log in to it.
-
Click the Settings button at the top of GeForce Experience.
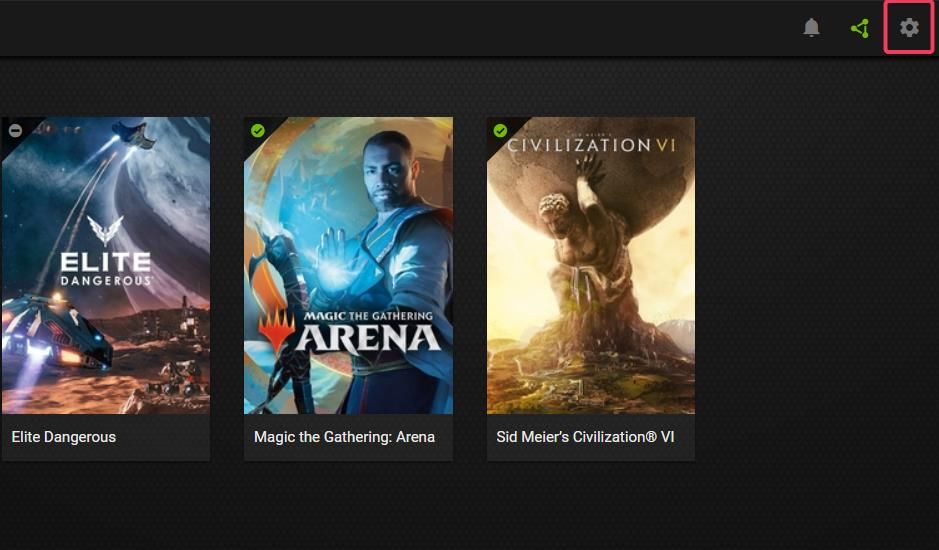
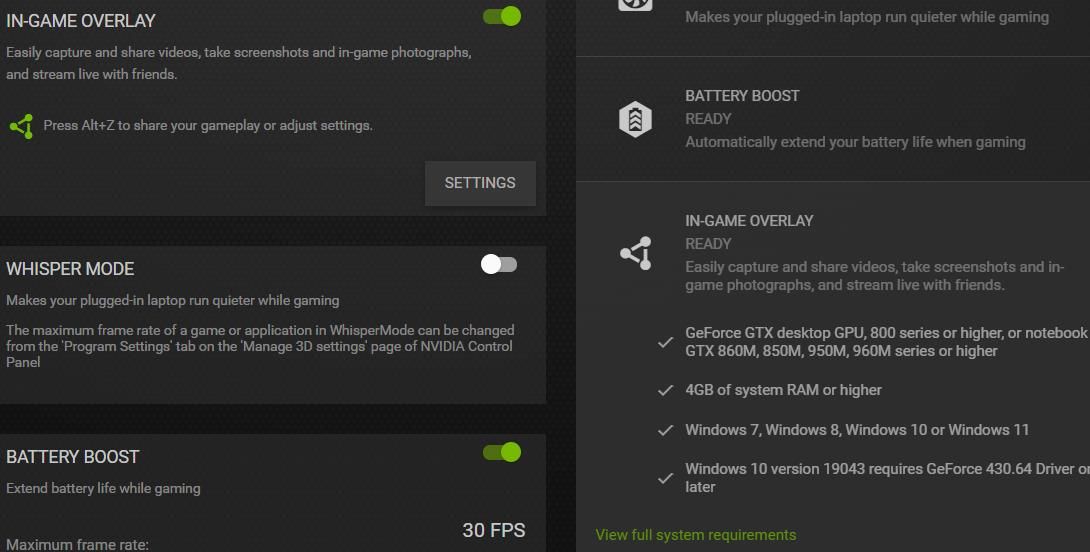
- Check your PC meets the system requirements for the overlay feature by clicking the In-Game Overlay box on the right of the GeForce Experience window.
-
Turn on the In-Game Overlay option shown directly below.
- Now click the GeForce Experience window’s X (close) button.
- Launch a game you want to capture screenshots from.
- Press the Alt + F1 hotkey to take a snapshot whilst playing. Or you can press Alt + Z to bring up the overlay and press the Screenshot button.


GeForce Experience saves your screenshots in the Videos folder. There you’ll find separate folders that include the screenshots of games you captured them from. This is the full path for the Videos directory:
C:\Users\<user folder>\Videos
You can view captured snapshots from the gallery in GeForce Experience. Press the Alt + Z key combo, and select Gallery on the overlay. The gallery shows you thumbnail previews for recently captured items and screenshot folders. Double-click an image thumbnail to view it or a folder to open.

4. How to Capture Game Screenshots With Steam
If you’re a Steam user (and most Windows gaming fanatics are these days), you can capture snapshots with that software’s screenshot key. To do so, open Steam and launch one of your games with that gaming client. Then press the default F12 hotkey to take an in-game screenshot.
After taking some snapshots, you can view them within the Steam gaming client. Click Steam’s View menu and select Screenshot. Select the game you took the pictures from in the Show drop-down menu. Then you’ll see a gallery that includes your screenshots for the game. Click each snapshot to view it enlarged.

5. How to Capture Game Screenshots With Fraps
Fraps is a video and screen-capturing software with which you can capture snapshots from OpenGL and DirectX Windows 11 games. Although it’s not freeware, you can take BMP screenshots with the unregistered version in Windows 11/10. These are the steps for capturing screenshots with Fraps:
- Bring up the Fraps download webpage.
- Click the Download Fraps link.
-
Press Ctrl + J in Edge, Chrome, Firefox, or Opera to bring up a Downloads tab. If you’re utilizing a different browser, select to open a Downloads tab from its primary menu.
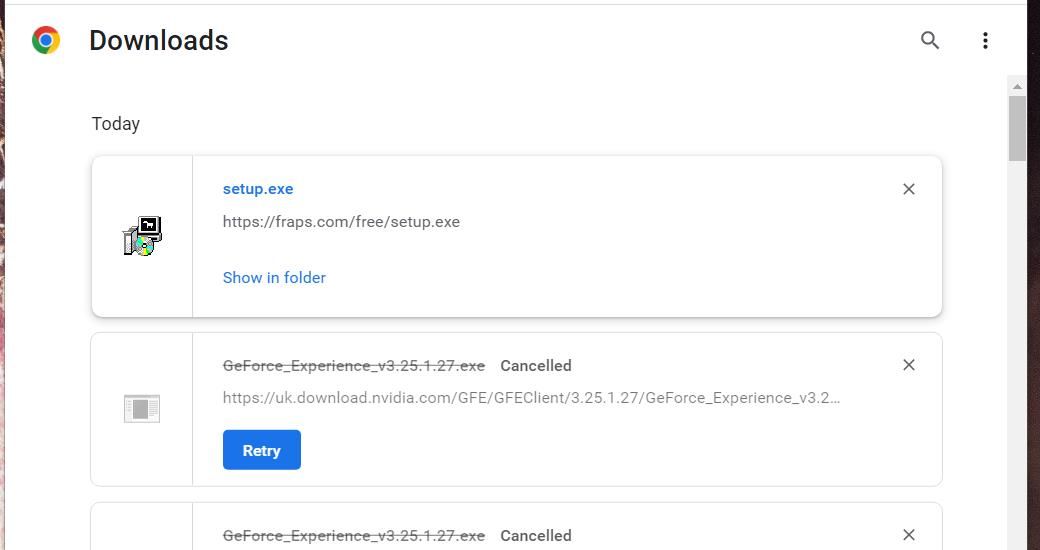
- Click Fraps’ setup.exe file in the Downloads tab.
-
Select I Agree > Next > Install in the setup wizard.
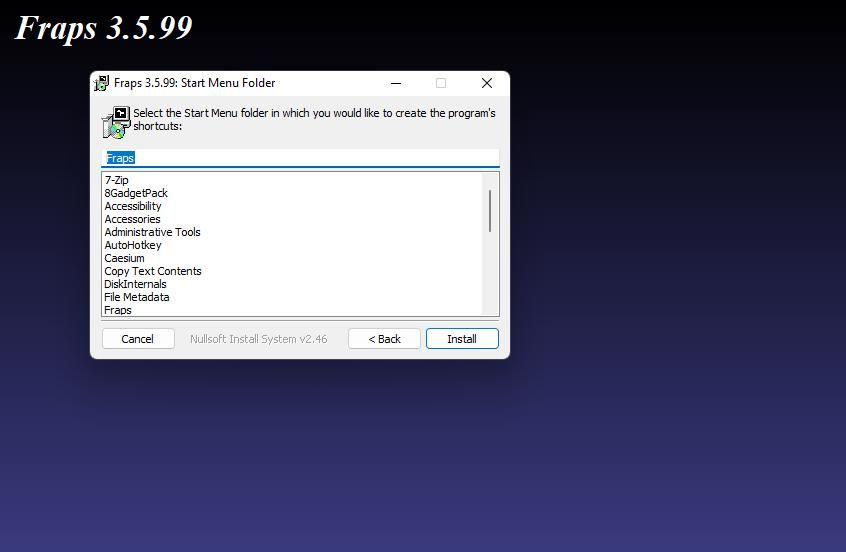
- Now you’ve installed Fraps, you can start taking some screenshots with it. First, run the software by clicking Start > All apps > Fraps on the menu.
- Minimize the Fraps window.
- Run an OpenGL or DirectX game from which to take screenshots.
- Then press Fraps’ default F10 hotkey to capture a snapshot.


The subfolder that includes your captured screenshots is in the Fraps folder. The Fraps folder has a Screenshots subfolder for your snapshots. If you installed the software in its default directory, the path for the folder will be:
C:\Fraps\Screenshots
You can check the folder path for your snapshots in the Fraps software. Open the Fraps window, and click its Screenshots tab. Then click the View button to bring up the folder. You can also change the capturing key by clicking in the Screen Capture Hotkey box on the Screenshots tab and pressing a different one.
6. Capture Screenshots With a Games Photo Mode Feature
Some games include built-in photo mode tools with which you capture snapshots from them without additional overlays or software. Aside from merely taking snapshots, those photo modes enable players to enhance screenshots by rotating camera angles and applying effects. These are some of the more notable games that incorporate photo modes:
- Control
- Forza Horizon 5
- Ghost of Tsushima
- Red Dead Redemption 2
- Far Cry 6
- Cyberpunk 2077
- Borderlands 3
- Batman: Arkham Knight
- Assassin's Creed Valhalla
- No Man’s Sky
Although it’s not an especially common feature, some of your Windows games might include a photo mode. How you access photo modes will vary between titles. However, you can often find screenshot tools for games from their pause menus.
Capture Your Favorite Gaming Moments With Screenshots
Taking pictures with screenshot tools preserves memories just like with real cameras. All the methods above for taking in-game snapshots will capture and preserve your favorite Windows 11 gaming moments. Then you can create a gaming photo album with a collection of in-game screenshots to display in image slideshows or share online.