By default, your USB flash drive uses the FAT (File Allocation Table) file system. This is due to the vast compatibility the FAT32 file system offers. However, the NTFS (New Technology File System) file system offers better security and larger storage support, among other benefits.
At times, you may also need to format your USB drive to NTFS for troubleshooting purposes. Regardless, Windows makes it easy to format external drives to different file systems without using third-party tools. Here, we show you the many ways to format a USB drive to the NTFS file system in Windows 11.
Note that formatting your USB drive will permanently delete all the data in the drive. Make sure to create a backup of any important data before formatting your drive.
1. How to Format the USB Drive Using File Explorer
File Explorer's context menu houses a bunch of useful utilities, including the Format option. It is the easiest way to format your USB drive with a few clicks.
To format your USB drive using File Explorer:
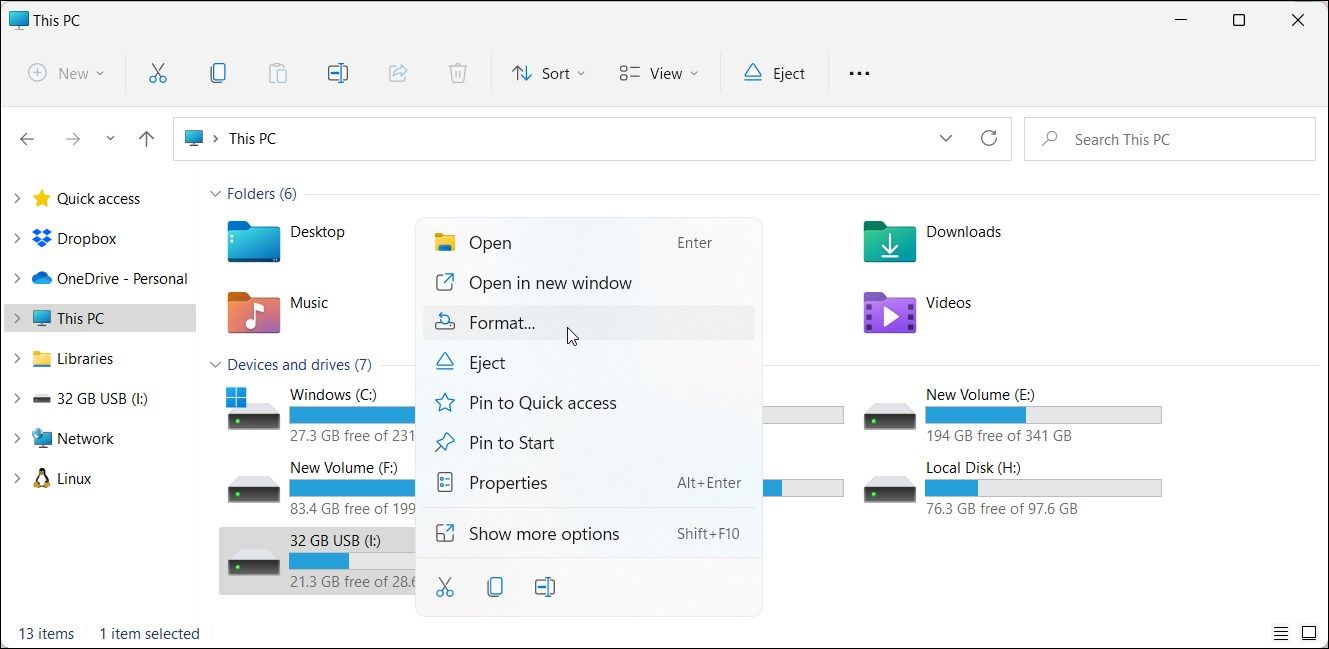
- Connect your USB drive to your PC and make sure it is detected.
- Press Win + E to open File Explorer. You can also access it from the taskbar or Windows search.
- In the left pane of File Explorer, click on This PC to view all the connected devices and drives.
-
Next, right-click on your USB drive and select Format.
- In the Format dialog, click the File System drop-down and select NTFS.
- Next, rename the Volume label (a name for your USB drive) or leave it as default.
-
Check the Quick Format option under Format options.
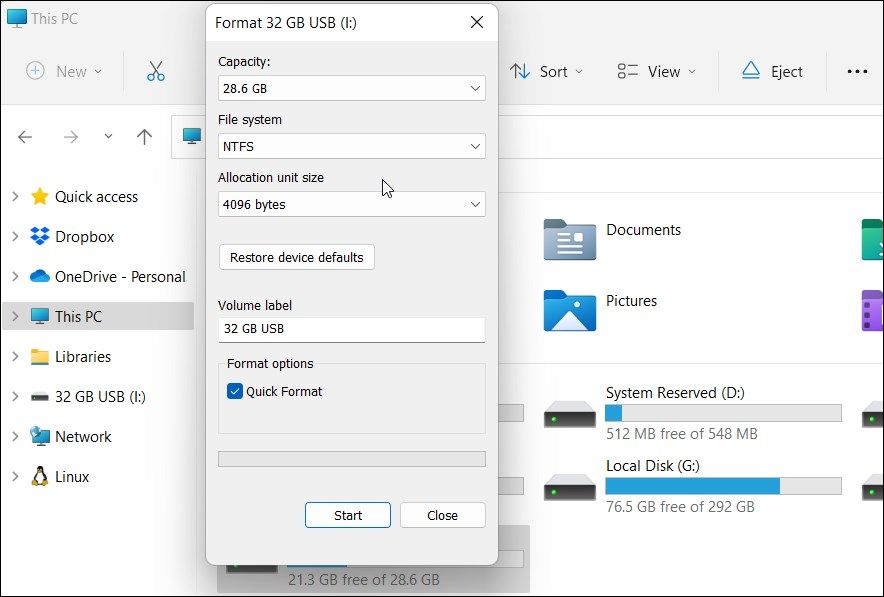
- Click on Start to initiate the format process. Click OK when the data deletion warning appears.
- Windows format utility will quickly format the drive to the NTFS file system.


How to Check Your USB Drive File Format

You can check your USB drive properties to confirm the changes and make sure it is using the NTFS file system.
To check the USB Drive file system format:
- Open File Explorer and click on This PC.
- Right-click on your USB storage device and select Properties.
- In the Properties dialog, open the General tab.
- Here, check if the File system section reads NTFS.
2. How to Format a USB Drive to NTFS Using Disk Management
Disk Management is a built-in Windows disk management utility. You can use it to create and shrink volume, change driver letters and even format detected drives.
Follow these steps to format the USB drive using Disk Management:
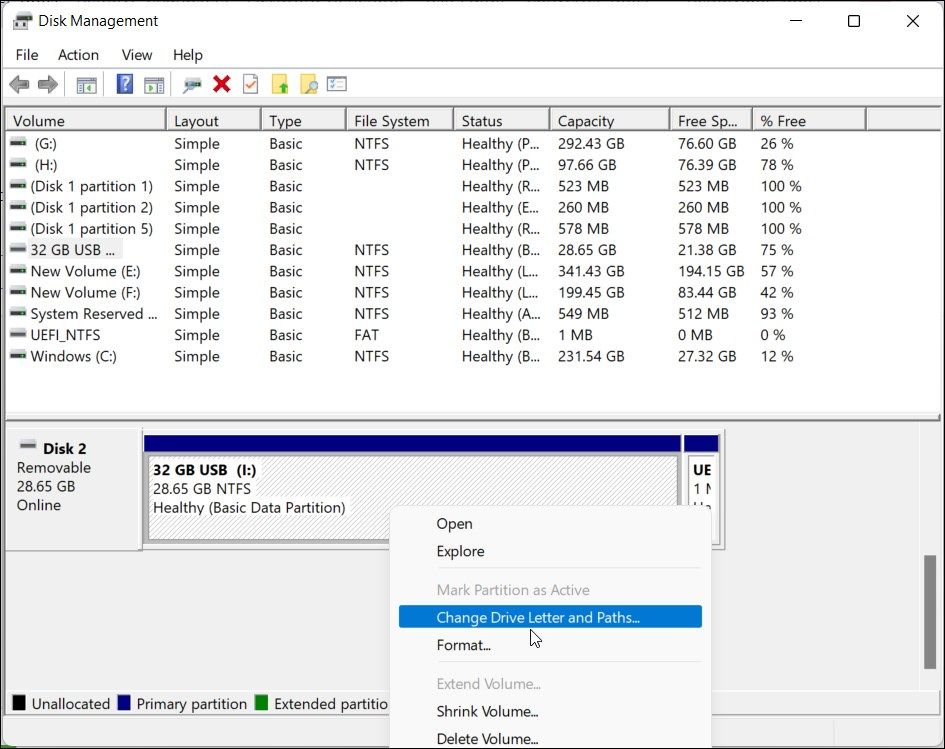
- Press Win + X to open the WinX menu.
- Click on the Disk Management tool to open the app. Disk Management will list all the storage drives connected to your computer.
-
Right-click on your USB drive in the list and select Format.
- Click Yes if a warning pop-up appears.
- In the format dialogue, type a name for Volume label.
-
Next, click the File system drop-down and select NTFS.
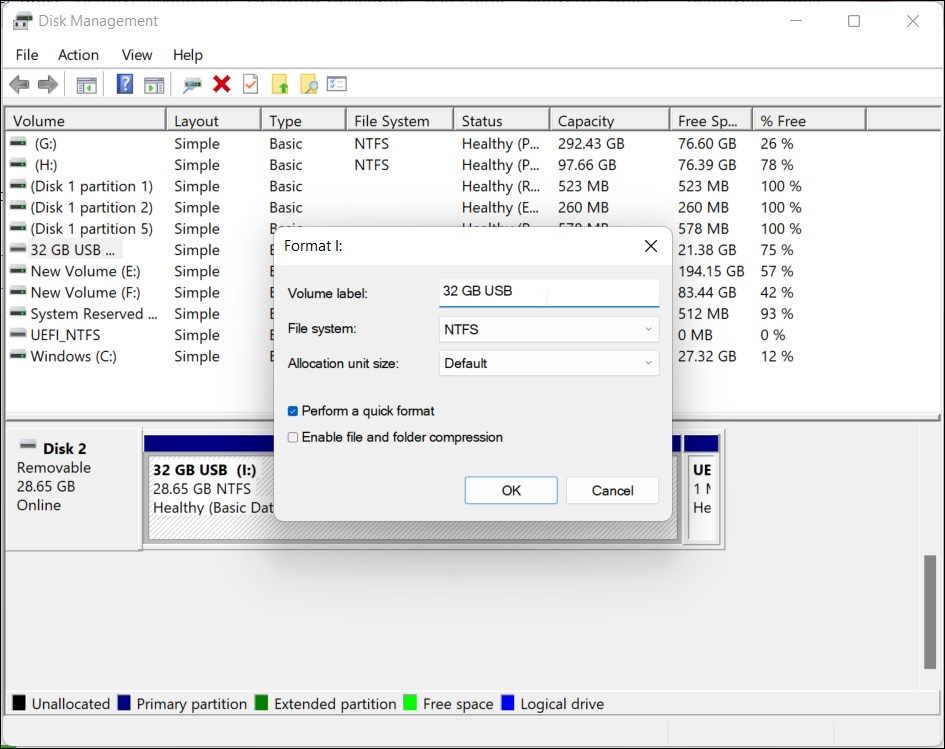
- Leave the Allocation unit size as Default.
- Next, check the Perform a quick format option.
- Next, click OK to format the drive. Wait for the process to complete and close Disk Management.


3. How to Format a USB Drive Using Rufus

Rufus is a third-party tool for creating bootable USB drives. Since the bootable USB drive process involves formatting the drive, you can use the tool to format your USB drive to the NTFS file system.
To use Rufus to format a USB drive:
- Go to the Rufus page, download the latest available version, and run the tool.
- If connected, Rufus will detect and show your USB drive in the Device drop-down.
- Next, click the Boot selection drop-down and select Non bootable.
- Under Volume label, type a name for your USB drive. You can also leave it as default.
- Next, click the File system drop-down and select NTFS.
- Click on Show hide advanced format options. Skip to the next step if you see Hide advanced format options instead.
- Make sure the Quick format option is selected.
- Finally, click on Start to format the drive.
- Click OK to confirm the action.
4. How to Format a USB Drive to NTFS Using Command Prompt
If the built-in tools don't work, you can use the diskpart command line utility to clean the drive and then format it to the NTFS file system.
To format the USB drive using Command Prompt:
-
Press the Win key and type cmd. Next, right-click on Command Prompt and select Run as administrator.
-
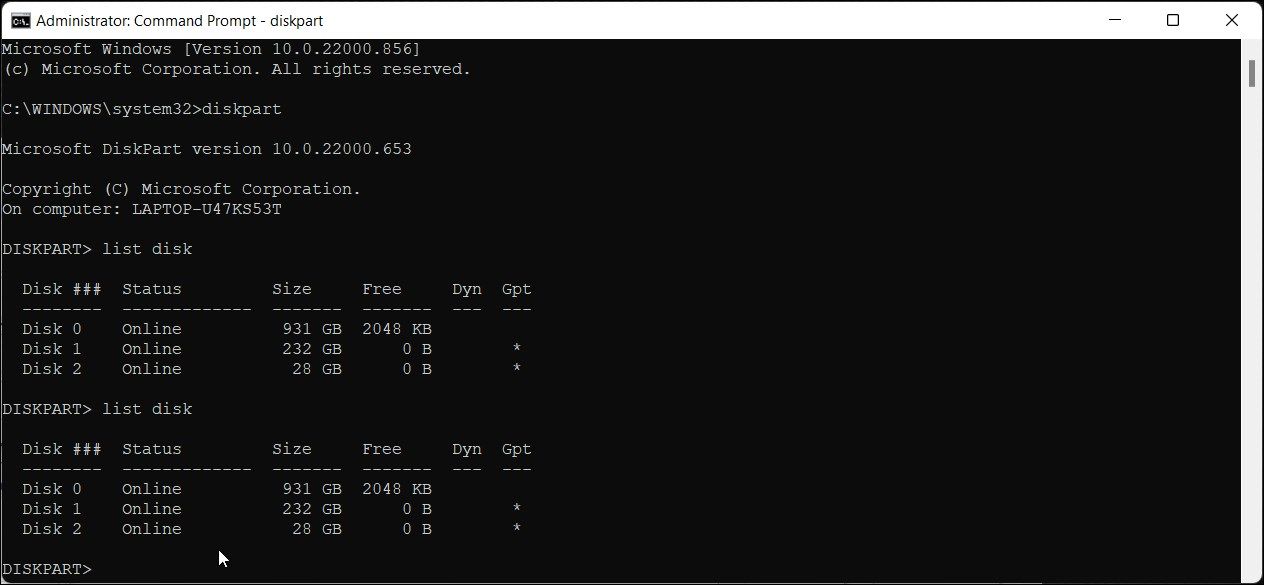
In the Command Prompt window, type the following command to launch the DiskPart command-line tool and press Enter to execute:
diskpart -
Next, type the following command and hit Enter to view all the connected drives to your computer:
list disk -
In the output, locate your USB drive. It is often listed at the bottom of the list. You can sort through the Size column to identify your USB drive.
-
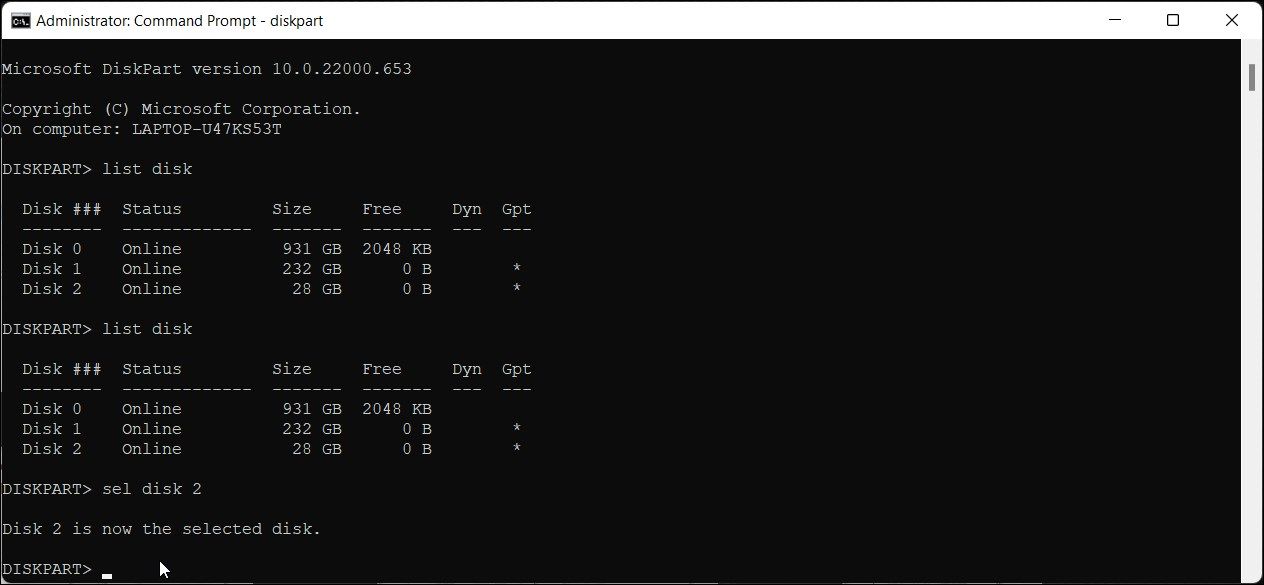
Next, use the following command to select your disk:
sel disk N -
Replace N in the above command with the disk number. For example, if your USB drive is listed as Disk 2, then the complete command will look something like this:
sel disk 2 -
Verify your disk selection once again to make sure you have selected the correct disk (USB drive). The next set of commands will erase your disk.
-
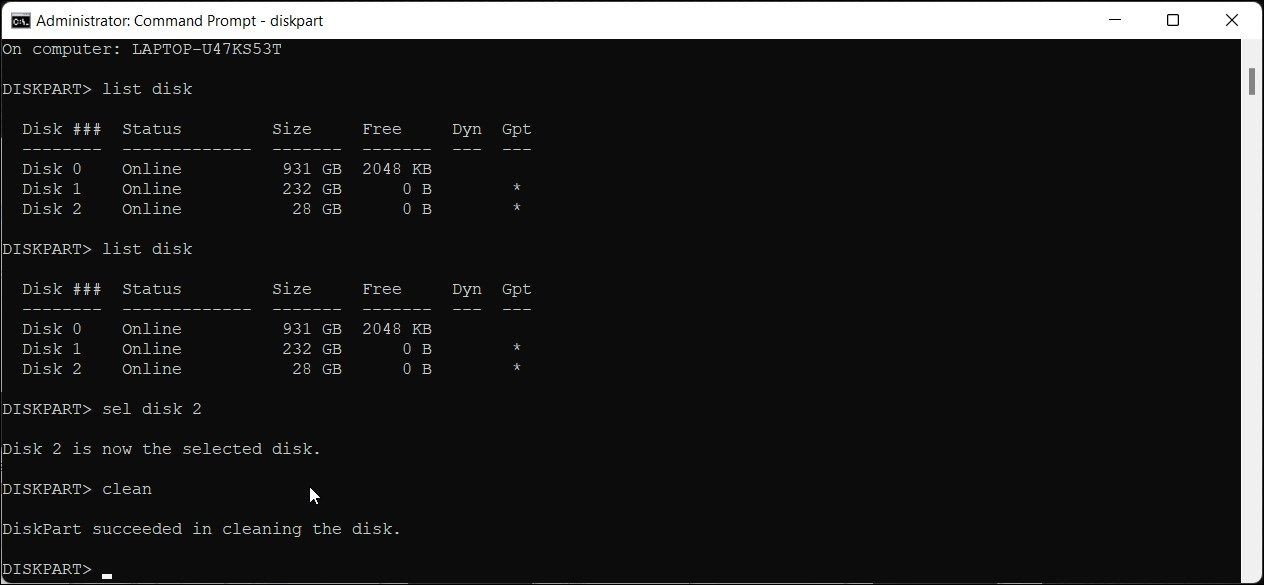
Next, type the following command to wipe clean your UBS drive:
clean -
Once the drive is clean, execute the following command to create a primary partition:
Create partition primary -
Now you are ready to format the cleaned USB Drive. Use the following command to quickly format your USB drive to the NTFS file system:
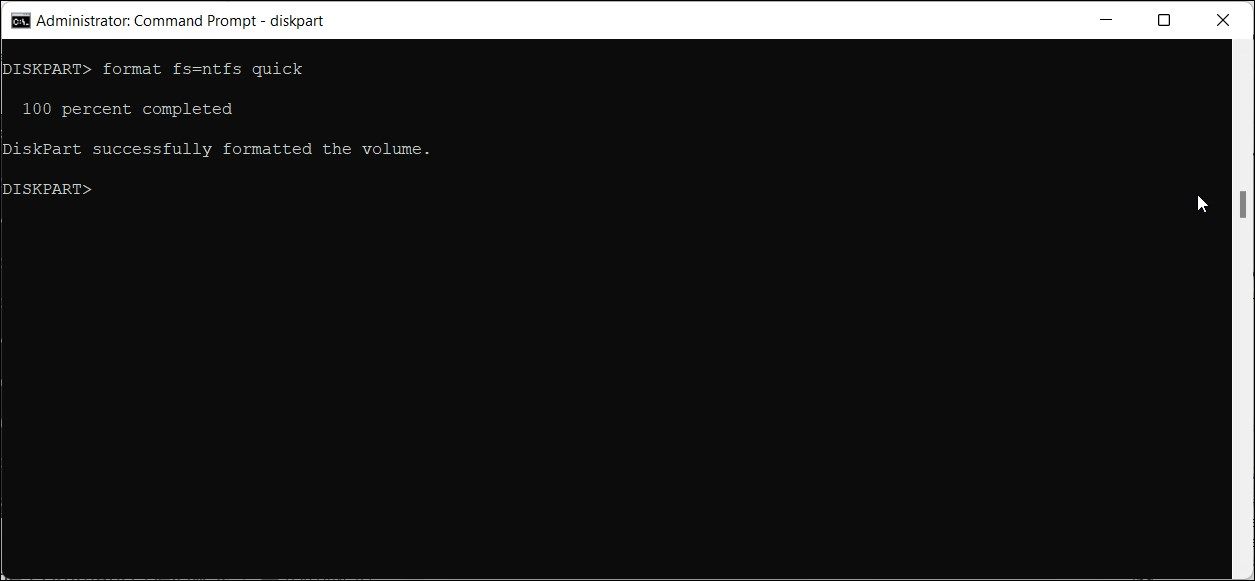
format fs=ntfs quick -
The above command will quickly format the drive and show a success message.
-
If you would rather perform a regular format and check for bad sectors, use the following command instead:
format fs=ntfs -
Next, you need to assign a drive letter to your USB drive. Use the following command. This step is optional.
Assign letter=J - If you need, you can replace J in the above command with any letter (currently unassigned).
- That's it! Close the Command Prompt, and open File Explore to confirm the changes to your USB drive.


The Many Ways of Formatting USB Drives to the NTFS Format in Windows 11
Whether you want to troubleshoot your Xbox with a repair or fix file transfer issues on Windows, an NTFS formatted USB drive is a prerequisite for many such things. Fortunately, Windows 11 offers multiple built-in tools to format your USB drive to NTFS. Additionally, you can also use the third-party tools like Rufus to format your USB drive to the NTFS file system.