Checking a folder's storage usage can help you identify directories that are taking up the most drive space on your PC. Once you identify the biggest space hogs, you can cut your largest folders down to size by uninstalling software and deleting (or even compressing) files in them.
There are a few different ways you can check the data sizes of folders within Windows 11. You can check folder size details within File Explorer, the Command Prompt, the Settings app, and numerous third-party software. These are four methods for checking folder storage usage in Windows 11.
How to Check Folders’ Sizes With File Explorer
File Explorer is Windows 11’s folder navigation and management app. Explorer’s detail view shows file sizes but doesn’t display folder storage usage. Nevertheless, you can still check folder sizes within File Explorer by viewing their properties windows as follows:
- Open Windows 11’s File Explorer.
-
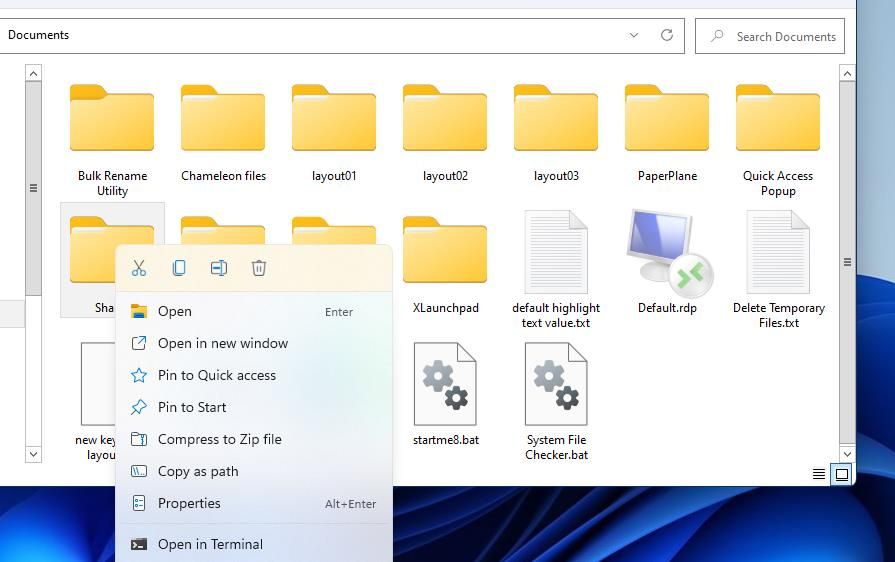
Right-click a folder you want to check the size of and select Properties.
-
Then check the size detail on the General tab.

- You can click OK to exit the folder’s properties window.


Another way you check a folder’s size info in File Explorer is to view its tooltip. Hover the cursor over a folder for a few seconds until a tooltip appears as in the snapshot below. That tooltip includes a size figure for the folder along with subfolder details.

Note that the tooltips won’t include size info if the Display file size information in tooltips option isn’t selected. If you can’t see folder size info in tooltips, click the See more (...) button and Options in Explorer. Then select the Display file size information in tooltips checkbox shown directly below, and click Apply to save.
How to Check a Folder's Size With the Command Prompt
You can also view folder size details within the Command Prompt by entering a short directory command. That command will display both a folder’s file size and the amount of free drive space. This is how to check a directory’s size within the Command Prompt.
- To open Command Prompt, find that app by entering cmd in the Start menu’s search box. Then click Command Prompt within your search results to bring up the command-shell app.
-
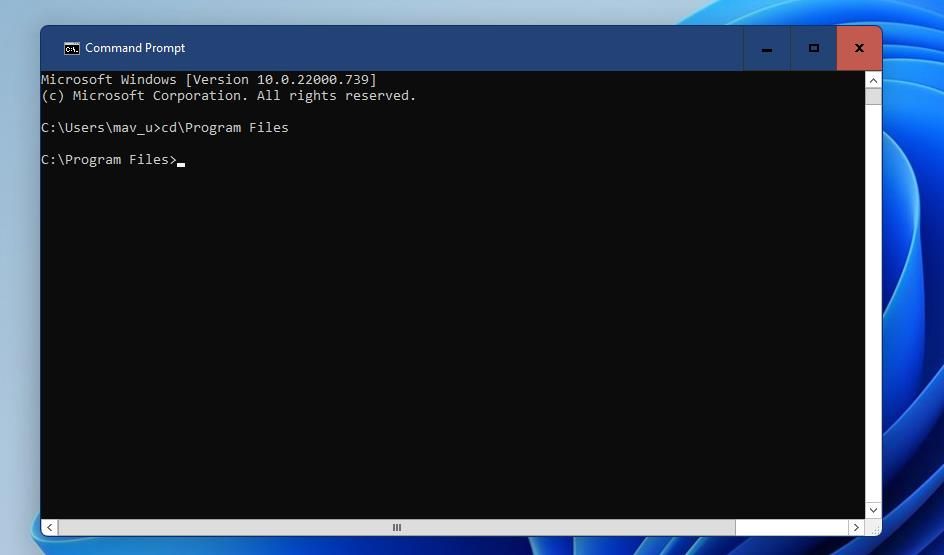
Next, open a folder you want to check the size for in the Command Prompt. To do so, you’ll need to enter a cd\folder name\subfolder name\subfolder name\subfolder name command that includes the folder’s directory path like the one shown directly below.
-
Then input this directory command within the Prompt and hit Enter:
dir/s


This command will run through all subdirectories and display an overall folder size at the end. The first total files figure shows the overall folder size in bytes. That figure could be 10 or even 11 numbers long if the folder size is in the gigabytes region.

How to Check a Folder's Size With Settings
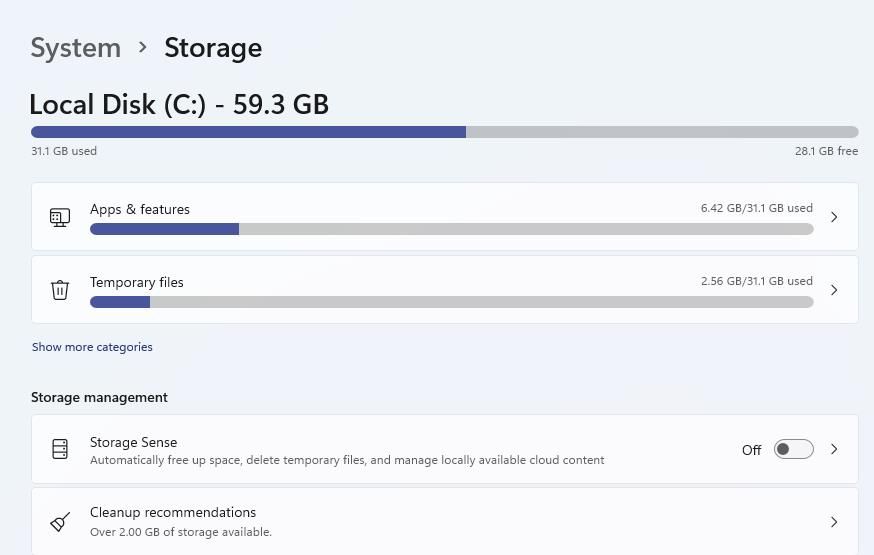
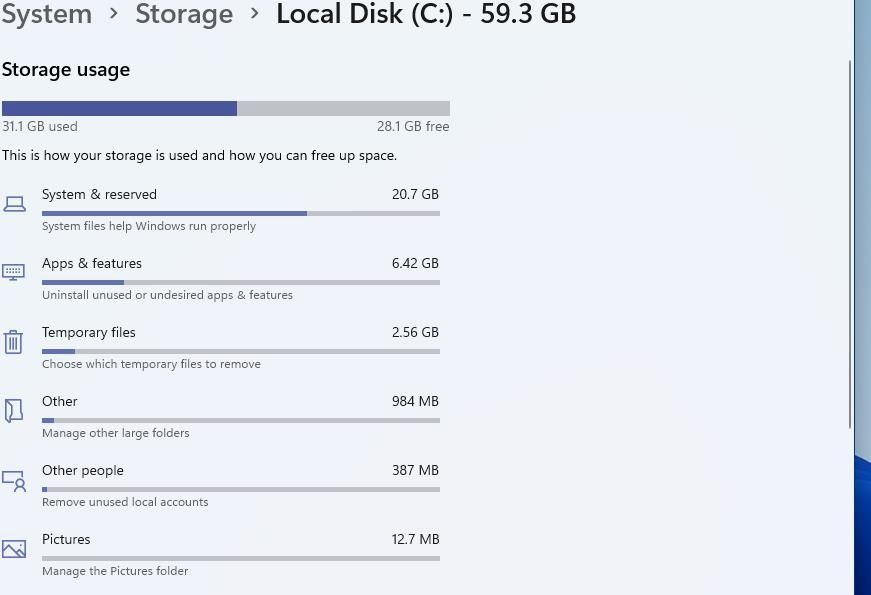
The Storage section of Settings provides a limited overview of folder sizes. There you can check the storage usage of some folders, but it doesn’t show all directories. You can check some folders’ storage usage with Settings like this:
- To open Settings, right-click the Start taskbar icon and select that app’s shortcut from the Power User menu.
- Select the Storage option (situated on the System tab) to view drive space details.
-
Click Show more categories under the Temporary files navigation option.
-
You can view size details for the Pictures, Documents, Music, and Videos user folders from the storage usage list shown directly below.
-
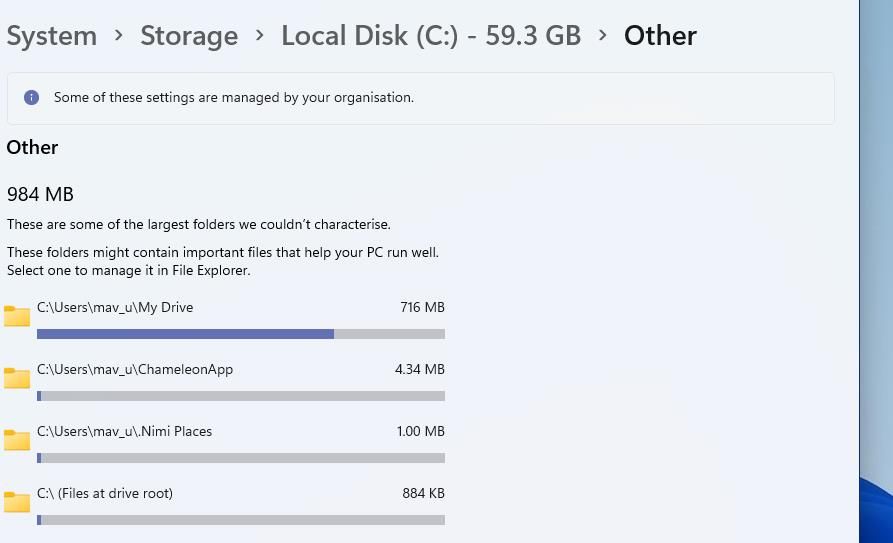
Click Other to view size details for non-categorized folders.


How to Check a Folder’s Size With TreeSize Free
The methods above may be ok for checking specific folder sizes. However, you can view a much more detailed overview of folders’ storage usage with the TreeSize Free software. TreeSize displays folders sizes in gigabytes, megabytes, and kilobytes with a directory list view. This is how you can check folders’ sizes with the FreeSize Free:
- Open the TreeSize Free download page on its publisher’s website.
- Select the Free Download option there.
- Choose TreeSizeFreeSetup.exe (with Installer, 9.02 MB) on the drop-down menu, and click the Download button.
- Open whatever folder includes the TreeSizeFreeSetup.exe installer with File Explorer.
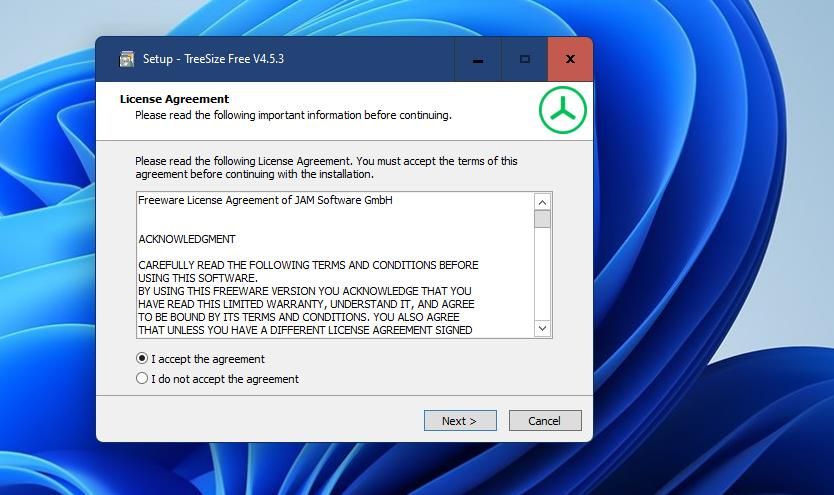
- Double-click the TreeSizeFreeSetup.exe file to open that setup wizard.
- Select English on the language menu, and click OK to proceed to the setup wizard.
-
Click the I accept the agreement option.
- Select Next to install the software.
- Click Launch TreeSize Free now to select that checkbox.
- Press Finish to open the TreeSize Free window.
-
Click Select Directory on TreeSize Free’s Home tab.
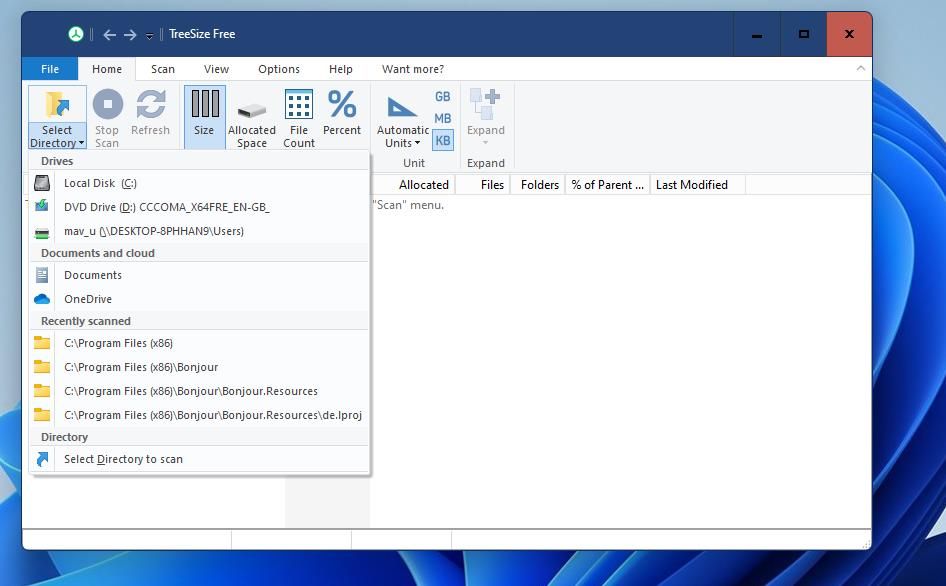
- Then click the Select Directory to scan option on the menu.
- Choose a directory to scan, and press the Select Folder button.


TreeSize will then display the overall size of the primary folder along with storage usage details for any subdirectories it includes. By default, its Size column will display the subfolders in descending order from biggest to smallest. The % of Parent column shows the relative percentage share each subfolder has of the overall root directory size.

TreeSize’s View tab includes options you can select to change how the software displays its details. If only want to see one specific detail, deselect the Show details option. Then click the Size, Allocated Space, File Count, or Percent option to select what storage usage info the software displays.
If you want to see a full overview of folder sizes on your PC’s hard drive, click Select Directory and Local Disk. Selecting that option will display the overall drive storage size and the amount allocated as in the screenshot directly below. Click the > arrows for all the folders to view storage usage info for all their subdirectories.

TreeSize is also accessible from File Explorer’s folder context menus. Right-click whatever folder you want to check the size for in Explorer to select Show more options. Then select TreeSize Free on the classic context menu to bring up storage usage details for the folder in the software.

Check Folder Storage Usage to Free Up Drive Space
So that's how you can check what folders are consuming the most storage space on your Windows 11 PC. Doing so will give you a better idea of the ones you most need to delete user files from. The best method above is to utilize TreeSize because it provides the most comprehensive overview of folder storage usage.