
DNS or Domain Name System is the decentralized naming system that identifies computers, servers, and other resources that the internet can reach. It basically helps identify your PC and traffic that comes in. However, you may experience some errors if your computer can’t access the DNS server.
If you are getting a “DNS Server Not Responding” error on your Windows 11, don’t panic. It is still a new system, and bugs can affect it from time to time. Just follow the fixes below, and you’ll get your system back up in no time.
How to Fix DNS Server Not Responding Error on Windows 11 Computer
There are many reasons why you are getting this error. In most cases, your computer can’t establish a connection with the internet. Sometimes, Windows misidentifies network-related problems as DNS issues, while in some cases, it’s caused by a third-party app interfering with your connection.
Whatever the reason, you can try the fixes below to solve the "DNS server not responding" error on Windows 11.
Important reminder: Before trying any fixes, make sure that you have a working internet connection. As mentioned, this is usually caused by network-related issues, so it’s best to eliminate this cause right away. If you have problems with your internet, fix it first before going through all these steps.
1. Disable Third-Party Antivirus
If you have a third-party antivirus installed on your computer, like Avast AVG, or McAfee, it might be the reason why you’re receiving this error. Sometimes, it can interfere with your network and cause various errors such as DNS issues.
To check if this is causing the issue, temporarily turn off your third-party antivirus software and check if you still have a DNS server problem. If it works properly, the program is likely the cause, and you should consider other ways to protect your computer.
You can either uninstall it completely and use the Windows 11 built-in security program, Microsoft Defender, or wait for a new Windows 11 update and see if it will fix this issue.
2. Flush Your DNS
This is the most popular way to fix most DNS problems, especially if it’s due to misconfigured settings in your device. Here’s how you can flush and renew your DNS on Windows 11.
- Open Run by pressing and holding Win + R keys. Then, type cmd and press Enter to open the Command Prompt.
-
On the Command Prompt, type ipconfig /flushdns and press Enter to execute the command.

-
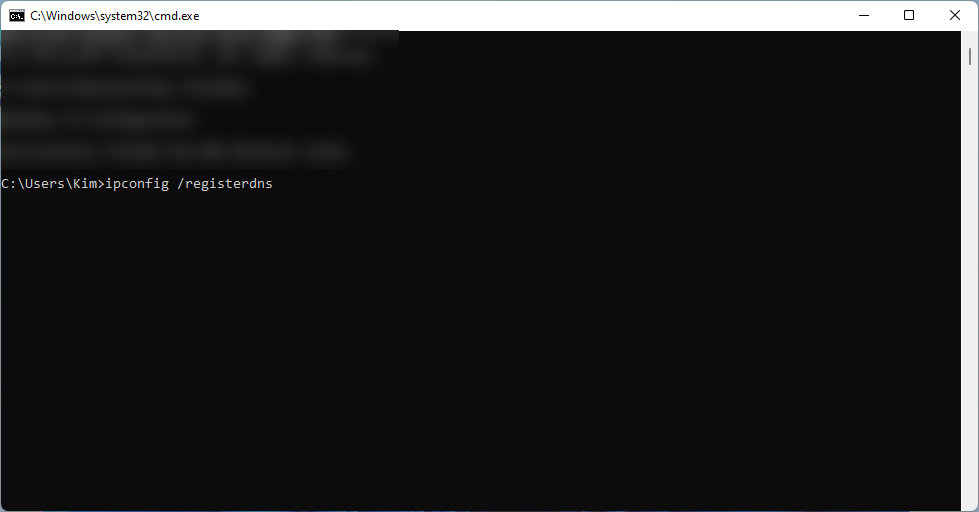
Then, type ipconfig /registerdns and press Enter.

-
After that, type ipconfig /release and hit Enter.
-
Next, type ipconfig /renew and press Enter.

-
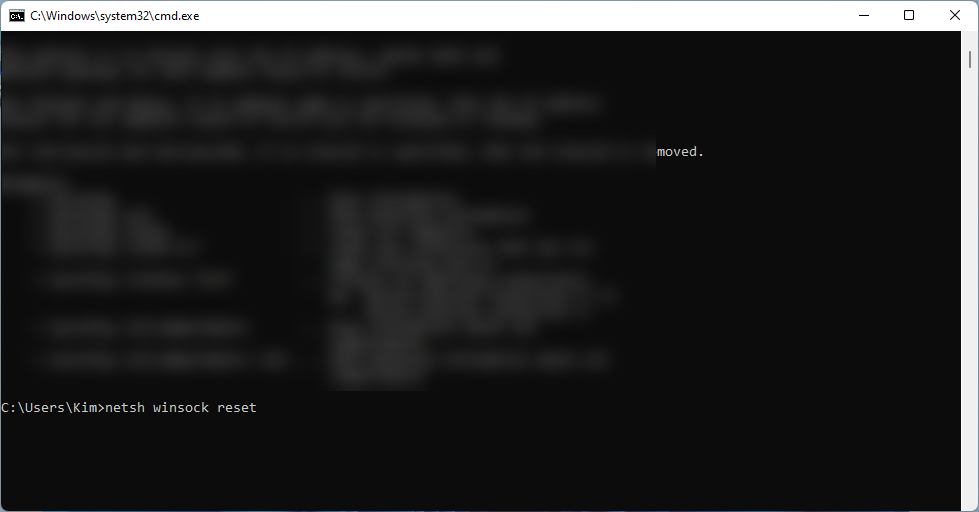
Lastly, type netsh winsock reset and press Enter.

-
Once you’ve typed in all the commands, restart your computer. This should fix the DNS error caused by a misconfigured setting. If the issue persists, try the following fixes.


3. Change the DNS on Your Windows PC
In some cases, using your network provider’s default DNS can cause issues to your system. If you haven’t changed yours yet, we recommend switching to a free DNS provider. You can either change it from your router settings or your computer’s network adapter setting. Here are some of the free DNS providers and addresses you can use:
- Google: 8.8.8.8 | 8.8.4.4
- OpenDNS Home: 208.67.222.222 | 208.67.220.220
- Cloudflare: 1.1.1.1 | 1.0.0.1
- AlternateDNS: 76.76.19.19 | 76.223.122.150
- AdGuard DNS: 94.140.14.14 | 94.140.15.15
- Quad9: 9.9.9.9 | 149.112.112.112
Follow the instructions below to change your DNS setting on your Windows 11 computer:
- Press and hold Windows + I keys to open Settings.
- On the Settings app, click ‘Network & Internet > Wi-Fi > Hardware Properties.
- From the DNS server assignment, click Edit.
-
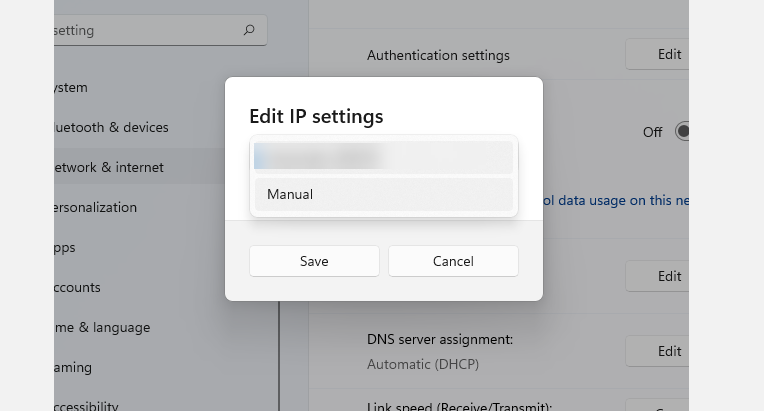
Under the Edit DNS settings section, choose Manual from the drop-down menu.

-
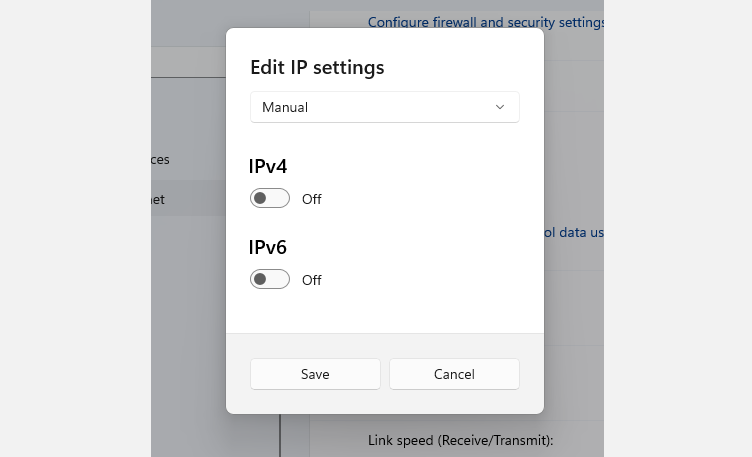
Depending on the DNS provider you choose, turn on the switch for IP4 or IPV6.
Author screenshot - no attribution needed -
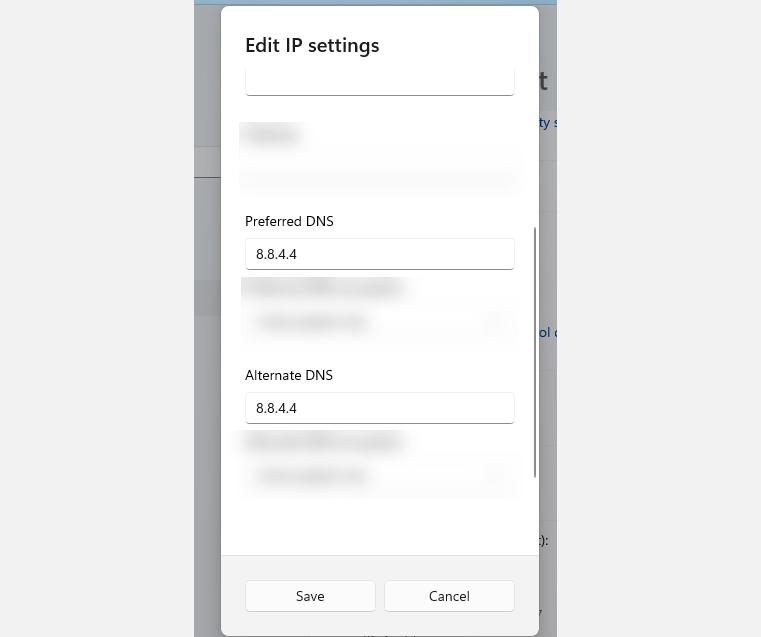
Then, enter the Public DNS you chose under the Preferred DNS section. Next, type in the address in the Alternate DNS section.
-
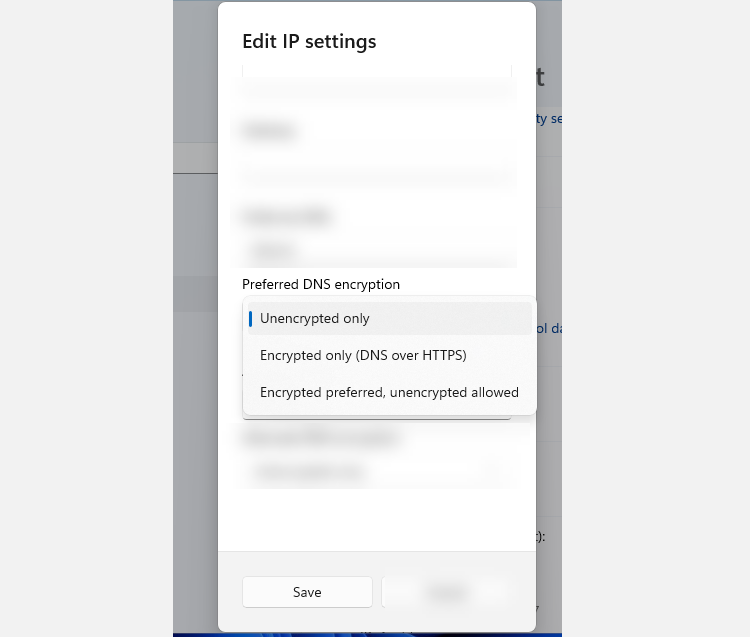
If there’s available encryption, select it from the option. Then, click Save.
-
You now have a new DNS setting on your computer. Check the error and see if your system is working as usual.


4. Update Drivers
If you want to quickly update the essential drivers of your computer, you can download and use a free driver updater for Windows. However, if you don’t like installing other programs on your computer, you can manually update them using the Windows settings. Follow these steps:
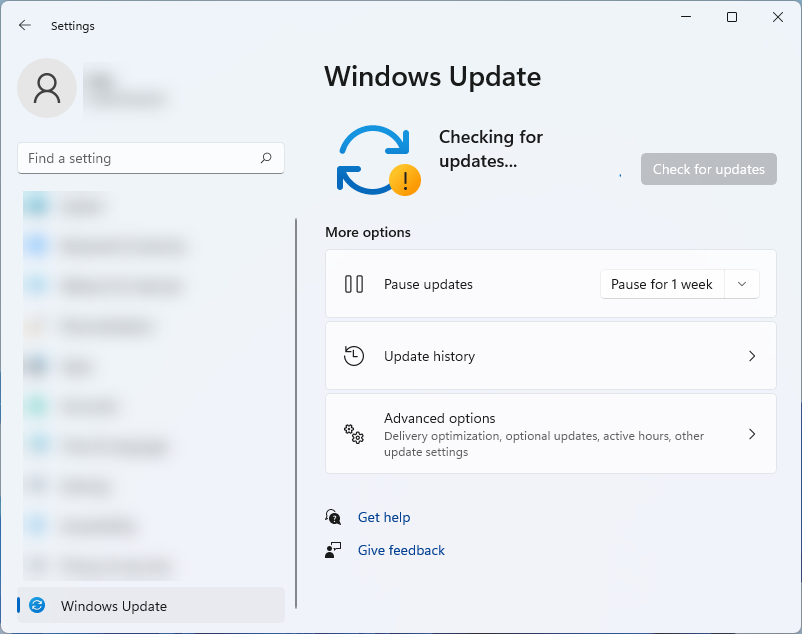
- Open Settings by pressing and holding the Windows + I keys.
- Then, click Windows Update and then, click the Check for updates button.
-
Lastly, install any updates available and restart your system.
- Once your computer booted, check if you’re receiving the same error.

5. Boot into Safe Mode
If you’re still experiencing the issue even after doing all the troubleshooting steps mentioned above, it’s best to restart your PC in Safe mode. In Safe mode, Windows will only run basic settings and \remove any settings that could cause the error. Here’s how you can boot into Safe mode.
- Open the Start menu, and click the Power icon.
- Then, press and hold the Shift key and click Restart.
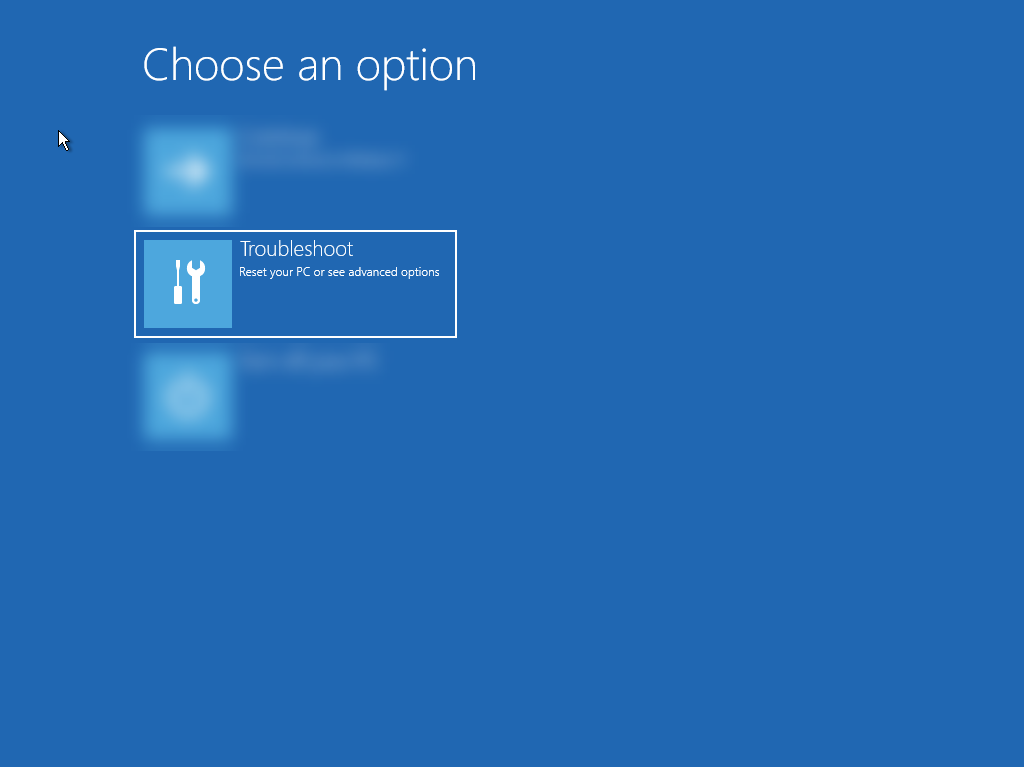
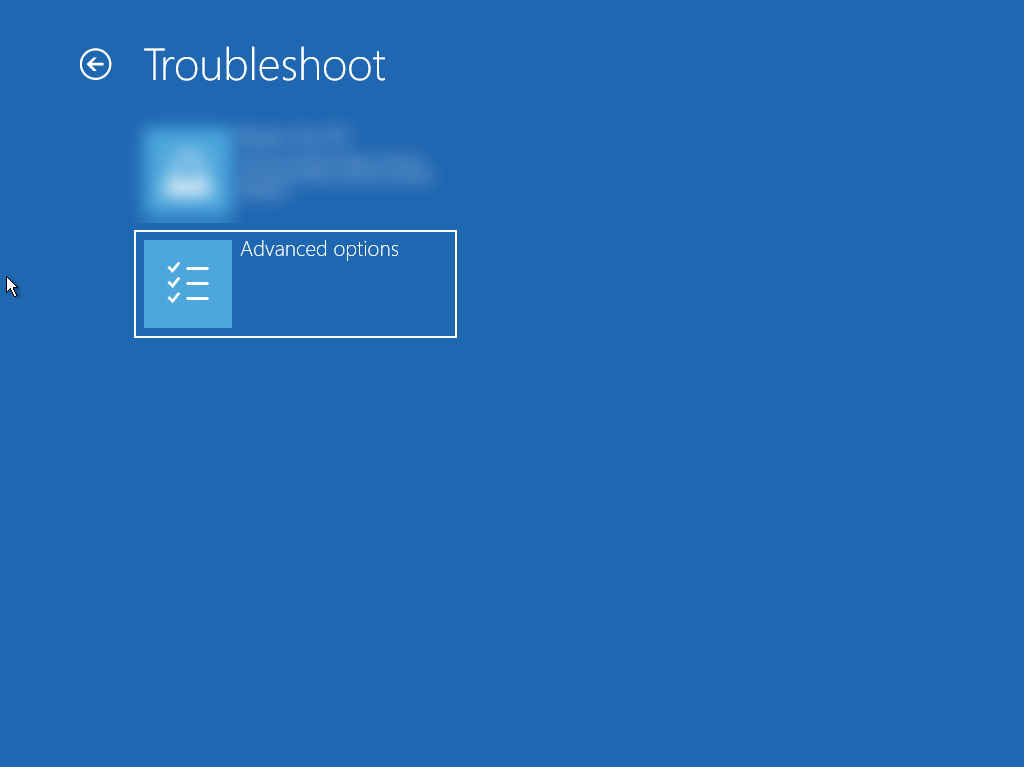
- On Recovery Options, click Troubleshoot
-
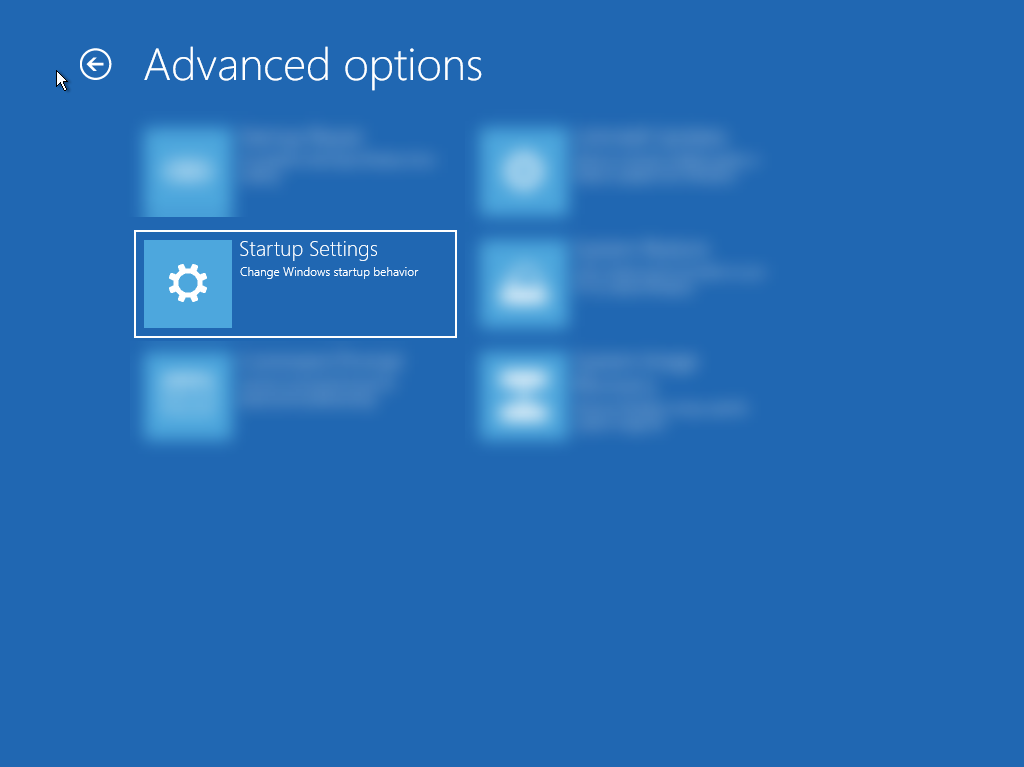
Then, click Advanced Options.
-
On Advanced options, choose Startup Settings.
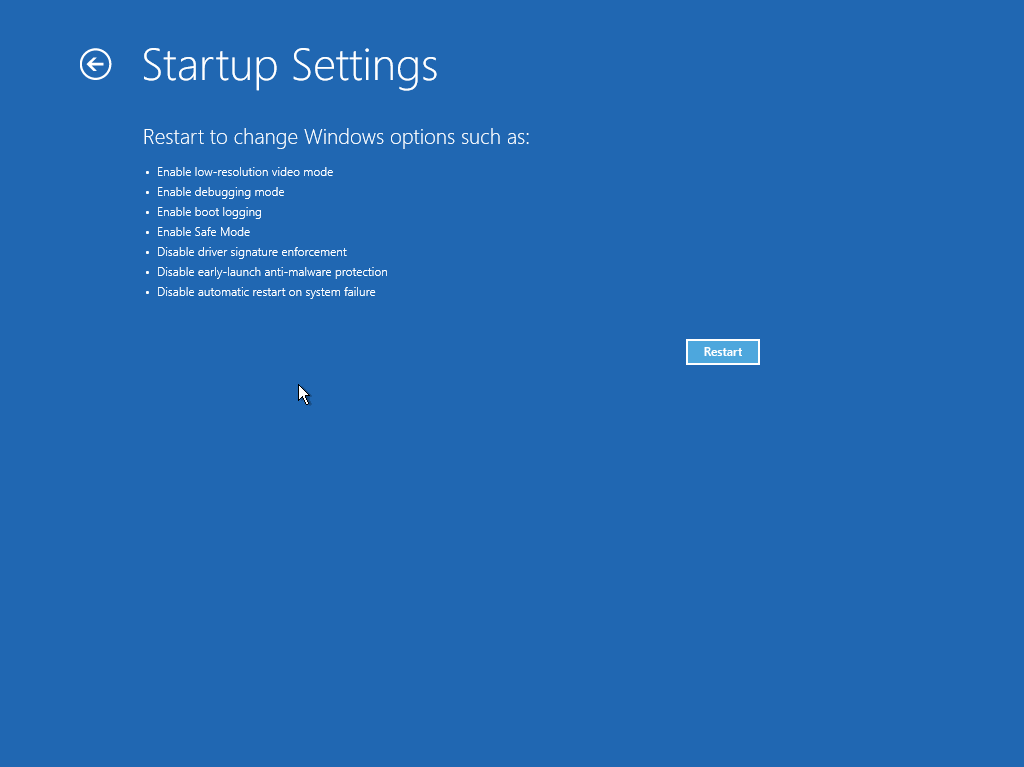
-
Next, press Restart.
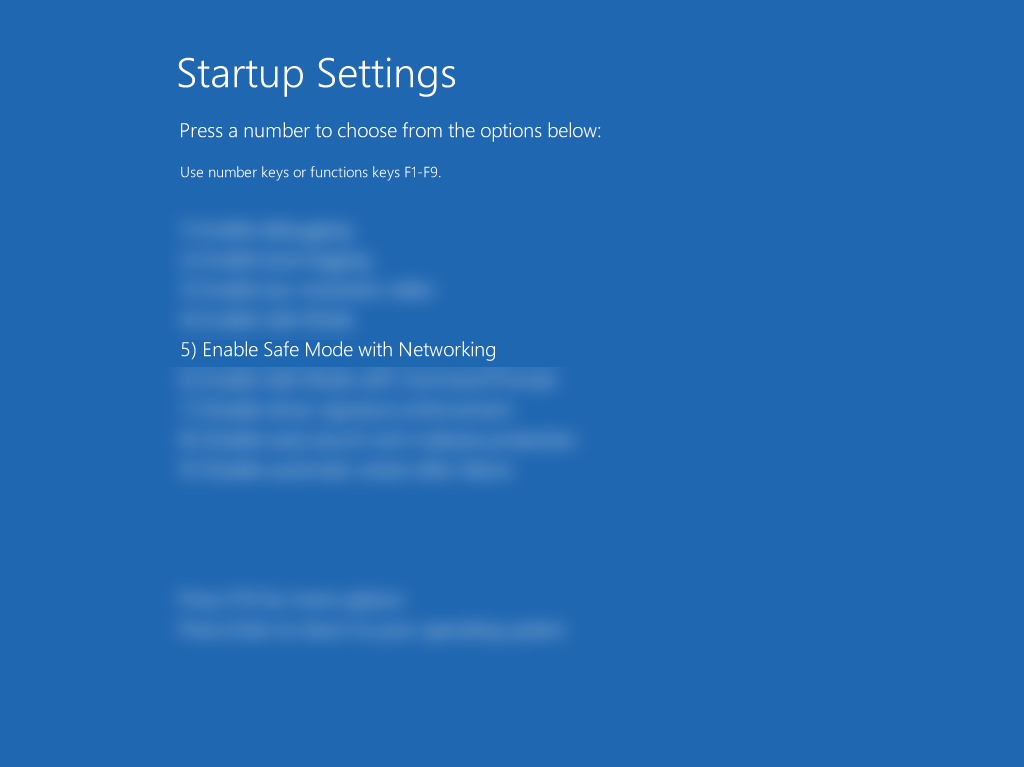
-
Next, press 5 or F5 to restart your computer in Safe mode with networking. This will also allow you to access the internet even on Safe mode.
-
After your PC reboots in Safe mode, test out your internet and see if the issue persists. If it doesn’t, the DNS error you’re facing is likely caused by a third-party app or service you’re using. Unfortunately, there’s no automatic way to determine which one is causing it. You have to manually uninstall or disable the app to check which is causing the issue.


A Better Windows 11 Experience
The “DNS Server Not Responding” error can be frustrating and concerning, especially when you’re trying to access important pages and settings on your Windows 11 system. There are several reasons you're experiencing this issue, but there is no need to panic. You can easily solve the problem, even if you’re not too technical.