The backgroundtaskhost.exe is a genuine process and is part of the Microsoft Windows operating system. However, when working on your computer or launching an application, you may encounter the BackgroundTaskHost.exe error.
This is a system error, and the error message can be different depending on the user. As such, it makes it hard to pinpoint the cause of the error. Here we show you a few troubleshooting steps to help you fix this error in Windows 11.
What Causes the BackgroundTaskHost.exe Error?
When this error pop-up, you are likely to see one of the following error messages:
- backgroundTaskHost.exe - System Failure
- backgroundTaskHost.exe – Application Error
These errors can occur due to incorrect registry modifications, third-party app conflict, and system file corruption. Unfortunately, there is no go-to solution to fix this problem.
We have listed a few system troubleshooting steps to help you resolve this error on your Windows 11 computer.
1. Perform a Clean Boot

In Clean Boot mode, Windows starts with a minimal set of drivers and startup programs to determine if a third-party app conflict is triggering the backgroundTaskHost.exe error in Windows 11.
You can clean boot Windows 11 from System Configuration. After the restart, Windows will launch in the Clean Boot environment. Continue to use the system and check if the error occurs. If yes, proceed with the next troubleshooting method.
If not, check your system for the recently installed apps. To do this, go to Settings > Apps > Apps & features. Click the Sort by drop-down and select Install date. Uninstall the most recently installed apps, such as Dell Assistant, that may cause this issue and restart your PC.
Additionally, check the update history in Windows 11 for your computer. Bad Windows updates can often cause the system to malfunction. If you determine an update to have caused the problem, you can uninstall Windows updates to fix the error.
2. Run System File Checker and DISM Scan Tool

The System File Checker tool is a built-in Command Prompt utility. It lets you scan Windows for system file corruption and replace it with new files stored on your system.
Deployment Image Servicing and Management (DISM) is another command-line utility that you can run to repair a Windows Image. Here’s how to use these tools to fix the backgroundTaskHost.exe - system failure error in Windows 11.
- Press the Win key, and type cmd. Then, right-click on Command Prompt and select Run as Administrator. Click Yes if prompted by UAC.
- Note that the DISM /Online command requires an Internet connection to fetch files from the Windows update servers. Make sure you are connected to the Internet, and then run the command below.
-
In the Command Prompt window, type the following command and press enter to run the DISM tool:
DISM.exe /Online /Cleanup-image /Restorehealth
- The DISM tool will use the Windows Update to provide the files required to fix issues with your system files. The Restore Health process may take some time and even appear stuck. So, wait till the process is complete. Once done, follow the next step.
-
In the Command Prompt window, type the following command and press Enter to run the System File Checker tool:
sfc /scannow
- The System File Checker tool will scan the protected system files for integrity violation and replace corrupted files from a backup copy stored in your boot drive.
- Wait till the verification is 100% complete. Once the scan is complete, close Command Prompt and restart your PC.
3. Perform a System Restore
Windows 11, like its predecessor, creates a new restore point whenever you make a significant change to your system. Restore point lets you undo the most recent changes and restore your PC to an earlier point in time when it was working without the error.
It is an excellent recovery option when you run into errors after making system modifications that may have damaged the system files.
Note that restore point is not enabled by default on all systems. Therefore, if you haven't enabled it manually, the chances of you having a restore point are minimal.
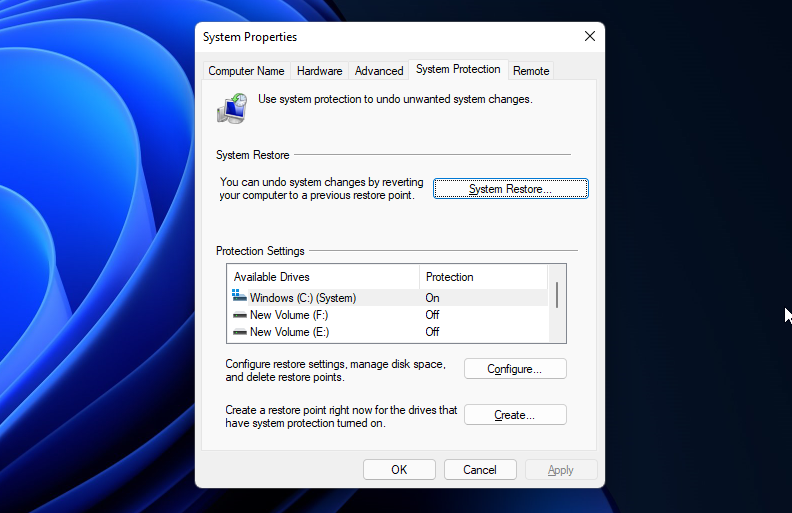
- Press the Win key, type system restore in Windows search and click on Create a Restore Point.
-
In the System Properties window, click the System Restore button.
- If a Recommended Restore point is available, select it and click Next. If not, select Choose a different restore point and click Next.
-
System Restore will show all the available restore points. Select the recent one and click Next.
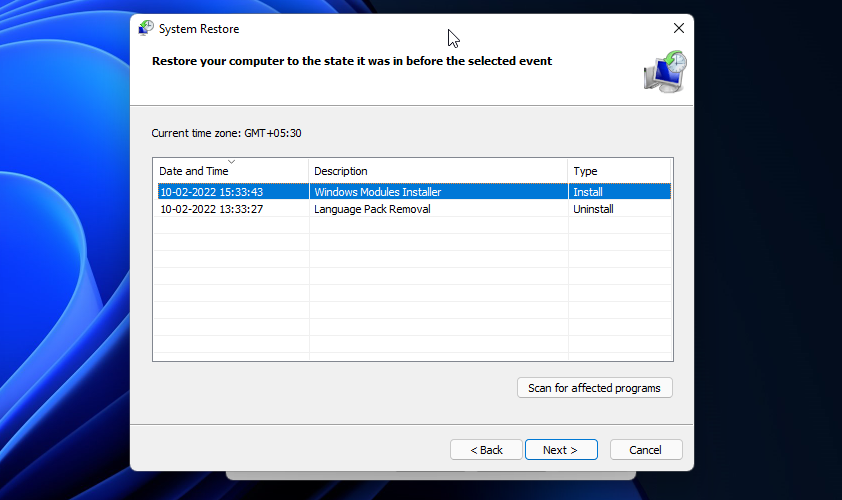
- Click on Scan for affected programs to view the programs and drivers that might be removed and restored during the process.
- Read the description that shows to what state it will restore your computer. Click Finish to begin the system restore process.


This process will take some time, so wait till it is complete. Your PC will restart after the process is complete.
Once done, you will be greeted with a success message confirming the system restore was successful. If the error persists, try other restore points available to fix the problem.
4. Perform an In-place Repair Upgrade
Critical system errors often require a clean install to fix the problem. However, performing a fresh install is cumbersome as it will delete all your files and apps and force you to start from scratch.
This is where the Windows repair install comes in handy. You can perform an in-place repair upgrade to reinstall Windows 11 without deleting apps. Follow the link for a detailed step-by-step guide.
This is a handy solution to fix many critical Windows problems that require a reinstall.
5. Reset Your Windows 11 Computer
If the repair reinstall didn't work, you can reset your Windows 11 computer to its factory default settings to fix the error.
Reset this PC is a recovery option available in Windows OS. It allows you to reset your PC to factory default by deleting the third-party apps without affecting your personal files and folders.
To reset Windows 11:
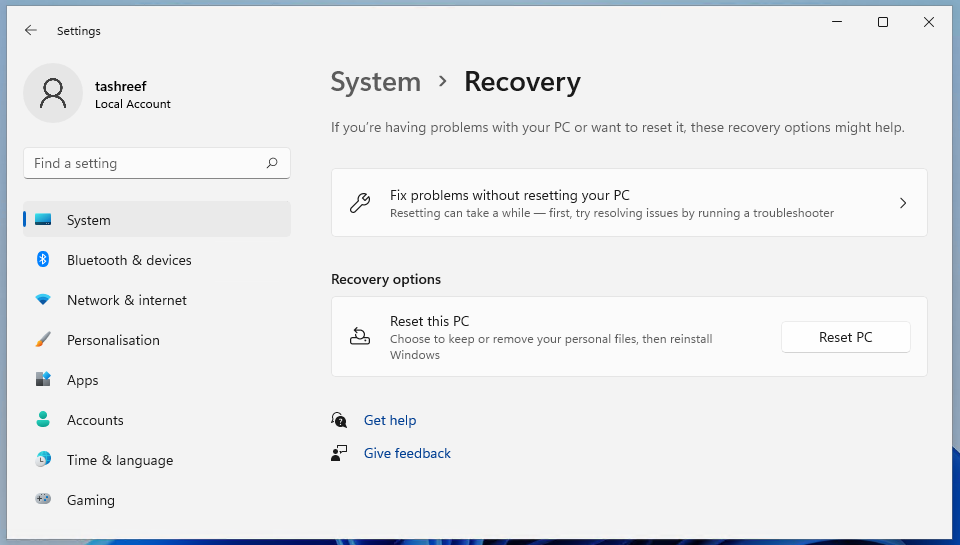
- Press Win + I to open Settings.
- In the System tab, click on the Recovery option (right pane).
-
Click the Reset PC button for Reset this PC.
-
Select Keep my files if you want to remove apps and settings, but keep your personal files. Else select Remove everything.
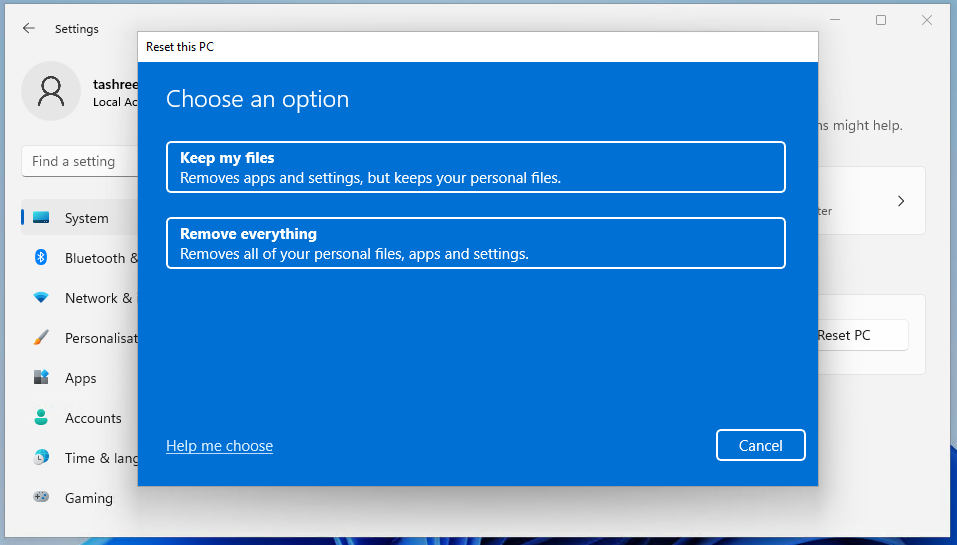
- Next, select Local reinstall. This will reinstall Windows from this device. If Local reinstall fails to fix the error, you can try again with the Cloud download option.
- Confirm the selection and click on Reset.
- Windows will start the Reset process. Your PC may restart a few times during the process, so leave it idle. After the rest, you can set up your Windows 11 PC with a local user account or Microsoft Account.


Fixing the BackgroundTaskHost.exe Error in Windows 11
You can fix the BackgroundTaskHost.exe error in Windows 11 by uninstalling the incompatible third-party apps. For additional diagnostics, perform a system restore or repair reinstall Windows 11.