If one of the disks in your Windows computer is running out of space, you can extend a disk's capacity by using the unallocated space in your hard drives. This method is handy as you won't need to format an entire volume so that you can repartition it. You can just shrink one, to extend another.
So, how do you extend a hard drive volume in Windows 11? Let's find out.
Why Extend a Data Volume?
There are various reasons why you would want to extend a data volume. However, the most occurring one is that you need more space in a given drive. Extending a hard drive will let you achieve more space in a given drive, though there's one requisite: you must have unallocated space available to extend your drive with.
There are multiple methods you could use for extending your data volumes. We've gone through four of the most common methods in this article.
How to Extend Data Volumes in Windows 11
Before extending your volumes, it's good to know that volumes and disk spaces follow an extension of the first law of thermodynamics. Disk space cannot be created or destroyed; it can only be transferred from one disk to another.
When you want to extend a volume, you require free space to extend that volume. And when you shrink a volume, this leaves a surplus of unallocated space that you can use later on.
As such, if your disks are at their maximum sizes, and there's no unallocated space, you cannot extend it. You'll need to shrink another volume, in order to extend the one you want more space on.
Disks often have system files that Windows refuses to move, and this can get in the way of you shrinking a volume. Depending on where exactly the system files are, and what they are, you may not be able to shrink a volume even though you have plenty of free space on that disk. You can get rid of most of these files, though the how-to is an entire article to itself.
With all that in mind, let's get down to extending volumes. As mentioned before, there are multiple methods you can use to extend a volume in Windows 11.
1. Windows Storage Settings
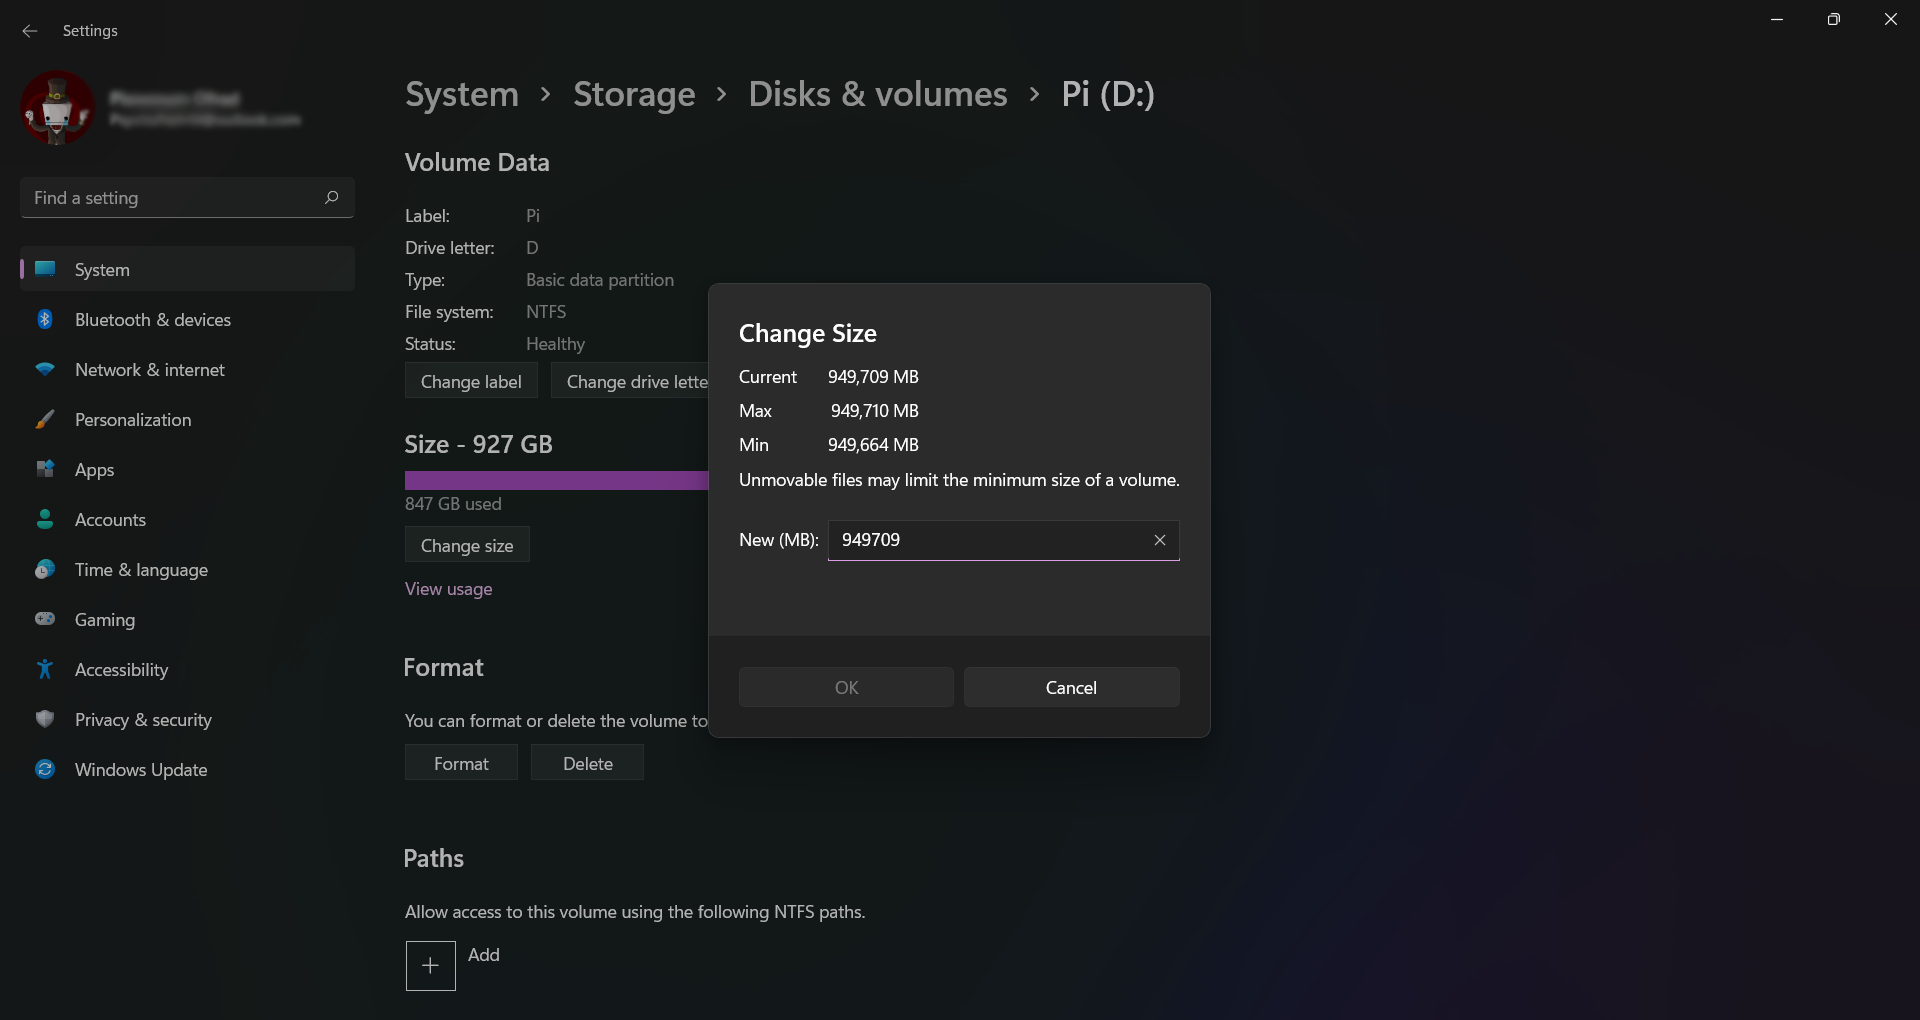
In Windows 11 most of the settings can be directly accessed through the Settings app, rather than the Control Panel or separate apps. You can extend your data volumes directly through the Settings app.
- Open the Settings app. You can search for it in the Start menu or bring it up from the app list.
- In the Settings app, from the System tab, select Storage.
- Under Storage management, select Advanced storage settings.
- Select Disks & volumes. This will take you to a new page.
- Click the volume you want to extend and then select Properties.
- On the new page, under Size, click on Change size.
- Enter the new size in the text box and then click OK.
You can use these same steps to shrink a data volume as well. If the new size is lesser than the current size, the data volume will shrink and the remaining space will become unallocated. You can later use this unallocated space to extend other volumes or this same volume.
2. Disk Management Tool
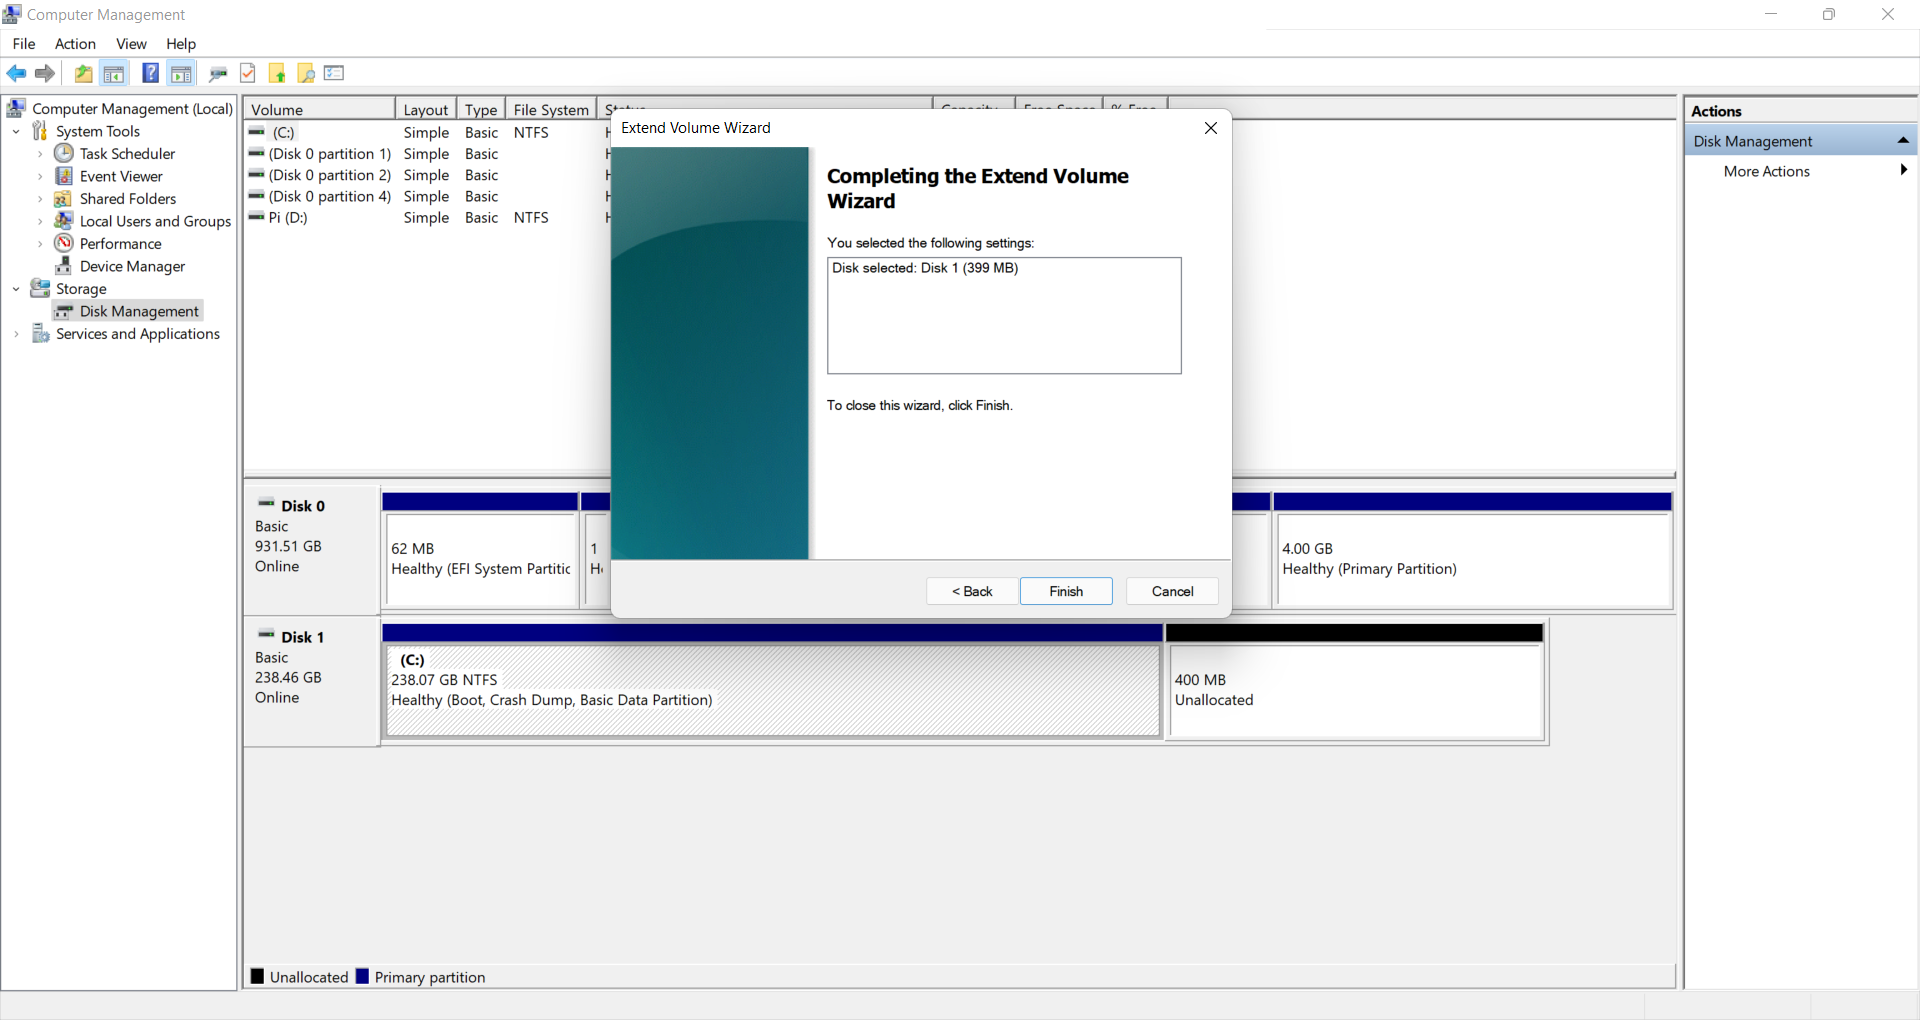
Alternatively, you can use the classic Disk Management tool which is still present and mighty functional in Windows 11. This is similar to Storage settings except that extend and shrink are separate functions.
- Open Windows Explorer.
- Right-click on This PC and select Manage from the drop-down menu. In Windows 11, select Show more options and then select Manage. This will open the Computer Management window.
- Inside Computer Management, select Disk Management from the categories on the left.
- On the bottom half of the screen, right-click on the volume you want to extend.
- From the right-click menu, select Extend Volume. The Extend Volume Wizard will appear.
- Click Next.
- Select the available spaces and then enter the amount you want to extend the volume by in the text box.
- Click Next and then finally click Finish.
3. Command Prompt
If graphical interfaces don't suit you and you want to command Windows to extend your volumes using a command line, then you should use the good old Command Prompt.
- Open the Command Prompt. You can search for it through the Start menu, or type cmd in the Run app.
- Inside Command Prompt, type the command below and press Enter: This will take you to the DiskPart menu of Command Prompt.
- If asked for Admin permission, select Yes.
-
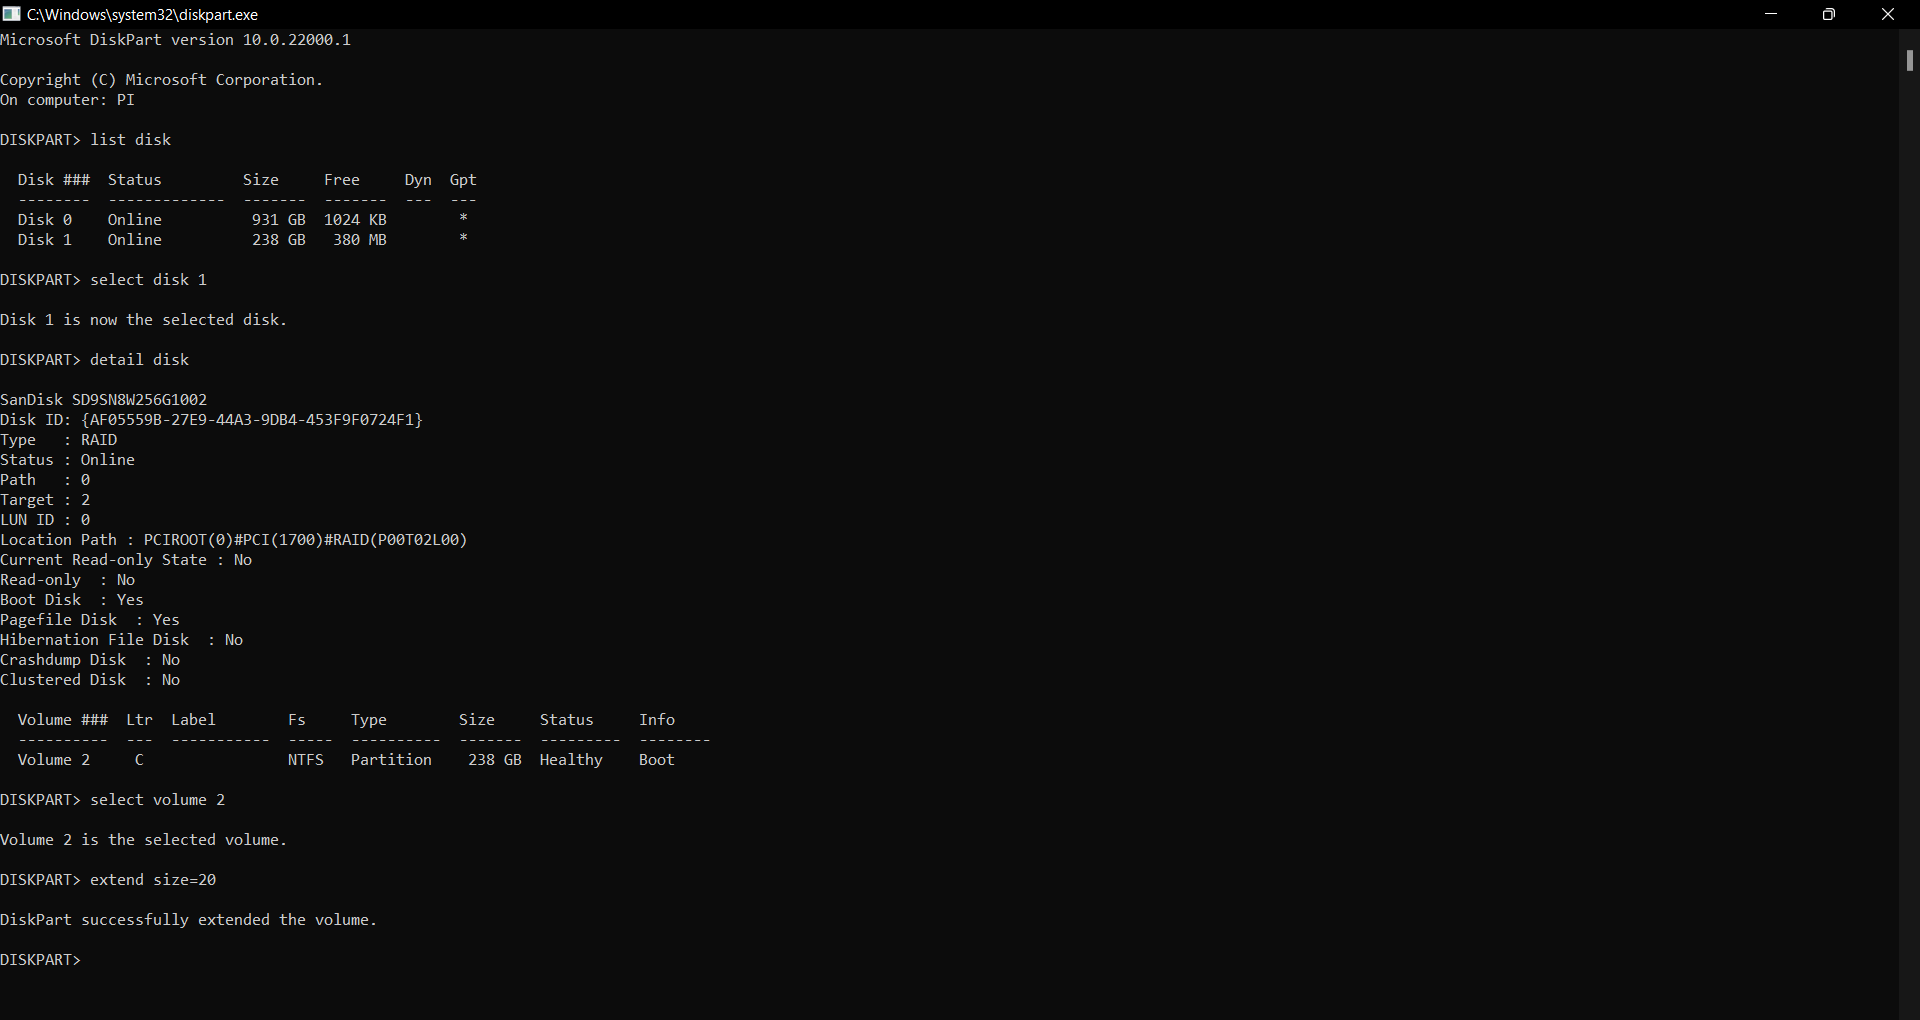
Before you proceed, you're going to know what exactly you're dealing with. So let's get a list of your disks. Enter the command below and press Enter.
list disk -
Select the disk you want to extend with the command below:
select disk <NUMBER> -
Now enter the command below to get a list of your volumes in that disk:
detail disk -
Select a volume by entering the command below:
select volume <NUMBER> -
Finally, use either of the commands below to extend your volume:
extendextend size=20
Once you're finished, Command Prompt will return a message saying DiskPart successfully extended the volume.
4. Powershell
Powershell is another alternative method you could use to extend a volume on your computer. Like Command Prompt, Powershell uses command lines.
- Run Powershell as Admin. To do this, search for Powershell in the start menu and select Run as administrator.
-
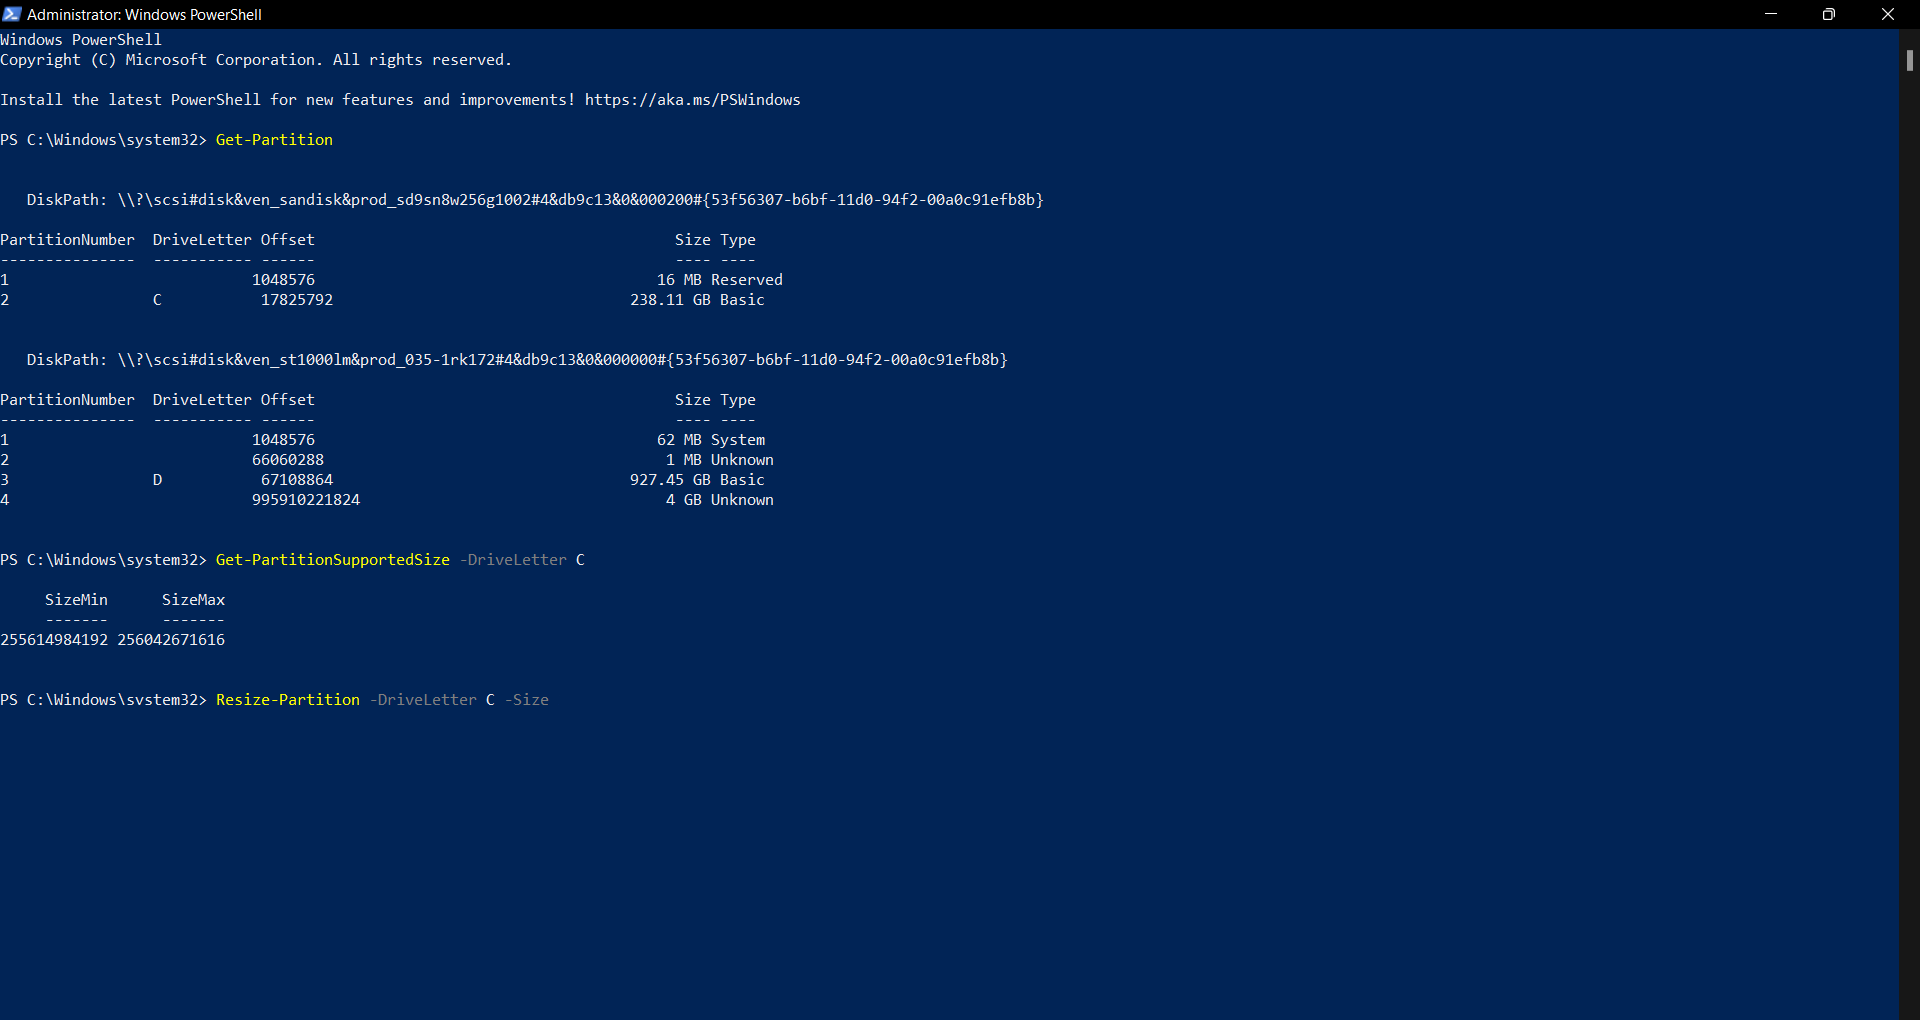
Once inside Powershell, type the command below and press Enter:
Get-Partition -
Now let's see how much you can actually extend your volume. You can get this information by entering the command below:
Get-PartitionSupportedSize -DriveLetter <LETTER> -
Now to resize the volume, enter the command below:
Resize-Partition -DriveLetter <LETTER> -Size <SIZE> - Press Enter. Powershell will now resize your volume.
Powershell commands can take a bit to return results, so don't worry if you're not getting immediate responses from the console. Be patient and hopefully all will go well.
Extend Your Dominion on Windows 11
You don't always need to go on and format your disks entirely in order to expand one or to repartition them in general. There is more than a single method to achieve what you want. Be it via the graphical interface of Windows Settings or the simple-but-effective Command Prompt, you now know how to extend your volumes on your Windows 11 computer.
Hard disks provide you with safe storage for your data, but if you've lost precious data in a hard disk, don't lose all hope. There are still things you can do to recover your precious files.


