
Language packs are a set of files using which you can install different languages on your computer. However, the installation process isn't as straightforward as it may sound. Many users have reported facing the error code 0x800F0909 when installing language packs on the computer.
As such, if you also see the same error code upon installing the language packs, here are seven fixes you can try to eliminate the problem for good.
What Causes Language Pack Error Code 0x800F0909 in Windows 11?
The error code 0x800F0909 is one of the many issues you will face on installing language packs on your computer. While the problem mainly results from a weak internet connection, there are plenty more culprits that can be responsible for the problem.
- Windows comes with a metered connection feature, which, when enabled, can cause the error code.
- The problem can also appear due to corruption in the system files.
- If certain services are disabled, you will likely face the issue.
Having identified all the primary culprits, let's jump into working fixes.
1. Eliminate Any Temporary Glitches
To begin with, restart your computer using one of the many ways to restart a Windows PC and check if the problem still appears. As it turns out, the error code can occur as a temporary glitch in your computer. And the best way by which you can get rid of such a glitch is to restart your computer.
2. Run Windows Update Troubleshooter
Windows offers various troubleshooters that you can use to eliminate different kinds of issues on your computer. The Windows Update Troubleshooter helps to eliminate language pack problems or fix Windows Update issues on Windows 11.
To run the Windows Update troubleshooter, follow the below instructions:
- Open the Settings menu by pressing the Win + I hotkeys.
- Choose System from the left panel and then select the Troubleshoot option.
- Select Other troubleshooters.
-
Click the Run button next to Windows Update.
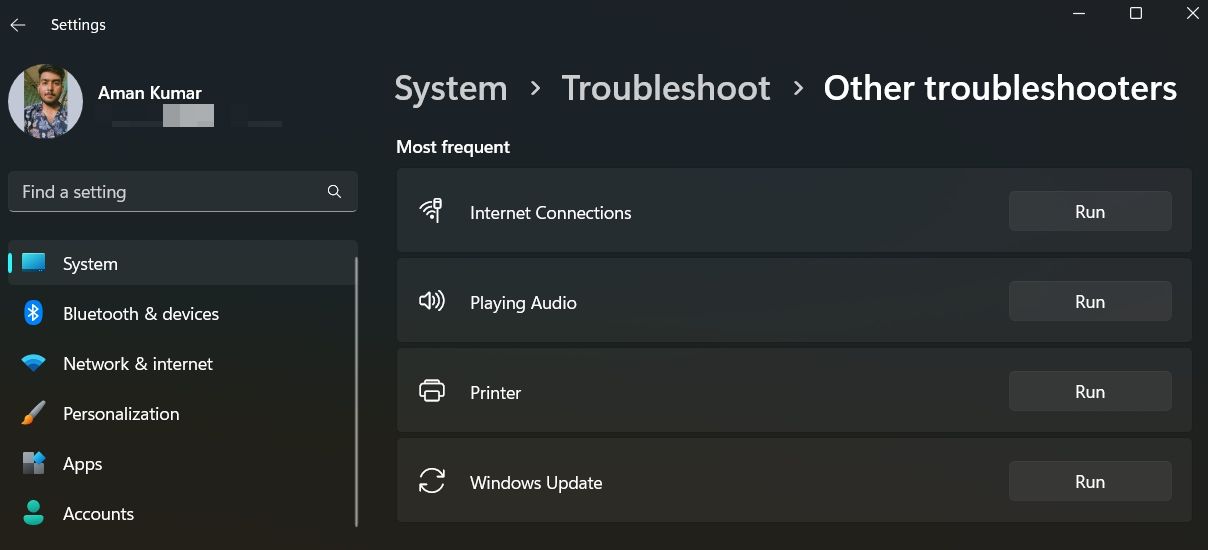

The Windows Update Troubleshooter window will appear and start scanning your system. In most cases, it automatically fixes all the problems. But sometimes, you will have to follow the on-screen instructions to complete the troubleshooting process.
3. Disable Metered Internet Connection
Windows comes with a metered connection feature which you must enable if you have a limited data plan. It's a data-saving feature that lets you better manage applications during their update process.
If the metered connection is enabled, your computer may stop data-consuming processes like installing language packs. Thus, before getting into the installation process, make sure to disable the metered connection feature. Here's how to do it:
- Open the Settings menu, and then select Network & internet from the left panel.
- Select Wi-Fi in the following window.
- Select your Wi-Fi to open its properties window.
-
In the Wi-Fi properties window, disable the toggle next to Metered connection.
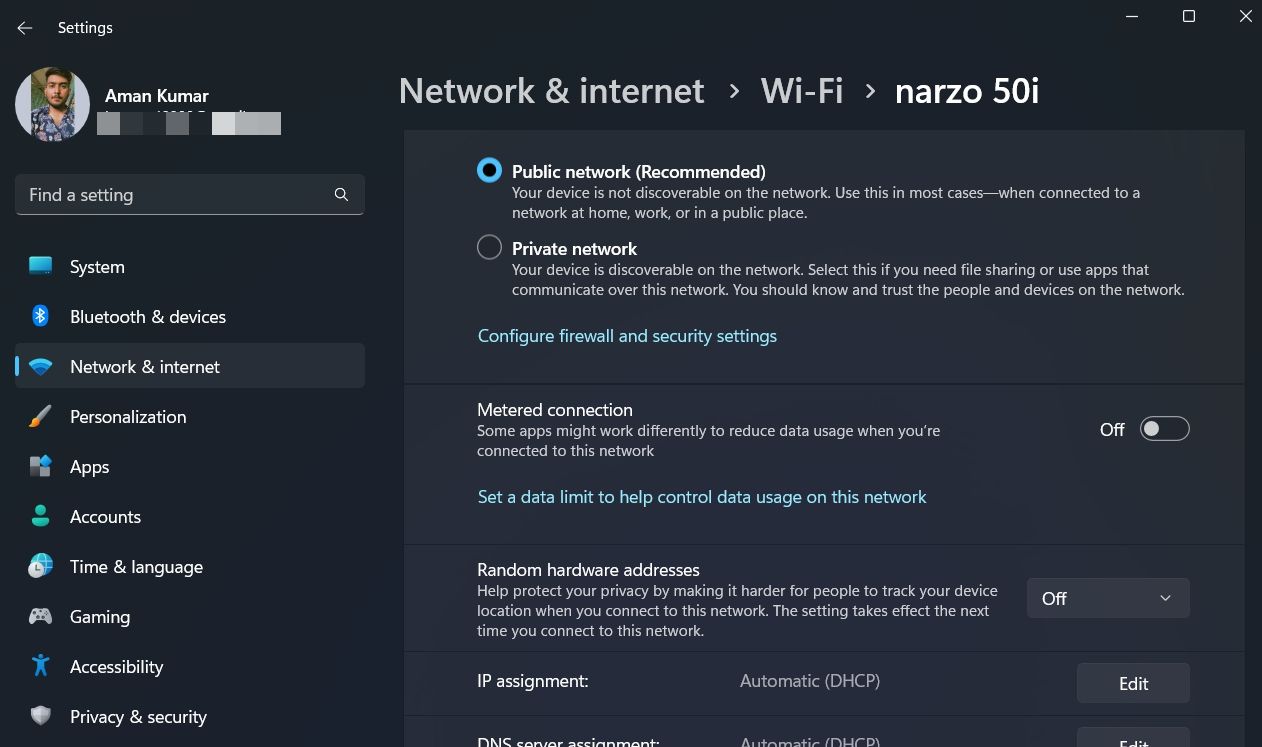

That's it. Restart your computer and check for the problem.
4. Enable Windows Update Services

The Windows Update service must be enabled and running if you want to install Windows update and language packs. Your computer can't download and install language packs when the service isn't on. To enable this service, follow the below steps:
- Launch the Start menu by pressing the Win key.
- In the search bar, type Services and press Enter. It'll open the Services window.
- Search and right-click on the Windows Update service.
- Choose Properties from the context menu.
- Click the drop-down icon next to Startup type and choose Automatic.
- Then, click the Start button under the Service status tag.
- Click Apply and then OK to save the changes.
Also, make sure other related services essential for updating Windows are enabled and running. These are three other services you should check as outlined above:
- Application Identify
- Background Intelligent Transfer Service (BITS)
- Cryptographic Services
That's it. Try to download the language packs and check if the problem appears again. If yes, then probably there's corruption in the Windows Update components.
5. Reset Windows Update Components
The prime reason behind the language pack error code 0x800F0909 can be corruption in the Windows update components. The solution, in this case, is to reset the Windows update components. Here's how to do it:
- In the Start menu search bar, type Command Prompt and choose Run as administrator from the right pane. It'll open Command Prompt with admin rights.
-
Type these four separate commands by pressing Enter after each:
        net stop bits
net stop wuauserv
net stop appidsvc
net stop cryptsvc -
Type this command and press Enter. It'll rename the SoftwareDistribution folder.
Ren %systemroot%\SoftwareDistribution SoftwareDistribution.old -
Type and press Enter to rename the catroot2.
Ren %systemroot%\System32\catroot2 catroot2.old -
To restart the services, type these separate commands by pressing Enter after each one.
        net start bits
net start wuauserv
net start appidsvc
net start cryptsvc
Windows will create a new SoftwareDistribution and catroot2 folder for Windows update when you rename them using the above method. The net stop and start commands restart the services that are essential for installing language packs.
After applying this fix, restart your computer and try to install the language packs again.
6. Turn Off the .NET Framework Feature

The next solution on the list is to disable the .NET framework feature. Here's how:
- In the Run dialog box, type optionalfeatures and click OK.
- Scroll down and uncheck the .NET Framework 3.5 (includes .NET 2.0 and 3.0) box.
- Click OK to save the settings.
7. Run an SFC Scan
As aforementioned, the problem can appear due to corruption in the system files. The solution, in this case, is to use the System File Checker, which is a tool designed to repair system files.
You can run an SFC scan by following the below steps:
-
Launch Command Prompt, type this Deployment Image Servicing command, and press Enter.
DISM.exe /Online /Cleanup-image /Restorehealth -
To run an SFC scan, type the following command and press Enter.
sfc /scannow - Wait until the SFC scan is complete and displays an output within the Command Prompt.
Fixing the Language Packs Error Code 0x800F0909
The language packs help to add new languages to your "Windows display language" list. But sometimes, the language packs can fail to install and show the error code 0x800F0909. Fortunately, you can fix this issue by applying the above fixes.