
Windows 11 includes a built-in administrator account that allows the computer manufacturers to install apps without creating a user account. For general users, however, the account is hidden by default to prevent unauthorized access.
If you want to use it, here is how to enable the built-in administrator account in Windows 11.
Why Do You Need the Built-in Administrator Account?
You can change your existing account type to have administrative rights. However, the built-in administrator account comes with elevated rights out of the box. Which means you can make changes to your PC without being bothered by the User Account Control (UAC) prompt.
It is a handy feature to use on a system with a fresh installation. You can install all your apps, setup network and other maintenance tasks with ease.
You can also use it as a backup account if you cannot sign in or if you do not have access to an admin account.
By default, the Administrator account is not password protected. Though, you can secure it by adding an authentication method.
That said, due to unrestricted access, using the Administrator account can be a security risk. The best practice is to disable the account once you are done using it and continue with a standard user account.
1. Enable Built-in Administrator Account in Local User and Groups
Local User Groups is an administrative tool that lets you manage your local as well as a remote computer. You can use it to set administrative permission for the local user accounts.
Note that, Local Users and Groups snap-in is only available on Windows 11 Pro, Education, and Enterprise edition of the OS. For the Home edition, you will have to rely on the third-party lusrmgmr tool to access this feature.
To enable a built-in administrator account:
- Press Win + R to open the Run dialog.
- Type lusrmgr.msc and click OK to open Local Users and Groups.
-
Next, select the Users folder in the left pane.

-
In the right pane, right-click on the Administrator user account and select Edit.
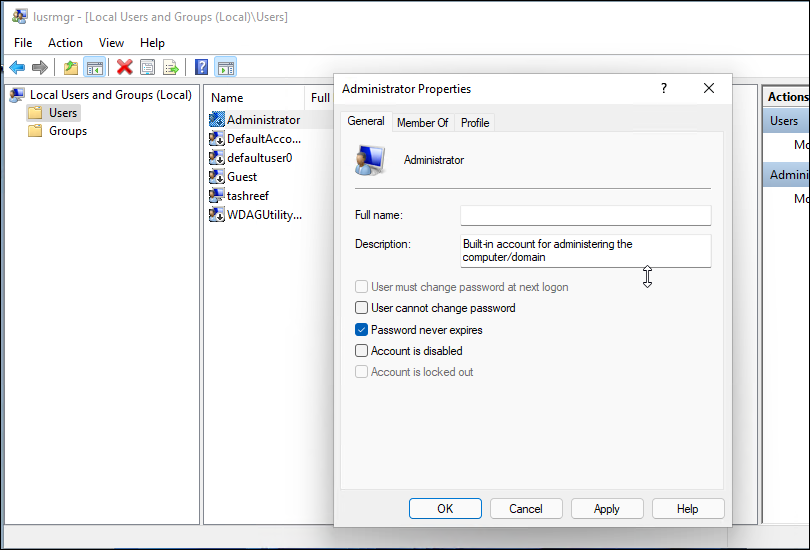
- In the General tab, uncheck the Account is disabled option.
- Click Apply and OK to save the changes.
- Close Local Users and Groups snap-in and login to the administrator account from the logon screen.


To disable the account, open Local Users and Groups and check the Account is disabled option. Click Apply and OK to save the changes.
If you are using a third-party tool to access Local Users and Groups, open the Account profile and uncheck Account is disabled to enable the administrator account.
2. Enable Built-in Administrator Account Using Command Prompt

You can enable the built-in administrator account in Windows 11 using the Command Prompt. You can use the net user command to make changes to the user account. Here’s how to do it.
- Press the Win key, and type cmd. Then, right-click on Command Prompt and select Run as administrator.
-
In the Command Prompt window, type the following command and press Enter to execute:
Net user Administrator /active: yes
- Upon successful execution, you will see the command completed successfully message.
-
To disable the administrator account, type the following command and press Enter:
Net user Administrator /active: no
- Close the Command Prompt window.
To sign in to the built-in administrator account, press Win + L to view the lock screen. Then, click on the Administrator account to login.
3. Enable Built-in Administrator Account Using PowerShell

You can use the Enable-LocalUser cmdlet to enable local user accounts via PowerShell, including the administrator account. Here’s how to do it.
- Press Win + X to open the WinX menu.
- Click on Windows Terminal (Admin).
- Windows Terminal will open in Windows PowerShell. If not, click the down-arrow icon in the toolbar and select Windows PowerShell. Alternatively, press Ctrl + Shift + 1 to select PowerShell.
-
In the PowerShell terminal, type the following command and press Enter to execute:
Enable-LocalUser -Name “Administrator”
- When the command is executed, it will enable the administrator account.
-
To disable the administrator account using PowerShell, use the following command:
Disable-LocalUser -Name “Administrator”
4. Enable Hidden Admin Account in Local Security Policy
If you are a system administrator, you can use the Security Policy snap-in to enable or disable the administrator account. It is a handy utility designed to manage security policy settings in Windows.
Note that, Local Security Policy is not available in Windows 11 Home edition.
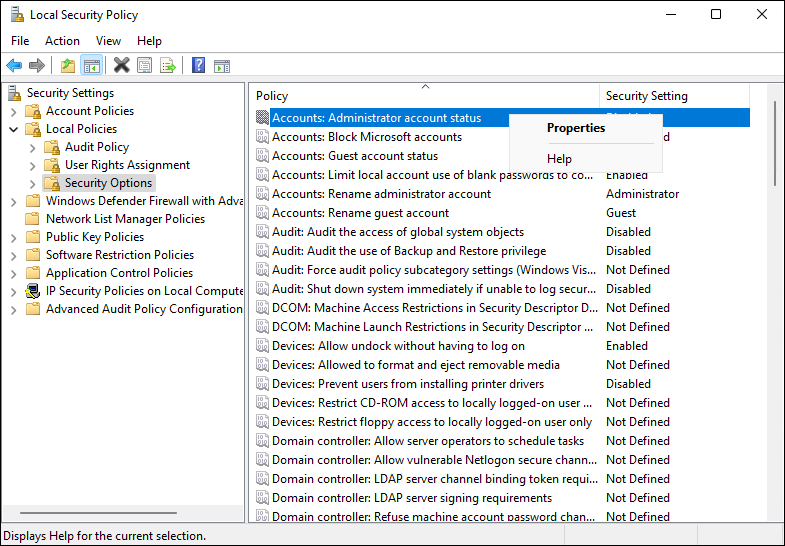
- Press Win + R, type secpol.msc, and click OK to open Local Security Policy.
-
Expand the Local Policies folder and then click on Security Options.
-
In the right pane, right-click on Account: Administrator account status and select Properties.

- Select Enabled in the Local Security Setting tab. If you want to disable the account, select Disabled.
- Click Apply and OK to save the changes.
- The new administrator account should be available for use on the logon screen.


How to Enable Built-in Administrator Account When You Cannot Sign-In to Windows 11
To enable the built-in Administrator account, you must be logged in with a standard admin account. If you are locked out of your PC, you can enable it using Command Prompt at boot.
You can access Command Prompt at boot via Windows Recovery Environment. Here is how to do it.
- Power on your PC and wait for the login screen to appear.
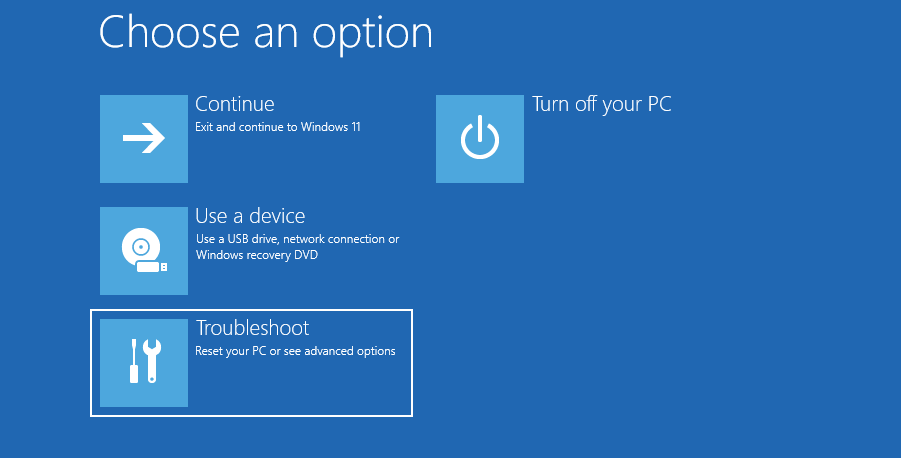
- Click the Power button in the bottom left corner. While holding the Shift key, press the Restart button. Click Restart anyway if prompted by Windows. Windows will now start in Windows Recovery Environment.
-
In the Choose an option screen, open the Troubleshoot option.
-
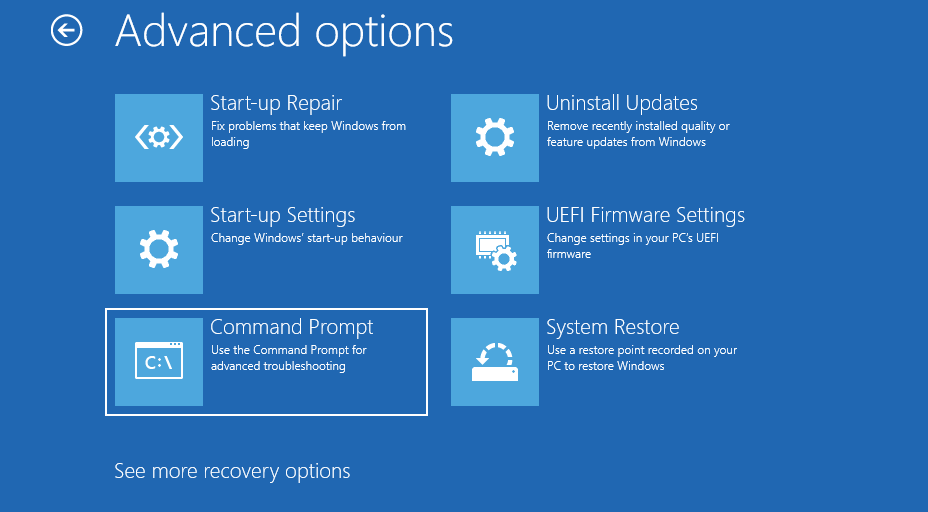
Next, go to Advanced options > Command Prompt.
-
In the Command Prompt window, type the following command and press Enter to open Registry Editor:
regedit
-
In the Registry Editor, select the HKEY_LOCAL_MACHINE key.
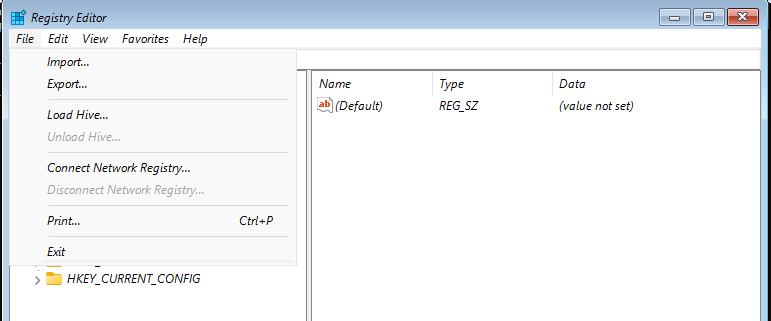
- Next, click on File (in the toolbar) and select Load Hive.
- When the Explorer window opens, click on This PC.
-
Next, navigate to the following location:
C:\Windows\System32\config
-
Here, locate and select the SAM file and click Open.

-
In the Load Hive dialog, type REM_SAM and click OK.

-
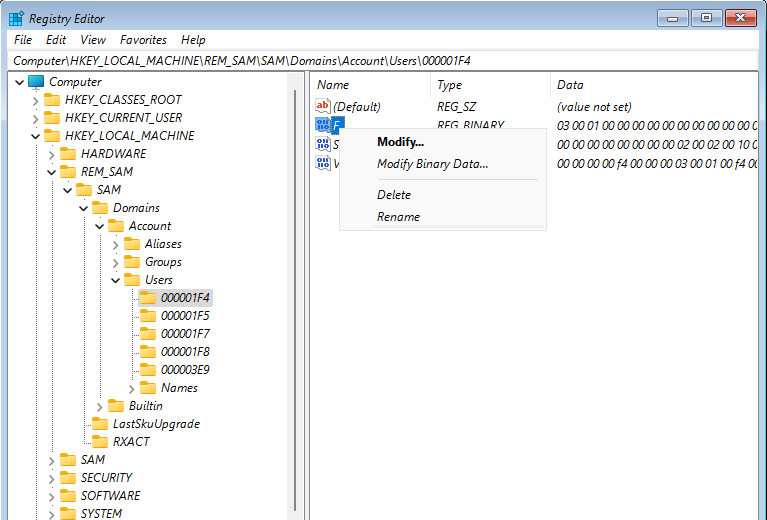
In the Registry Editor, navigate to the following location:
HKEY_LOCAL_MACHINE\REM_SAM\SAM\Domains\Account\Users\000001F4
-
In the right-pane, right-click on the F binary value and select Modify.
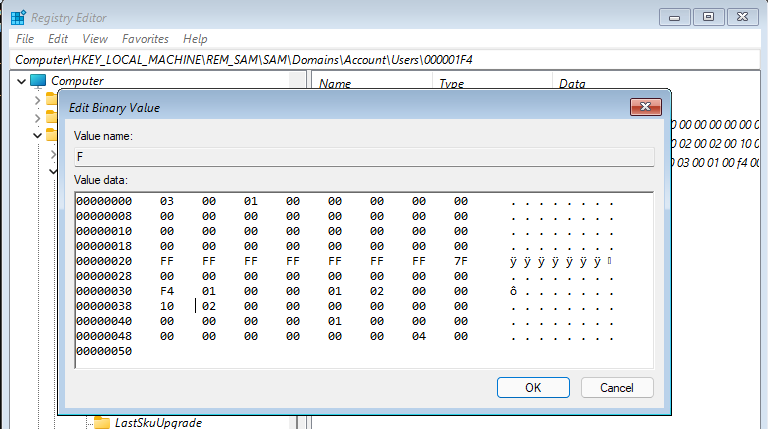
-
Under the Value data column, locate 00000038. Then, change the value 11 to 10 and click OK. This will enable the Administrator account in Windows 11.
- Close the Registry Editor and the Command Prompt window.
- In Windows Recovery Environment, click on Continue to startup Windows.


Using the Hidden Windows 11 Administrator Account
Whether you want to sail through the setup after a fresh install or gain access to your computer after being locked out, the built-in admin account is a useful backup option.
However, it is recommended to disable the account once you have completed the intended task to prevent a data breach, theft, and other security risks.