The Recycle Bin is the storage repository for unwanted files on your Windows 11 PC. Whenever you select to delete a file, it will go into that bin unless you’ve configured otherwise. Thus, files aren’t genuinely erased until you’ve emptied your Recycle Bin.
Your Recycle Bin might start wasting quite a lot of drive storage space on your PC if you neglect to empty it. So, it’s a good idea to empty that bin every few months at least. Here are several alternative ways you can empty the Recycle Bin within Windows 11.
1. How to Empty the Recycle Bin Within File Explorer
Opening the Recycle Bin from the desktop is probably the most obvious way to empty its contents. Double-clicking the Recycle Bin desktop shortcut will open a File Explorer window that displays its content. Then you can click Empty Recycle Bin on Explorer’s command bar to erase all files in it.

If you don’t see a Recycle Bin icon on your desktop, that’s probably because you’ve got that shortcut disabled in Windows 11. This is how you can configure the Windows desktop to display the Recycle Bin icon:
- Right-click an empty area of your Windows desktop to open the context menu and select Personalize.
-
Click Themes > Desktop icon settings to bring up the window shown directly below.
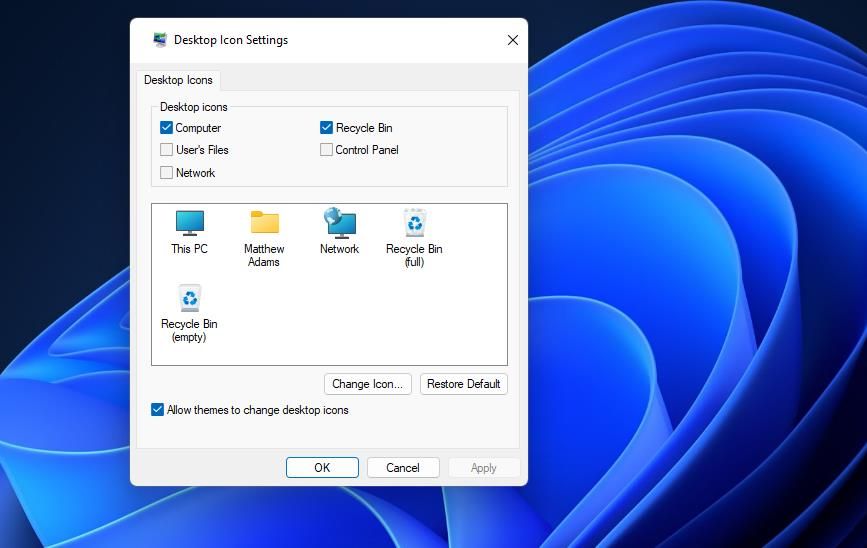
- Select the Recycle Bin checkbox if that option is disabled.
- Click Apply to restore the Recycle Bin on your desktop.

2. How to Empty the Recycle Bin via Its Context Menu
You can skip opening the Recycle Bin by selecting to empty it from the context menu. Right-click the Recycle Bin desktop icon to view its context menu. Then you can select Empty Recycle Bin on that menu.

3. How to Empty the Recycle Bin in Settings
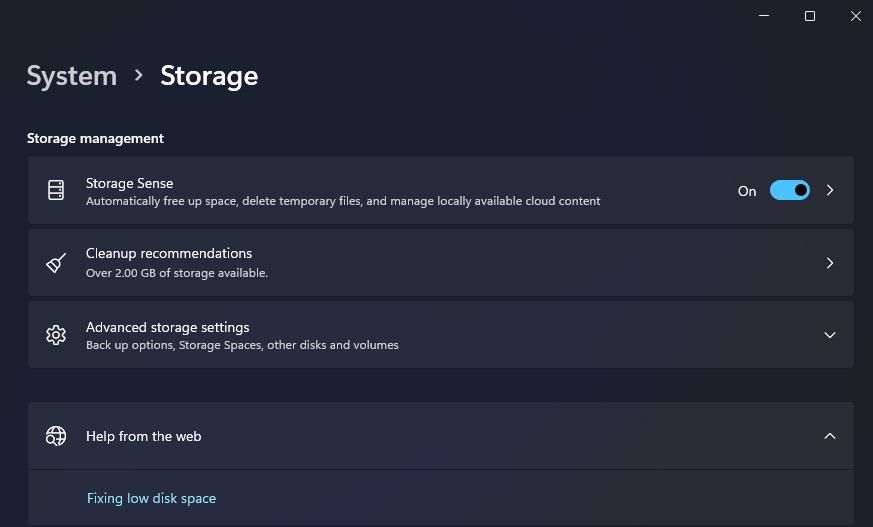
The Settings app incorporates a handy utility for deleting temporary files. Even though files in the Recycle Bin aren’t strictly temporary ones, you can still select to clear the bin with that tool. This is how to empty the Recycle Bin from Settings:
- Select the Start button, and input Storage settings within the menu’s search utility.
- Click the Storage settings search result.
-
Then select Temporary files in Settings.
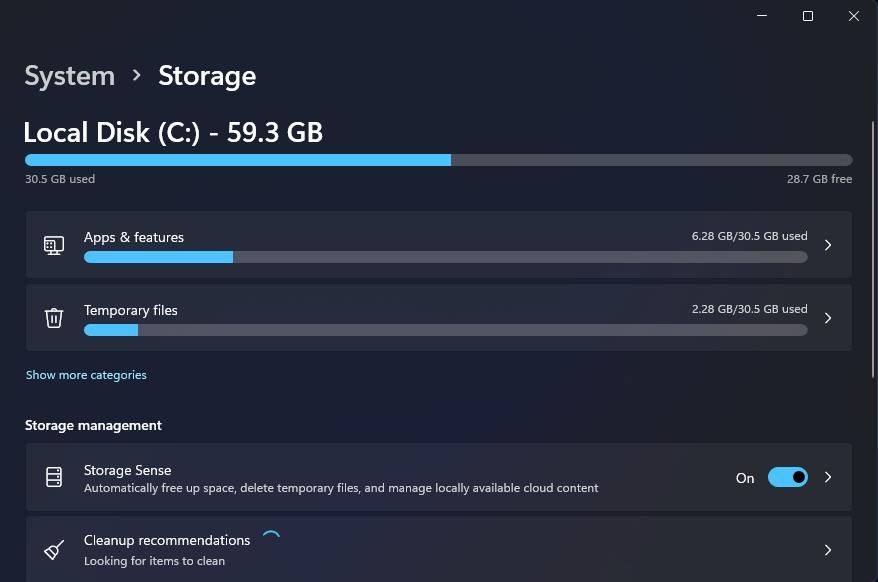
- If you only want to empty the Recycle Bin, deselect all other temporary file checkboxes.
-
Select the Recycle Bin checkbox.
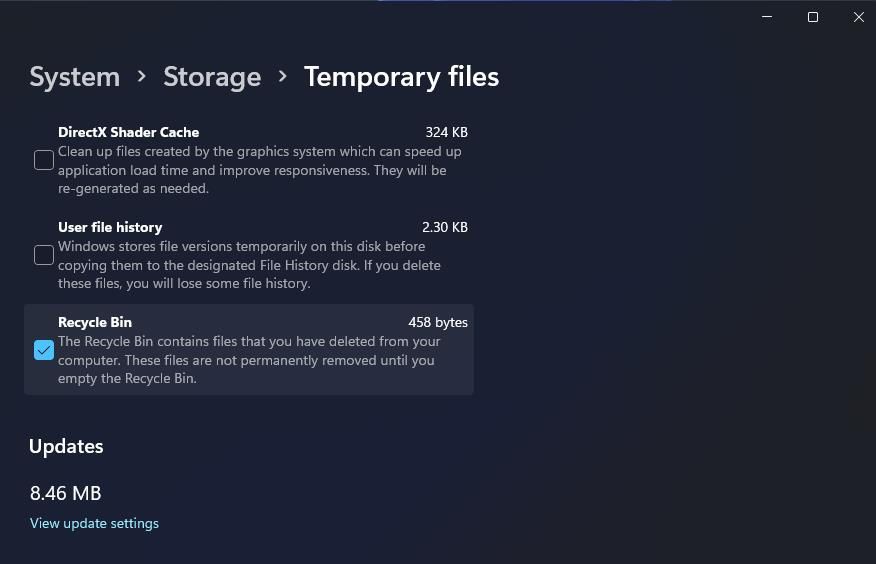
- Press the Remove files button.
- Click Continue to confirm.


If you find manually emptying Recycle Bin a bit of a chore, you can also configure the automatic deletion of files there via Settings. You can enable and configure a Storage Sense feature in Settings to schedule regular automatic Recycle Bin cleanups. These are the steps for enabling the automatic deletion of files in the Recycle Bin:
- Bring up the storage options in Settings as covered in the first couple of steps of method two above.
-
Turn on the Storage Sense option.
- Click the small arrow for the Storage Sense setting to view further options.
-
Select an option of preference in the Run Storage Sense drop-down menu.
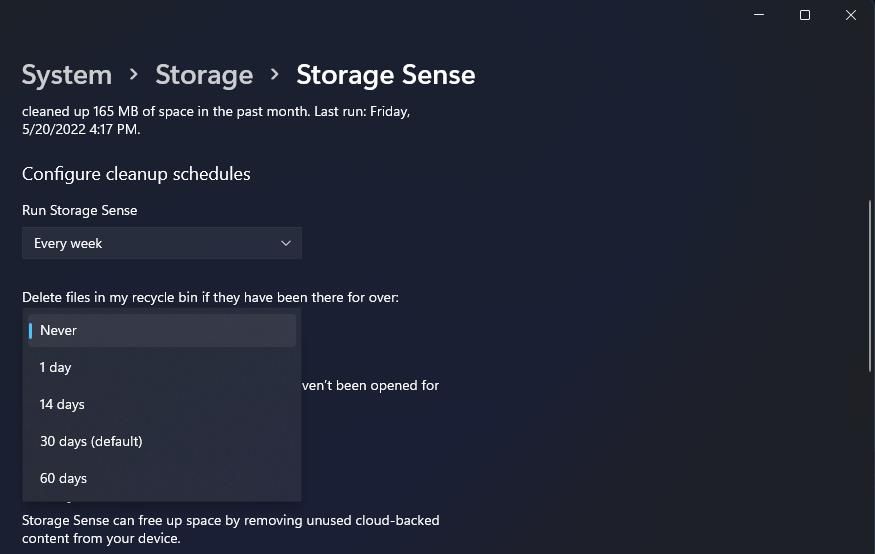
- Then choose a setting in the Delete the files in my Recycle Bin if they have been there for over a year drop-down menu.


Now files that have been in the Recycle Bin for over one, 14, 30, or 60 days will get automatically deleted depending on what option you selected. Thus, enabling Storage Sense will ensure regular, automatic Recycle Bin emptying. However, remember that you won’t get any chance to restore files when they’ve been removed from the bin.
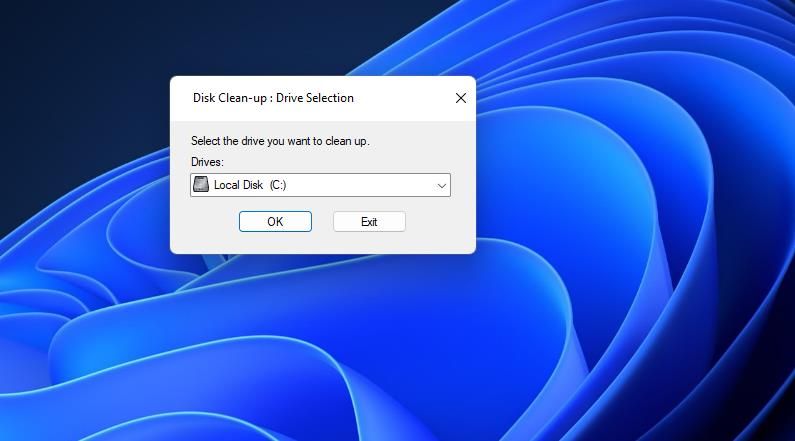
4. How to Empty the Recycle Bin With the Disk Cleanup Utility
Disk Cleanup is Windows 11’s tool for erasing superfluous files on your PC. That utility provides us with yet another option for clearing out the Recycle Bin. This is how you can empty the Recycle with Disk Cleanup:
- To bring up the search tool, click the magnifying glass icon for that utility along Windows 11’s taskbar.
- Type Disk Cleanup within the text box to find that tool.
- Next, select Disk Clean-up at the top of your search results.
-
Select Local Disk C: on the drive selection window, and click OK to proceed.
-
Click the Recycle Bin checkbox to select it.
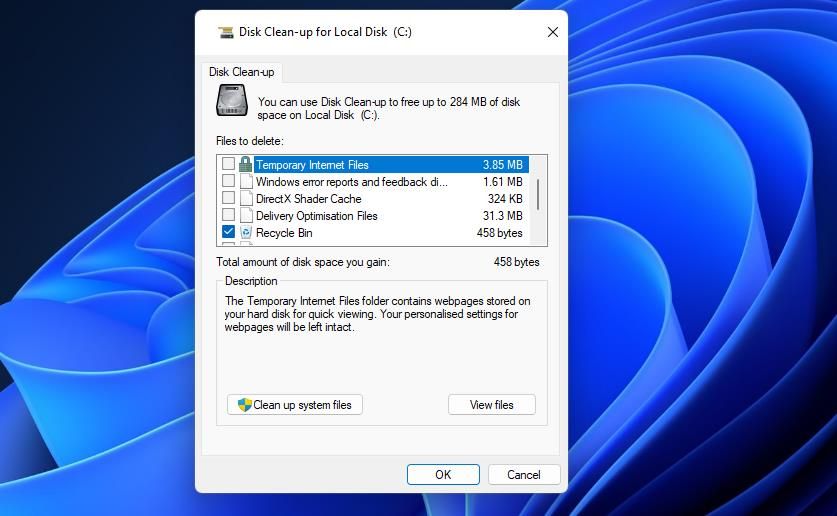
- Press the OK button, and click Delete Files to confirm.


5. How to Empty the Recycle Bin With PowerShell
PowerShell is Windows 11’s default command-line shell with which you can carry out many system maintenance tasks by entering cmdlets. You can force empty the Recycle Bin with a Clear-Powershell cmdlet in the following steps:
- Open PowerShell as an administrator with a method in our "Ways to Open the Command Prompt or PowerShell" guide.
-
Then input this cmdlet for emptying the Recycle Bin within PowerShell:
Clear-RecycleBin -Force -
Hit the Enter key to execute.
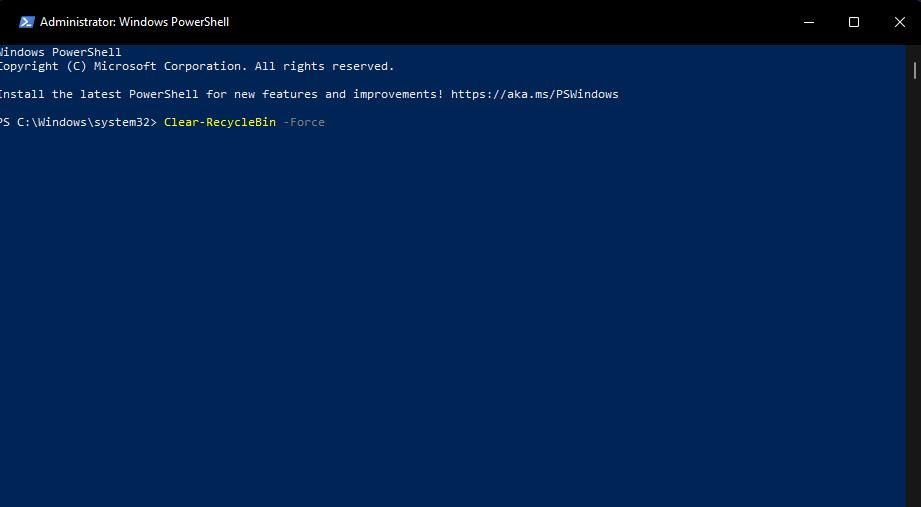
- Press the Y keyboard button to confirm.

6. How to Empty the Recycle Bin With Command Prompt
The Command Prompt is an alternative to PowerShell you can also empty the Recycle Bin with. However, it has a different command for clearing the bin. This is how to empty your Recycle Bin with Command Prompt.
- Click the button for the Start menu, and enter Command Prompt in the search box there.
- Open the Command Prompt with elevated user rights by clicking Run as administrator for that app’s search result.
-
Input this command for emptying the bin and hit Enter:
rd /s %systemdrive%$recycle.bin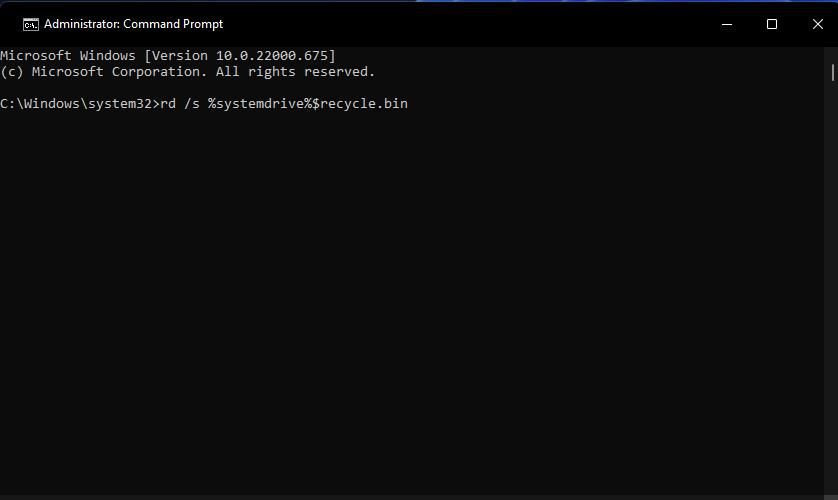
- When asked if you’re sure, press Y on your keyboard to confirm.

7. How to Empty the Recycle Bin With a Hotkey
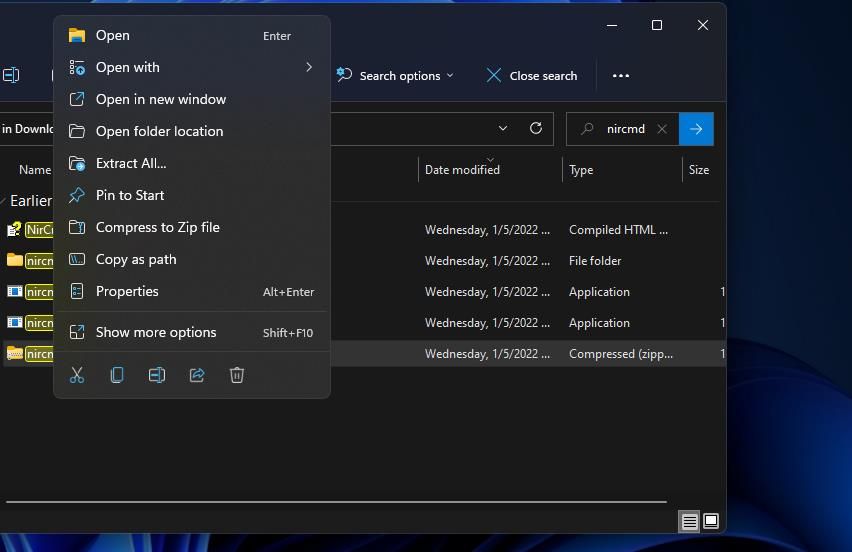
A hotkey for emptying the Recycle Bin would be very convenient, but Windows 11 doesn’t have such a keyboard shortcut. Nevertheless, you can still set up a hotkey for emptying the bin across drives with the third-party NirCmd software. To do so, you’ll need to download and extract NirCmd and set up a shortcut for its empty Recycle Bin command as follows:
- Bring up the download page for NirCmd in your browser.
- Click Download_NirCmd_64-bit to save NirCmd’s ZIP file.
- Start the Explorer file manager, and open the folder that contains NirCmd’s downloaded ZIP.
-
Right-click nircmd-x64.zip and select the Extract All option for it.
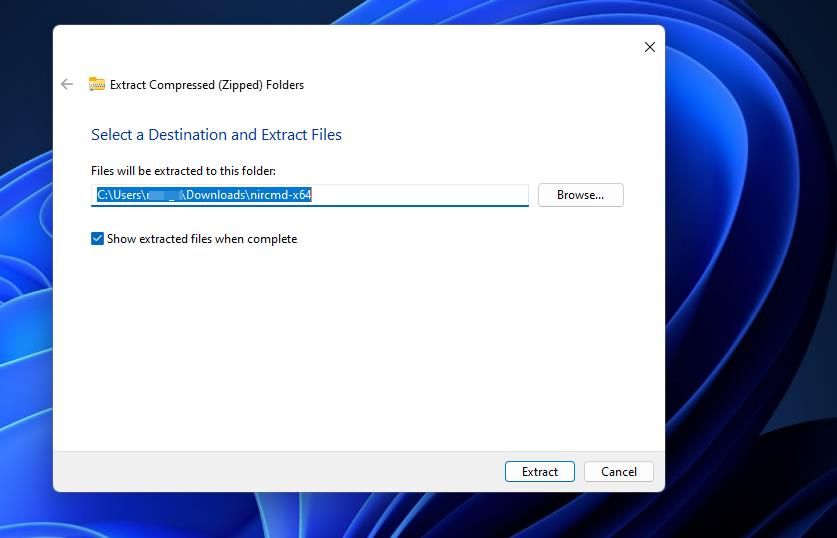
- Copy the folder path destination within the Files will be extracted to this folder text box by selecting it and pressing Ctrl + C.
-
Select the Extract option within the extraction tool.
- Right-click somewhere on Windows 11’s desktop and select the New option.
- Click the Shortcut option from the submenu.
- Then press the Ctrl + V hotkey to paste in the folder path for NirCmd within the text box.
-
Add nircmd.exe emptybin to the end of NirCmd’s folder path as shown in the screenshot directly below.
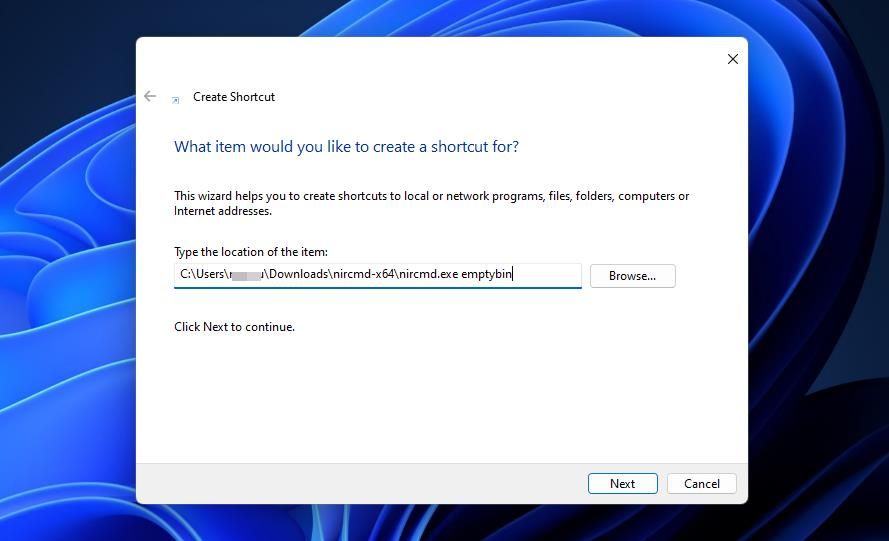
- Click the Next option, and type Empty Recycle Bin in the name box.
- Select Finish to add the Empty Recycle Bin shortcut.
- Right-click the Empty Recycle Bin shortcut and select its Properties context menu option.
-
Click in the Shortcut key box, and press the E key.
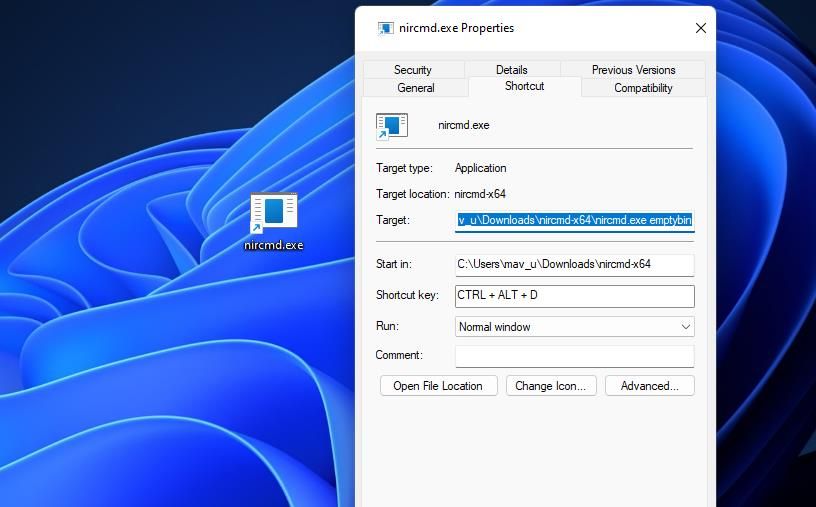
- Select Apply to save your new Ctrl + Alt + E keyboard shortcut.


Pressing the Ctrl + Alt + E hotkey will now empty your Recycle Bin. So, go ahead and try that keyboard shortcut out. It’s probably the quickest and most convenient way to empty the Recycle Bin.
Don’t Forget to Empty the Recycle Bin
Emptying the Recycle Bin now and then can be considered a routine system maintenance task. Always leaving it full will inevitably eat up drive storage space that could otherwise be allocated to new software. If you often delete images, documents, and videos, they might now be wasting many megabytes of space lying in your Recycle Bin. So, make sure you don’t forget to empty your Recycle Bin with any of the methods above.