Many users utilize USB flash drives (sticks) to store files and transfer them between PCs. Of course, you can always remove such drives from USB ports without ejecting them first. However, you might corrupt data on your USB stick if you don’t safely remove it.
To forestall potential file corruption, you should eject USB sticks and external hard drives. There are numerous ways you can select to eject a USB flash drive before removing it. Here are several alternative methods for safely removing USB drives on Windows 11 PCs.
1. How to Eject an External USB Drive via the System Tray
Windows 11’s system tray displays a Safely Remove Hardware and Eject Media icon whenever you’ve inserted a USB stick or other external hard drive. Right-click that icon to open a context menu for it, which includes an Eject option. Select the Eject option there, and proceed to remove the drive when the Safely Remove Hardware icon has disappeared.

If you don’t see that system tray icon when you’ve inserted a USB drive, it’s probably disabled within the taskbar corner overflow settings. You can enable that icon to appear within the system tray as follows:
- Press the Windows and I buttons on the keyboard simultaneously.
- Select Personalization along the left of Settings.
-
Click Taskbar and Taskbar corner overflow to view the options shown directly below.
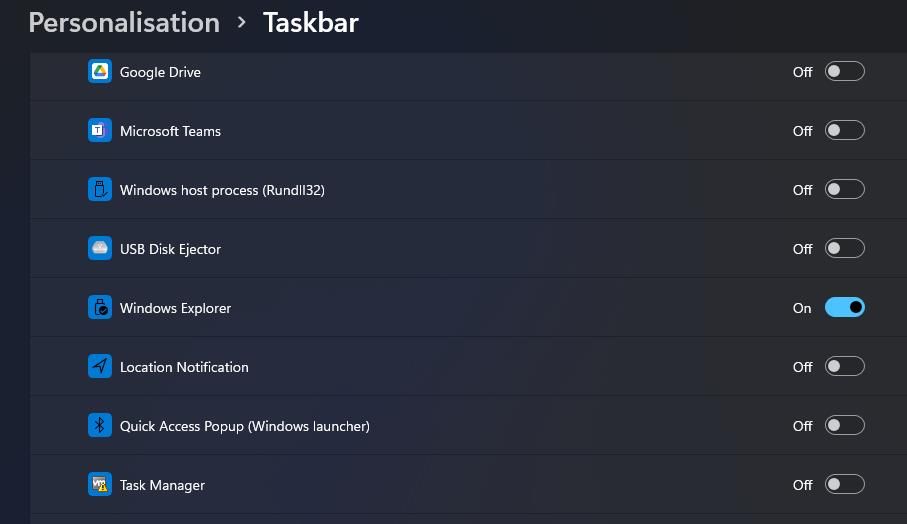
- Turn on the Windows Explorer icon setting there.
2. How to Eject an External USB Drive in File Explorer
File Explorer shows all the connected USB drives on your PC. You can select to eject USB drives in two different ways within that file manager. This is how to remove a USB drive via File Explorer:
- To open File Explorer, click the folder taskbar button.
-
Right-click the USB drive in the left navigation pane to select Eject.
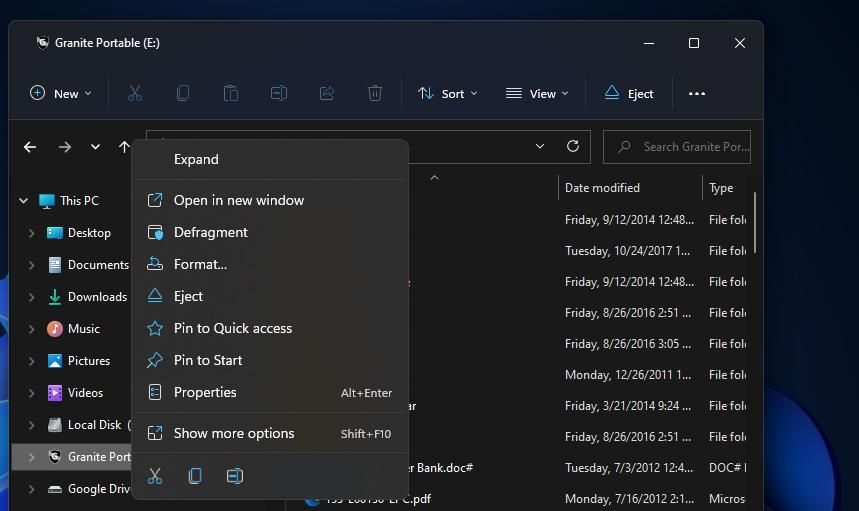
- Or you can select the USB drive and press Eject on Explorer’s command bar.
- Remove the USB drive after ejecting.

3. How to Eject an External USB Drive in Settings
The Settings app lists connected USB drives. You can select a Remove device option within Settings for your connected USB drive. This is how to select that option:
- Launch Settings, and select its Bluetooth & devices tab.
- Click the Devices navigation option.
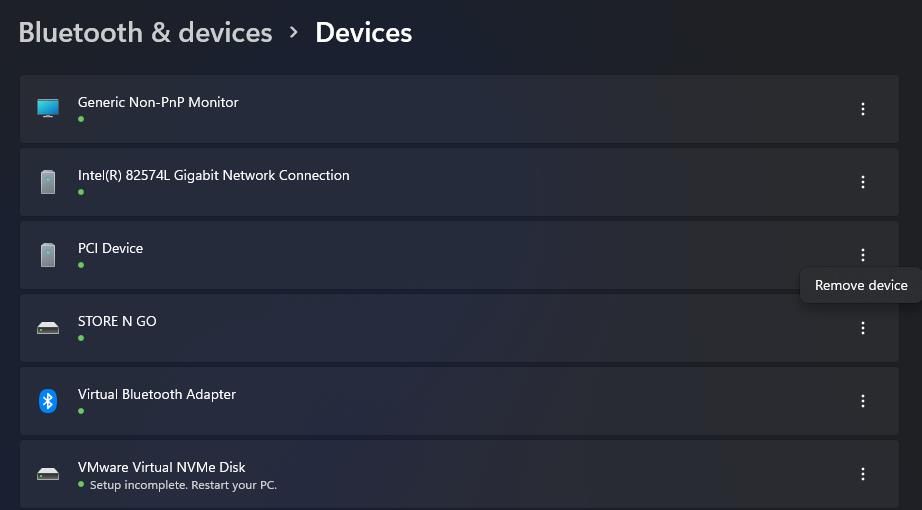
- Then click the More options button for your listed USB drive there.
-
Select the Remove device option.
- A prompt will appear asking if you’re sure about removing the USB drive. Go ahead and click Yes to confirm.
- Then you can unplug the USB drive.

4. How to Eject an External USB Drive in Disk Management
Disk Management is a Windows 11 utility that displays HDD partitions and connected USB drives on your PC. With that tool, you can format, change letters, and delete volumes for drives. You can select to eject your USB drive from within Disk Management like this:
- Press the Windows + X key combination to view the Power User menu.
- Select Disk Management to open that utility.
-
Right-click your removable USB drive in Disk Management and select Eject.
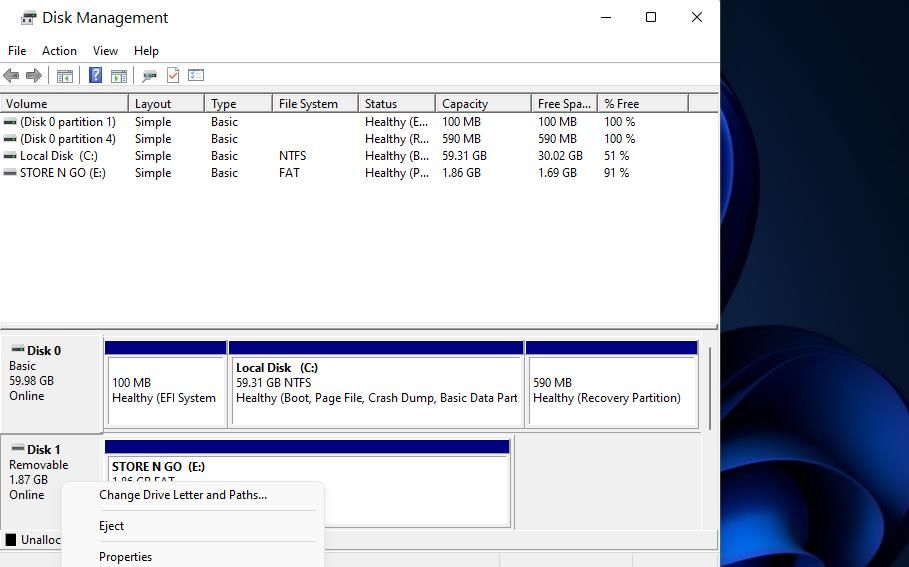
- Wait a few seconds, and remove the USB stick when Disk Management no longer displays drive details for it.

5. How to Eject an External USB Drive With PowerShell
Windows 11’s default PowerShell command-line shell provides another way to safely remove USB drives. You can eject a USB stick with PowerShell’s DiskPart utility for drive partitioning. These are the steps for ejecting a USB drive within PowerShell:
- Press the Win key, and type PowerShell in the Start menu’s search box.
- Select Windows PowerShell to open that command-line app.
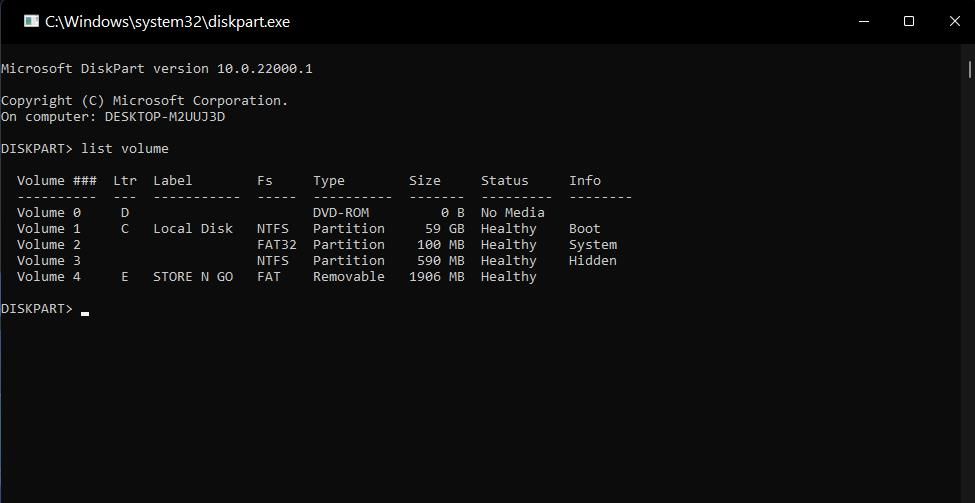
- Type diskpart within PowerShell, and press the Enter key.
-
A new window will then open. Type list volume in the new window, and press Return to execute.
-
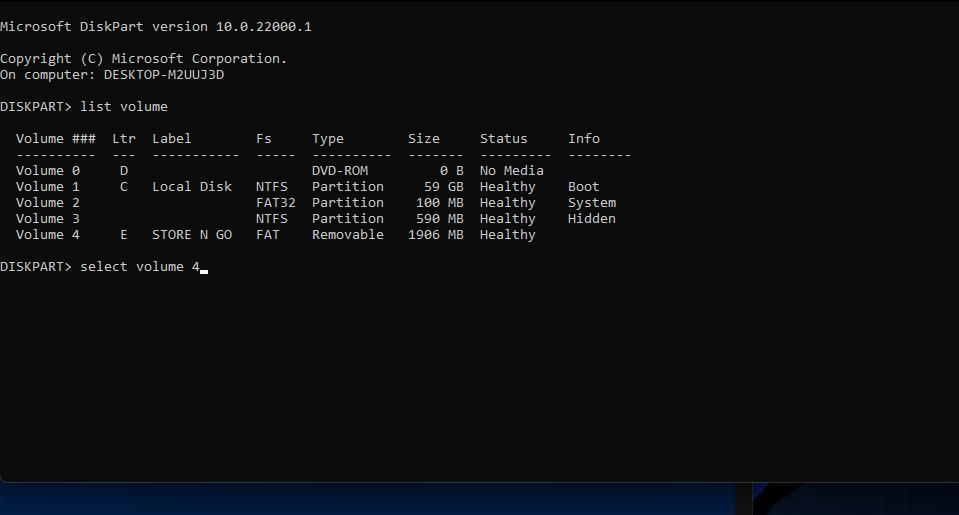
Input the following select volume command and press Return:
select volume <number> -
Then eject the drive by entering this command and hitting Enter:
remove all dismount - Now you can remove the drive from its USB port.

You’ll need to replace <number> in the select volume command with an actual drive number listed. For example, you would enter this command to remove a volume 4 USB drive:
select volume 4
 6. How to Eject an External USB Drive With USB Disk Ejector
If you want more USB drive ejection options, check out USB Disk Ejector. USB Disk Ejector is a freely available portable app with which you can safely remove USB sticks. That software also includes a few extra ejection settings. You can download, extract, and remove your external drives with USB Disk Ejector as follows:
- Open the USB Disk Ejector download page in Softpedia.
- Select the Download Now and Softpedia Mirror (US) options.
- Bring up the folder that includes the USBDiskEjector1.3.0.6.zip archive in File Explorer.
-
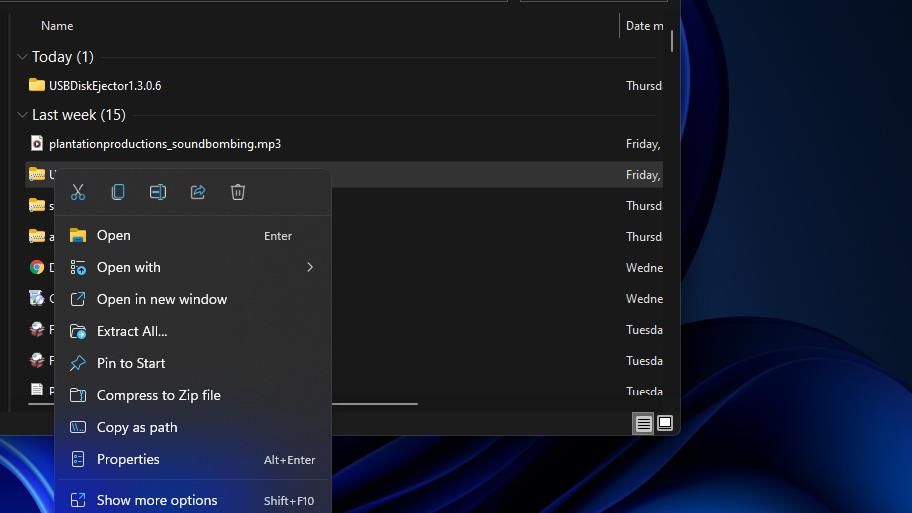
Right-click the USBDiskEjector1.3.0.6.zip file and select Extract All to open a tool for unzipping the archive.
-
Select Show extracted files when complete to automatically open the unzipped folder after extraction.
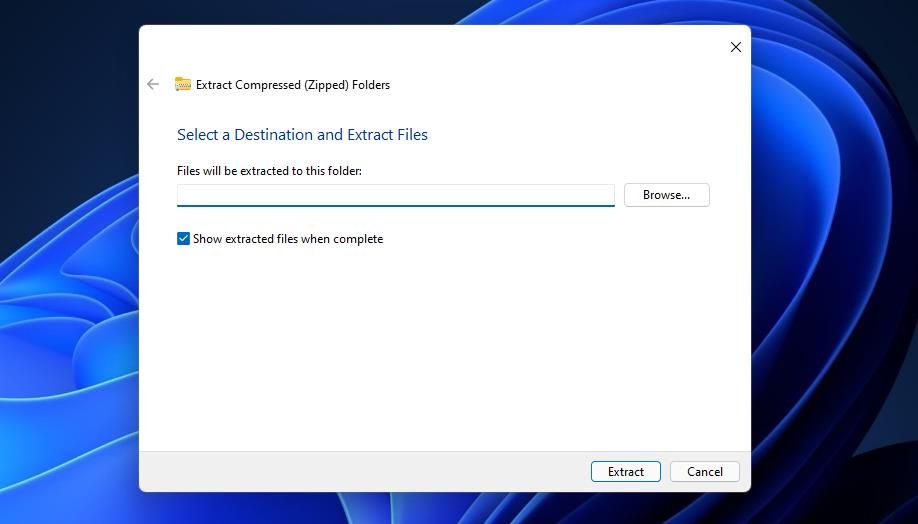
- Click Extract to open an extracted USB Disk Ejector folder.
-
Double-click USB_Disk_Eject.exe to open the window in the snapshot directly below.

- Then double-click your USB drive in the USB Disk Ejector window to eject it.
- Now remove the USB stick.


To view extra options, click More > Options in USB Disk Ejector. Select the Ejection tab shown directly below. There you can select some program and notification ejection configuration settings.

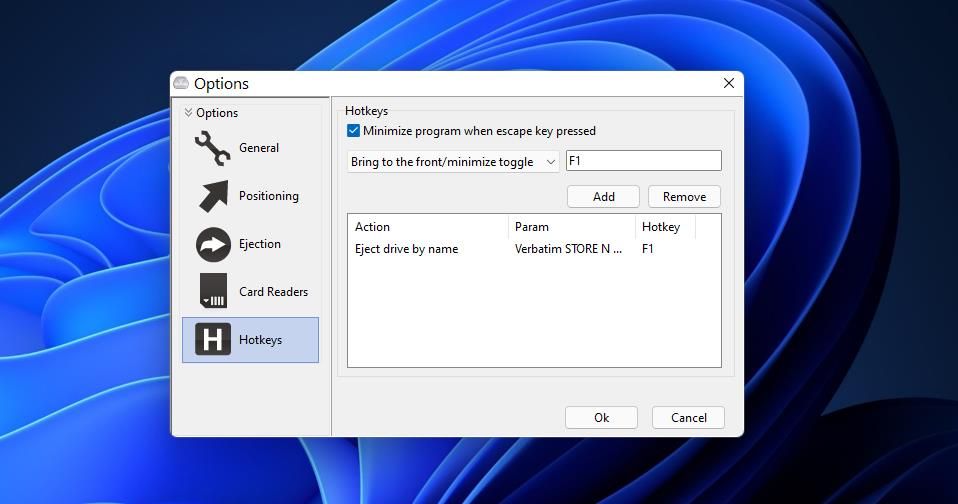
You can also set up a special USB drive hotkey. By doing so, you can press a keyboard shortcut to eject your USB stick whenever needed. This is how you can set up such a hotkey:
-
Open USB Disk Ejector’s Hotkeys tab in the screenshot directly below.
-
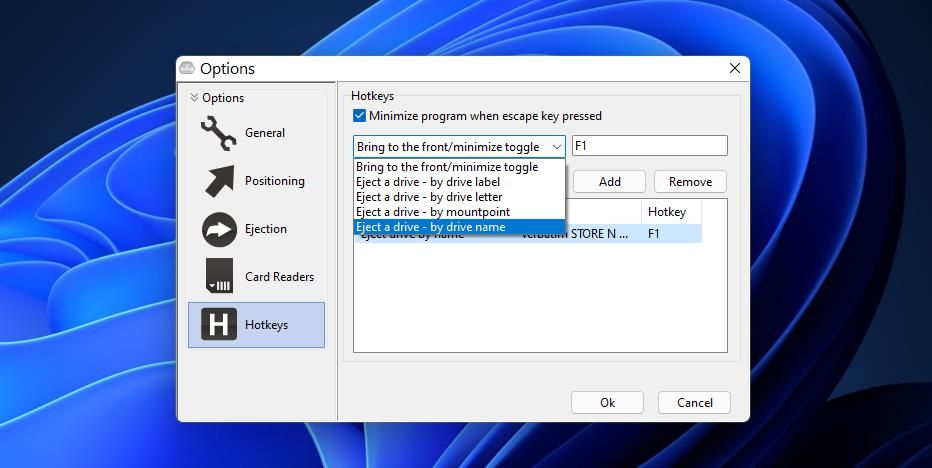
Select the Eject a drive by drive name drop-down menu option.
- Then select the name of the USB drive in the other drop-down menu.
- Click in the hotkey box, and press a key combination for the keyboard shortcut.
- Select the Add option when finished.
- Click OK to save your new hotkey.
- Now press your new ejection hotkey to try it out.


7. How to Safely Remove a USB Drive Without Ejecting it
If you can’t bring yourself to eject a USB stick with any of the methods above, there is a way you can safely remove it without doing so. However, you’ll need to set a "quick removal" policy setting for that drive first. You can select that policy option in the following steps:
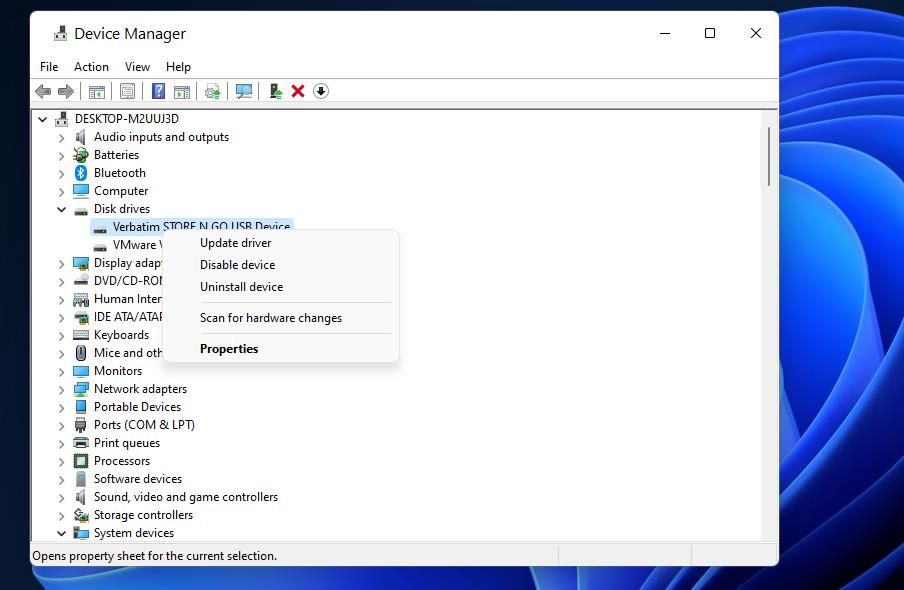
- Right-click the button for the Start menu to select Device Manager.
- Extend the Disk drives category by double-clicking it.
-
Right-click your listed USB drive and select Properties.
-
Click the Policies tab shown directly below.
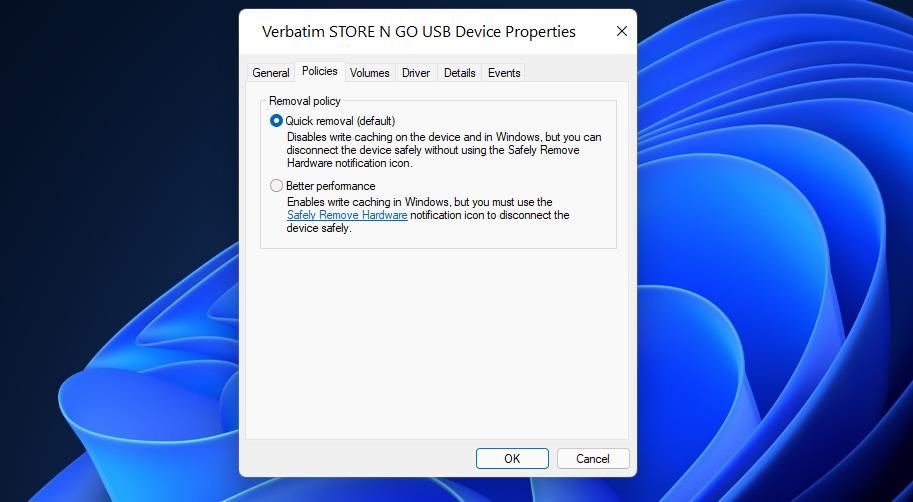
- Select the Quick removal radio button.
- Click OK to save the setting.
- Select Yes on the dialog box that asks to restart Windows.
- You can safely remove your USB drive without selecting to eject it ever again.


Safely Remove Your USB Drives to Avert Data Corruption
Safely removing your USB drive with any methods above will ensure it’s not still in use when removed. It doesn’t make much difference how you safely remove it but make sure you do so. Choose whatever way you prefer for safely removing your USB sticks and other types of external storage drives.