.jpg?q=50&fit=contain&w=1140&h=&dpr=1.5)
Windows 11 includes a built-in Defragment and Optimize Drives utility (formerly called Disk Defragmenter) for drive optimization. This tool defrags your hard drive by reorganizing fragmented data on it. As a result, it enhances data retrieval efficiency on your PC.
As such, it’s worth defragging your PC’s primary storage drive now and again. You can add alternative disk defragmenter shortcuts to the drive and desktop context menus in Windows 11. Such shortcuts will save you from having to search for the defrag tool. This is how you can set up convenient defragment context menu options in two different ways.
How to Add a Defragment Option to File Explorer’s Drive Context Menu
File Explorer’s This PC section includes a C: drive icon you can click to delve into the local disk. That drive icon’s context menu is the perfect place for a Defragment option, but guess what: it doesn’t have one! Nevertheless, you can still add a defrag shortcut to the Local Disk icon’s context menu by editing the registry like this.
- Click the search tool’s magnifying glass taskbar icon.
- Type Registry Editor in the text box, and click the Run as administrator option for its search result.
- Navigate to the HKEY_CLASSES_ROOT\Drive\shell key within the Registry Editor.
-
Right-click shell on the left of the Registry Editor to select New > Key.
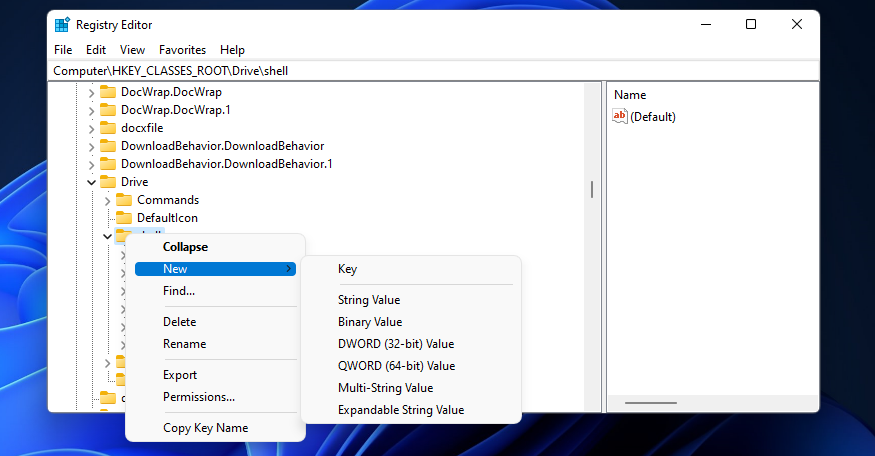
- Input the name runas for the new key.
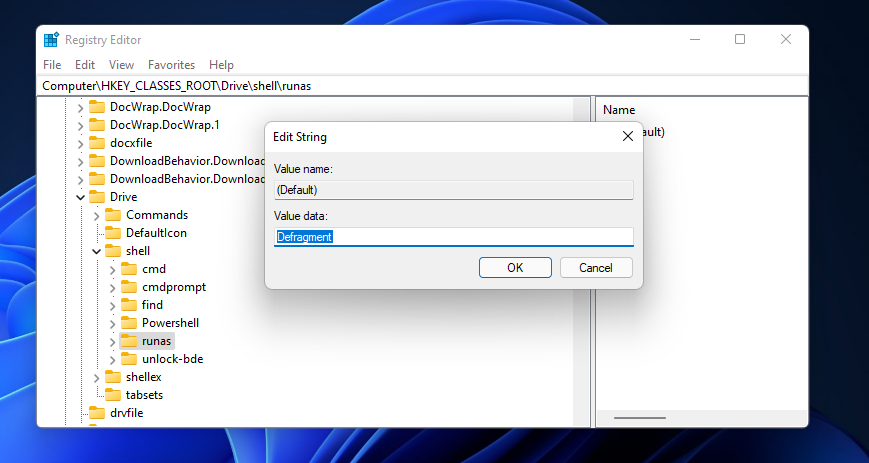
- Select the runas key, and double-click its (Default) string.
-
Enter Defragment in the Edit String’s text box, and click the OK button.
- Right-click runas and select the New and Key context menu options.
-
Type command to be the new key’s title.
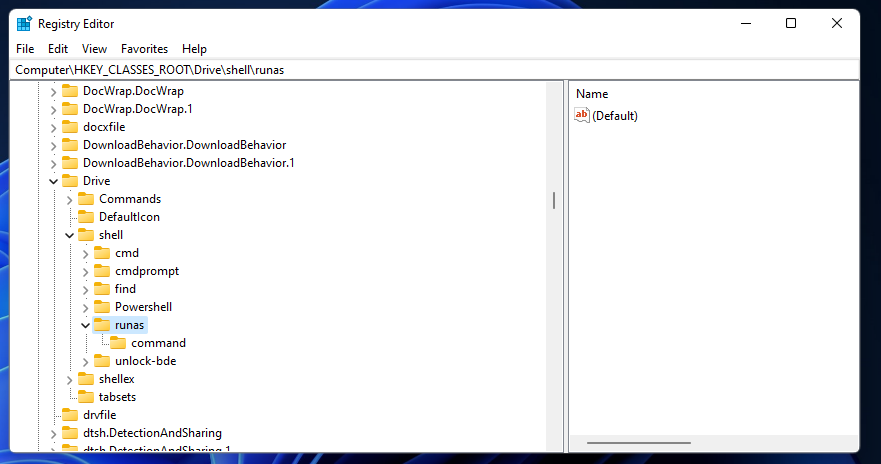
- Click the new command key to select it.
- Double-click (Default) on the right side of the Registry Editor.
-
Enter defrag.exe /u /v %1 in the Edit String’s window Data value box like in the screenshot directly below.

- Select OK to exit the Edit String window, and close the Registry Editor.


Now it’s time to try out the new Defragment shortcut. Open File Explorer, and click This PC within the left navigation pane. Right-click Local Drive and select the Defragment context menu shortcut shown directly below. Selecting that option will defrag the drive and open a classic command-line window that displays the results.

This registry tweak also adds a Defragment option to the classic context menu, which means it works for Windows 10. To open the classic context menu for the drive icon in Windows 11 File Explorer, select Local Disk and press the Shift + F10 hotkey. Then you can select Defragment from the classic menu.

How to Add a Disk Defragmenter Option to the Desktop Context Menu
Windows 11’s desktop context menu is another place we can add a shortcut for the Defragment and Optimize Drives tool to. By adding a shortcut there, you’ll be able to access the defrag tool directly from your desktop. This is how you can set up a desktop context menu shortcut that opens the graphical (GUI) Optimize Drives window.
- Open the Registry Editor (as administrator).
- Open the Computer\HKEY_CLASSES_ROOT\Directory\Background\shell key.
-
Right-click shell to open its context menu and select New > Key.

- Give the new key a Disk Defragmenter title.
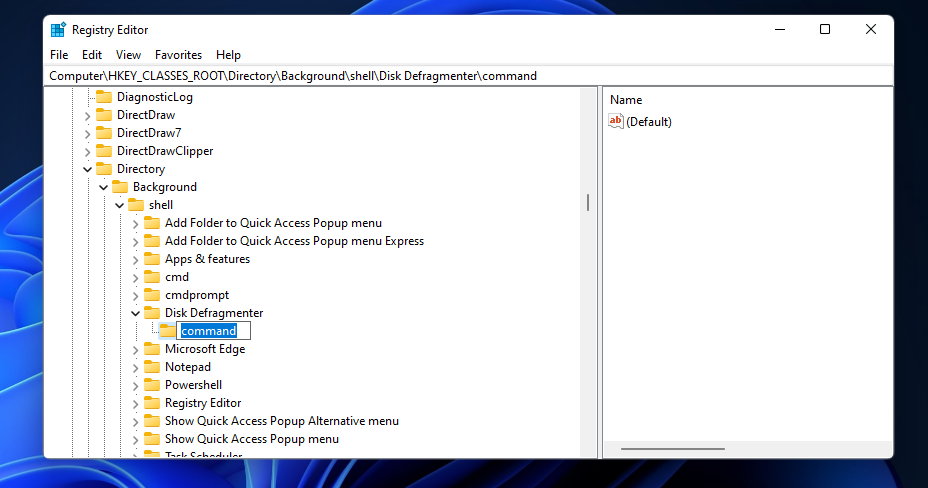
- Right-click Disk Defragmenter to select the New and Key options.
-
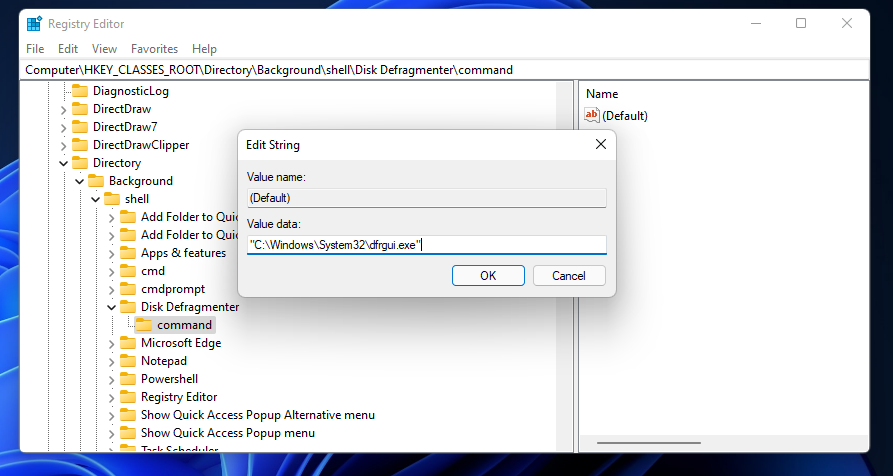
Input command to be the subkey’s title.
- Select the new command subkey, and double-click the (Default) string for it.
-
Input "C:\Windows\System32\dfrgui.exe" within the Edit String window’s text box as in the screenshot directly below.
- Press the OK button, and close the Registry Editor.


To select the new Disk Defragmenter shortcut, open the classic context menu by right-clicking the Windows 11 desktop and selecting Show more options. Clicking the new Disk Defragmenter option there will open the Optimize Drives window below. There you can select your C: drive and click Optimize to defrag it.

Defrag Your PC’s C: Drive With Those New Context Menu Shortcuts
Those context menu shortcuts will give you more direct access to the Defragment and Optimize Drives tool in Windows 11. The first method adds a right-click menu option to Explorer’s Local Disk icon that defrags your PC’s C: drive when selected.
If you prefer a shortcut that just opens the Optimize Drives window, without defragging anything, add that option to the desktop context menu as outlined for the second method.