
The Windows 11 desktop wallpaper image can be anything you want. You can even set up desktop slideshows to flick through multiple pictures. Yet, Windows lacks a built-in feature for adding smaller images that overlap onto the desktop’s wallpaper.
Many users would probably utilize such a feature to add smaller family pictures to the Windows desktop over wallpapers. The lack of such a feature has prompted some software developers to release apps that display overlapping images on the desktop. You can add an overlapping image to the Windows desktop with Overlap Wallpaper, Desktop Photo, and 8GadgetPack.
How to Add an Overlapping Image With Overlap Wallpaper
Overlap Wallpaper is a freely available and portable app for adding overlapping pictures to the desktop. That software enables users to add opaque and transparent pictures to the desktop. This is how you can add an overlapping photo with Overlap Wallpaper:
- Open the Overlap Wallpaper website’s download page.
- Click the Overlap Wallpaper download link.
-
Press the Download button in the top right corner of the tab that opens.
- Open Explorer and the folder your browser is configured to download files to.
-
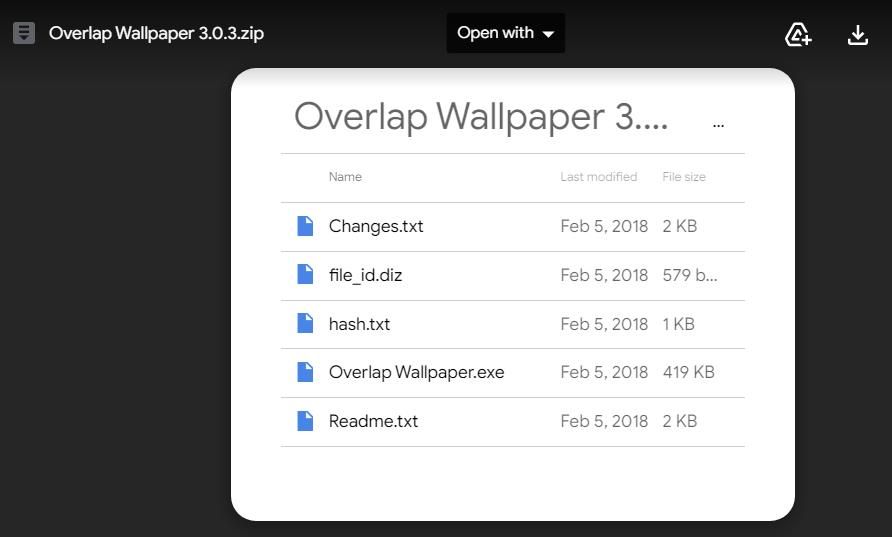
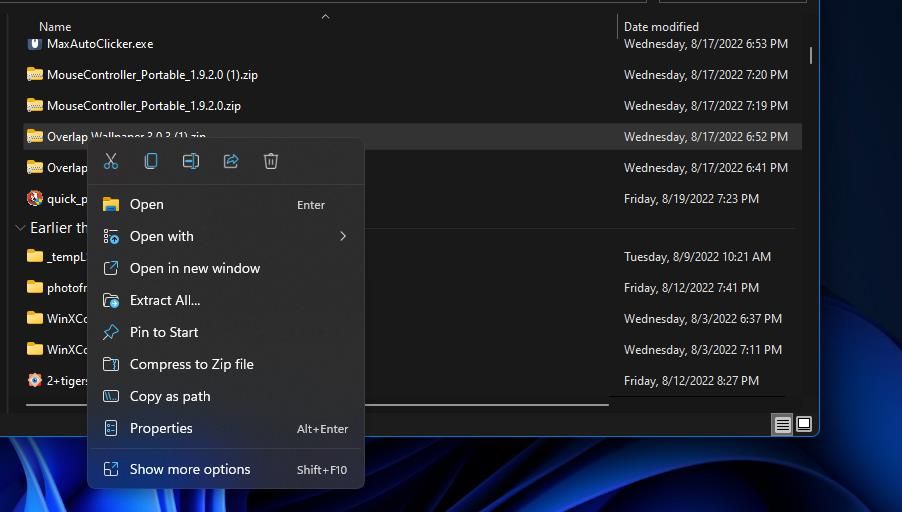
Click the Overlap Wallpaper ZIP file with the mouse’s right button and select the Extract All option for the archive.
-
Select the Extract Compressed window’s Show extracted option.
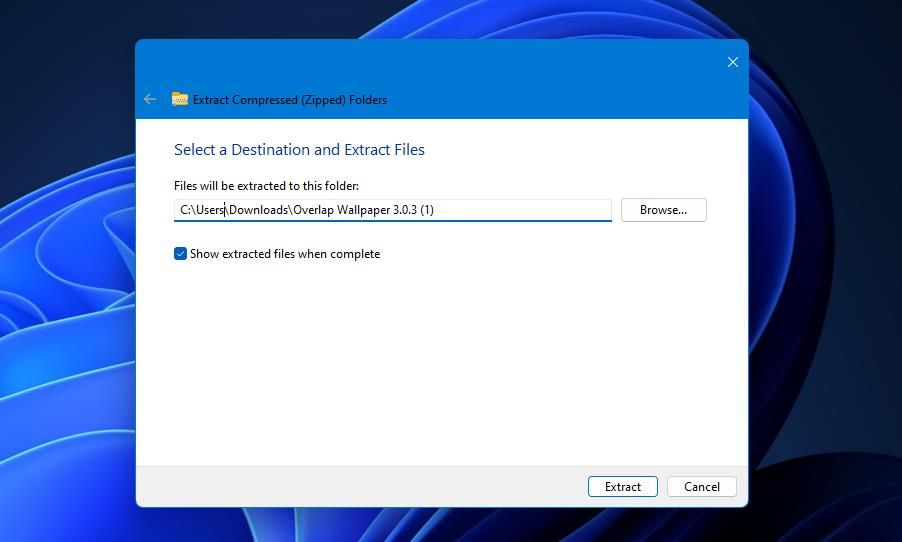
- Click Browse if you want to choose an extraction location. Then choose a directory in the Select a destination window, and click the Select Folder option.
- Press the utility’s Extract button to bring up an extracted Overlap Wallpaper folder.


Now it's time to get Overlap Wallpaper up and running:
- Double-click Overlap Wallpaper.exe to run the program.
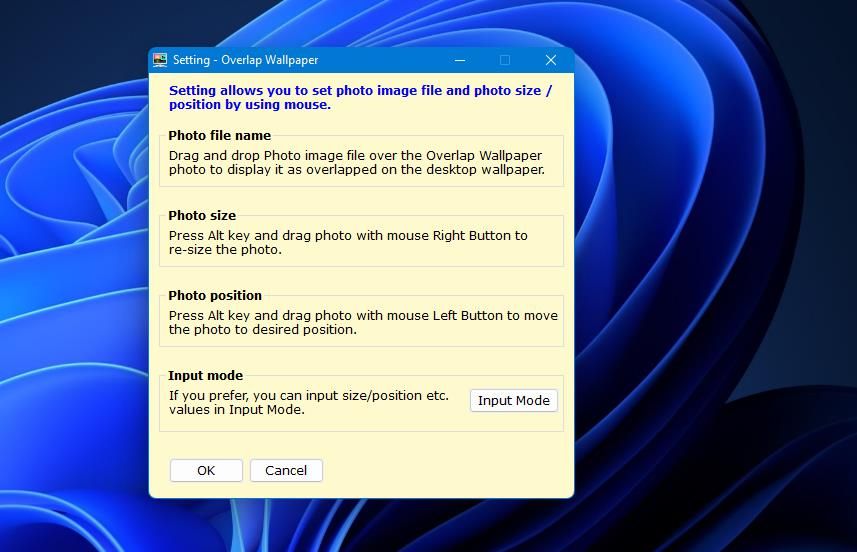
- Next, double-click the Overlap Wallpaper system tray icon and click Settings to open the Setting window.
-
Press the Input Mode button there.
- Click Browse in the Input Mode Settings window. Then choose a picture you want to add to the desktop and press the Open button to select it.
-
Then you’ll see a new overlapping image on the desktop you can resize and reposition. To resize that picture, enter new values in the size boxes on the Input Mode Settings window.
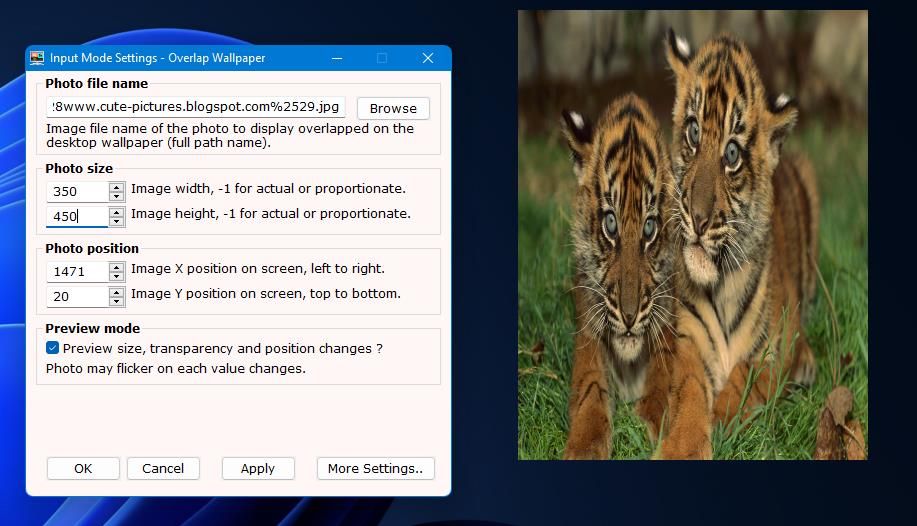
- Click the Apply > OK options to save the resized image.


It’s easier to reposition the photo via the yellow Setting window. Right-click Overlap Wallpaper’s system tray icon and select Settings. Then hold the Alt key and left-click the overlapping picture to drag it to a new position on the desktop.
The older Overlap Wallpaper 2.6.0 version also includes a transparency option, which the developer has removed in the latest package. So, you’ll need to download and extract the ZIP for that version if you want to apply transparency effects.
You can apply transparency to an overlapping image by reducing the value of the Photo transparency setting on the Settings window in Overlap Wallpaper 2.6.0.

How to Add an Overlapping Image With Desktop Photo
Desktop Photo is a lightweight app you can install and utilize on most Windows platforms. Unlike Overlap Wallpaper, this software adds framed overlapping pictures to the desktop. It also enables you to add captions to displayed photographs.
You can add an overlapping image to Windows 11’s desktop with that software as follows:
- Bring up the Desktop Photo 1.00 download page.
- Select the Download Now link on Desktop Photo’s page.
- Click the yellow folder icon on the taskbar that opens Explorer.
- Open the Downloads folder or whatever other directory includes the Desktop Photo setup wizard.
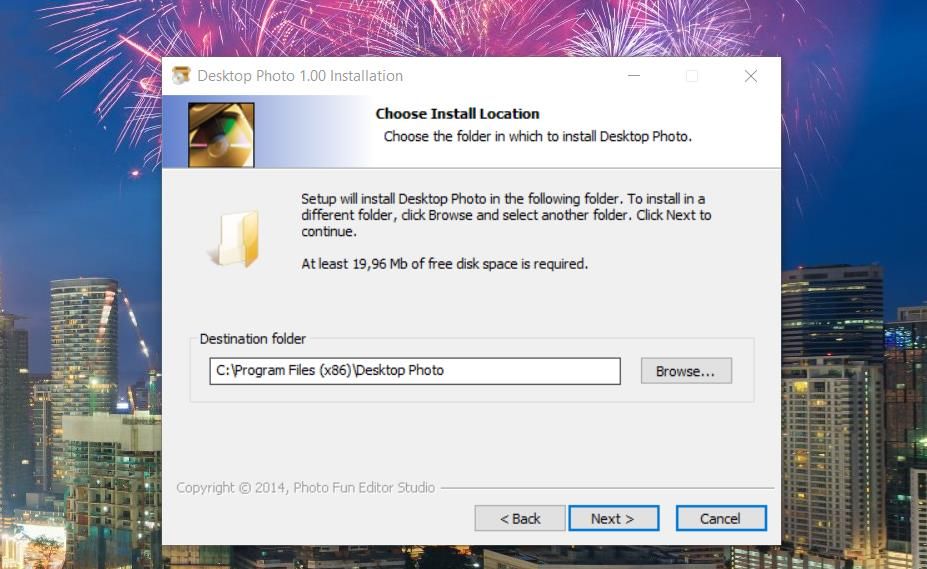
- Double-click setup_desktopphoto.exe to open Desktop Photo’s installation wizard.
- Click Next to reach the install location step.
-
Select Browse to choose a folder for the software if preferred, and then click OK.
- Click Next > Install to add the software.

Now that Desktop Photo is installed, it's time to put it to work:
- Double-click the Desktop Photo shortcut you’ll see on the desktop after installation.
- Next, click inside the default picture box to view all of Desktop Photo’s options.
-
Select the Open Photo option.
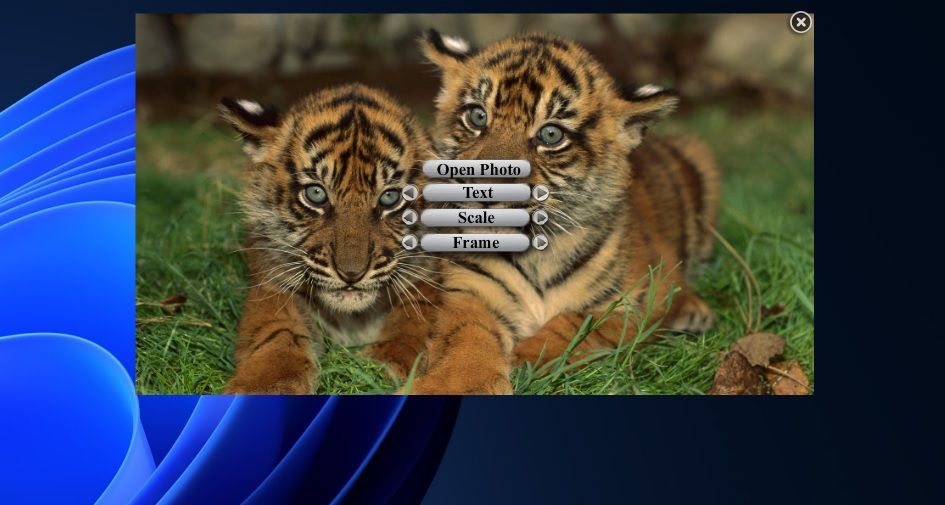
- Then select an overlapping photo display, and click the Images window’s Open button.
- Left-click the overlapping image and hold the mouse button to drag and position it on the desktop.
- After positioning the image, move the cursor of it. The software options will disappear from the overlapping picture when it’s not selected.

You can stop there after adding the overlapping image. However, most users will probably prefer to configure their pictures a bit more by at least resizing them. To do that, select the photo and click the left and right arrows for the Scale option. Note that software has maximum and minimum sizes that restrict how much you can resize pictures.

You can also customize the overlay picture with frames. To choose a different border for the picture, click the left/right buttons for the Frame option. However, the frames are a little basic, and there are only six to choose.

To add a picture caption, click the Text button. Then input some text at the top of the photograph. The maximum caption length is two lines across the width of the picture.

Desktop Photo automatically adds itself to the Windows startup. However, it doesn’t include a startup setting. If you prefer the software not to start automatically, you’ll need to disable it via Task Manager’s Startup tab.
How to Add an Overlapping Image Slideshow With an 8GadgetPack Desktop Widget
Neither Desktop Photo nor Overlap Wallpaper enables users to add overlapping image slideshows to the desktop. However, you can add various widgets to the desktop with the 8GadgetPack software. Among them is a widget that adds a small overlapping image slideshow to the desktop.
This is how to add an overlapping picture slideshow to your desktop with 8GadgetPack Desktop:
- Open the 8GadgetPack homepage, and click Download there.
- Launch File Explorer, open your browser’s download folder, and double-click 8GadgetPackSetup.msi.
- Then select the Install option in the 8GadgetPack Setup window.
- Select the Show gadgets when setup exits box to automatically start the software.
- Click Finish to exit the 8GadgetPack Setup.
Now you're ready to add a gadget:
-
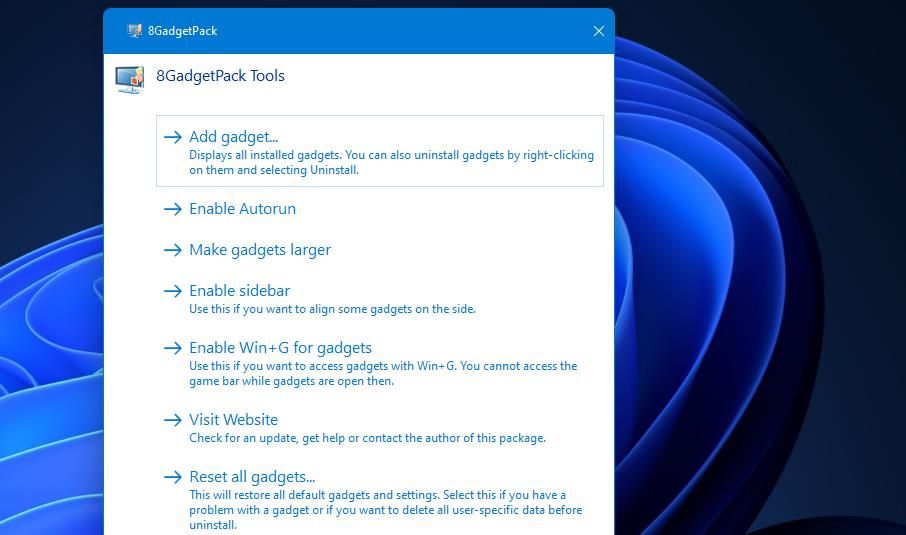
Select Add gadget on the 8GadgetPack window.
- Then double-click the Slide Show gadget on the third page of the widget window.
-
Press the Options button on the right of the widget.
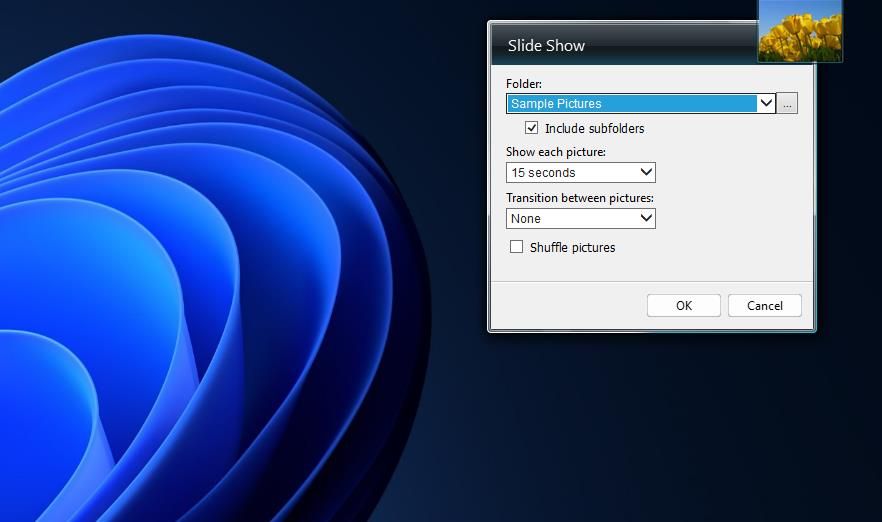
- Click the ellipses button by the Folder drop-down menu.
- Choose a folder that includes the pictures you want the widget to display, and click the directory selection window’s OK button.
- You can select optional settings in the Show each picture and Transition between each pictures drop-down menus. The first menu includes options for adjusting how long the widget displays each image, and the second has transition effect settings.
- Click OK to save the slideshow settings.


Now you can sit back and enjoy the overlapping slideshow of your favorite photos on the desktop. The smaller setting for that widget is a little small. However, you can expand it by clicking the gadget’s Larger size button.

You can also configure that widget to display just a single picture if preferred. Simply set up a new folder that includes one photo, and select that directory for the slideshow. Then the widget can only display the folder’s one image.
Add Your Favorite Photo Over Your Windows 11 Desktop Wallpaper
It’s a pity there aren’t many software packages available that add overlapping images to Windows 11’s wallpaper. Nevertheless, you can still add your favorite family or other personal snapshots to Windows 11’s desktop without changing its wallpaper with the software in this guide. They’re relatively simple programs with which you can include a special picture on your desktop.