A Windows 11 bootable USB drive is useful to clean install your OS, or perform an upgrade. A bootable Windows USB also helps you troubleshoot your PC from critical errors and install Windows on multiple PCs offline.
Microsoft makes it easy to create an installation media with its Media Creation Tool. In addition, you can also use Rufus and the Command Prompt to create one. In this guide, we show you the three different ways to create a USB flash drive installer for Windows 11.
Before We Start: How to Download the Windows 11 ISO Image
To successfully create a Windows 11 USB bootable drive, you will need a Windows 11 ISO file, also known as an ISO image. As such, get this sorted before you proceed to create a bootable USB. You can easily download the Windows 11 ISO from the Microsoft official website. Here's how to do it:
- Visit Microsoft’s official page to download Windows 11.
- Scroll down to the Download Windows 11 Disk Image (ISO) for X64 devices section.
-
Click the drop-down menu and select Windows 11 (multi-edition ISO).
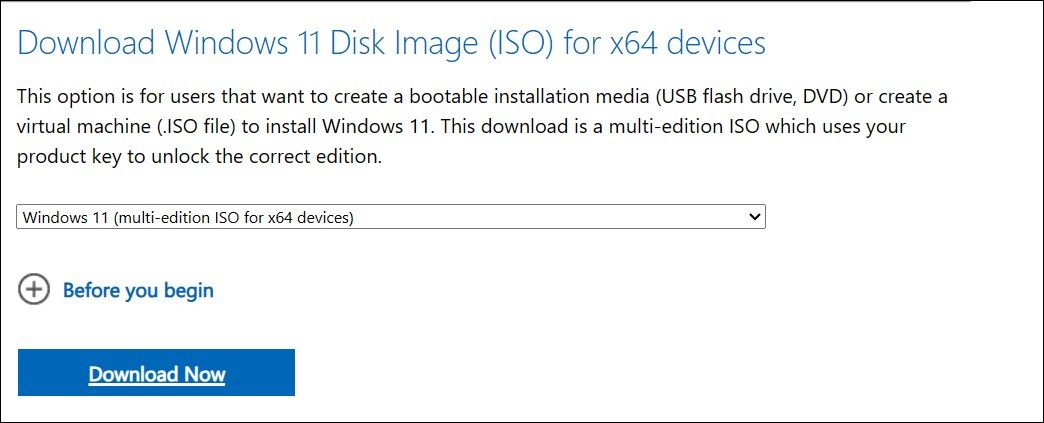
- Next, click on the Download Now button to continue.
-
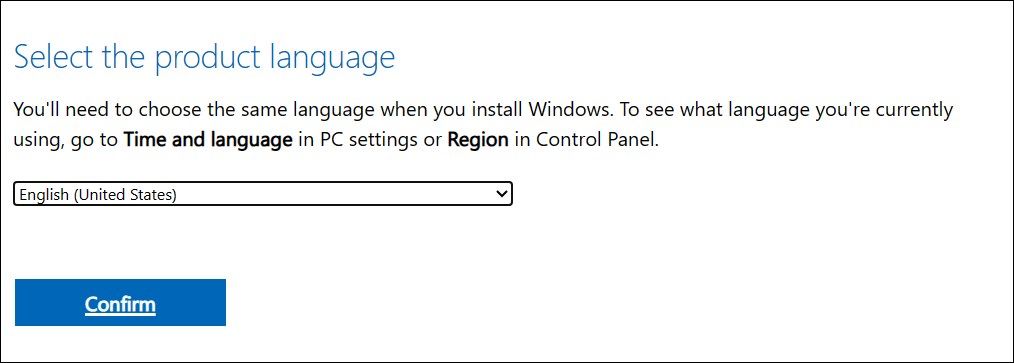
The current page will load additional information and show the Select the product language section. Click the drop-down for Choose one and select your preferred language. Click Confirm to continue.
-
When the download section loads, click the 64-bit Download button.
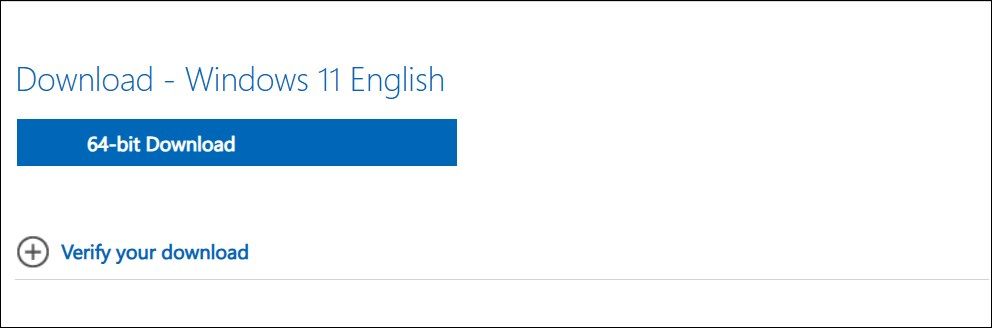
- Your download will begin immediately. However, it may take some time to finish downloading, depending on your Internet speed.


Once you have the ISO file downloaded, follow one of the methods below to create a Windows 11 bootable USB drive.
1. How to Create a Windows 11 Bootable USB Using Rufus

Rufus is an open-source utility to format and create a bootable USB flash drive for the Windows operating system. It's a lightweight utility and offers a few more customization options compared to Microsoft's in-house media creation tool.
To create a Windows 11 bootable USB drive using Rufus:
- Visit the Rufus website and scroll down to the Download section.
- Click on the Rufus link to download the latest version.
- Run the executable file and click Yes if prompted by UAC.
- Connect your USB flash drive to your PC and wait for Rufus to detect and show it under the Device section.
- Click the drop-down for Boot selection and select Disk or ISO image.
- Then, click the SELECT button.
- Select the Windows ISO file and click Open.
- Click the drop-down under the Image option and select Standard Windows 11 Installation.
- Leave the Partition scheme (GPT) and Target system (UEFI) as default.
- Under Volume label, enter a name for your bootable flash drive.
- Leave the File system and Cluster size, and other options as default.
- Make sure the Quick format and Create extended label and icon files option is checked.
- Click the Start button to initiate the bootable drive creating process.
Once done, Rufus will show a success message. Now you can use the Windows 11 bootable drive to install the OS on any compatible system.
2. How to Create a Windows 11 Bootable USB Drive Using the Media Creation Tool
The media creation tool is Microsoft's in-house solution to create an installation media. You can use the media creation tool to create a bootable USB flash drive or download the ISO file to your local drive. Since it needs to download the ISO to create a bootable drive, you cannot use an existing Windows ISO image with this tool.
To create an installation media using the media creation tool:
- Connect your USB flash drive of at least 8GB to your PC. Make sure it is detected and you have taken a backup of all the files on your USB drive.
- Next, visit the Microsoft download center page.
- Under the Create Windows 11 Installation Media section, click the Download Now button and save the file to your PC.
- Next, run the Mediacreationtool.exe file and click Yes if prompted by UAC. The tool may take a few seconds to launch, so wait till you see the Setup wizard.
-
Click the Accept button to agree to the terms.
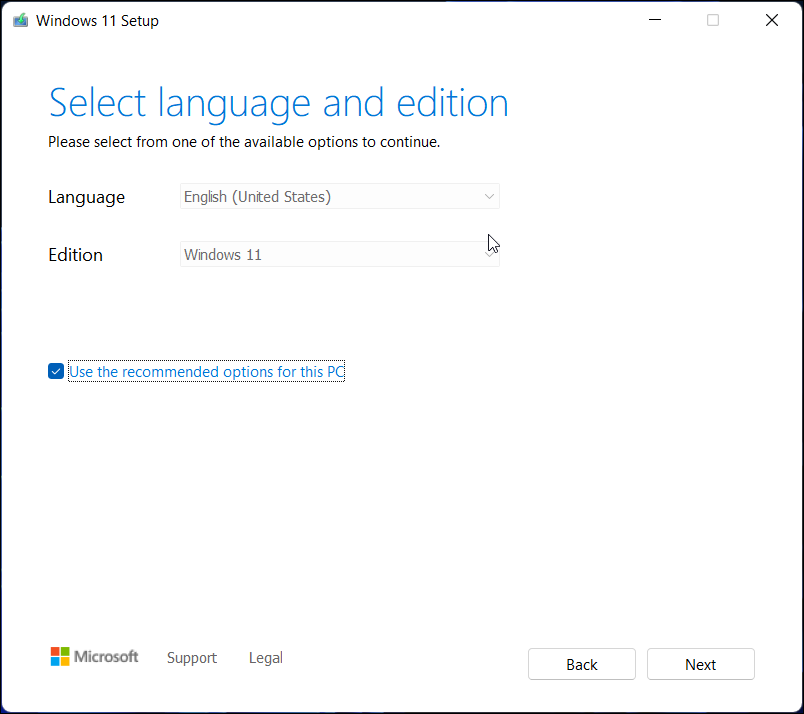
- The media creation tool will automatically select the Edition and Language to match the current Windows configuration on your PC. To change the language, uncheck Use the recommended options for this PC box and select your preferred language from the drop-down menu.
-
Choose your options and click Next.
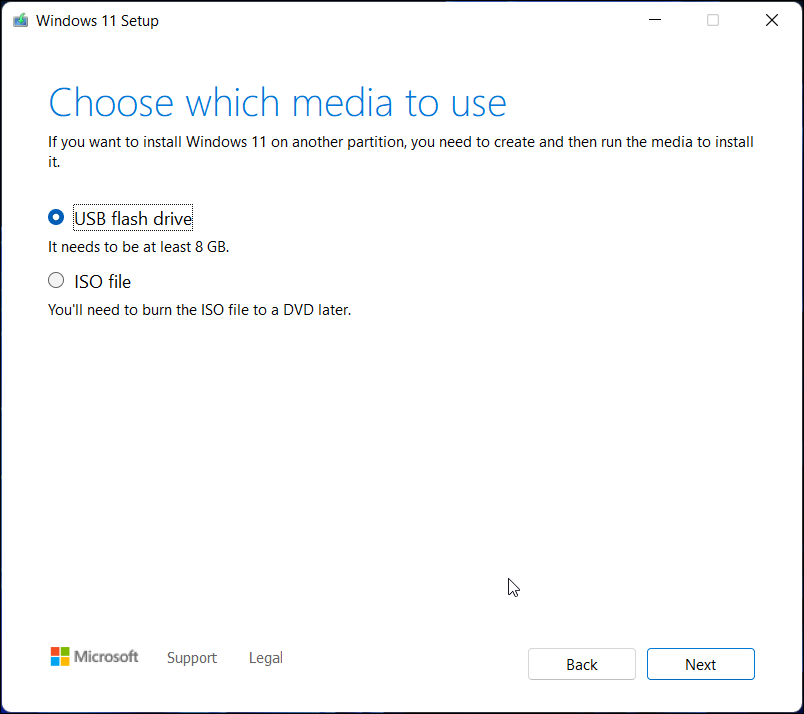
- In the Choose which media to use window, select USB flash drive.
- Click the Next button.
-
Select your USB drive from the list of drives available.
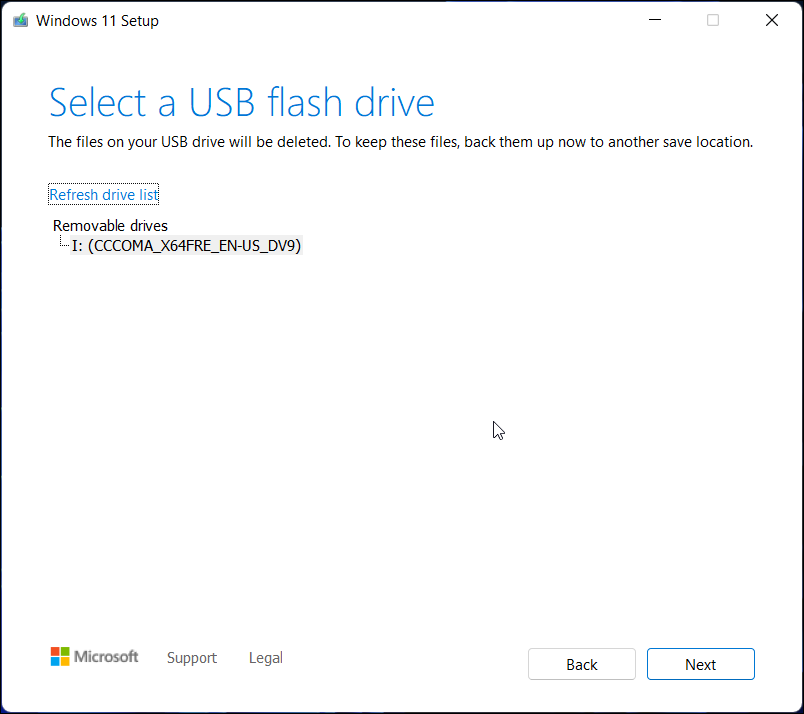
- Click the Next button to continue.
- Next, click the Finish button.


Media Creation Tool will now download the necessary Windows 11 files and create an installation media. When the "your USB flash drive is ready" message appears, click the Finish button to close the setup wizard. Now you can boot from the USB drive to troubleshoot or clean install Windows 11.
3. How to Create a Bootable Drive Using Command Prompt
If you don’t want to use a third-party tool to create a bootable drive, you can use the Diskpart utility and Command Prompt to create installation media. Here's how to do it.
- First, take a backup of all the files on your USB drive and then connect it to your PC.
-
Press the Win key, type cmd, and click on Run as Administrator under Command Prompt. You can also use PowerShell if you prefer it over Command Prompt.
-
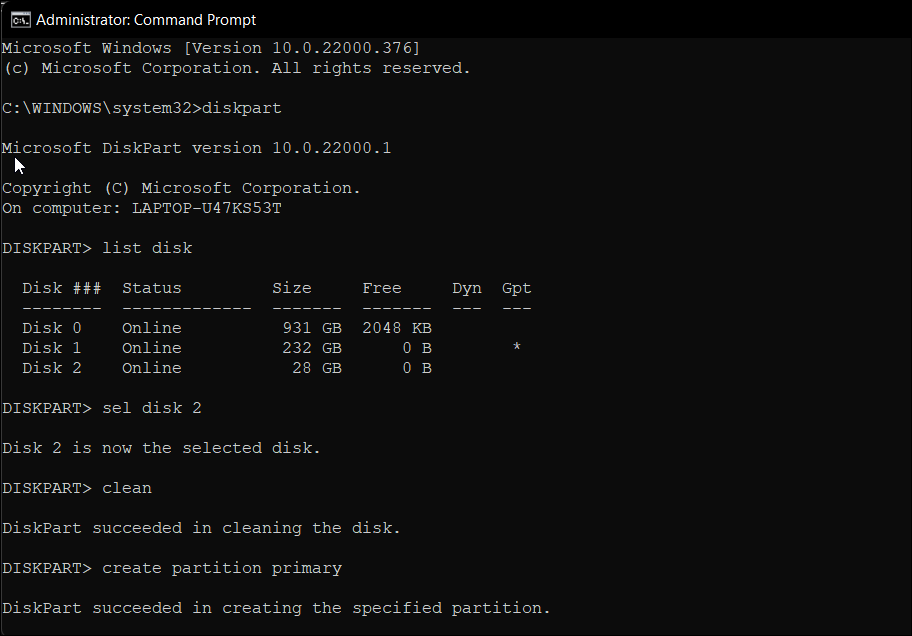
In the Command Prompt window, type the following command and hit enter to launch the Windows Diskpart utility.
DISKPART -
Next, type the following command to list all the available storage devices:
LIST DISK - Here, locate your USB drive. You can look at the Size column to determine your USB drive. In this case, the USB drive is listed as Disk 2.
-
Next, type the following command to select your drive:
SEL DISK 2 - In the above command, change DISK 2 with the number assigned to your USB drive. For example, if you have a single SSD or SATA drive setup, your primary drive will show as DISK 0 and USB drive as DISK 1. It is of extreme importance that you select the right drive as the next step involves wiping clean the selected drive.
-
Once the drive is erased, type the following command and hit enter to erase all the content from the drive:
Clean -
Next, type the following command to create a primary partition:
Create Partition Primary -
After creating a primary partition, type the following command to select the main partition:
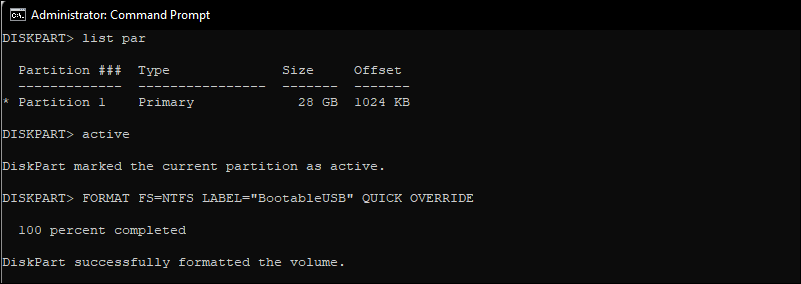
List Par -
Command Prompt will show the details of your USB drive.
-
Type the following command and hit enter to activate the partition:
Active -
Then type the following command to format the USB drive. It is important to format the drive in NTFS format as the FAT32 format will cause the incorrect parameter error.
FORMAT FS=NTFS LABEL=“BootableUSB” QUICK OVERRIDE - Once done, type Exit and hit enter to exit the Disk Part utility.


Now you will need to mount the ISO image and then move its content to your USB drive.

-
To do this, type the following command and hit Enter to mount the Windows 11 ISO file:
PowerShell Mount-DiskImage -ImagePath "C:\Users\UserName\Downloads\Win11_English_x64v1.iso" -
In the above command, replace the file path with the location of your Windows 11 ISO.

-
Once the ISO is mounted, type the following command to launch Diskpart.
Diskpart -
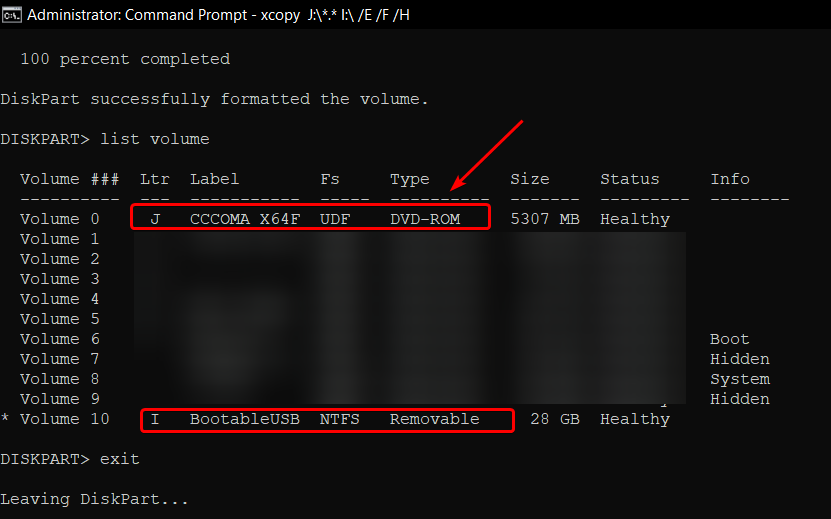
Next, type the following command to show the available volume.
List volume -
This will help you determine the Drive letter for the mounted ISO file. In the Type column, the mounted ISO will be listed as DVD-ROM. And the Ltr column lists the letter associated with the volume. Note down the details of the ISO volume as you will be using it moving forward.
-
Once you have the volume details for the mounted ISO, type the following command to exit Diskpart:
Exit -
Next, type the mounted ISO volume letter and hit enter. For example, if your mounted ISO volume letter is J, then type the following command and press Enter.
J: -
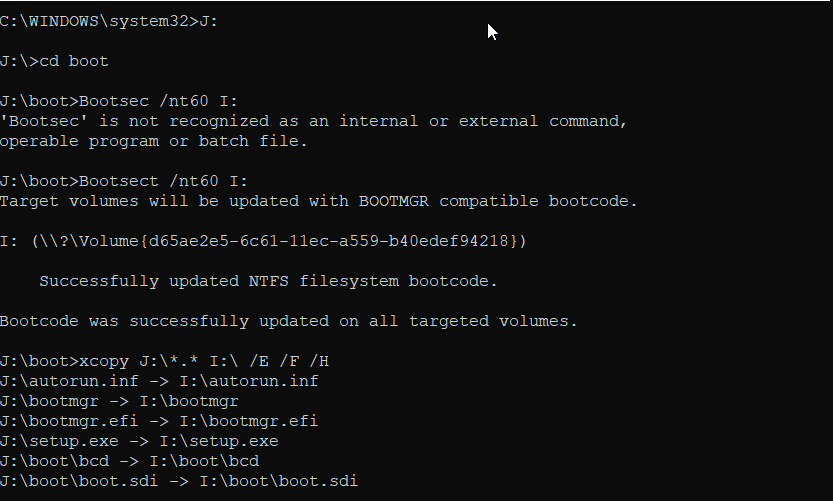
Type the following command to boot from CD:
cd boot -
Next, type the following command to apply the master boot code compatible with Bootmgr to the USB flash drive:
Bootsect /nt60 I: -
In the above command, replace I with the drive letter associated with your USB flash drive.
-
Next, type the following command and hit Enter to copy Windows 11 system files to the USB flash drive:
xcopy J:\*.* I:\ /E /F /H - In the above command, replace K: and I: with your Mounted ISO Volume and USB drive letter, respectively.
- The process may take a 5-10 minutes to complete. If the Command Prompt feels stuck, it is normal behaviour, so wait until the process is complete.
- If successful, you will see a Files (s) Copied message.


That’s it. Now you can use the USB bootable drive to clean install Windows 11.
Multiple Ways to Create a Windows 11 Bootable USB Drive
With its Media Creation Tool, Microsoft makes it easy to create installaltion media. However, if you have a Windows 11 ISO image ready, you can use Rufus or the Command Prompt to create a Windows 11 bootable USB drive quickly. You can use the same to clean install Windows 11 on a new PC, troubleshoot your Windows computer or dual boot Windows 10 with Windows 11.