A cache is a group of temporary files that programs and websites create to render faster performance on subsequent use. Think of cache as something similar to a memory reserve that your computer or apps can dig into for quickly pulling the information you need.
At first, cached files sound like a good idea, but too much of it can take up a good chunk of your storage and corrupted files in the cache can cause an app to glitch.
Here's the good news: you can clear the cache in less than a minute. In fact, it's recommended that you clear cache every once in a while. If you're on Windows 11, there are several types of cache you might want to clear. In this guide, we walk you through how you can clear the cache on Windows 11 quickly.
How to Clear the Windows 11 Cache With Disk Cleanup
Windows has a built-in tool called Disk Cleanup that can help you clean several types of cache files. To launch Disk Cleanup, search for disk cleanup in the Start Menu and select the Best match. Select the disk drive you want to clear cache from and click OK.
Alternatively, you can right-click on a disk drive from Computer and select Properties. Click on the Disk Cleanup button from the General tab in the Properties window, and that should launch Disk Cleanup as well.
You'll see a window pop up. Select Clean up system files from the bottom.
The window will disappear and then reappear with more items in the Files to delete section. Select all boxes and click OK, and then Delete files to start clearing the cache files. If you recently installed Windows 11, you'll also see the Windows 10 files in this section. Select the Windows 10 files if you wish to delete them as well.
How to Flush the DNS
Your operating system stores your computer's query history, including for the websites you access. The cache makes it easy for your computer to load websites quickly, but over time, it might accumulate. In worse cases, you may be a victim of DNS cache poisoning. Fortunately, you can clear the DNC cache on your PC with a simple command and fix these issues.
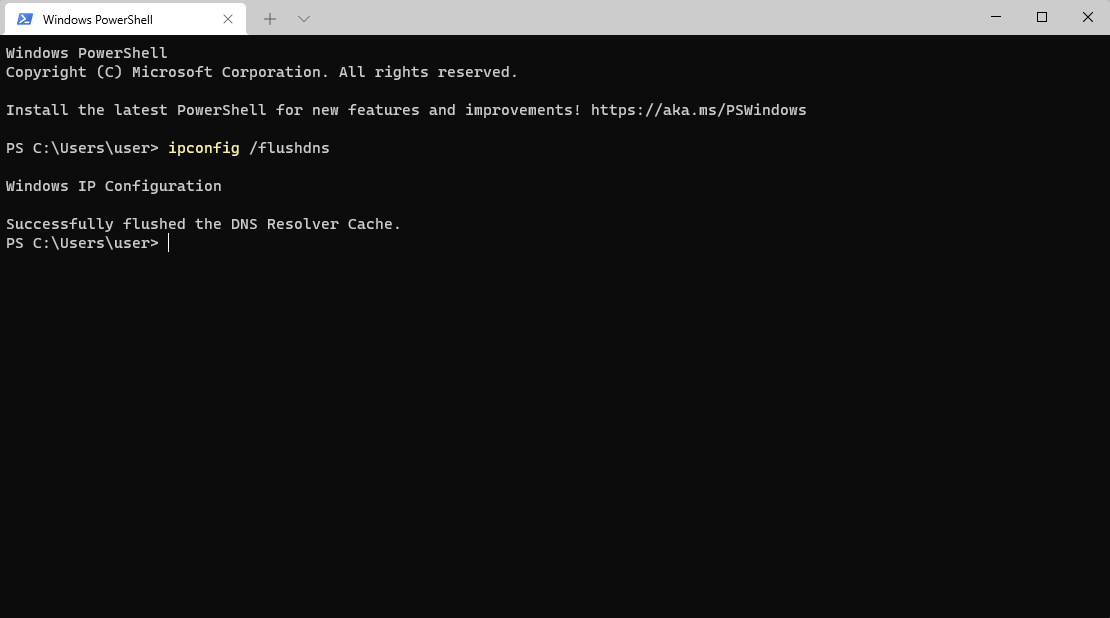
Launch the Windows Terminal by searching for windows terminal in the Start Menu and selecting the Best match. Type the following command in the terminal and press enter:
ipconfig /flushdns

Note that you can also execute the command using PowerShell or Command Prompt.
Once the cache has been cleared, you'll see a message that reads Successfully flushed the DNS Resolver Cache.
How to Clear Microsoft Store's Cache
Microsoft Store also stores cache files on your PC, just like other apps. However, if you're receiving a "Windows Store cache may be damaged" error or just want to make empty some storage, you can clear the Microsoft Store cache.
Press Win + R, type wsreset.exe, and press Enter. You'll see a blank window pop up and close automatically. At this point, your Microsoft Store cache will have cleared.
How to Clear Your Browser's Cache
Your browser also stores cache data as you go about your day browsing websites. Clearing browser cache is pretty simple, but it works slightly differently on all browsers.
On Google Chrome or Edge, you can press Ctrl + Shift + Delete, select Cached images and files. and click Clear data.
You can also set your Edge to automatically clear cache every time you close the browser. After pressing Ctrl + Shift + Delete, just press Cancel, go to Choose what to clear every time you close the browser option under Clear browsing data, and turn on the button next to Cached images and files.
On Firefox, you'll need to click on the hamburger menu icon at the top-right, select Settings > Privacy & Security, and select Clear Data under the Cookies and Site Data section. This will pop open a small window where you can choose to delete cookies, site data, and cached web content, or just the cached web content. Once you've selected the relevant options, click on Clear.

How to Clear the Location Cache
Windows also saves your location history as cache files. You can remove the location cache on your PC from the Settings app.
Press Win + I to launch the Settings app and navigate to Privacy & Security > Location. Look for Location history and click the Clear button next to it.
Set the Cache to be Deleted Automatically with Storage Sense
Instead of clearing different types of cache on your Windows PC separately, you can use the built-in Storage Sense feature to clear cache automatically at a set interval. You can set it up from the Settings app.
Press Win + I to launch Settings and navigate to System > Storage > Storage Sense. Toggle the button next to Automatic User content cleanup to turn on Storage Sense. Next, configure cleanup schedules by selecting the frequency to run storage sense (i.e., clear cache), deleting files from the recycle bin, and deleting files from the Downloads folder.

If you want to run Storage Sense right now, scroll to the bottom and click on Run Storage Sense Now.
Once you've set it up, Storage Sense will keep clearing cache automatically as per the schedule you've selected.
Did You Clear the Cache?
Hopefully, you were able to clear the cache from Windows 11 and free up a considerable amount of storage on your hard drive. Clearing cache also helps improve performance, especially for heavily used apps like browsers. Clearing cache might also resolve errors if your app seems to be giving you trouble, and in some cases, it's even essential for your PC's security.
You should aim to clean the storage frequently, but if that's too much of a task, you can always rely on Storage Sense. Of course, there are several ways other than clearing cache for cleaning up your Windows 10 PC.