.jpg?q=50&fit=contain&w=1140&h=&dpr=1.5)
When you want to do something new with your PC, such as installing a new program or using it for a specific task, you'll sometimes want to check your PC's specifications. For example, some Windows 11 games and image-editing applications have high minimum system requirements. And if your PC can't match those requirements, it can't run the program optimally.
As such, it’s a good idea to check your PC’s specifications before purchasing and downloading software with high minimum system requirements. You can view system info in Windows 11 with a few different apps. These are five ways you can check computer information within Windows 11.
1. Check System Details in Settings
The Settings app includes some basic information about your PC. Although that app doesn’t provide lots of system specs, it’s still a good place to check Windows platform details at least. You can view computer info on the About tab in Settings as follows.
- Open Windows 11’s Start menu.
- Click Settings on the menu, which is among the pinned apps.
-
Select About on the System tab to bring up the system info below.
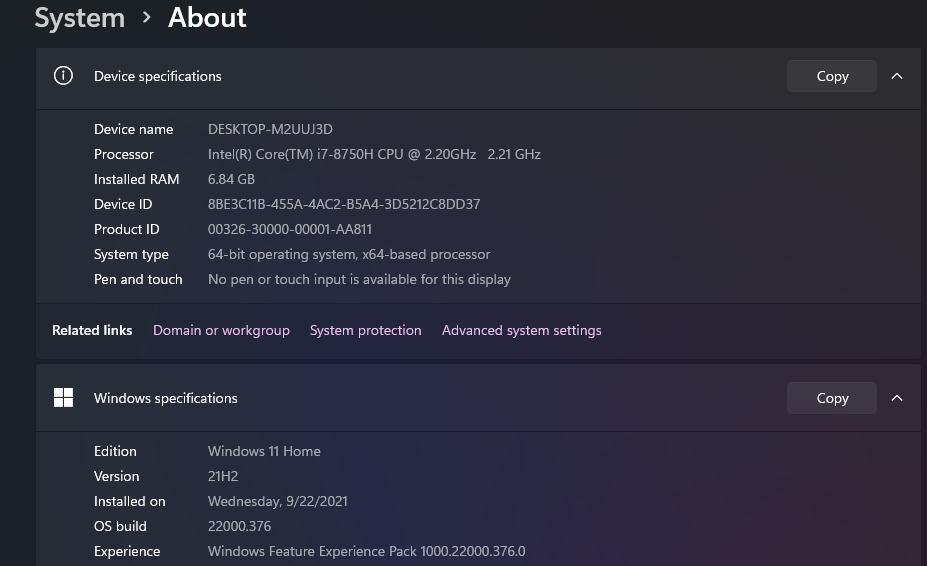
- If you need to share any info there, you can select the Copy options. You can paste the copied details into Notepad by pressing the Ctrl + V key combo.

The Windows specifications there tell you your platform’s edition, version, and build number. The listed device details include RAM, processor, and system type (32 or 64-bit) specifications. The system type spec is one worth checking before installing 64-bit programs. You can’t run 64-bit software on PCs with 32-bit system architecture.
You’ll also notice device and product ID details there. The Product ID is something used for identifying PC products (it’s not a Windows activation key). You might need to provide that ID when contacting Microsoft support or other help services.
2. Open the System Information App
When you need to look at much more detailed PC info, open the System Information app. System Information is a built-in Windows app that includes comprehensive system specs for pretty much all your PC’s hardware resources and components. To check computer specs with that app in Windows 11, open it like this.
- Open the Start menu.
- Click inside the search box at the top of the Start menu.
- Type System Information within the search text box.
-
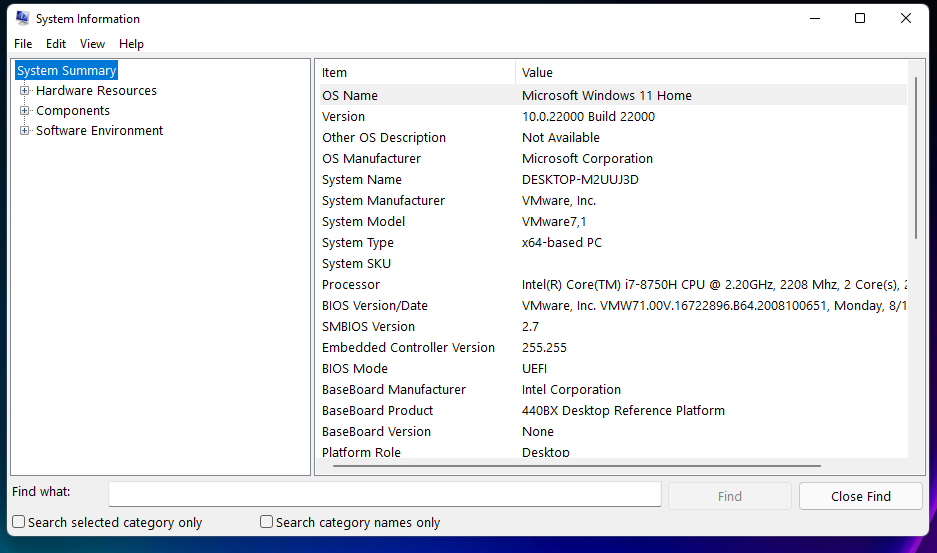
Then select System Information in the search results to bring up that app’s window.
-
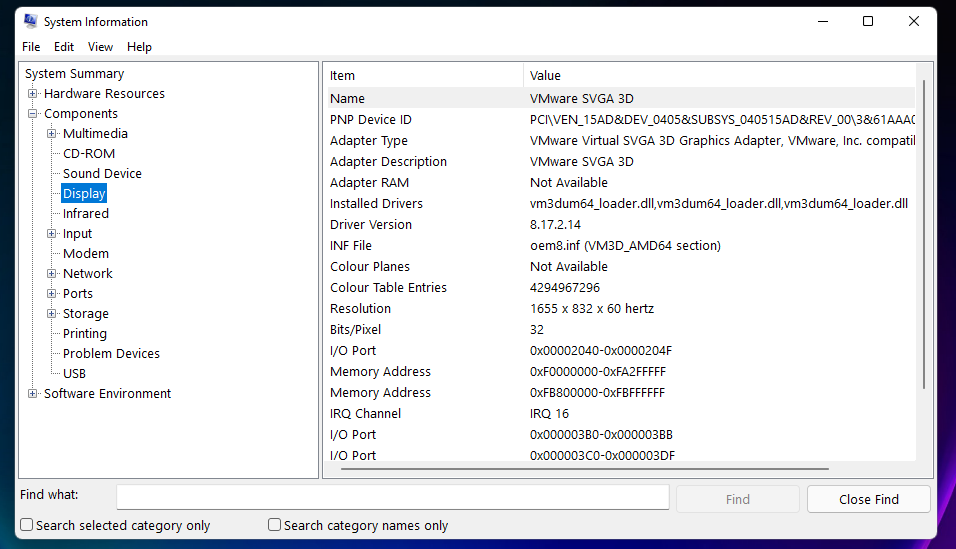
The System Summary in System Information includes most of the specifications you’ll need to check for software requirements. However, you’ll need to double-click Components and select Display to view graphics card details. To check hard drive size and available space, double-click Storage and select Drives.


3. View System Information With the DirectX Diagnostic Tool
Windows platforms also include a DirectX Diagnostic Tool (otherwise DxDiag), which is a good source for system info. That tool primarily provides video and audio device information for your PC. Aside from the device information it displays, DxDiag can also detect, sound, and input issues. This is how you can open it.
- Bring up the Power User (WinX) menu by pressing Win + X.
- Select Run on the Power User menu.
- Type dxdiag in the Open box.
-
Click OK to bring up DxDiag’s System tab.
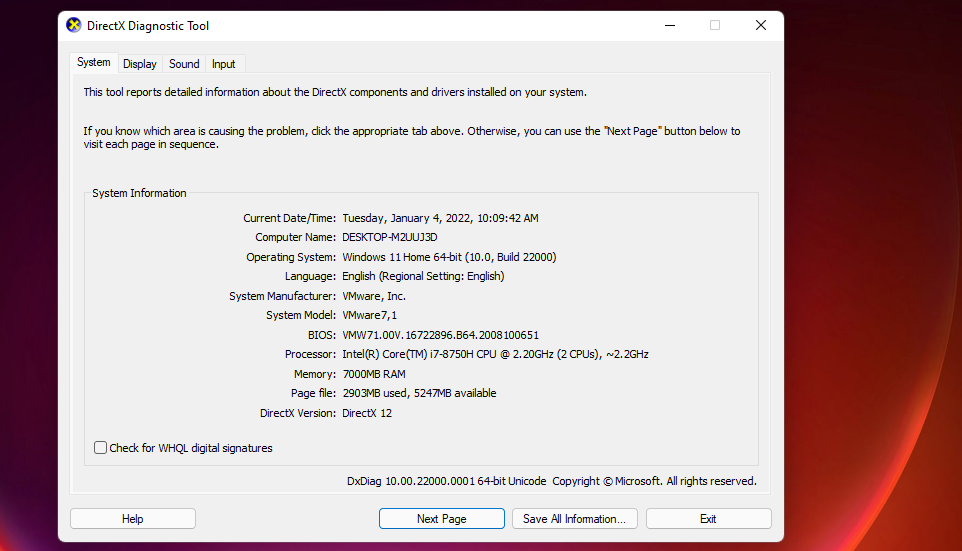
- The System tab shows general PC specs, such as model, memory, processor, operating system, and DirectX version. You can click the Display tab there to view detailed information for your PC’s graphics card. Select the Sound tab to view audio device details.


If you ever contact a customer support service for a Windows game or other software, an agent might ask you to provide system info from DxDiag. To do so, click the Save All Information button within the DirectX Diagnostic Tool. Choose a folder to save in, input a file title, and select the Save option. Then you can attach that TXT file to emails to provide support services with any required system details.
4. Check System Details With Windows Terminal (Command Prompt and PowerShell)
Windows Terminal is an app that incorporates both Command Prompt and PowerShell. You can view an overview of system specifications for your PC with both those command-line interfaces within Windows Terminal. To do so, you’ll need to execute a system information command as follows.
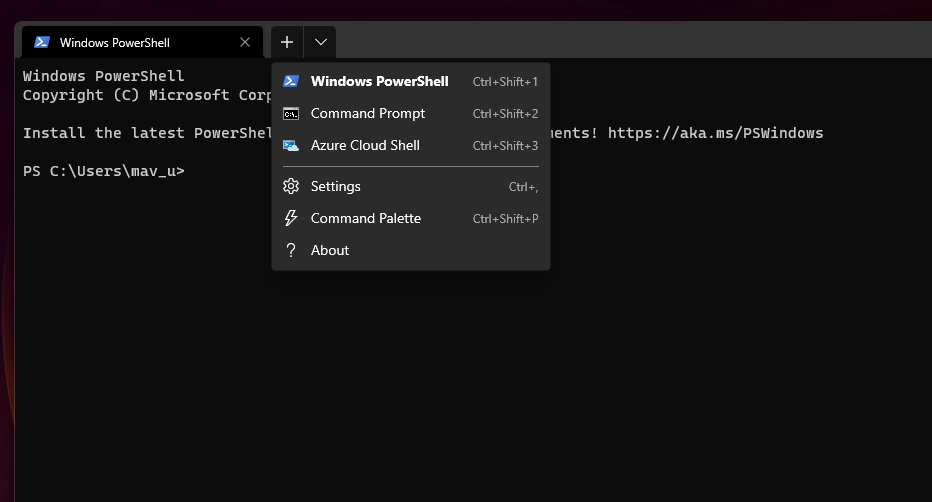
- Right-click the Start taskbar button and select the Windows Terminal (Admin) shortcut.
-
To select a command-line interface, click the Open a new tab button within Windows Terminal. Then choose either PowerShell or Command Prompt.
- Type systeminfo in your selected command-line interface.
- Press the Enter key to view system information.


The systeminfo command displays more extensive system details than the Settings app. Entering it is at least a good way to check what network cards your PC has. However, that command’s computer information lacks graphics card, sound device, and hard drive storage specifications. So, many users might prefer to check specifications with System Information or the DirectX Diagnostic Tool.
5. View System Info With Speccy
If you’re not satisfied with Windows 11’s system info apps, check out Speccy. Piriform Speccy is one of the best third-party system info apps for Windows platforms. It is a freely available app that provides extensive OS, RAM, motherboard, graphics, sound, storage, network, optical drive, and peripheral information for users’ PCs.
- Open Speccy’s download page on the CCleaner website.
- Click the Download Free Version button.
- Press the Windows + E hotkey, and open the folder you downloaded Speccy to in File Explorer.
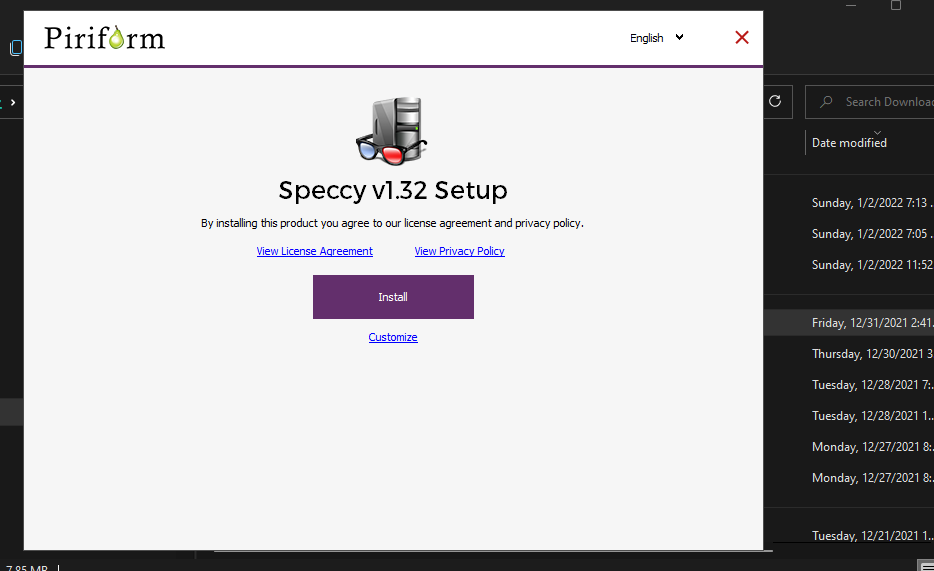
- Double-click Speccy’s setup wizard to open the installer.
-
Select the Install option.
- Then open Speccy to view the extensive system information it provides.


Speccy has a more appealing and accessible UI design compared with Windows 11’s System Information app. All its computer details are organized across 11 primary tabs. The Summary tab displays all the main specifications you’ll need to check for games’ minimum system requirements. There, you can click links to view more detailed RAM, motherboard, processor, OS, CPU, and storage information.
If you ever need to save PC information from Speccy to a text document, click the File menu. Select the Save as Text file option on that menu. Then choose a folder for the document, and press the Save button.
Check System Information With TheseMethods
Make sure you check your PC’s specifications with the above methods whenever you’re not sure if your desktop or laptop meets the minimum system requirements for a software package. If you don’t, you might end up purchasing some software packages your PC can’t run.
Speccy and the System Information app in Windows 11 provide the most detailed info. However, the other methods can still be useful for checking certain system details.