
A power plan in Windows is a set of system/hardware settings that configure a PC’s energy consumption. Windows 11 has its predefined saver, balanced, high, and ultimate performance power plans. Those plans are more significant for laptop users who can optimize battery life by changing them.
There’s more than one way to adjust the power plan on a Windows 11 PC. Power plan settings are available in Control Panel and Settings, but you can also change them with the Command Prompt and shortcuts. Here are six different methods for changing the power plan in Windows 11.
1. How to Change the Power Plan With the Control Panel
The Control Panel incorporates a Power Options applet from which you can change your plan setting. Unlike Settings, that applet also has a Create a power plan option. Plus you can reconfigure the Start menu’s Power button from there. This is how you can change your PC’s power plan via the Control Panel:
- Press the Power User menu’s Win + X key combo, and click Run to bring up its Open box.
- Enter Control Panel in the Open box within Run.
- Select OK to open and view the Control Panel in Windows 11.
-
If you’re in category view, click Small icons on the Control Panel’s View by menu.
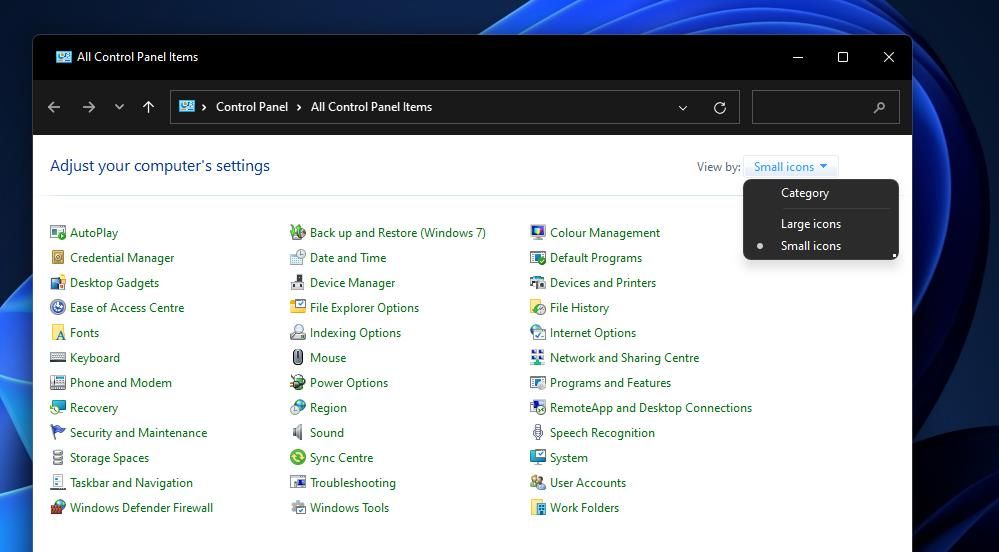
-
Select Power Options to open that applet.
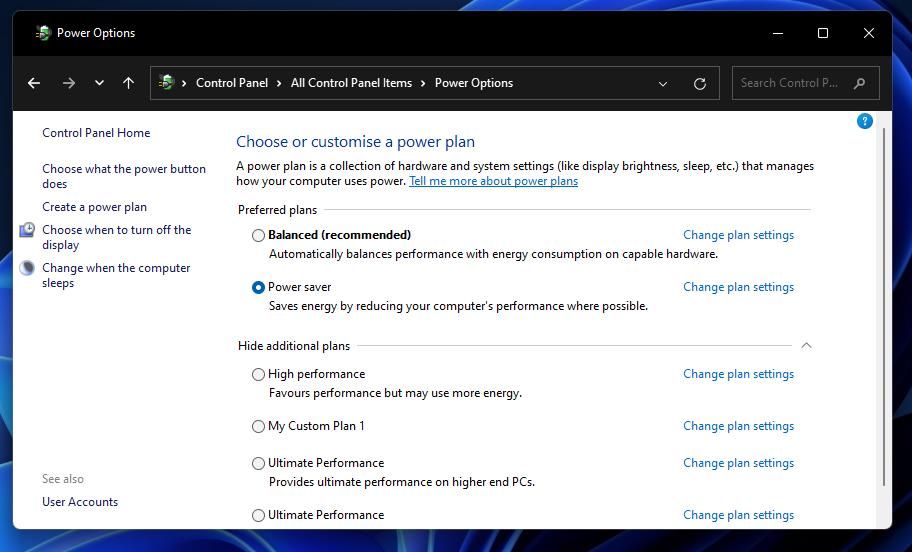
- Then select the Balanced, High performance, Power saver, or Ultimate Performance radio button to change your plan.

2. How to Change the Power Plan With Settings
The Settings app in Windows 11 has a Power & battery section that displays your current battery level and usage history. There you can change power mode, screen, and sleep settings. These are the steps for changing the power plan in Settings:
- Go to your Start menu, and select its pinned Settings shortcut.
-
Select Power & battery within the System tab.
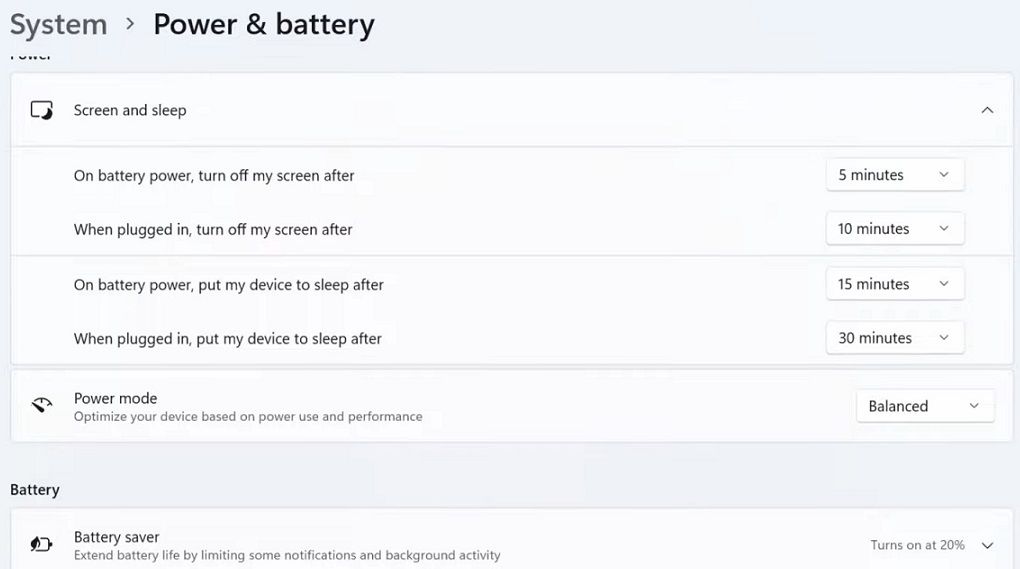
-
Then click the Power mode drop-down menu to open it up.
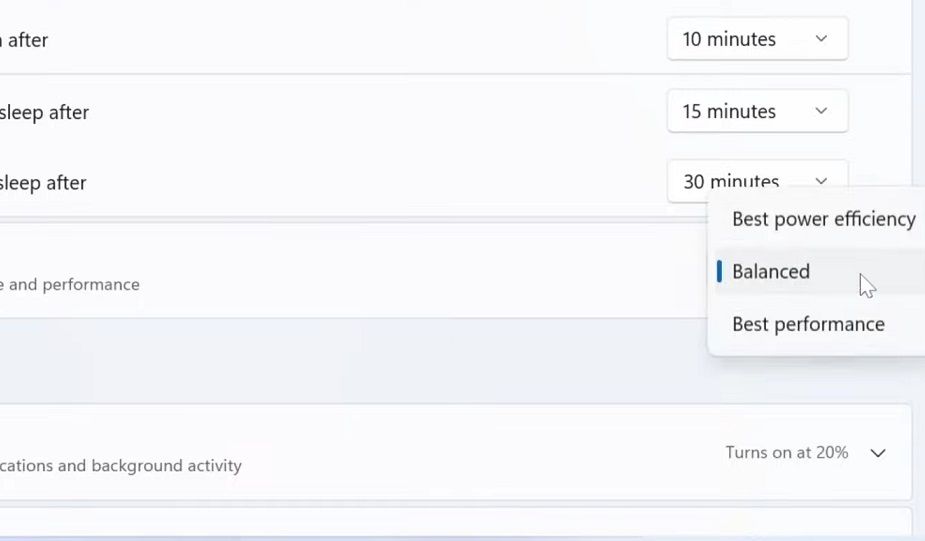
- Choose a Balanced, Best power efficiency (saver), or Best performance (high) mode setting on the menu.


3. How to Change the Power Plan With the Command Prompt
The Command Prompt has a powercfg.exe utility with which you can change the power plan. It has three separate commands for activating the balanced, saver, and high power modes in Windows 11. Those commands will change the Control Panel’s power plan setting when executed. You can set a power plan in Command Prompt like this:
- Press the Win + S keyboard buttons, and enter a CMD search keyword in the text box.
- Open Command Prompt by clicking the search result.
-
To change to a saver power plan, input this command and press the Enter button:
powercfg.exe /setactive a1841308-3541-4fab-bc81-f71556f20b4a -
You can change to a balanced plan by running this command:
powercfg.exe /setactive 381b4222-f694-41f0-9685-ff5bb260df2e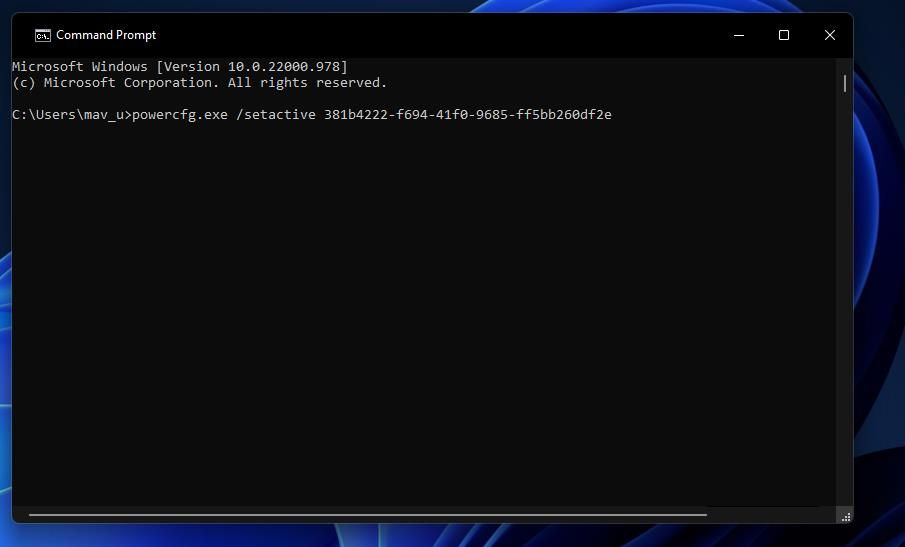
-
Or input this command for the high power plan and hit Return:
powercfg.exe /setactive 8c5e7fda-e8bf-4a96-9a85-a6e23a8c635c

4. How to Change the Power Plan With Desktop Shortcuts
You can turn the Command Prompt commands specified in method three into handy desktop shortcuts. Then you’ll be able to quickly switch between power modes by clicking shortcuts for them on the desktop. Such shortcuts will be invaluable for users who frequently change their power plans. This is how you can add a power mode to the desktop:
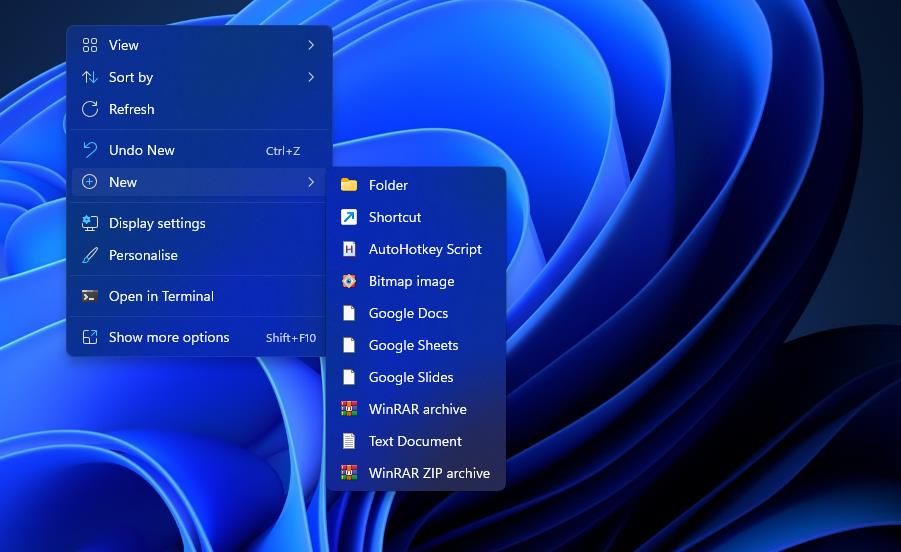
- Click somewhere on your desktop with the mouse’s right button to select a New option.
-
Select the Shortcut wizard option.
- Copy one of the power plan commands in method three by selecting the text for it and pressing the Ctrl + C copy hotkey.
-
Click inside the item location box and press Ctrl + V to paste in the command.
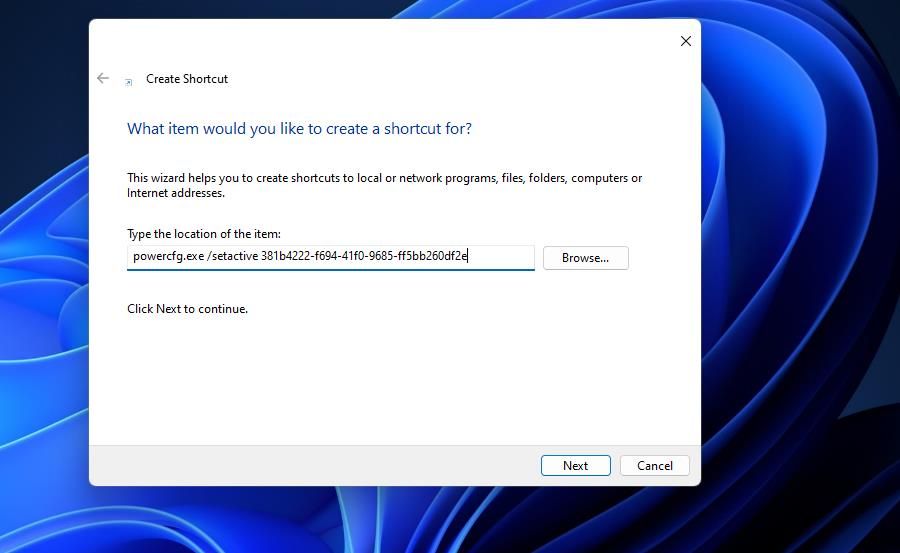
- Select the Create Shortcut’s wizard Next option.
- Input a suitable name for your power plan shortcut in the text box. For example, Power saver would be a suitable title for a desktop shortcut that sets that plan.
- Press Finish to add your power plan shortcut.
- Double-click the shortcut you’ve added to execute its command and change the power plan.


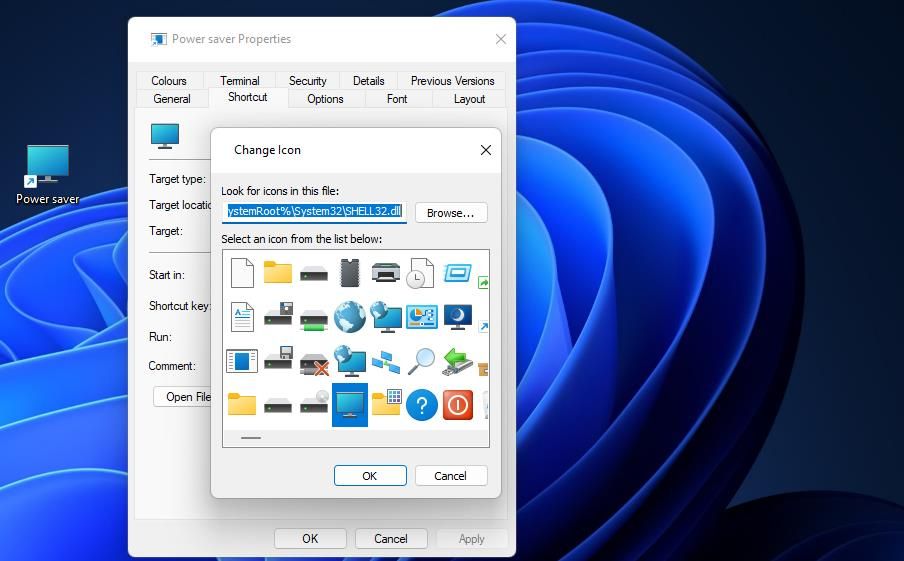
The power plan shortcuts won’t have default icons. You can add icons to them from Windows 11’s SHELL32 system set in these quick steps:
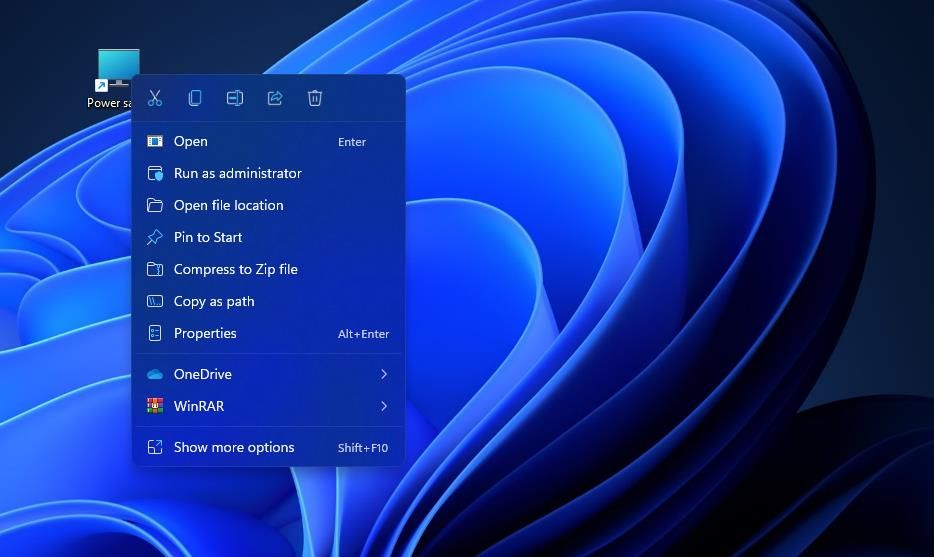
- Right-click a power plan desktop shortcut and select Properties.
- Click Change Icon to view the SHELL32 system icon set.
-
Choose an icon from there and click OK to make your selection.
- Select the properties window’s Apply option to add the new icon.
- Click OK or the X window button to exit.
5. How to Change the Power Plan With Hotkeys
A power plan shortcut on the desktop can become a hotkey with some additional tweaking. Adding a hotkey to one of your power mode shortcuts will enable you to change that plan by pressing a key combination for it. You can set up a power plan keyboard shortcut like this:
- Create a power plan desktop shortcut as covered in the previous method.
-
Right-click the power plan shortcut to select Properties.
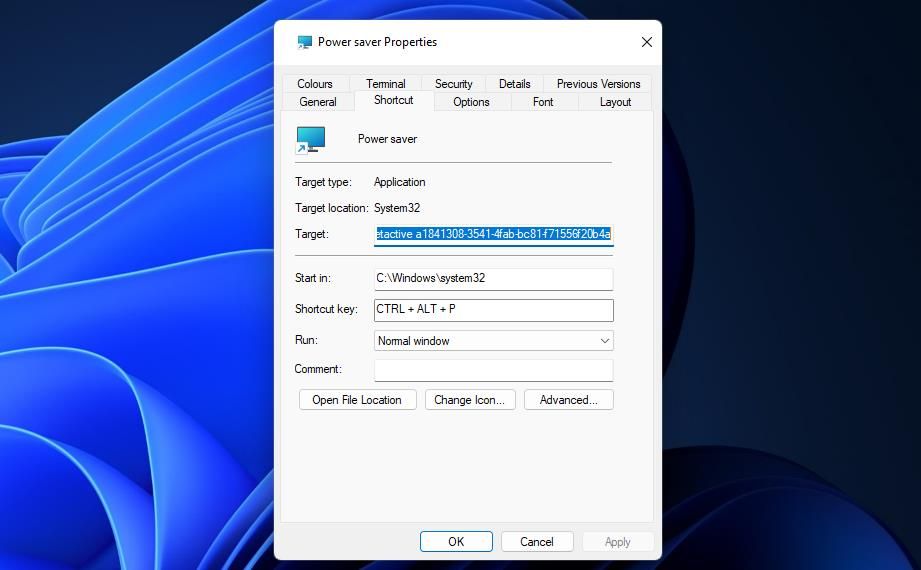
- Move the cursor over and click within the tab’s Shortcut key field.
-
Press P to establish a Ctrl + Alt + P hotkey for activating the power plan.
- Click Apply to set the hotkey for the power plan.
- Then click X or OK to close the Shortcut tab and its window.
- Repeat those steps to apply different hotkeys to all your power plan desktop shortcuts. Then you can press their custom keyboard shortcuts to switch power mode.


6. How to Change the Power Plan From the System Tray
You can also add shortcuts for changing the power plan to the system tray area with PowerPlanSwitcher. PowerPlanSwitcher is a freely available app that adds a handy menu power plan menu to the system tray. You can change the plan by selecting different options on that menu. Go through these steps to change the power plan from Windows 11’s system tray:
- Open PowerPlanSwitcher in the Microsoft Store, and click Get button to install.
- Press Open on the app’s MS Store page to run PowerPlanSwitcher.
-
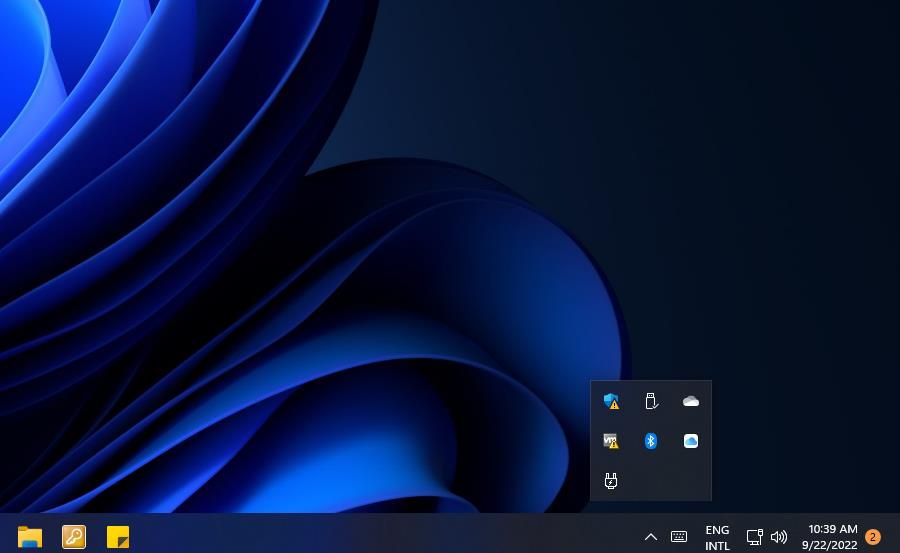
Click the PowerPlanSwitcher system tray icon to open that app’s menu. You may need to click a Show hidden icons button first to see the icon in the overflow menu.
-
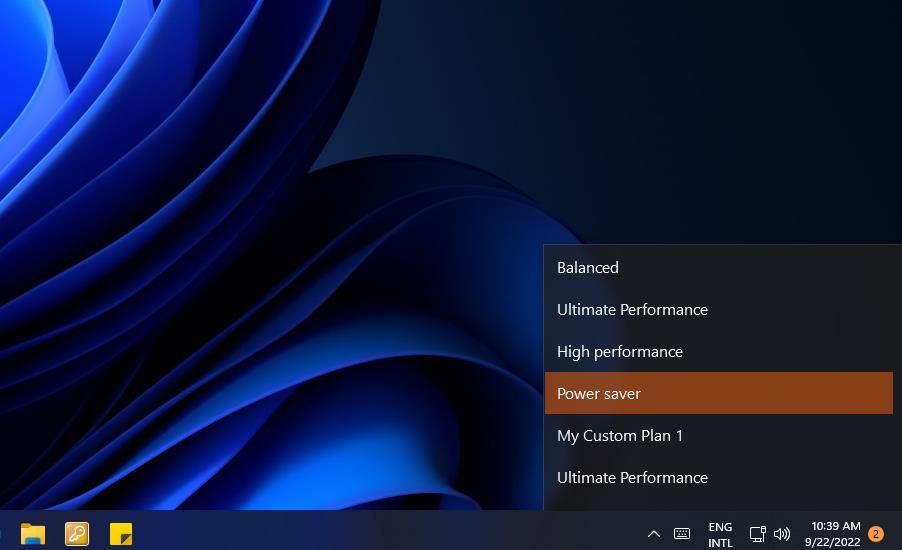
Then select a Balanced, Power saver, High, or Ultimate Performance option on the menu to change the plan.


There’s also a hotkey for accessing that menu, but you’ll need to enable it. Right-click the PowerPlanSwitcher system tray icon to select Settings > Enable shortcut for flyout toggle. Then pressing Shift + Windows + L keys simultaneously will open the power plan menu.

Change the Power Plan One Way or Another
Changing the power plan now and then will adapt your PC’s energy consumption to suit your requirements better. The quickest methods for changing settings are usually the best ones. So, many users may prefer to change plans with shortcuts, as outlined in methods four, five, and six. The PowerPlanSwitcher app is a particularly convenient system tray menu with which to change power mode.