
The date and time settings of a Windows computer are generally set up automatically as soon you connect it to the internet. However, you have the option to change these settings manually as well. In this article, we’ve laid down the exact steps you need to take for changing the date and time in your Windows 11. So let’s jump right in.
How to Change Date and Time in Windows 11
To change the date and time in your Windows 11, you’ll have to make use of the Windows Settings. To get started, head to the Start menu search bar, type in ‘settings,’ and select the Best match. Alternatively, you can use the Win + I shortcut.
From there, follow the steps below:
- In the Settings menu, click on Time & language.
- Select Date & time.
-
In Date & time settings, switch the Set time automatically option to “off”.
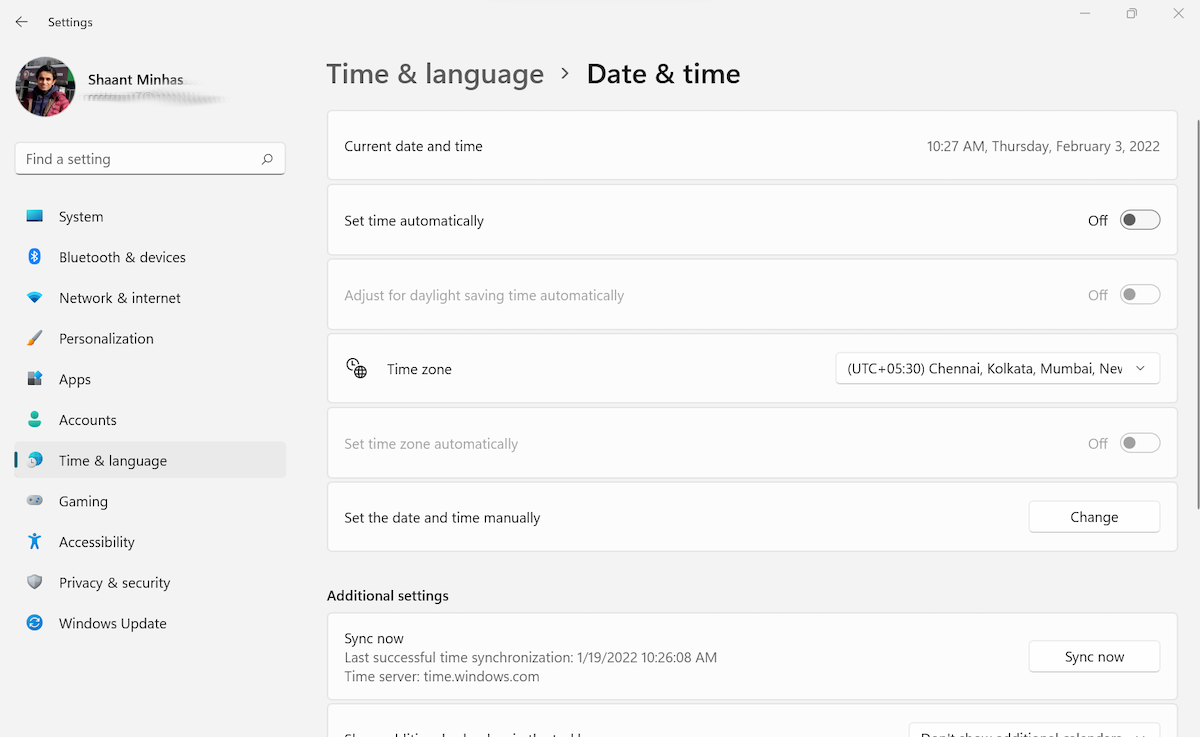
- Scroll down to Set the date and time manually and click on Change.


A "change date and time" dialog box will crop up. You can easily change the date and time settings from here. When you've picked the appropriate settings, click on Change. Your PC’s date and time will be changed instantly.
How to Automate Your Date and Time Zone
While you can set your time and date settings manually, you might always not want to do it this way. To roll back the manual changes and set your date and time synchronization to automatic, simply toggle on the Set time automatically setting again, and you'll be on your way.
Apart from this, you also have a feature to pick your own time zone. Simply click on the dropdown menu in front of Time zone, and choose the one you are comfortable with.

Tweaking Date and Time Settings in Windows 11
And that’s it, folks. Hopefully, you were able to tweak the date and time settings of your PC manually without any major difficulties. While in most cases automatic synchronization is the best approach, manual tinkering can be helpful if you have a corrupt clock on your hands.