
Some photographers might consider black-and-white photos to be old-fashioned. Yet, black-and-white image conversion can often enhance photographs with poor lighting conditions. Converting images to black and white is also one of the best retro-editing methods for giving pictures of old subjects a nostalgic look.
The vast majority of image editors include at least basic black-and-white editing options. So, there are plenty of software options for converting images to black and white in Windows 11. This is how you can convert your pictures to black and white in Windows 11 with some freely available apps.
How to Convert Images to Black and White With Photos
Photos is Windows 11’s default image viewer, which also packs in some handy editing options to boot. It includes a few alternative filters to apply black and white to your images. You can convert photos to black and white with the Photos app like this:
- Click the pinned Photos app on Windows 11’s Start menu.
- Next, select an image to edit in Photos’ Collection tab.
-
Press the Edit image button at the top of Photos.
- Click the Filter button.
-
Then select the B&W filter option.
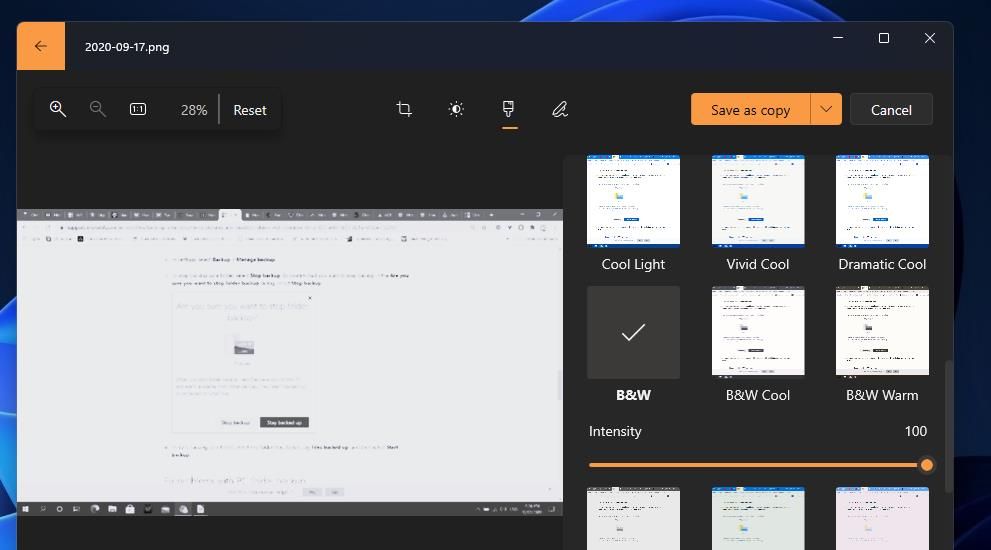
- Select the Save as copy option.


Alternatively, you can select different B&W Cool, B&W Warm, or B&W High Contrast options to convert an image to black and white. Each filter applies a different style of black-and-white effect. You can colorize a black-and-white image slightly by dragging the Intensity bar slider to the left for each B&W filter. And if you're interested in bringing color to old images, check out how to colorize old black-and-white photos with Ancestry.
Don’t forget to check out the options on the Adjustments tab. There you can refine a converted black-and-white image by dragging the sliders on the Brightness, Exposure, Highlights, and Contrast bars.

How to Convert Images to Black and White With Paint.NET
Paint.NET is a full-blown image editor for Windows with which you can convert images to black and white. It has alternative desktop and MS Store app versions. The desktop software version of Paint.NET is freely available. This is how you can convert your images to black and white with Paint.NET.
- Open Paint.NET’s Softpedia page.
- Select Download Now to view location options.
- Click the Softpedia Secure Download (US) – Free Desktop Version option.
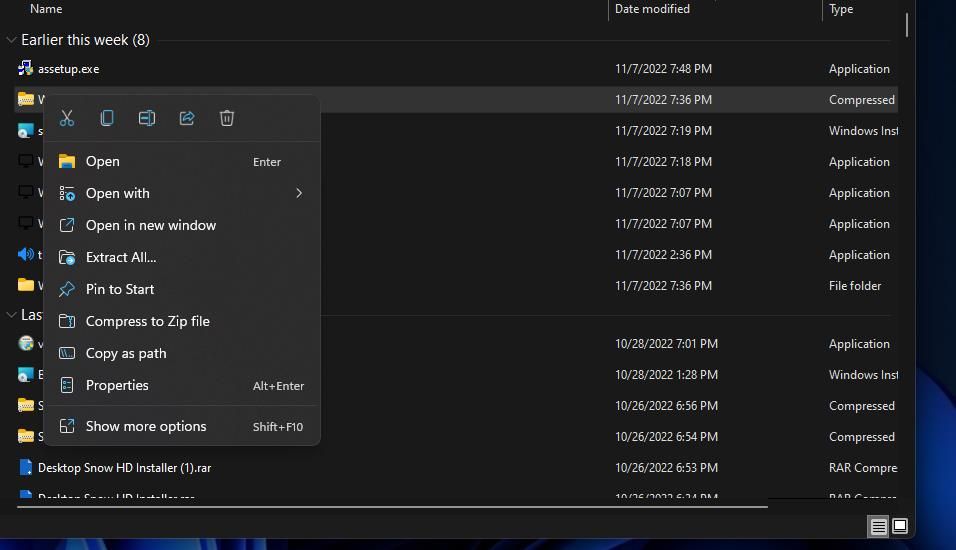
- Bring up whatever folder includes the downloaded Paint.NET ZIP archive.
-
Right-click Paint.NET’s ZIP and select Extract all on the archive’s context menu.
-
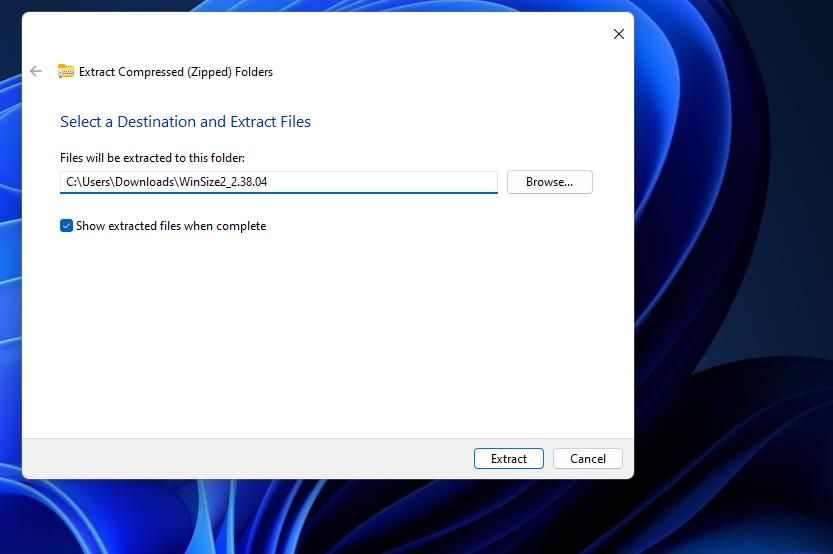
Select the box for the Show extracted files option, and click Extract to view the archive.
- Then double-click the paint.net.4.3.12.install.anycpu.web.exe file.
-
Select the Express installation option.
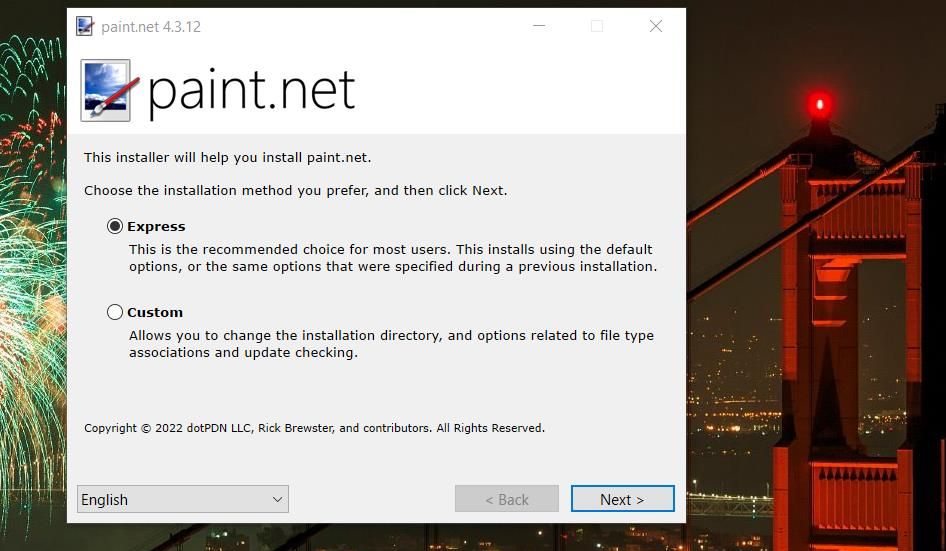
- Click Next to view the license agreement.
- Select I agree and click Next to install.
- Then click Finish with the Start paint.net option selected.


Now you’ve got the software up and running, you can start editing in Paint.NET. These are the steps for converting an image to black and white:
- Click Paint.NET’s File menu.
- Select the Open option.
- Choose an image to edit, and click Open again.
- Click the Adjustments tab.
-
Select the Black and White option to convert.

- Click File and Save to save over the original image.

An alternative method for black-and-white image conversion is to select the Hue / Saturation option on Paint.NET’s Adjustments tab. Then drag the slider on the Saturation bar to the far left. You can drag the Lightness slider to darken or lighten the black-and-white picture. Removing color saturation will also convert images to black and white in any other editing software with such an option.

If you're enjoying Paint.NET, check out some useful image edits you can perform with Paint.NET to get the most out of it.
How to Convert Images to Black and White With Black and White Photos Pro
Black and White Photos Editor Pro is a black-and-white conversion app you can download from Microsoft Store. That app is freely available, albeit with a pro version that includes more textures, stickers, and overlays. You can unlock the full app version for $3.49. Here’s how you can convert your images to black and white with the Black and White Photos app:
- Open the Black and White Photo Editor Pro app’s Microsoft Store page.
- Then click the Get in Store App option, and select Open Microsoft Store.
- Click the Install option for Black and White Photo Editor.
- Select Open on the app’s MS Store page.
-
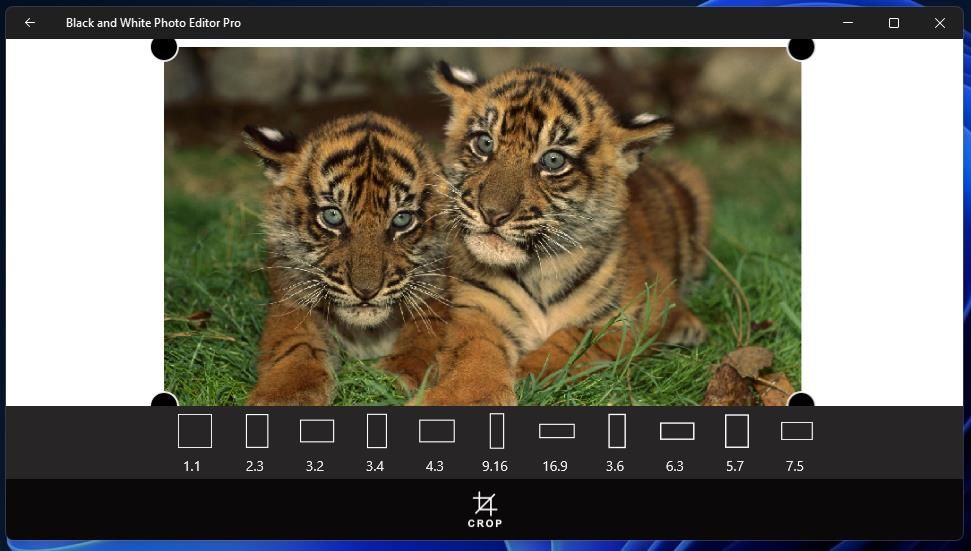
Next, click the Gallery button.
- Select a photo to convert to black and white, and click the Open option. A cropping tool will then open.
-
Select the Crop option without making any cropping adjustments to proceed. Then you’ll see a black-and-white version of your selected image in the app.
- Click the Save option to automatically save the picture to a default location. You can see where the app saves the image by clicking the folder button.


To refine your black-and-white image, click the Manual button in the app. Then you can select Brightness, Exposure, Contrast, Blur, Sharpen, Saturation, and Vignette editing options from there. Drag the slider for each option to increase or decrease its editing effect.
You can also add a different texture and overlay to the image. Click the Texture or Overlay buttons to see what options are available. Most of the textures and overlays are reserved for the pro version, but there are a few available for selection in the free app.

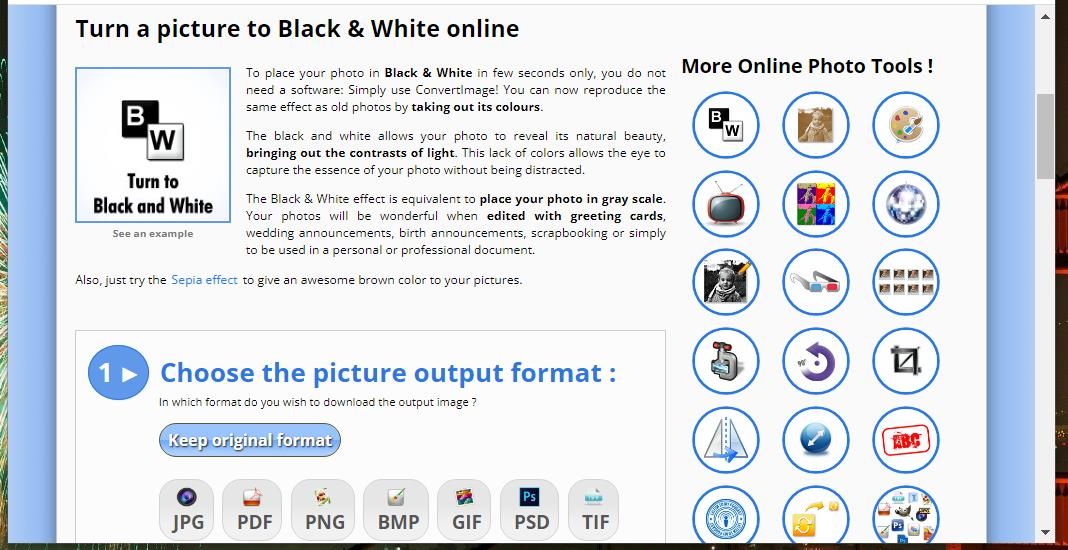
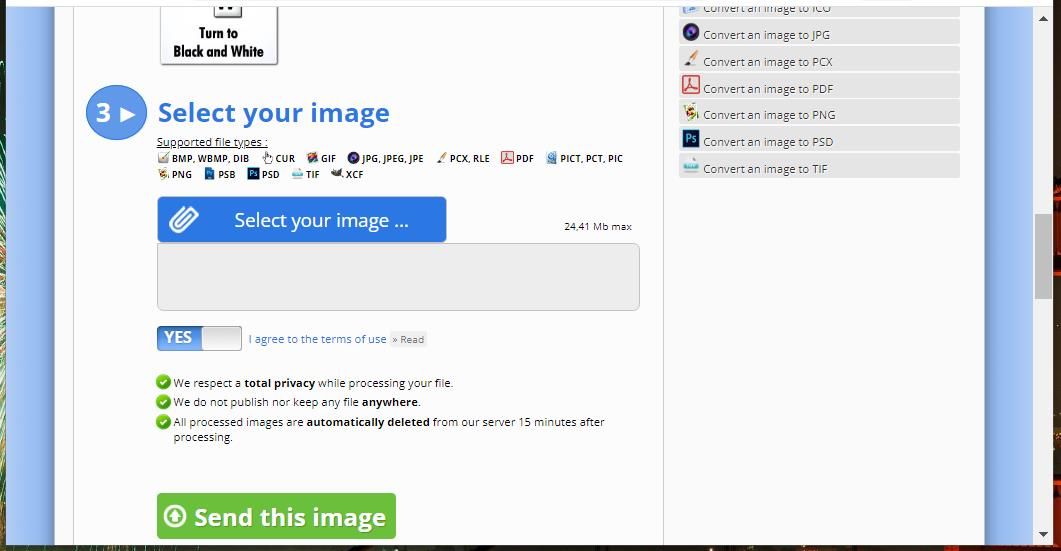
How to Convert Images to Black and White With ConvertImage
There are also black-and-white image conversion web apps you can utilize in Edge or other Windows browsers. The ConvertImage.net site includes various image conversion tools, among which is a utility for turning photos black and white. That’s a quick and easy tool to utilize for converting images to black and white on the fly. You can convert images with ConvertImage like this:
- Open the ConvertImage black-and-white conversion tool webpage.
- Click the Select your image button.
- Choose a photo to turn black and white, and select the Open option.
-
You can select alternative PNG, PDF, JPG, BMP, and TIF formats, among others, for the image. If you don’t want to change the image’s file extension, select the Keep original format option.
-
Press the Send this image button.
-
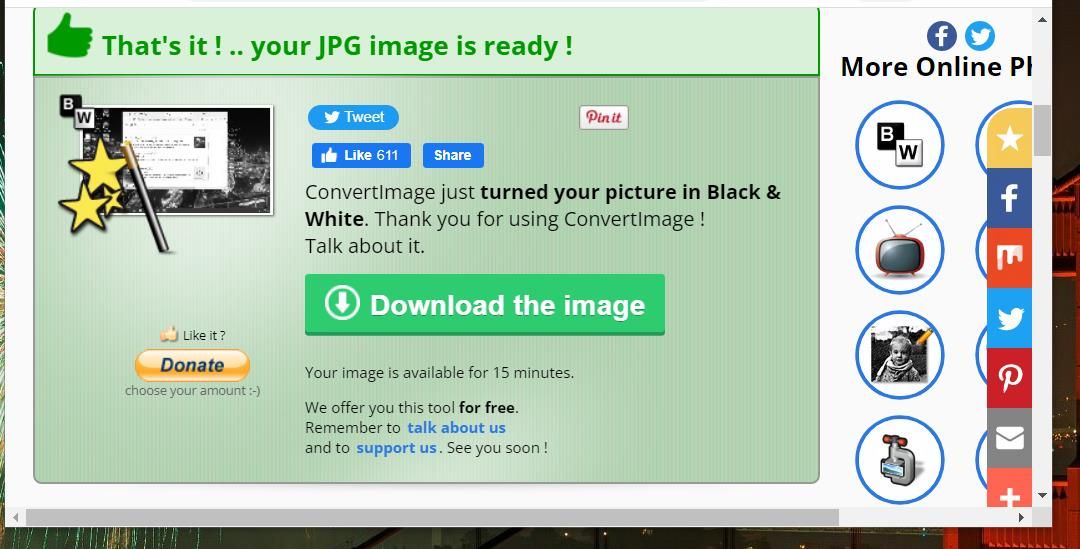
Select the Download the image option to save the black-and-white picture.


Make Your Photos Darker in Windows 11
You can bring out the dark sides of your pictures quickly and easily by converting them to black and white in Windows 11 with the above apps. Black and white will work better in some images than others. So, try experimenting with black and white on photos with notable shadows, poor lighting quality, or retro subjects that could benefit from a darker look.