AutoPlay allows you to automatically perform different actions depending on the media type you connect to your PC. It is a handy feature for many, and finding it not working can hamper your productivity and disturb your workflow.
You can enable and disable AutoPlay in the Settings panel. If it is enabled and still not working, here’s how to troubleshoot and get AutoPlay working in Windows 11.
1. Turn Off and On AutoPlay in the Settings
You can quickly turn on and off the AutoPlay feature to fix any temporary glitches. Follow these steps to disable and re-enable the AutoPlay feature in Windows 11.
- Press Win + I to open Settings.
-
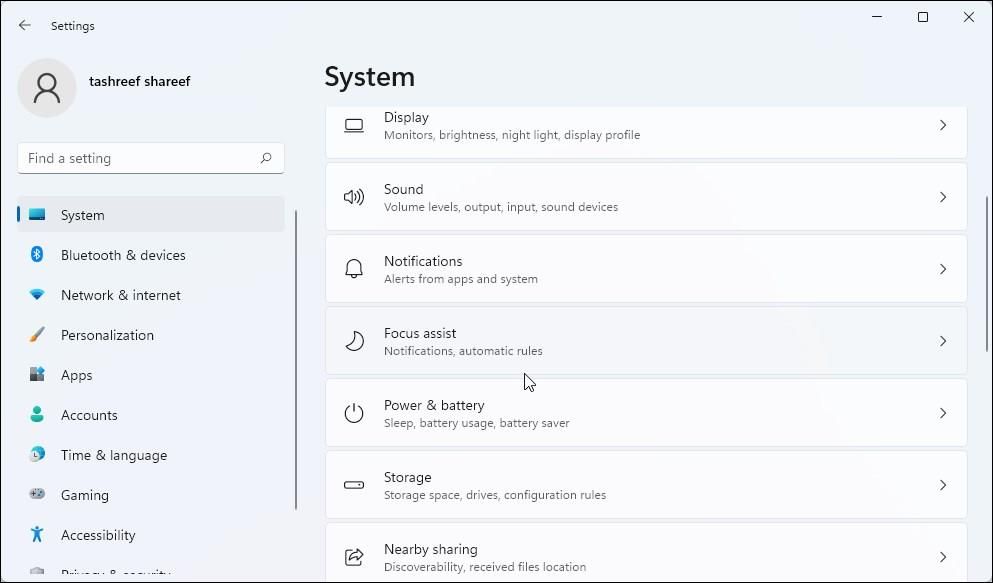
Open the Bluetooth & devices tab in the left pane.
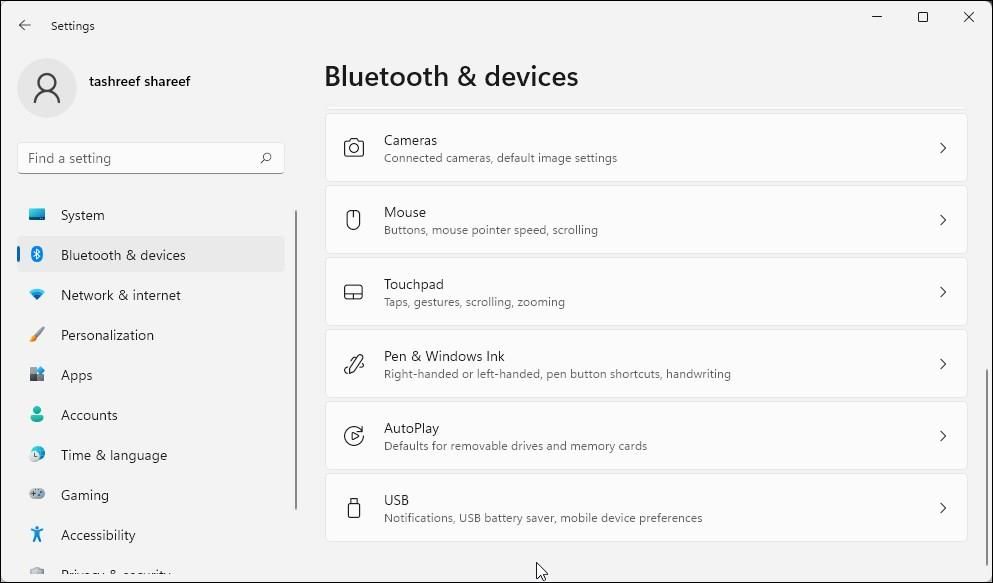
- In the right pane, scroll down and click on AutoPlay to open its settings.
-
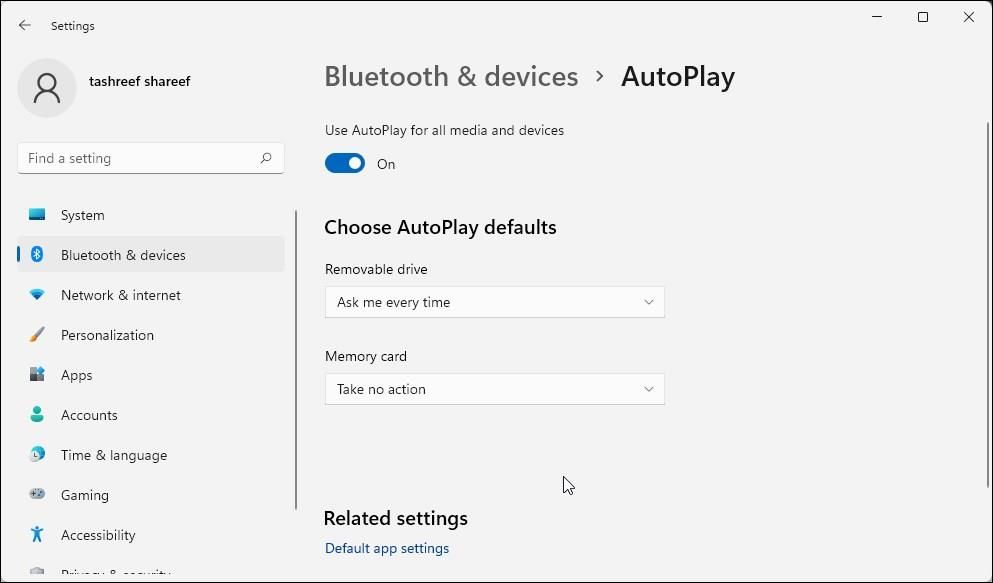
Toggle the switch to turn on AutoPlay if it is Off.
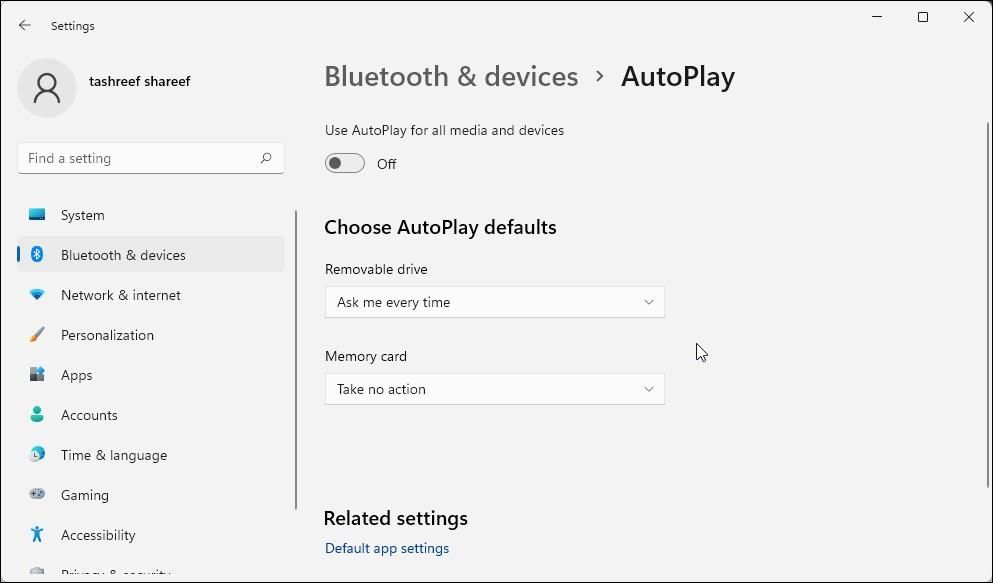
- If it is already On, toggle the switch to turn it Off.
-
Close the Settings page and restart your PC.
- After the restart, go to Bluetooth & devices> AutoPlay and toggle the switch to turn it On.


Plug in your media device to see if the AutoPlay action resumes.
2. How to Enable the AutoPlay Notification in Windows 11
In Windows 11, you can customize system notifications for apps and services. However, if you have disabled notifications for AutoPlay, the feature may stop working.
Disabled system notification is one of the common contributing factors to this problem. Fortunately, you can turn on the notification to perform resolve this issue.
To turn on the AutoPlay notification:
- Press the Win key and then click on Settings to open your system settings.
-
In the System tab, scroll down and click on Notifications.
- Make sure the Notifications option is set to On.
-
Next, scroll down and locate AutoPlay under the Notifications from apps and other senders section.
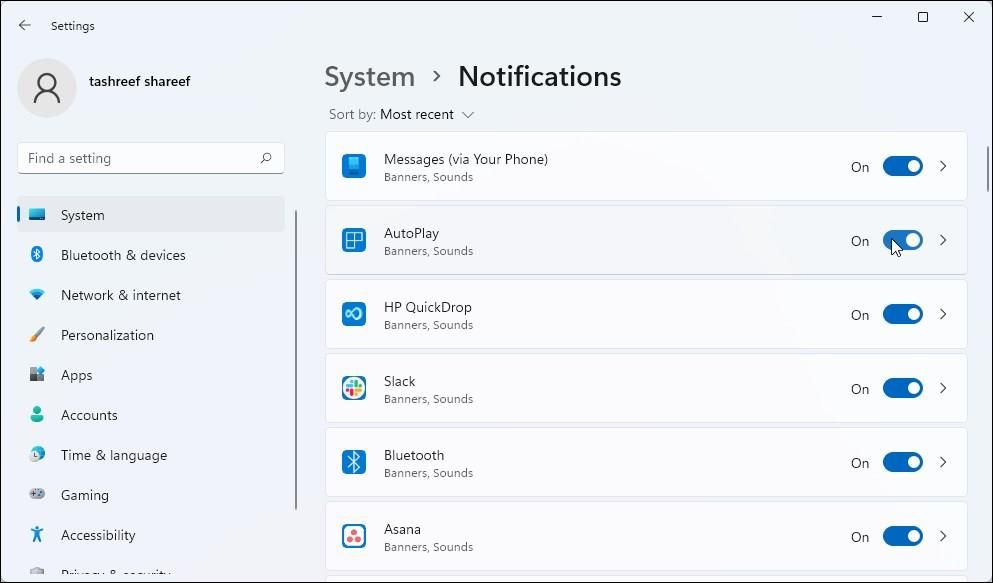
- Toggle the switch for AutoPlay to turn on notifications.


If it was set to Off, AutoPlay should start working as soon as your turn on the notifications.
3. How to Reconfigure the Shell Hardware Detection Service
AutoPlay is dependent on the Shell Hardware Detection service for the detection of AutoPlay hardware events and to provide notifications. If this service is not running or the startup type is set to Delayed or Manual, AutoPlay will not work.
You can check and configure the Shell Hardware Detection service to make sure it is running and set the Startup type to Automatic. Here’s how to do it.
- Press Win + R to open Run.
-
Type services.msc and click OK to open Services.

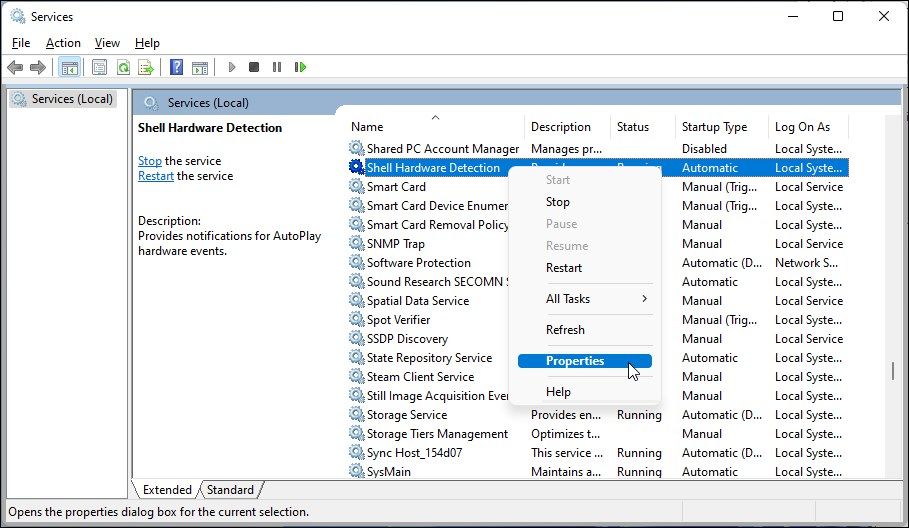
- In the right pane, scroll down and locate the Shell Hardware Detection service. Press the S key on your keyboard for easier navigation.
-
Right-click on Shell Hardware Detection and select Properties.
-
In the Properties dialog, make sure the Service status is set to Running. If not, click on Start.
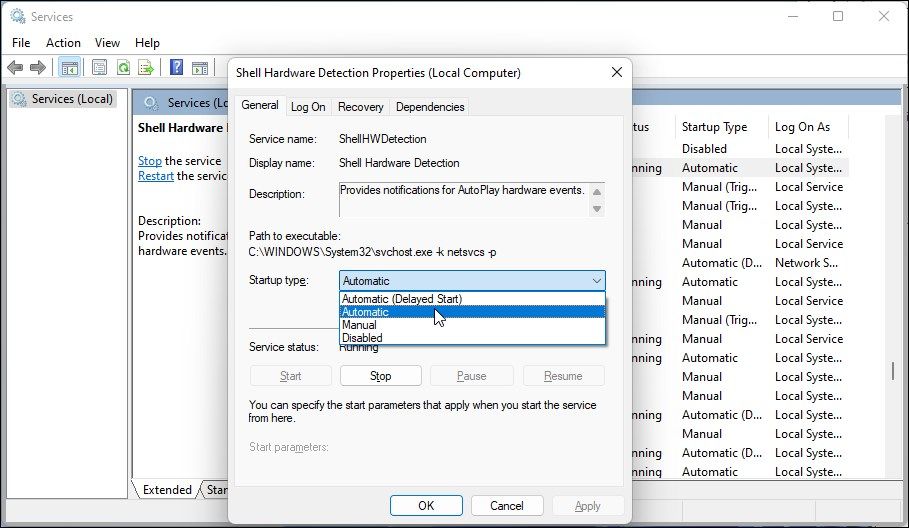
- Next, click the drop-down for Startup type and select Automatic.
- Click OK and Apply to save the changes.


4. Reconfigure the AutoPlay Defaults
Even when you have AutoPlay turned On, you will need to configure the AutoPlay defaults to make sure you receive the notifications.
If AutoPlay default is set to "take no action," Windows 11 will not perform any action nor prompt you to take action when you plug in your media device.
To fix this, check your AutoPlay default configuration and change the action as per your preference. Here’s how to do it.
- Open Settings (Win + I).
- Open the Bluetooth & devices tab in the left pane.
-
Next, scroll down and click on AutoPlay.
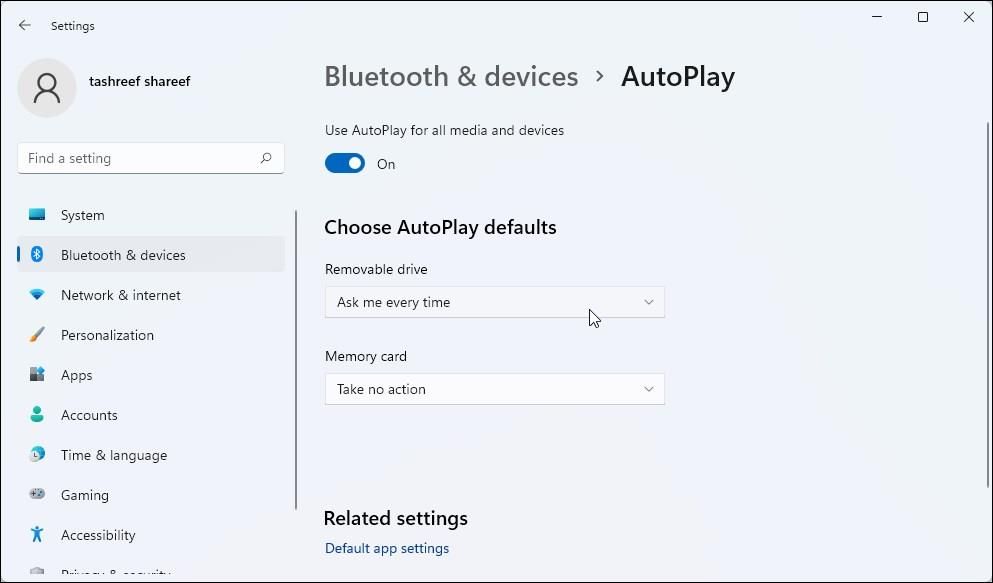
- Here, under Choose AutoPlay defaults, click the drop-down for Removable drive.
- Select Ask me every time. You can also choose other options, but selecting Ask me every time will allow you to test if AutoPlay is working or not.

Connect your media device to your PC, and AutoPlay should prompt you to choose what happens with the removable drive when you connect one.
Once AutoPlay starts working, you can go to Settings > Bluetooth & devices > AutoPlay and configure specific actions for the removable drive.
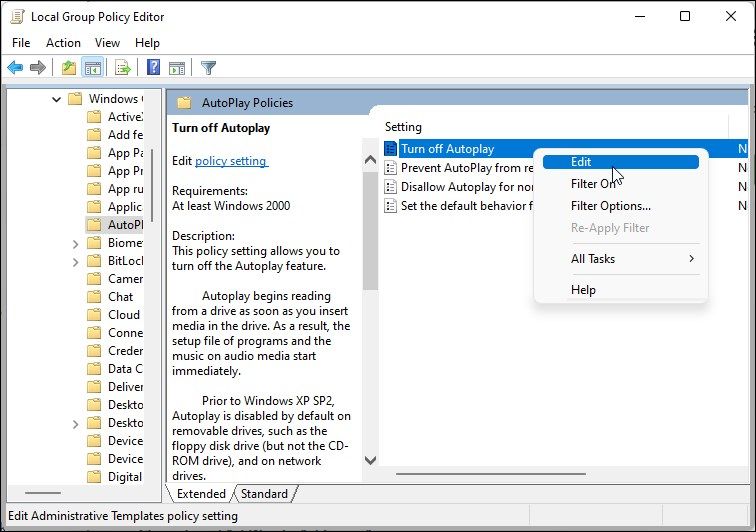
5. Configure the AutoPlay Feature in Local Group Policy
You may find AutoPlay disabled on work computers managed by the organization. Organizations use the Local Group Policy Editor to manage and modify policy settings with Group Policy Objects.
If this is the case, you should contact your organization to resolve the issue. On a personal computer, you can configure the AutoPlay feature for removable drives using the Group Policy Editor.
Note that Group Policy Editor comes pre-installed on Windows 11 Pro, Edu, and Enterprise editions of the OS. If you are using Home, you will need to manually install gpedit in Windows 11 Home before you can use it to edit group policies.
- Press Win + R to open the Run box.
-
Type gpedit.msc and click OK to open Group Policy Editor.
-
In Group Policy Editor, navigate to the following location:
Computer Configuration > Administrative Templates > Windows Components > AutoPlay Policies - In the right pane, locate and right-click on Turn off AutoPlay and select Edit. You can also double-click on the policy to perform this action.
-
Next, select the Disabled option in the properties dialog.
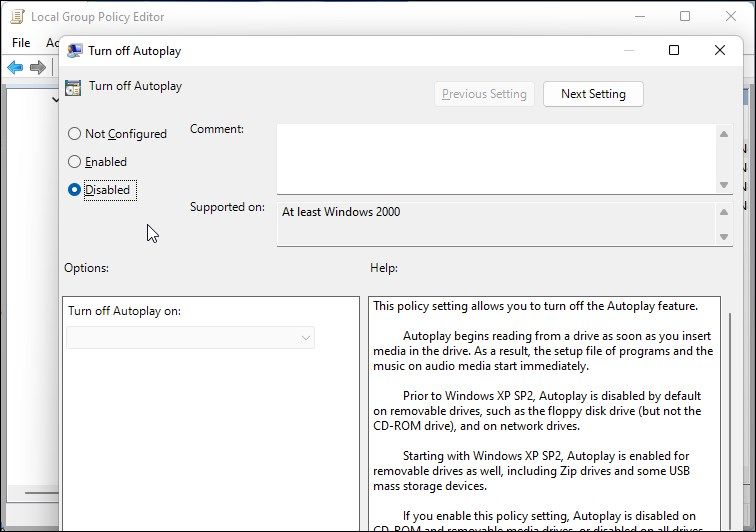
- Click Apply and OK to save the changes.


Restart your PC to apply the changes to the policy and check for any improvements.
6. Reset AutoPlay to its Default Settings
As a last resort, you can reset AutoPlay to its factory default. Doing so will remove all the changes made to AutoPlay and restore the feature to its original configuration.
To reset AutoPlay to factory defaults:
- Press Win + R to open Run.
- Type control and click OK to open the Control Panel.
-
In the Control Panel, click on Hardware and Sound.
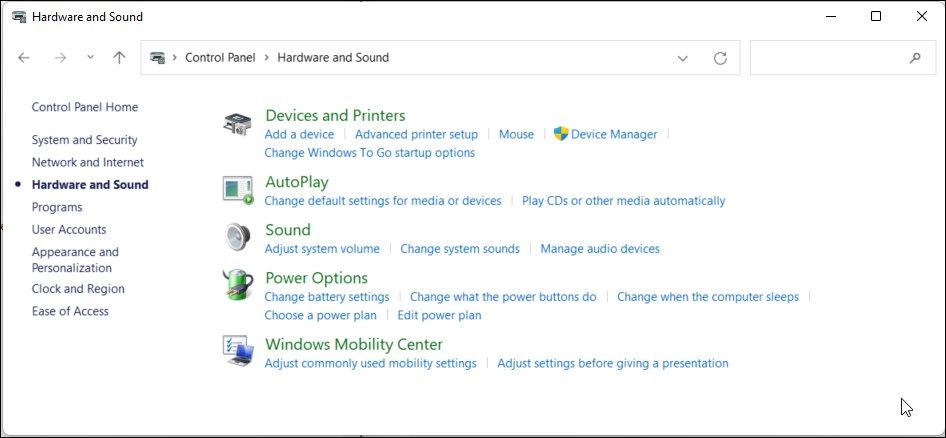
- Next, click on AutoPlay.
-
Scroll down to the bottom and click on Reset all defaults.
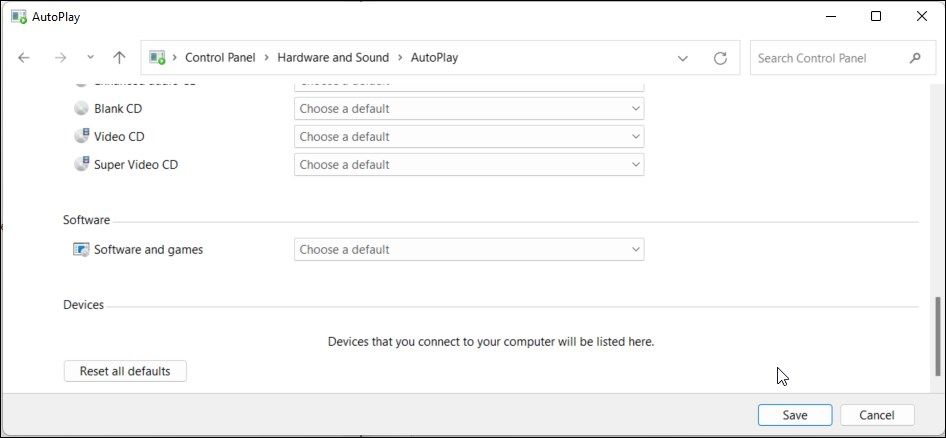
- Click on Save to apply the changes and close the Control Panel.


Restart your PC and check if the AutoPlay feature starts working again.
Make AutoPlay Functional Again in Windows 11
AutoPlay is not for everyone. But for those who have found a use, it is an extremely handy feature to automatically perform repetitive tasks with external drives. And if it stops working, you can perform a few quick troubleshooting steps to restore its functionality.
That said, if you find the feature annoying, you can disable it as easily using the Control Panel, Local Group Policy, and the Settings panel.