
If you’re like us, chances are you have to collaborate with colleagues or clients in different time zones; constantly looking up the local time in other cities can become quite irritating and time-taking. So why not just add multiple clocks to Windows 11, and get the information you need on the fly?
Microsoft has designed Windows 11 to make users feel connected and give them a user interface that helps them stay focused. There have also been significant changes to improve productivity and get more done without feeling overwhelmed. Adding clocks of different time zones is a handy feature that helps you get more done without cluttering your Windows 11 user interface.
How to Add Multiple Clocks to the Notification Center on Windows 11
Windows 11 allows you to add up to clocks of two time zones onto the calendar in the Notification Center. You can add multiple clocks to the Notification Center through the Settings app:
- Launch the Start menu, locate the Settings app and click on it.
- From the sidebar menu, select Time & language.
- You now want to click on the tab titled Date & time.
-
Once you have opened the Date & time settings page, scroll to find the Related links section.
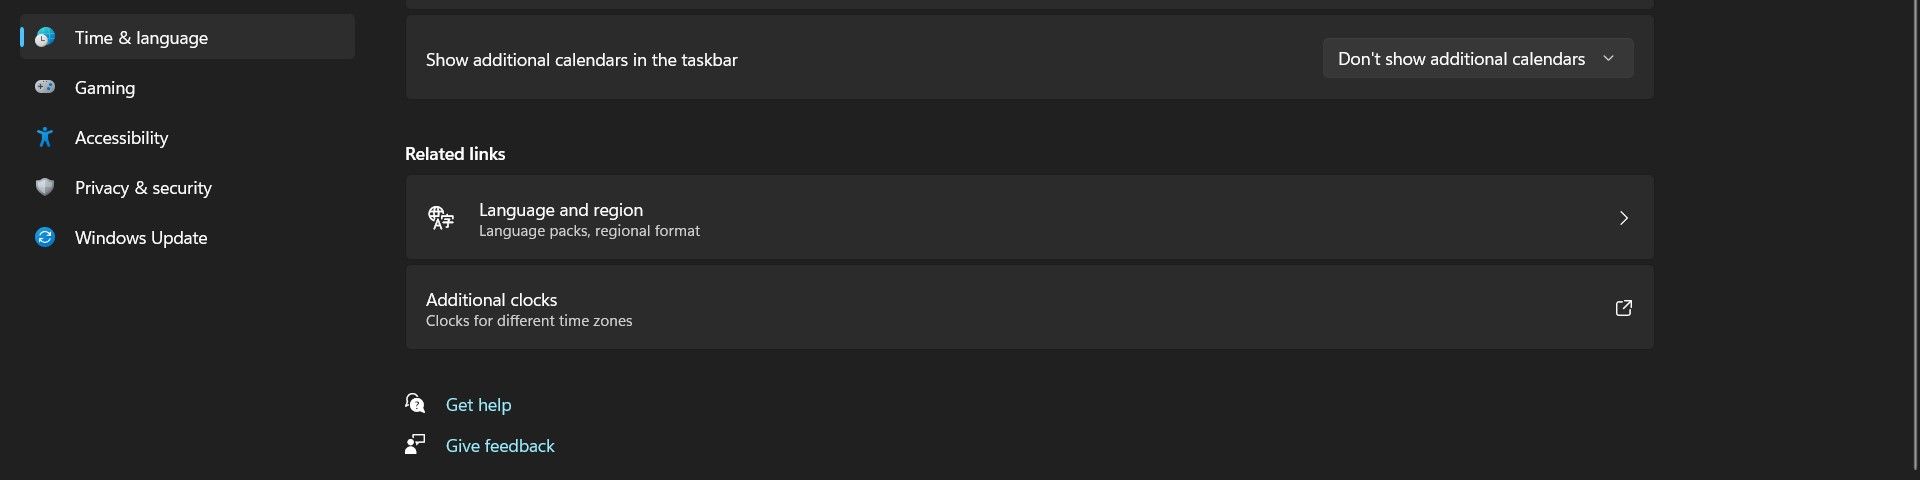
-
Now click on Additional clocks, and a Date and time dialogue box will appear.
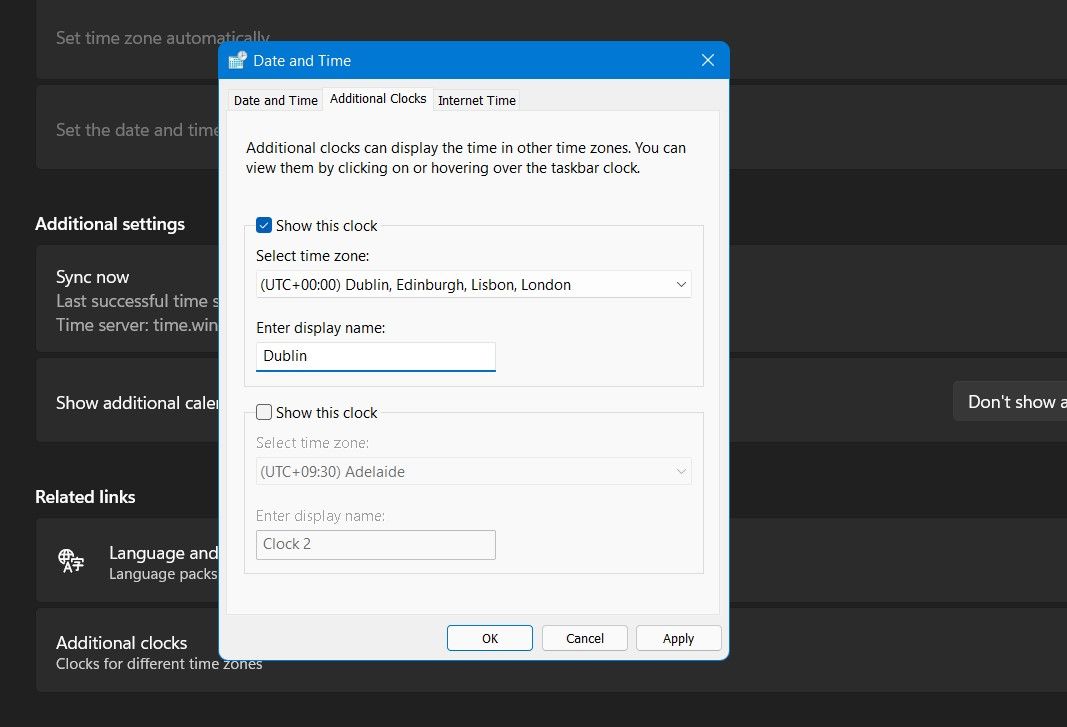
- Check the Show this clock checkbox, select a time zone and enter a display name for the clock.
- If you want to add two clocks, repeat the same for the second clock.
-
After making the necessary changes, click on Apply and then Ok.
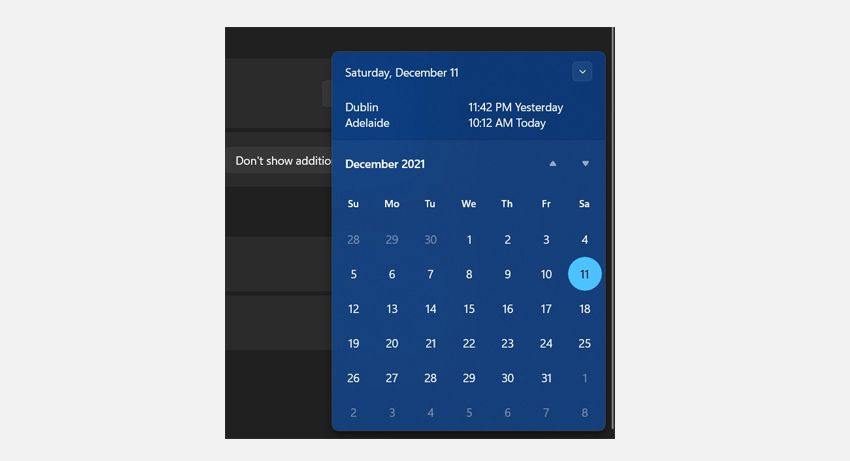
- You can now view the additional clocks by clicking on the date/time on the Taskbar and then expanding the calendar flyout.


Windows 11 Makes Customization Easy
There are tons of things we love about Windows 11, and the ability to customize so many features makes everything better; you can even customize the system tray clock to have a fresh new look.