Microsoft released its first Windows 11 build version update in September 2022. The 22H2 update has added a slew of new Windows 11 features and options. Many users are now installing that update via Settings.
However, some users have reported in forums that they can’t upgrade Windows 11 to the 22H2 version. Those users have said that updates get stuck at percentage marks when they try to download and install them from Settings. Some users see error codes like 0x800f0806 for that update. This is how you can fix the Windows 11 22H2 update not installing.
1. Run Windows 11’s Troubleshooter for Updates
The Windows Update troubleshooter is there to check for and resolve issues with the update process. That troubleshooter isn’t guaranteed to fix all update errors, but it might fix Windows 11’s 22H2 update not installing for some users at least. You can run the Windows Update troubleshooter in the following steps:
- Press Win + I to open Settings.
- Select the System tab’s Troubleshoot option.
- Click Other trouble-shooters to reach the troubleshooting utilities.
-
Select Run for the Windows Update troubleshooter.
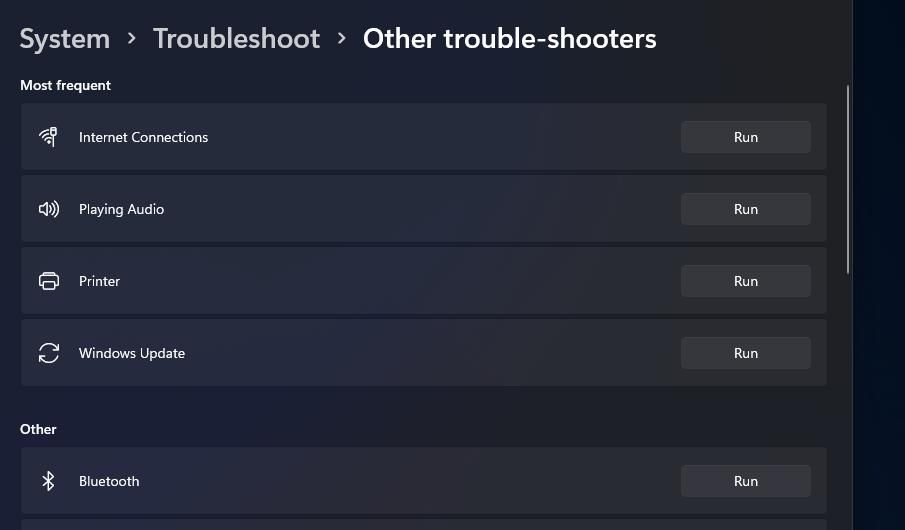
- Wait for the troubleshooter to detect issues and display an outcome. It will usually automatically apply fixes for detected issues.

2. Disconnect Non-Essential External Hardware and Peripherals From PC
It's recommended that users unplug non-essential hardware from PCs before attempting to upgrade to a new Windows 11 version. Doing so will ensure that there aren't any non-essential hardware devices that can potentially interrupt or conflict with the upgrade process. You'll still need your mouse and keyboard of course, but disconnect all the following non-essential peripherals:
- Headphones
- External storage drives
- Printers
- Scanners
- Speakers (they're not essential)
- Gamepads
- USB Hubs
- Webcams
- Microphones
- Secondary monitors (you only need one)
3. Run a System File and Deployment Image Scan
System file corruption can cause Windows update errors to arise. You can check for and remedy corrupted files by running a System File Checker scan in the Command Prompt. It’s also recommended to run a Deployment Image Servicing and Management scan to check the system image before that. This is how to run both scanning tools in Windows 11.
- Open the file search tool with the Windows + S hotkey.
- Search for Command Prompt by inputting cmd in the text box.
- Right-click Command Prompt inside the search tool’s results to select a Run as administrator option.
-
Start by inputting this command and pressing Enter:
DISM.exe /Online /Cleanup-image /Restorehealth -
Then run the SFC tool by typing in the following command and pressing Return:
sfc /scannow - Wait for the SFC scan to show an outcome message in the Command Prompt.
4. Free Up Some Drive Storage Space
You’ll need at least 64 gigabytes of drive storage space available for the Windows 11 22H2 update. So, check your hard drive has enough space for the 22H2 update before installing it.
If it doesn’t, free up the required drive storage space for the update by erasing superfluous files and uninstalling Windows software. Check out our Cleanup recommendations guide for further details about how to create storage space via Settings.

5. Check If the Dependency Services for Windows Update are Enabled
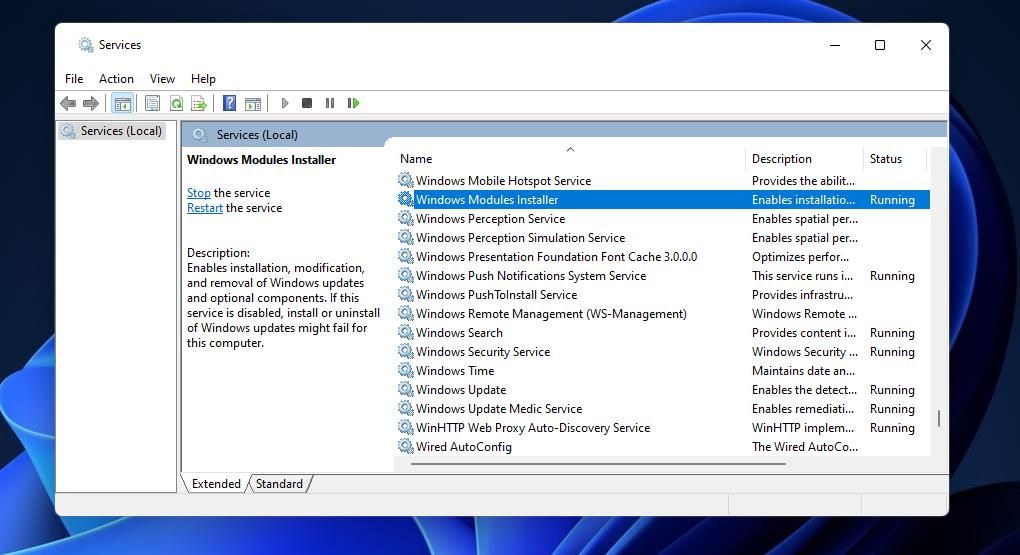
The Windows Update service has some service dependencies that need to be enabled and running. Windows 11 22H2 update issues will likely arise if necessary prerequisite services are disabled. You can make sure the Windows Module Installer, BITS, and CryptSvc services are enabled like this:
- Open Windows 11’s Services utility. You can check out our how-to-open Services guide for further instructions.
-
Double-click Windows Module Installer to view a properties window for that service.
- Select the Automatic start option for the service on its Startup type drop-down menu.
-
Click Start on the properties window if the service isn’t running.
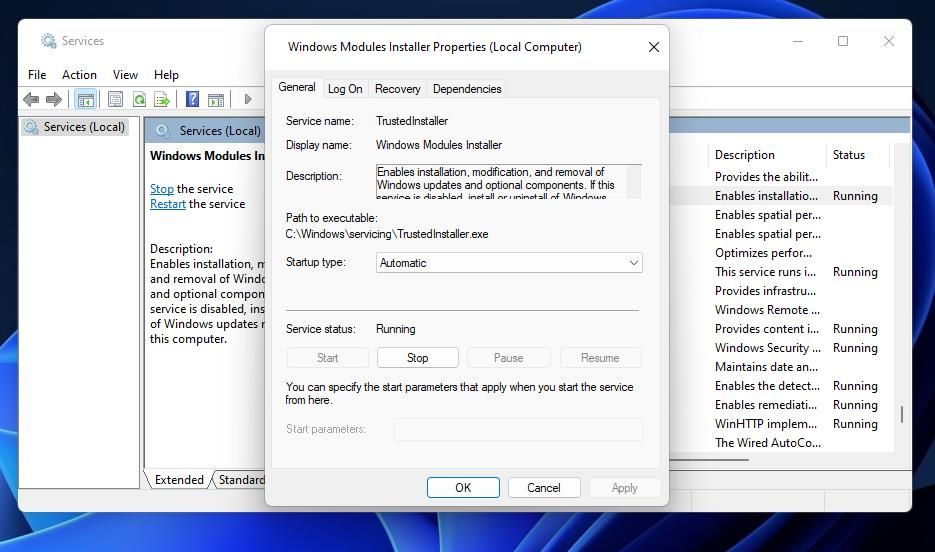
- Select Apply > OK to set the service’s settings.
- Repeat the previous four steps for the Background Intelligent Transfer Service, Cryptographic Service, and Windows Update services.


6. Make Sure .NET Framework 3.5 is Enabled
The .NET Framework 3.5 feature also needs to be enabled for the Windows Update service to work. That should be enabled by default in Windows 11, but some users may still need to turn on .NET Framework 3.5. This is how you can make sure .NET Framework 3.5 is enabled in Windows 11:
- Open the file and app search utility by pressing the Windows + S key combo.
- Enter Windows features in the Type here to search box.
- Click the Turn Windows features on or off applet in the search tool.
-
Select the .NET Framework 3.5 checkbox if that feature isn’t enabled.
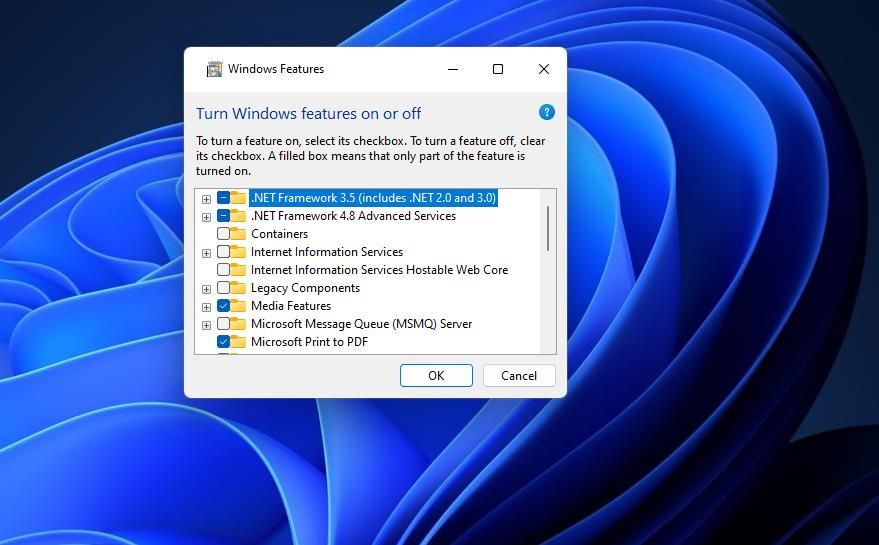
- Also, click the .NET Framework 4.8 checkbox if it’s not selected.
- Press the OK button in the Windows Features window.
- Then click Yes to install.
- Restart Windows 11 after installing the feature.

7. Reset the Components for Windows Update
Windows 11 22H2 update issues can also arise because of corrupted update components. You can repair the update components by resetting them. This troubleshooting method involves restarting update services and refreshing the catroot2 and SoftwareDistribution folders by renaming them. You can reset components for Windows updates with the Command Prompt like this:
- Open Command Prompt with elevated permissions, as outlined in steps one to three of method two.
-
Then stop four services by inputting and executing the following commands:
        net stop wuauserv
net stop bits
net stop cryptSvc
net stop msiserver -
Next, rename the SoftwareDistribution folder by executing this command:
ren C:\Windows\SoftwareDistribution SoftwareDistribution.old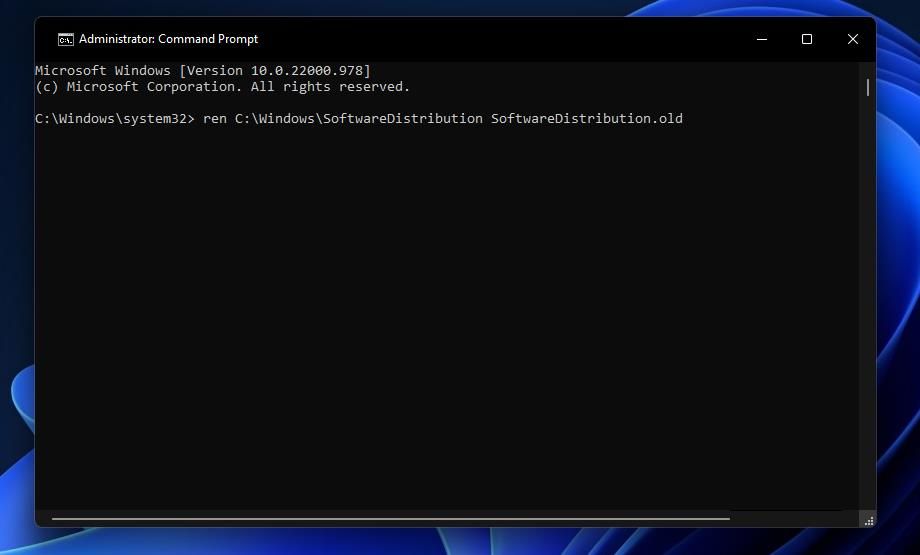
-
Input this rename catroot2 command and press Return:
ren C:\Windows\System32\catroot2 Catroot2.old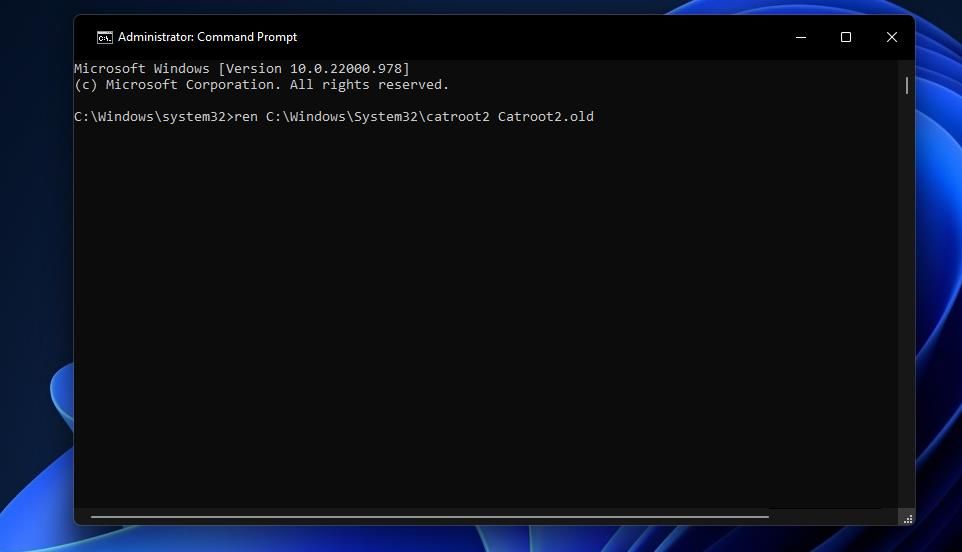
-
Then restart the services with these commands:
        net start wuauserv
net start bits
net start cryptSvc
net start msiserver - Close Command Prompt, and select Restart on your Start menu.


8. Turn Off Third-Party Antivirus Utilities
Some third-party antivirus utilities can mistakenly interfere with the update process for Windows 11’s 22H2 update. To stop this from happening, disable real-time scanning for third-party antivirus software.
If you have a third-party antivirus tool installed, right-click its system tray icon and select a context menu option to turn off its shield for a few hours; then try upgrading Windows 11 to the 22H2 version with the antivirus software disabled.
AVG and Avast are two antivirus software packages that often generate Windows update errors. Those antivirus tools have also been incompatible with some Windows 10 builds. If you have either of those two installed, consider uninstalling them instead of merely disabling their shields.
9. Disable Kernel DMA Protection
Some users have said the Kernel DMA Protection security feature in Windows 11 causes the 22H2 update to fail when enabled. If that feature is enabled on your desktop or laptop, disabling it could fix the Windows 11 22H2 not installing. To check if Kernel DMA Protection is enabled, open the System Information app and look for that feature in the System Summary section.

The only way to turn off Kernel DMA Protection is to disable a setting for it in the BIOS (Basic Input Output System). You can access Basic Input Output System settings on Windows 11/10 PCs as outlined within our guide on how to enter the BIOS. Look for and disable a Kernel DMA Protection setting on a Security tab within the BIOS.
10. Update Your PC's Drivers
Outdated device drivers can cause Windows upgrade issues. So, we recommend that you generally update device drivers on your PC. The quickest way to do that is to utilize a driver updater tool like Driver Booster.
A Driver Booster scan will show you what devices on your PC have antiquated drivers. You can also select an Update Now option in that software to update the drivers for listed devices. Our Driver Booster guide includes instructions for updating drivers with that software.

Alternatively, you may be able to install some new drivers with optional Windows updates. This is how you can check available optional updates in Windows 11:
- Open Settings and its Windows Update tab.
- Select Advanced options to bring up some configuration settings for updates.
- Click Optional updates to see if there are any driver updates available.
- Select the checkboxes for driver updates there.
- Click the Download and install option for selected driver updates.
11. Install the 22H2 Update via the Installation Assistant
This final resolution is more of a workaround than a fix for the 22H2 update not installing via Settings. Instead of using Settings, try upgrading with the Windows 11 Installation Assistant. We have a full guide that tells you how to use the Installation Assistant for updating Windows 11.

Discover the Windows 11 2022 Update
Those possible solutions will likely resolve most 22H2 update errors for the majority of users. The resolutions on Microsoft’s Windows update troubleshooting page might also help some users fix Windows 11’s 22H2 update not installing. With that issue fixed, you can discover all the interesting new features and options in the Windows 11 2022 Update.