Windows 11 includes three desktop context menu options for changing icon size. However, those settings do nothing to change the spacing between icons. Nor does the Settings app or Control Panel offer any configuration settings with which to adjust icon spacing variables.
As such, it might seem that you can’t change icon spacing on the desktop in Windows 11/10. However, Windows 11 does have two hidden settings for changing the vertical and horizontal desktop icon spacing in the form of registry strings. Here is how you can change desktop icon spacing in Windows 11/10 in two different ways.
How to Change Desktop Icon Spacing By Manually Editing the Registry
The registry is one big database of configuration settings that you can edit to customize Windows. It includes a WindowsMetrics key that incorporates IconSpacing and IconVerticalSpacing strings.
You can tweak these hidden options and create the desktop icon spacing you want as follows:
- Click the Start button on the taskbar with the right mouse button to select the Run shortcut.
- To open the Registry Editor, enter regedit in the Run and select OK.
- Go to the Computer\HKEY_CURRENT_USER\Control Panel\Desktop\WindowMetrics registry key. You can copy and paste that registry location in the address bar or click the keys for it on the left sidebar.
-
Select the WindowMetrics key.
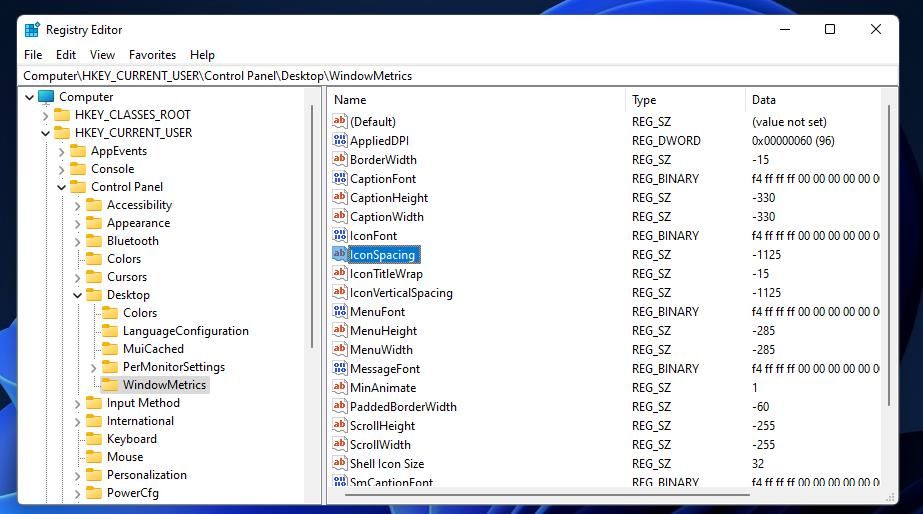
- Double-click the WindowMetrics key's IconSpacing string, which changes the horizontal spacing for desktop icons.
- Then erase the current -1125 number from the Value data box.
-
Enter a replacement value with a minus (-) sign in front of it. For example, entering -1180 will slightly increase the horizontal spacing.

- Press the OK button to close IconString’s Edit String window.
- Next, double-click the IconVerticalSpacing string setting, with which you can modify vertical icon spacing.
- Clear the current value, and then input another number with a minus sign in front of it. If you want the vertical spacing to be the same as the horizontal, enter a number there that matches the IconSpacing value.
- Click the Edit String window’s OK button.
- Exit the Registry Editor.
- You’ll need to restart Windows to apply this registry tweak.


After the restart, the icon spacing on your desktop will have changed according to the new IconString and IconVerticalSpacing values you entered. You’ll notice the difference if you entered notably higher or lower values. Don’t get too carried away by entering values that are far too low or high. The shortcuts’ labels will overlap with too little spacing and some icons might disappear from the desktop if you expand the space between them too much.
Now you might wonder how you can restore the default desktop icon spacing. The default spacing value for both the strings is -1125, which amounts to 75 pixels. So, return to the WindowMetric registry key and enter -1125 for both the IconString and IconVerticalSpacing string values. Thereafter, restart your PC to restore the default spacing.
How to Change Desktop Icon Spacing With Winaero Tweaker
Some third-party customization software packages for Windows 11/10 include options for changing desktop icon spacing. Among them is the freeware Winaero Tweaker, which has two slider bars with which you can increase or decrease horizontal and vertical icon spacing. As that software also specifies space values in pixels, some users might prefer to change icon spacing with it. This is how to change the spacing for desktop icons with Winaero Tweaker.
- Open a browser and visit the Winaero Tweaker download page.
- Scroll down the page to select a Download Winaero Tweaker option.
- Next, launch File Explorer to open the folder that includes Winaero’s ZIP archive.
-
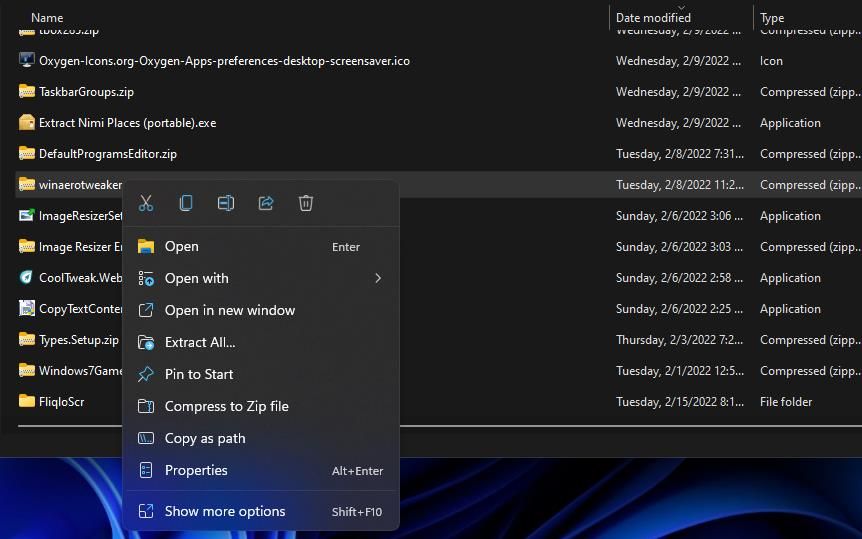
Right-click the winaerotweaker.zip file and select its Extract All option.
-
Select the checkbox for the Show extracted files when complete setting on the Extract Compressed (Zipped) Folders window.
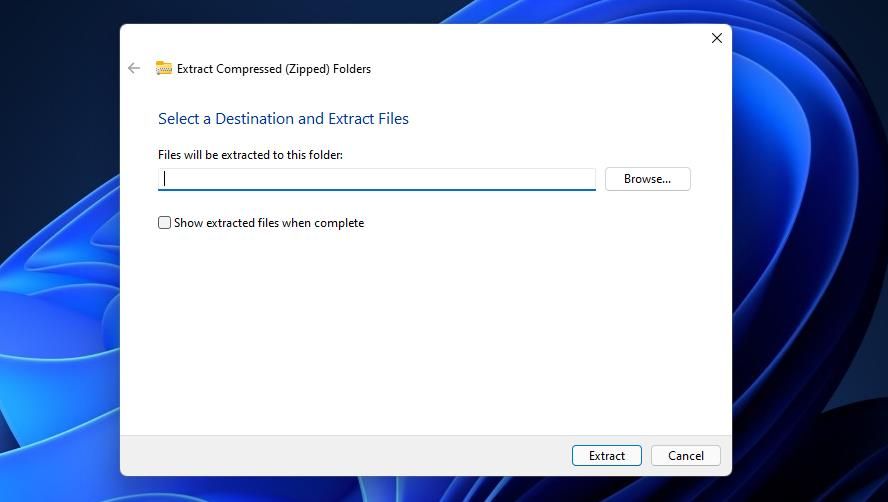
- To unzip the archive, click Extract.
- Double-click the installer file for Winaero Tweaker to bring up the software’s setup wizard.
- Select the Next option a few times, and click the I accept the radio agreement button.
-
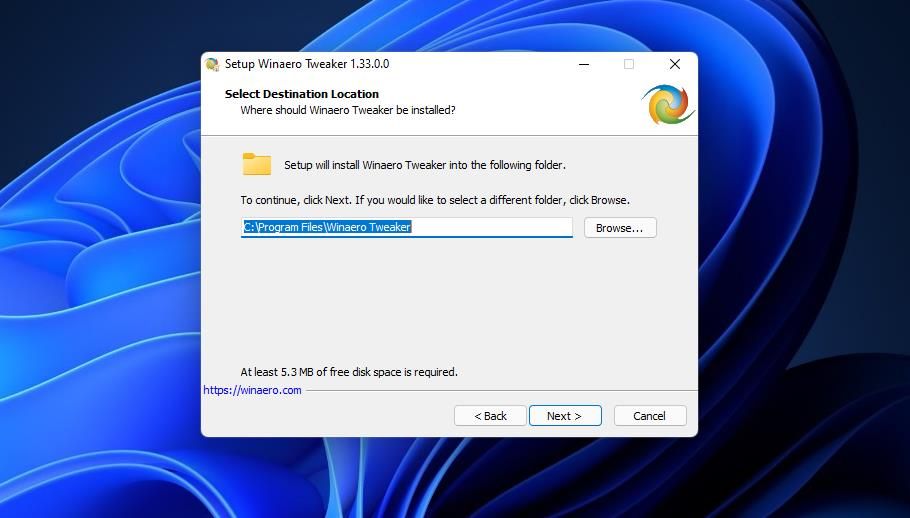
Click Next to proceed to the folder selection. Although not essential to do so, you can click Browse to choose a different folder.
- All the other default installation options selected are fine. Keep clicking Next and then Install to finish.
- Select the Run Winaero Tweaker checkbox after installing, and then click Finish.
- Double-click the Advanced Appearance Settings category in Winaero.
- Click the Icons option shown directly below.
-
Drag the Horizontal spacing bar’s slider right or left to increase or decrease the space width between icons.
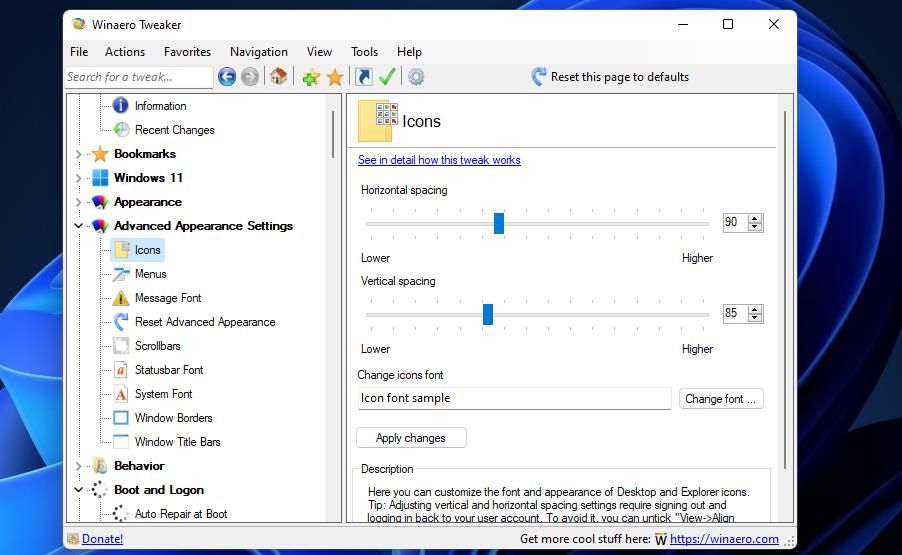
- Then drag the slider for the Vertical spacing bar left or right to adjust the amount of vertical space for desktop icons.
- Press the Apply changes button.
- Click the Sign out now option to restart your PC and apply the icon spacing changes.


That’s it. Now you can see the icon spacing change on the Windows 11 desktop.
If you go a bit over the top with the space changes, you can easily readjust the values with Winaero Tweaker’s icon spacing slider bars. To restore the default spacing, click the Reset this page to defaults option for the Icon option.
You might also notice that Winaero Tweaker’s Icon option has an additional Change icons font setting. That option enables you to choose a different font for your desktop icons. Press the Change Font icon button to bring up the window shown below.

There you can select a different icon font from a wide variety of alternatives in the Font menu. The Font style menu there includes 12 different styles for icon fonts to choose from. Input a higher or lower value in the Size box to increase or decrease the font size. You can also select Strikeout and Underline text effect options there.
Click OK when you’ve customized the desktop icon font, and then select the Apply Changes and Sign out now options.
How to Change Desktop Icon Spacing With DesktopOK
DesktopOK is another third-party app with which you can adjust the vertical and horizontal spacing between desktop icons. That software also enables you to save desktop icon layouts and packs in other useful tools and features. You can change desktop icon spacing with DesktopOK like this:
- Open this DesktopOK download page.
- Click the DesktopOK_x64.zip (for the portable app version) to save the archive.
- Simultaneously press the Windows logo + E keys on your keyboard to activate File Explorer.
- Go to the folder containing the DesktopOK ZIP archive.
- Follow the instructions in this how-to unzip archives in Windows guide to extract the ZIP file.
- Then double-click the DesktopOK_x64.exe file.
-
Click Tools on the DesktopOK window.
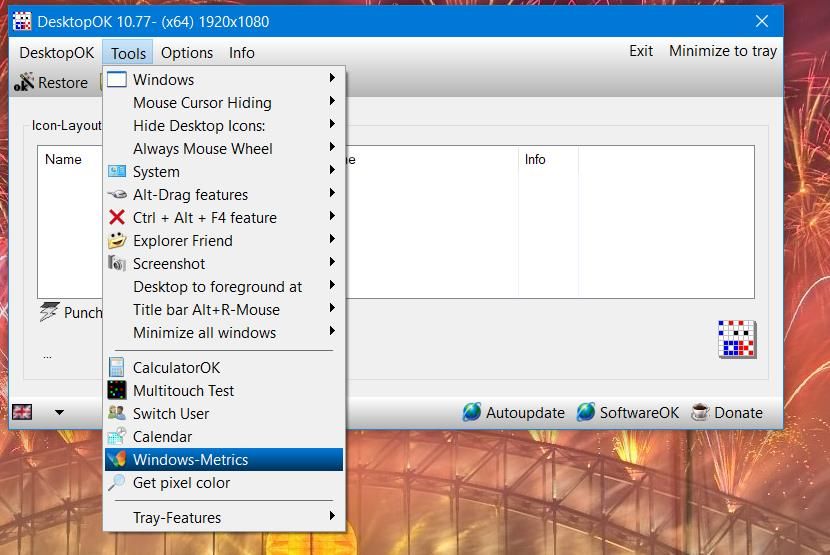
- Select Windows-Metrics on the Tools menu.
- Click Yes on the confirmation dialog prompt.
-
Drag the Horizontal Space bar’s slider to change horizontal desktop icon spacing.
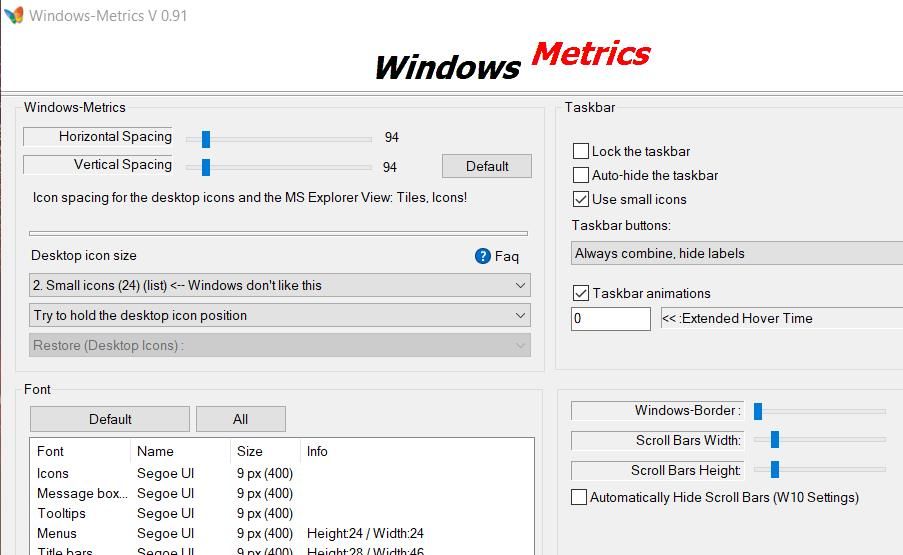
- Then drag the Vertical Space bar’s slider to adjust vertical icon spacing.


You can also change desktop icon sizes from the Windows-Metrics window. Click the Desktop icon size drop-down menu to choose an alternative size from there. If you select the largest icon sizes, you’ll need to increase the spacing between them to prevent them overlapping.
How Much Icon Space Do You Want on Your Desktop?
So, would you prefer the desktop icons in Windows 11/10 to have more or less space between them? Reducing desktop icon space will free up space for more shortcuts. However, some Microsoft Surface touchscreen PC users might prefer to widen the spaces between icons a little bit. You can choose either way by manually editing the registry or adjusting spacing with Winaero Tweaker’s Icon option or the Windows-Metrics utility in DesktopOK.