Unorganized and uncleaned spaces tend to accumulate clutter. This is no different when it comes to your PC. The more you use your computer, the more junk it builds up.
On slower drives such as traditional hard disks, junk files can slow your operating system to a crawl. So, cleaning them frequently can help improve performance. Windows 10 features built-in tools to remove most junk files, and if something remains, you can clean up manually. We'll show you how.
Why Should You Clean Your Junk Files in Windows 10?
Junk files, like junk food, don’t have any benefits. Instead, it can make your system difficult to manage. On computers with puny SSD drives, you may run into insufficient storage and performance issues.
Removing trash can help you keep your files and folder organized, save a ton of precious storage space, and improve system performance as your computer no longer has to churn through files that do nothing for you.
The Different Types of Junk Files in a Windows Computer
All kinds of sources can create a junk file on your PC, from the leftovers of uninstalled programs to that cute wallpaper you downloaded ages ago but ultimately got bored with. Here are a few common types of junk files that most systems have:
- Files in the Recycle Bin. Discarded files in your Recycle Bin are likely unnecessary but remain in the folder, sometimes taking gigabytes of storage.
- Windows temporary files. These are junk files whose use is temporary and become redundant once the current task is complete.
- Windows and third-party software leftovers. When you uninstall a program, not all the files associated with the software are deleted. This can often conflict with other programs that you are trying to work with.
- Downloads. The downloads folder usually takes a chunk of your storage space. Usually, it contains unwanted installers, images, videos, and other redundant documents that accumulate over time.
Thumbnails and thumbnail photos can be considered junk files. However, you don't need to clean them unless necessary. If cleaned, your system will have to generate thumbnails again, which can slow things down.
Create a Restore Point Before You Clean Up Junk Files
System Restore in Windows allows you to undo system changes by reverting your computer to a previous restore point. It is useful in case you delete a critical system file and run into issues.
Follow our guide to create a restore point in Windows. Once you have it ready, continue with the steps below.
1. Empty the Recycle Bin to Free Up Space
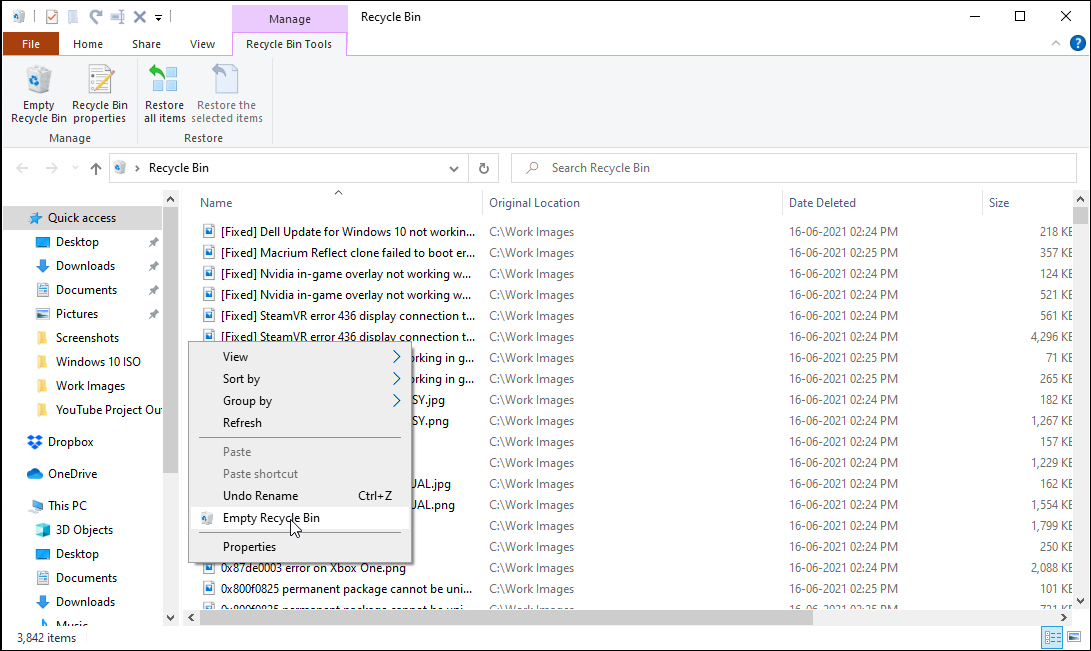
The Recycle Bin stores all the files you've deleted from your computer. It is a handy utility as you can restore deleted files if you accidentally discard any. However, if not cleaned frequently, it can accumulate gigabytes of files that eat into your storage space.
Fortunately, cleaning the Recycle Bin is easy. You can select and delete individual files permanently or empty them at once.
- Open the Recycle Bin from the desktop. If you don’t have a desktop shortcut available, type Recycle Bin in the Windows search bar and click on the best match.
- Go through the deleted files. If you want to restore any, right-click and choose Restore.
- To delete all, right-click inside the folder and choose Empty Recycle Bin.
- You can also perform this action from the desktop. Right-click on the Recycle Bin shortcut and choose Empty Recycle Bin. Click Yes to confirm the action.
2. Clean Up Temporary Files to Remove Junk
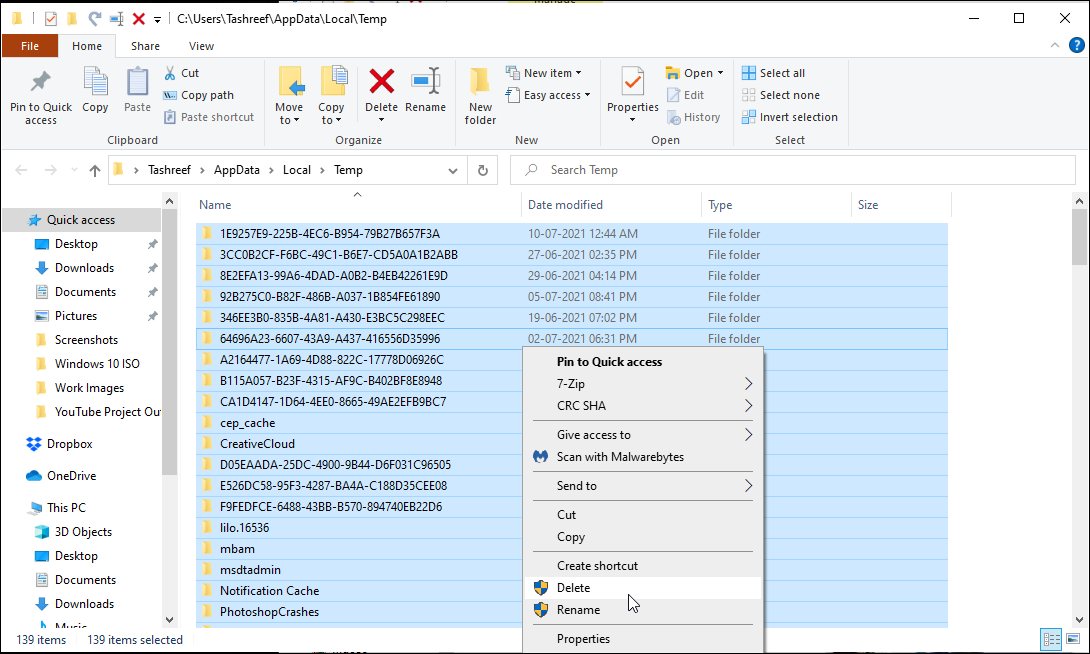
Temporary files are created automatically to hold information for a file in use. Once the task is complete, these files are deleted. Temp files are stored in the Windows Temp folder, and you can manually clean up temporary files to free up disk space in Windows.
To clear temporary files:
- Press the Win + R to open Run.
- Type %temp% and click OK.
- In the temporary folder, press Ctrl + A to select all the files and hit the Delete key. Click Skip for any file that appears to be in use.
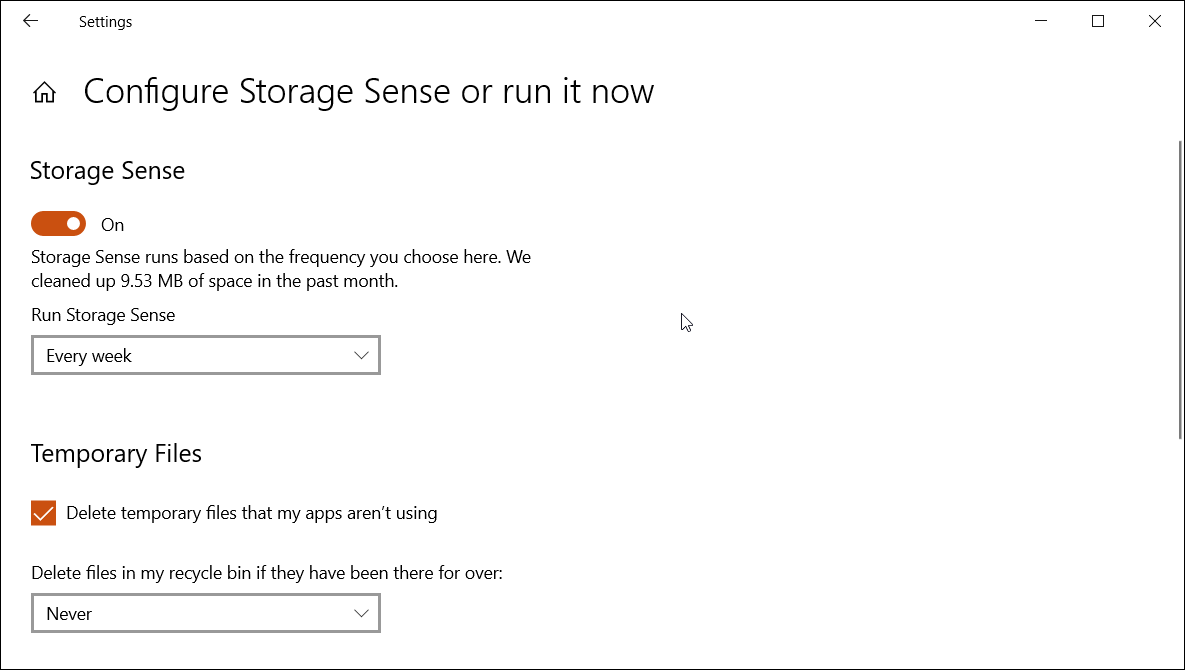
Alternatively, Windows 10 comes with Storage Sense, a built-in feature to clean up junk files from multiple sources. If you like the sound of this, you can configure it to delete temporary files automatically.
To set up Storage Sense to delete temporary files, go to Settings > System > Storage. Toggle the switch to enable Storage Sense. Next, click on Configure Storage Sense or run it now.
Choose when you want to run Storage Sense. Under Temporary Files, check Delete temporary files that my apps aren't using option.
3. Remove Junk Files With the Disk Cleanup Tool
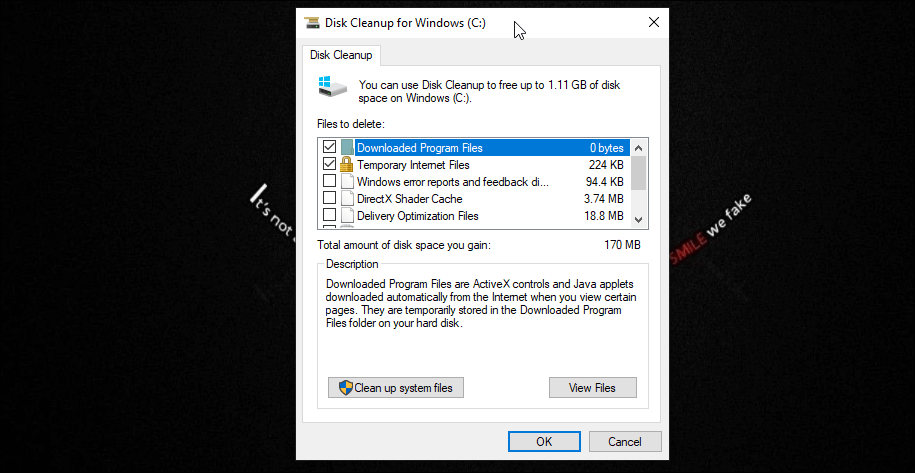
The Disk Cleanup tool in Windows is a one-stop solution to clean up junk files from your computer. It scans and calculates how much space you will be able to free on the selected drive.
Using Disk Cleanup, you can get rid of junk files such as downloads, temporary Windows installation files, temporary internet files, delivery optimization files, Recycle Bin, and more.
Here’s how to use the Disk Cleanup tool.
- In the Windows search bar, type Disk Cleanup and hit enter to launch the utility.
- Choose a drive you want to clean up and click OK. It will scan the selected drive for junk files from multiple and usual sources.
- Next, the tool will populate the screen with how much space you can free up by deleting different junk files.
- Check the box to select the file type you want to clean up. To view which files will be removed, click View Files.
- Click on Clean up system files to view Temporary Windows installation files and device driver packages.
- Click OK to remove the junk files. Select Delete files to confirm the action.
Leave the Thumbnail box unchecked. Removing the thumbnail cache can free up a few megabytes of storage. However, the system will have to regenerate them when you look for a file, which will slow down your PC.
4. How to Remove Junk Files Using the Command Prompt
Don’t fancy the graphical user interface much? You can clean up junk files using the Command Prompt. Here are a few commands you can use for taking out the trash.
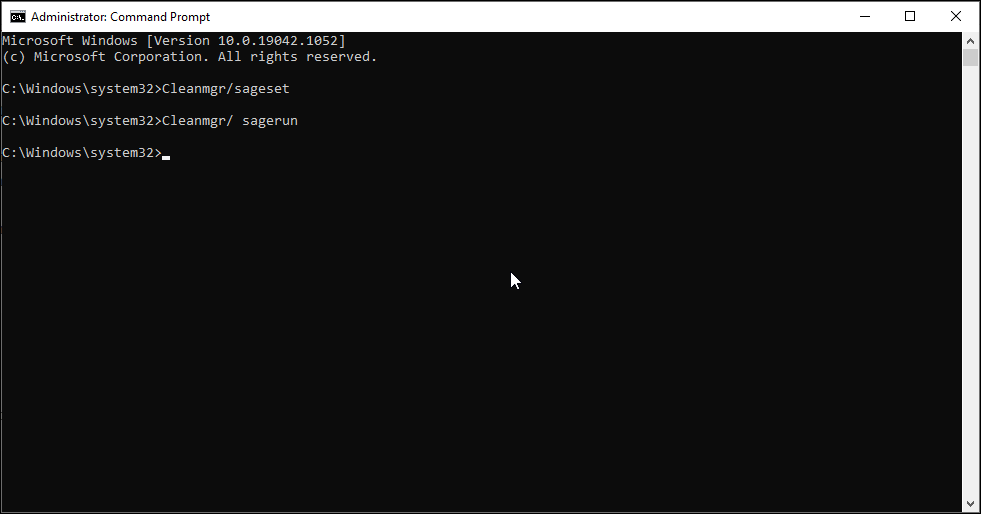
To use the Disk Cleanup tool using the Command Prompt, use one of the following commands:
To skip disk selection and view the category selection menu:
Cleanmgr/sagest
To automate the disk-cleaning process without choosing any category:
Cleanmgr/ sagerun
Running low on disk space? Use this command for a quick cleanup:
Cleanmgr/lowdisk
Clean Up Temporary Files Using the Command Prompt
If your work involves frequently cleaning up temp (temporary) files created by a user or the system, a cmd command can come in handy.
To view temp files, run this command as administrator:
%SystemRoot%\explorer.exe %temp%\
To delete temp files, run this command as administrator:
del %temp%\*.*/s/q
The Command Prompt is a useful utility. If you are new to entering commands, we have some useful tips to master the Command Prompt in Windows 10 to help you get started.
5. Clean Up Restore Points
System restore points can be a lifesaver. However, too many of them can take up unnecessary space on your storage drive. While Windows doesn't show how much space is taken by the system restore, you can delete old restore points to free up more space.
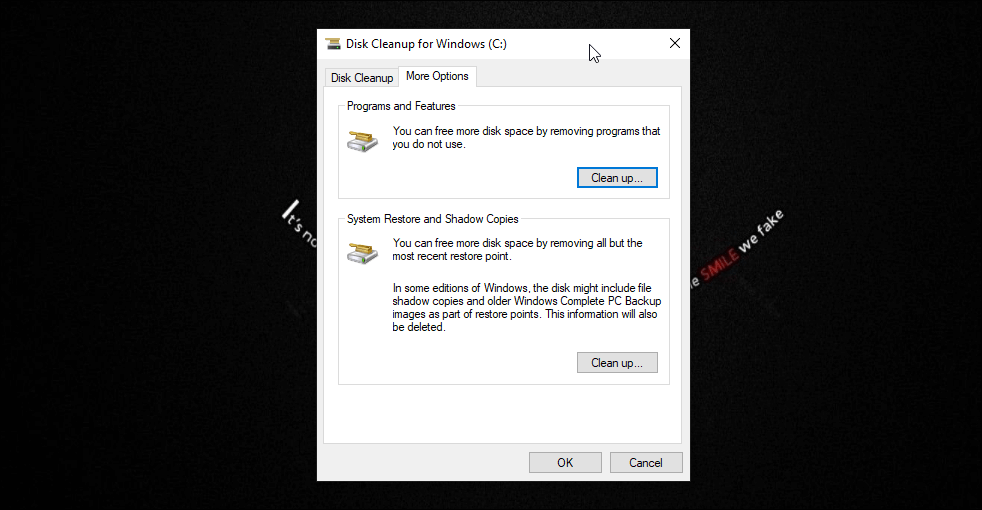
You can clean up restore points from the Disk Cleanup utility. Restore point clean-up will remove all but the most recent restore points. Here’s how to do it.
- In the Disk Clean utility, click the Cleanup system files button.
- Select a drive and click OK to initiate the scan.
- Next, open the More Options tab.
- Under System Restore and Shadow Copies, click the Cleanup button.
- Select Delete to confirm the action.
Alternatively, you can also specify disk space usage for restore points. Useful if you don't want to deal with deleting the restore points frequently.
To specify disk usage space for Restore Point:
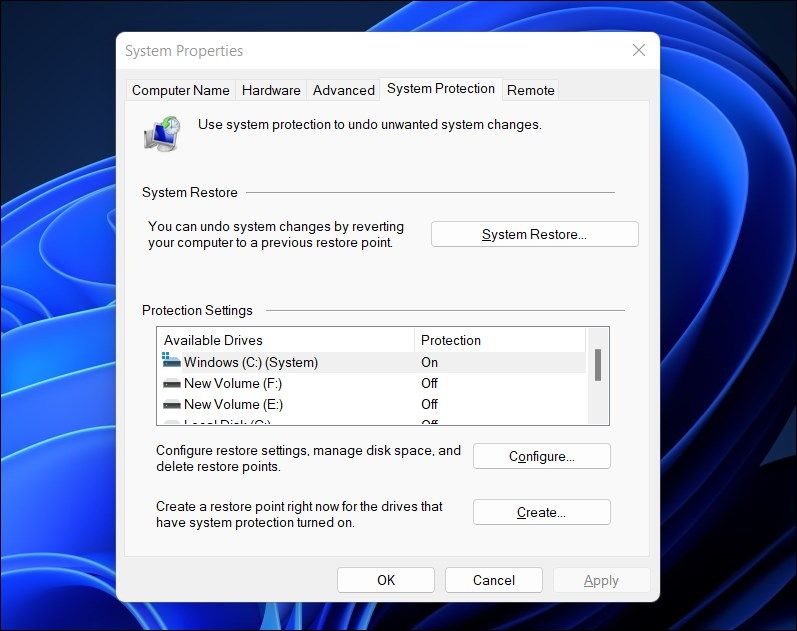
- Press the Win key and type Restore Point.
-
Next, click on Create a restore point option to open the System Properties dialog.
-
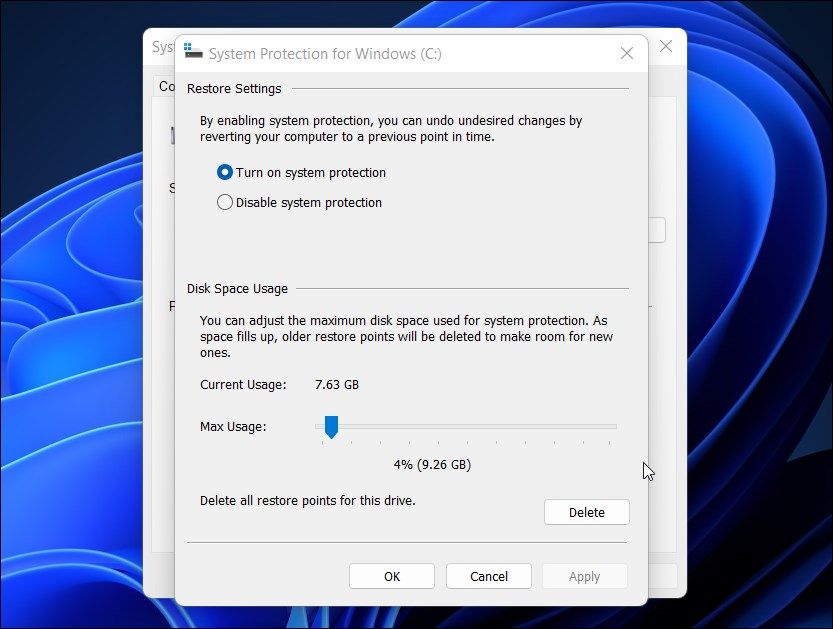
In the System Protection tab, click on the Configure button under the Protection Settings section.
- In the pop-up dialog, adjust the Max Usage slider to specify Disk usage space.
- Click Apply and OK to save the changes.
Remove Junk Files to Improve Windows 10's Performance
Junk Files aren’t a pretty sight and can negatively impact your system performance. However, you can either clean up junk manually or run Disc Cleanup periodically to keep your system clean.
To gain more space, delete unnecessary programs such as bloatware, third-party system cleanup utilities, and other redundant applications from your system.

