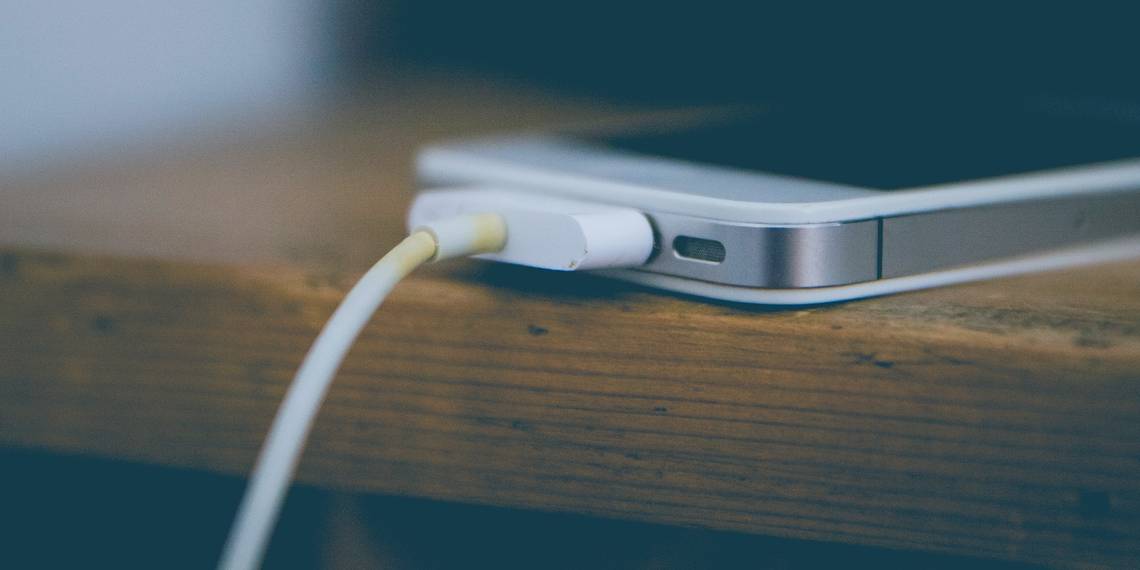
Sometimes you'll encounter a weird issue with an iPhone where it downright refuses to play ball with Windows 10. When this happens, even though it is physically connected to your computer via lightning cable, Windows will not recognize your phone.
Due to this problem, you cannot charge your phone or transfer files from your phone to your computer. The problem can be with the computer, but it can also be with the iPhone. If you are experiencing this same issue, here are some fixes you can try.
1. Reboot Both Devices
When a device doesn't want to connect with another, it's a good idea to start with resetting both. Therefore, you need to restart both your iPhone and Windows device, as the problem may lie with either one. Before restarting, disconnect the connection cable if it is already connected.
Connect your iPhone to your computer again after restarting your devices. Check to see if a fresh start of both devices resolves the issue. If not, proceed to the other fixes.
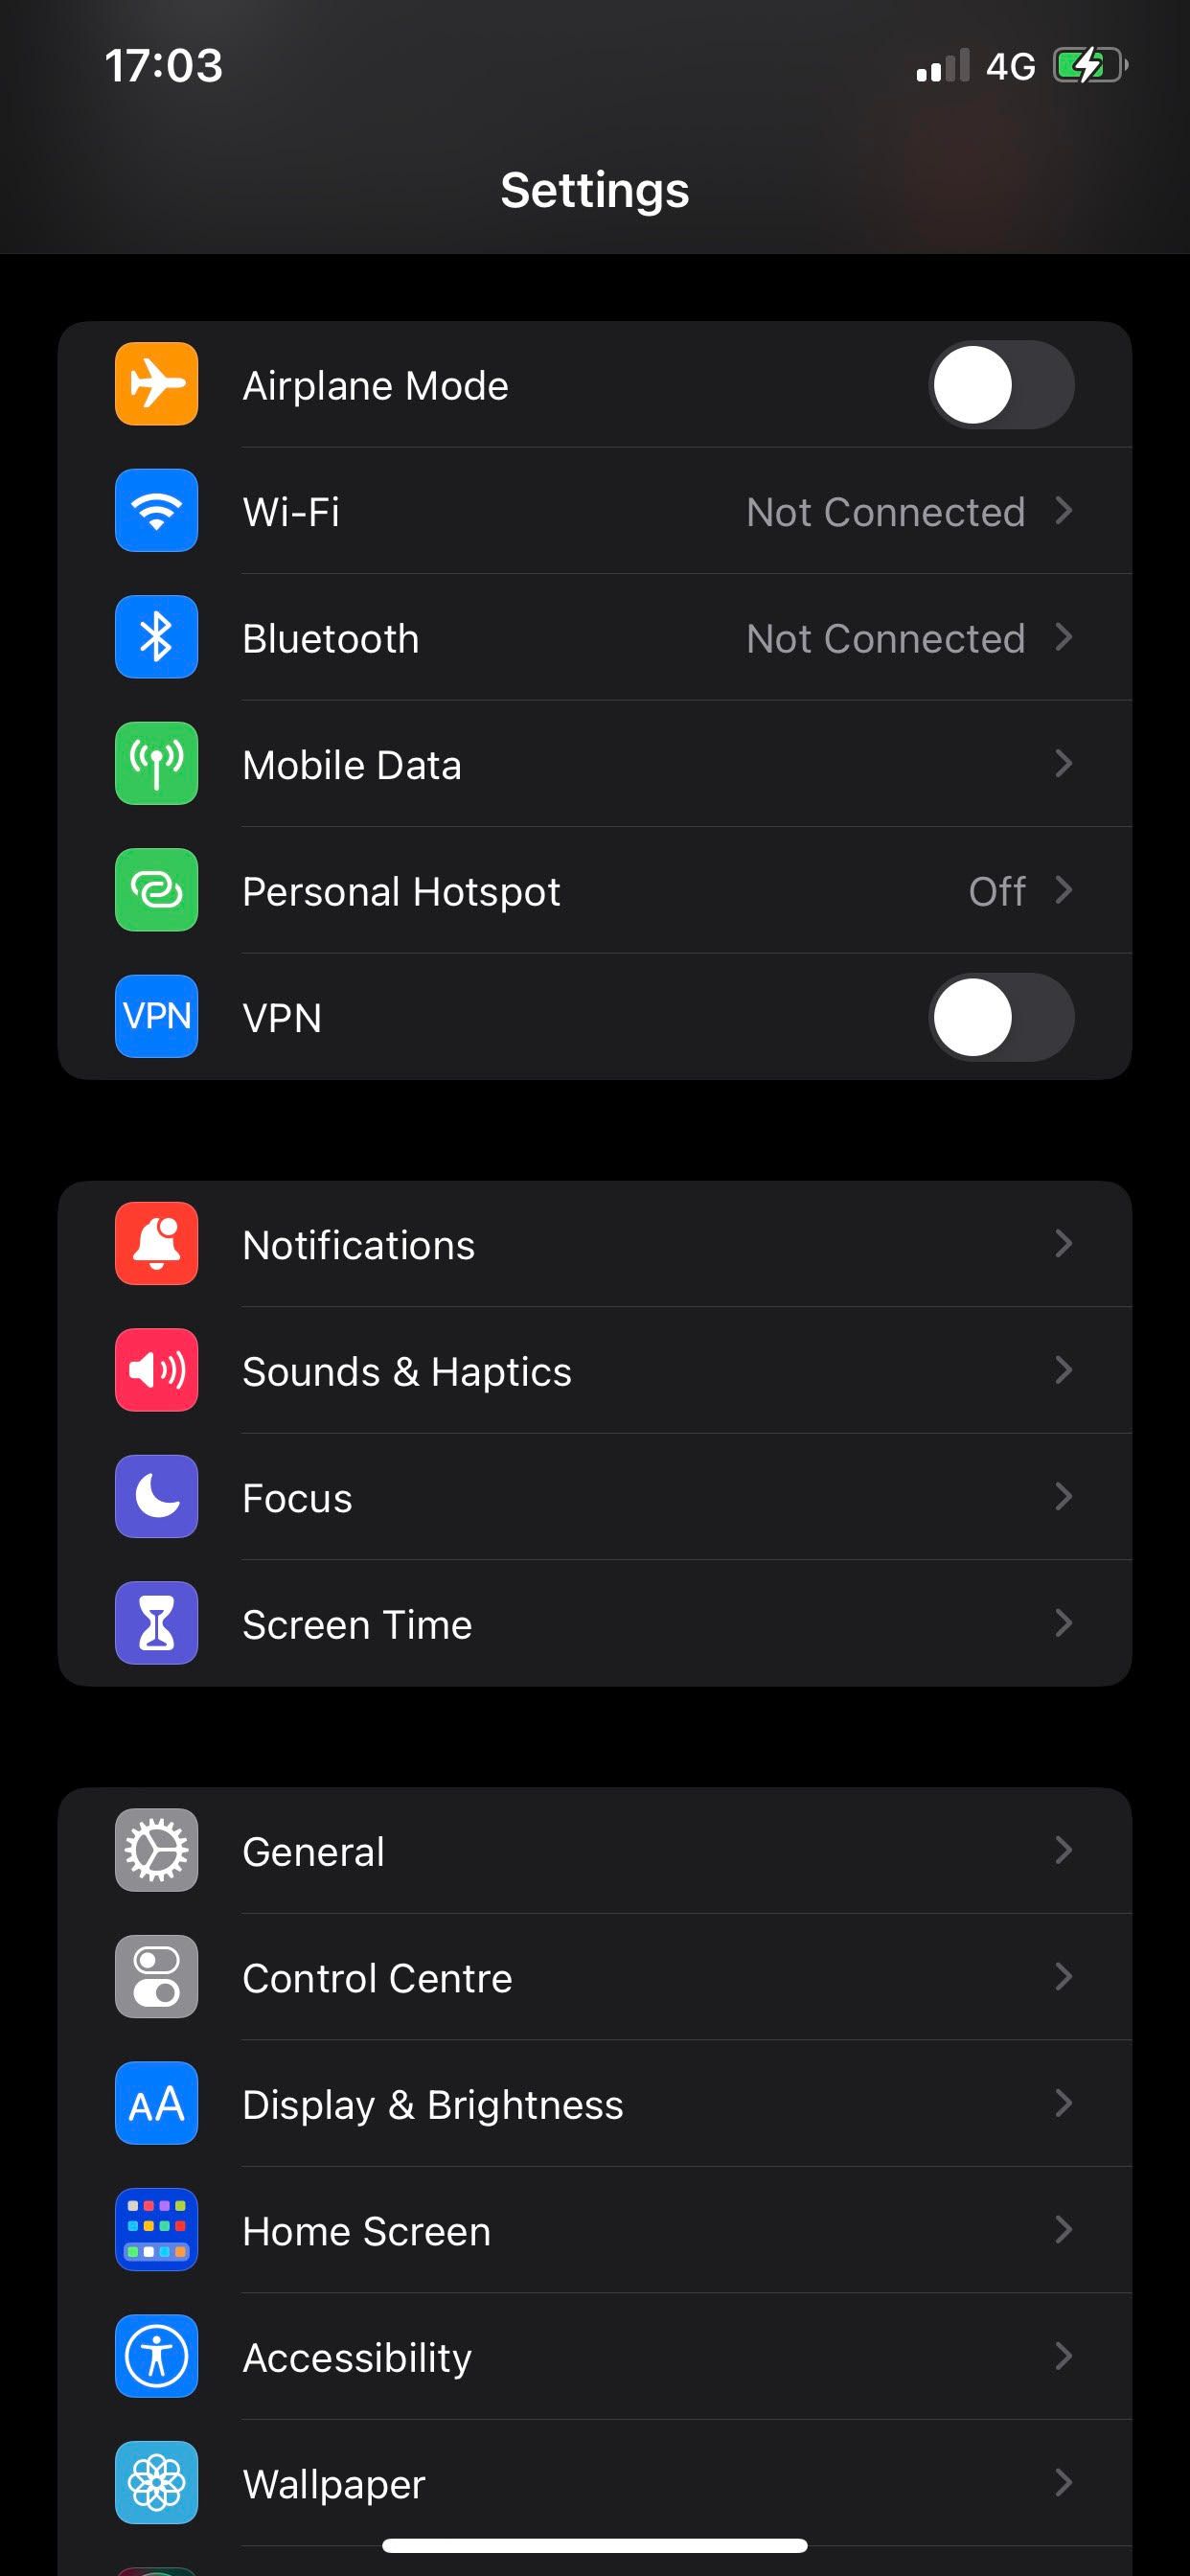
2. Disable Any VPN Services on Your Phone
If you keep your iPhone's VPN on all the time, you may want to disable it. Using a VPN is an excellent way to hide your IP address and establish an anonymous, secure connection. However, there are times when your PC does not recognize your iPhone device with VPN enabled. As such, it's worth disabling your VPN services and giving it a second shot.
Check if your iPhone connects properly by temporarily disabling your VPN connection. If possible, uninstall your VPN app. If that isn't the problem, explore more fixes below.
3. Tell your iPhone to "Trust your computer"
As soon as you connect your iPhone to your computer, you'll see a notification saying, "Trust this Computer?". By tapping the Trust button, your iPhone will receive the green signal that the connection is safe. Otherwise, you won't be able to transfer files from both ends even though your iPhone is physically connected to your computer.
If you do not see any of these notifications, try to remember whether you previously connected your iPhone device and selected Don't Trust? In that case, your iPhone is smart enough not to connect with such a device.
Reset your device's Location and Privacy settings to fix the issue. Here is where you can find this setting:
- Navigate to your phone's Settings.
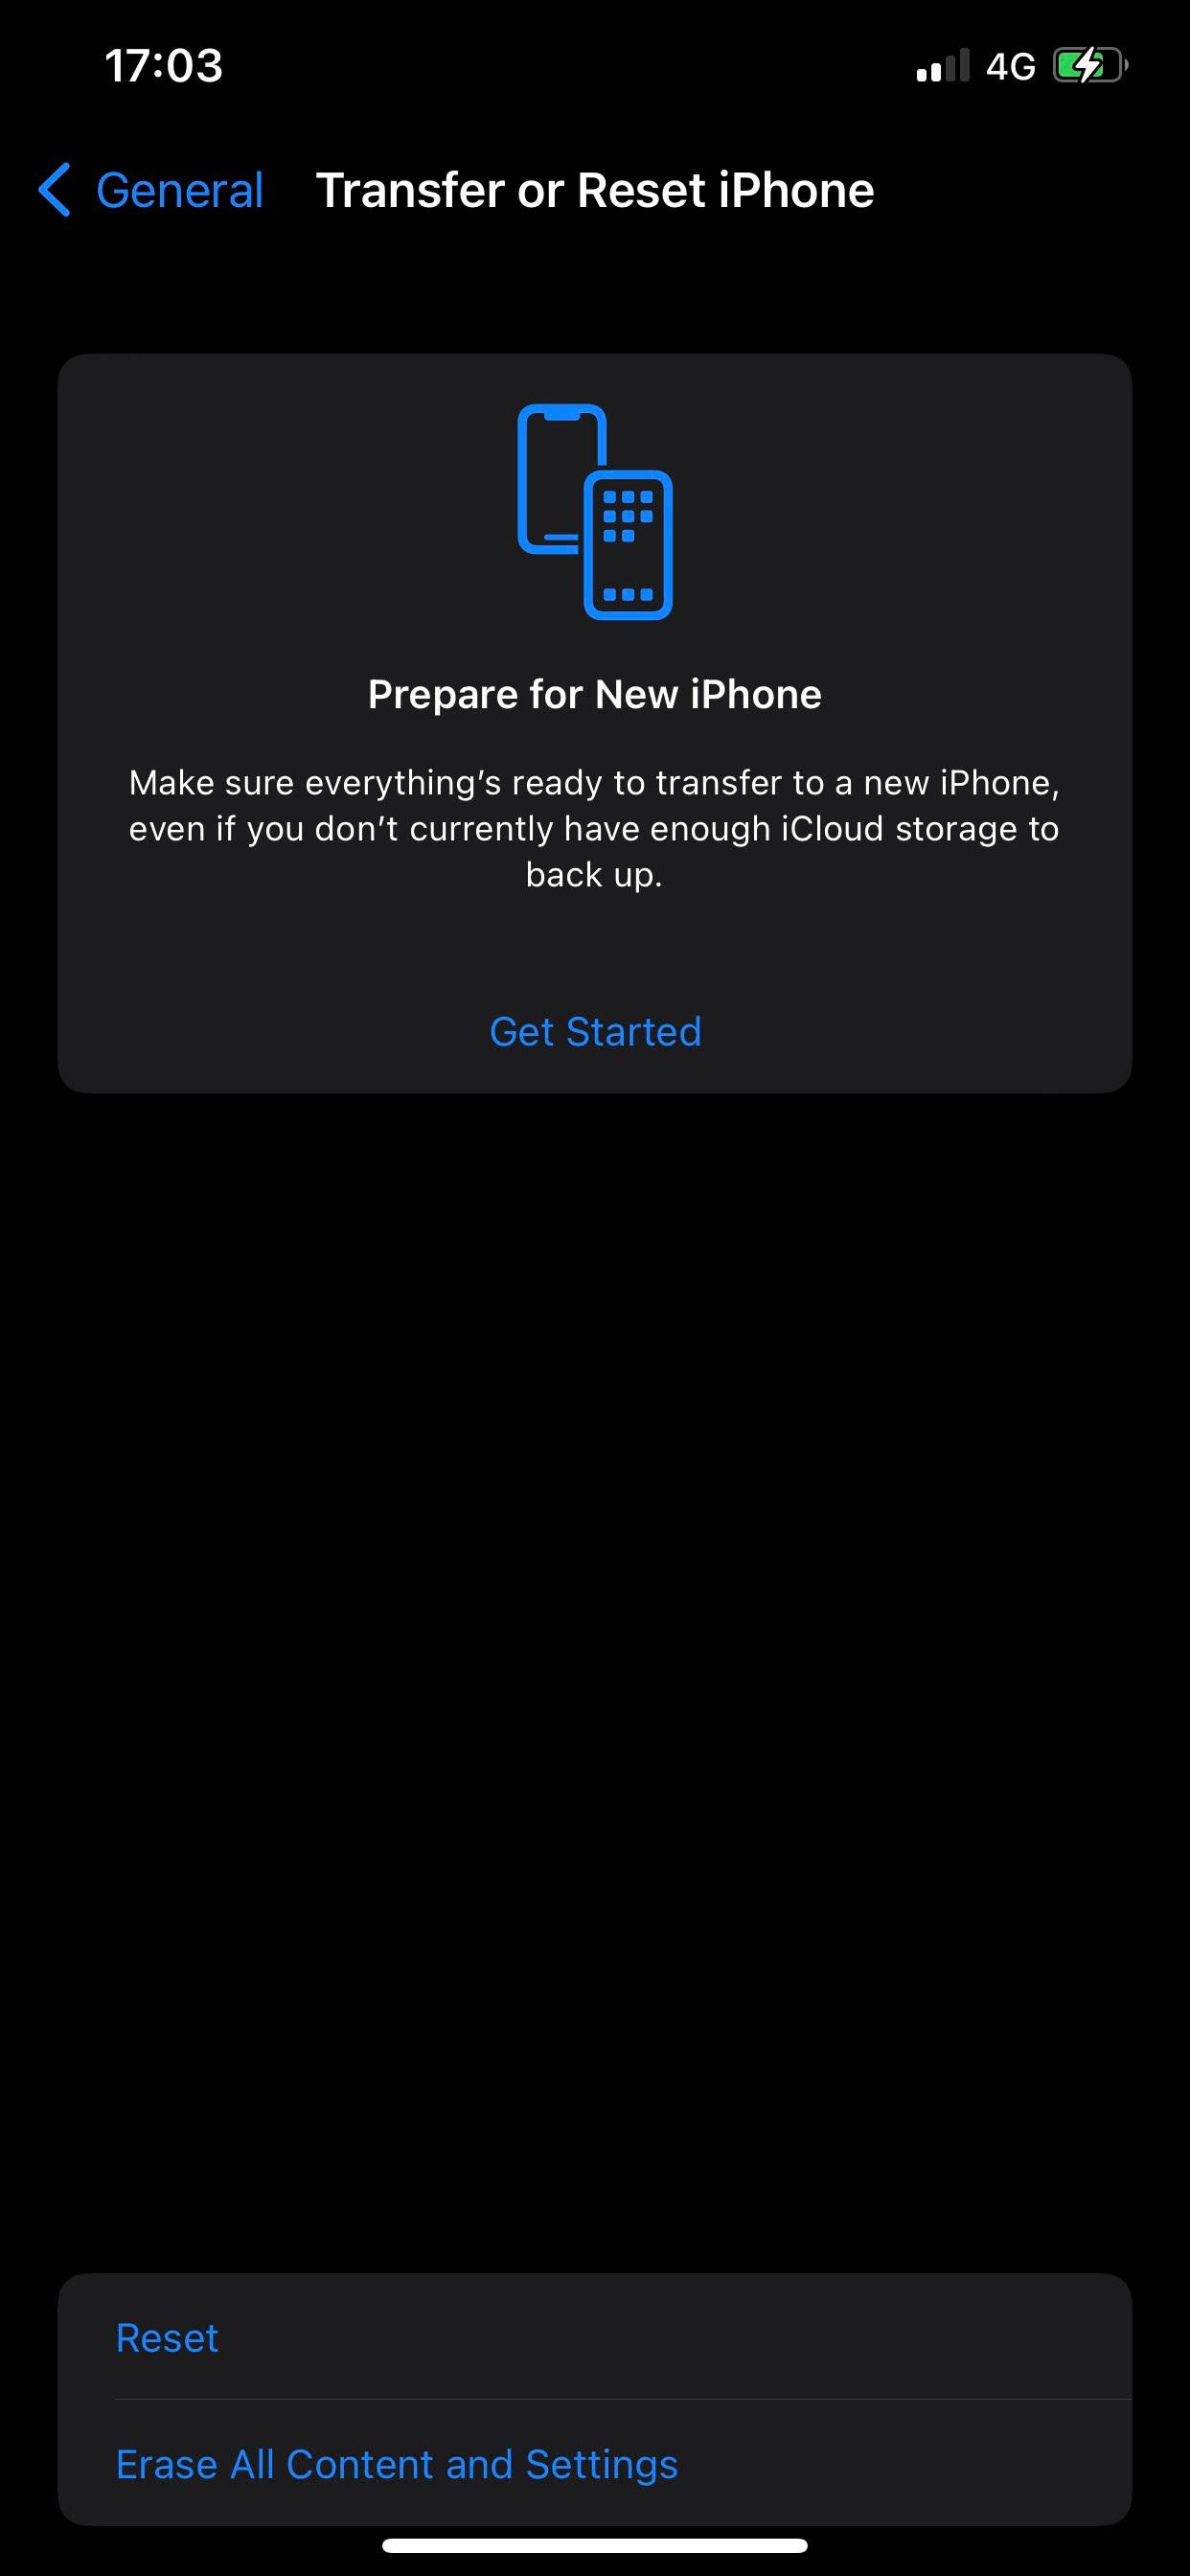
- Go to General > Transfer or Reset iPhone.
- Click on Reset.
-
Choose Reset Location & Privacy.
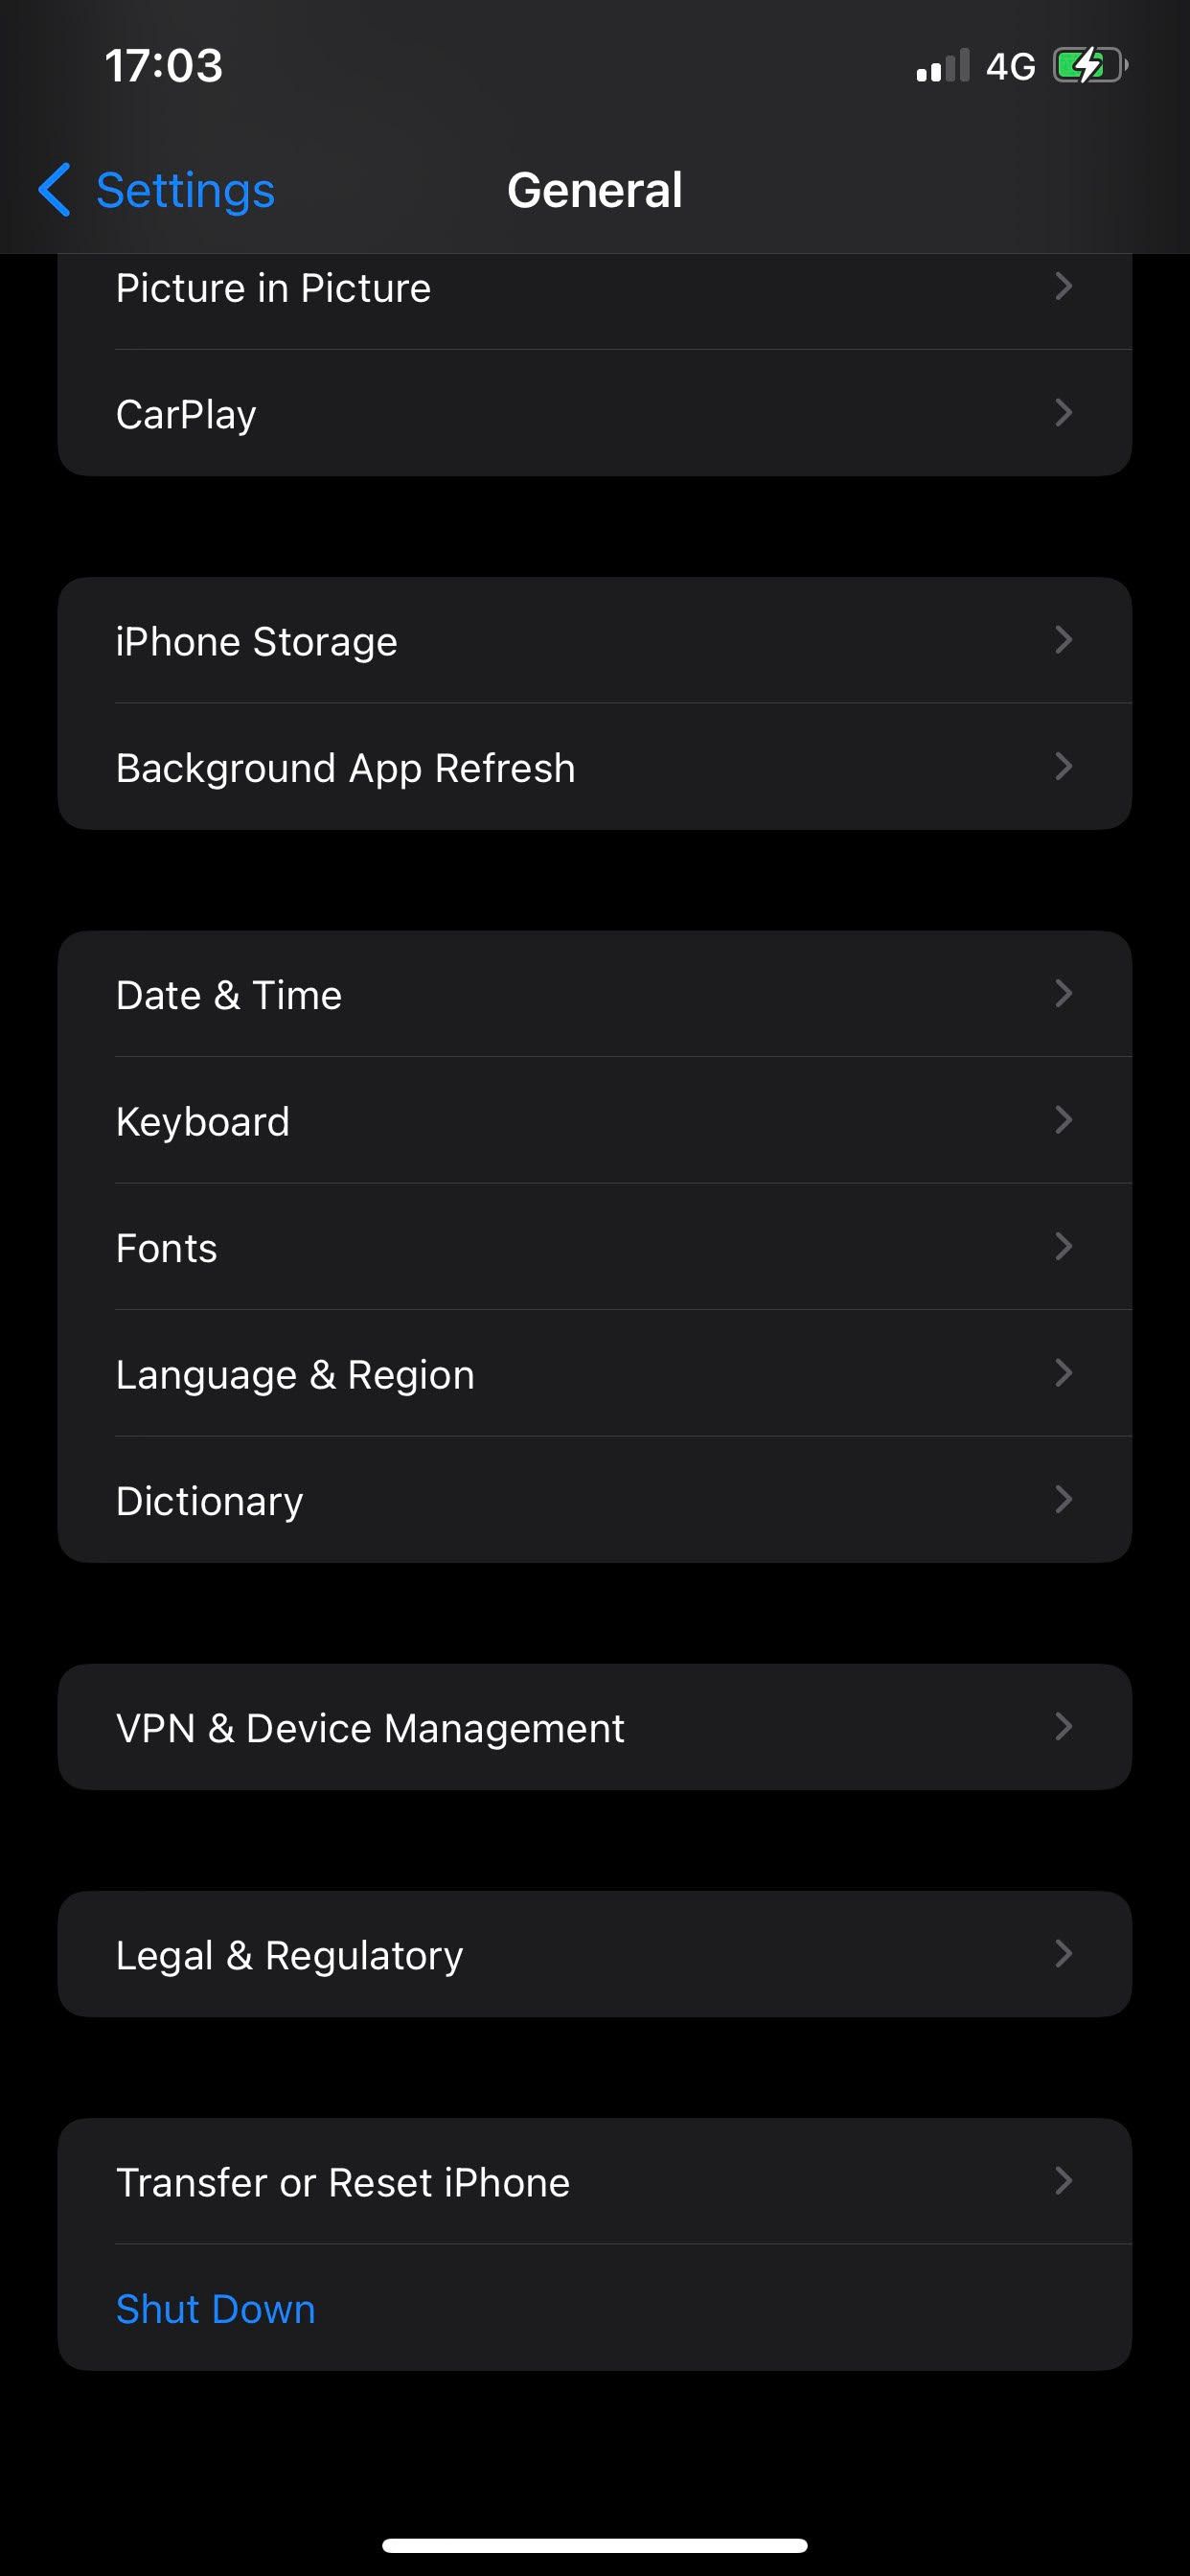
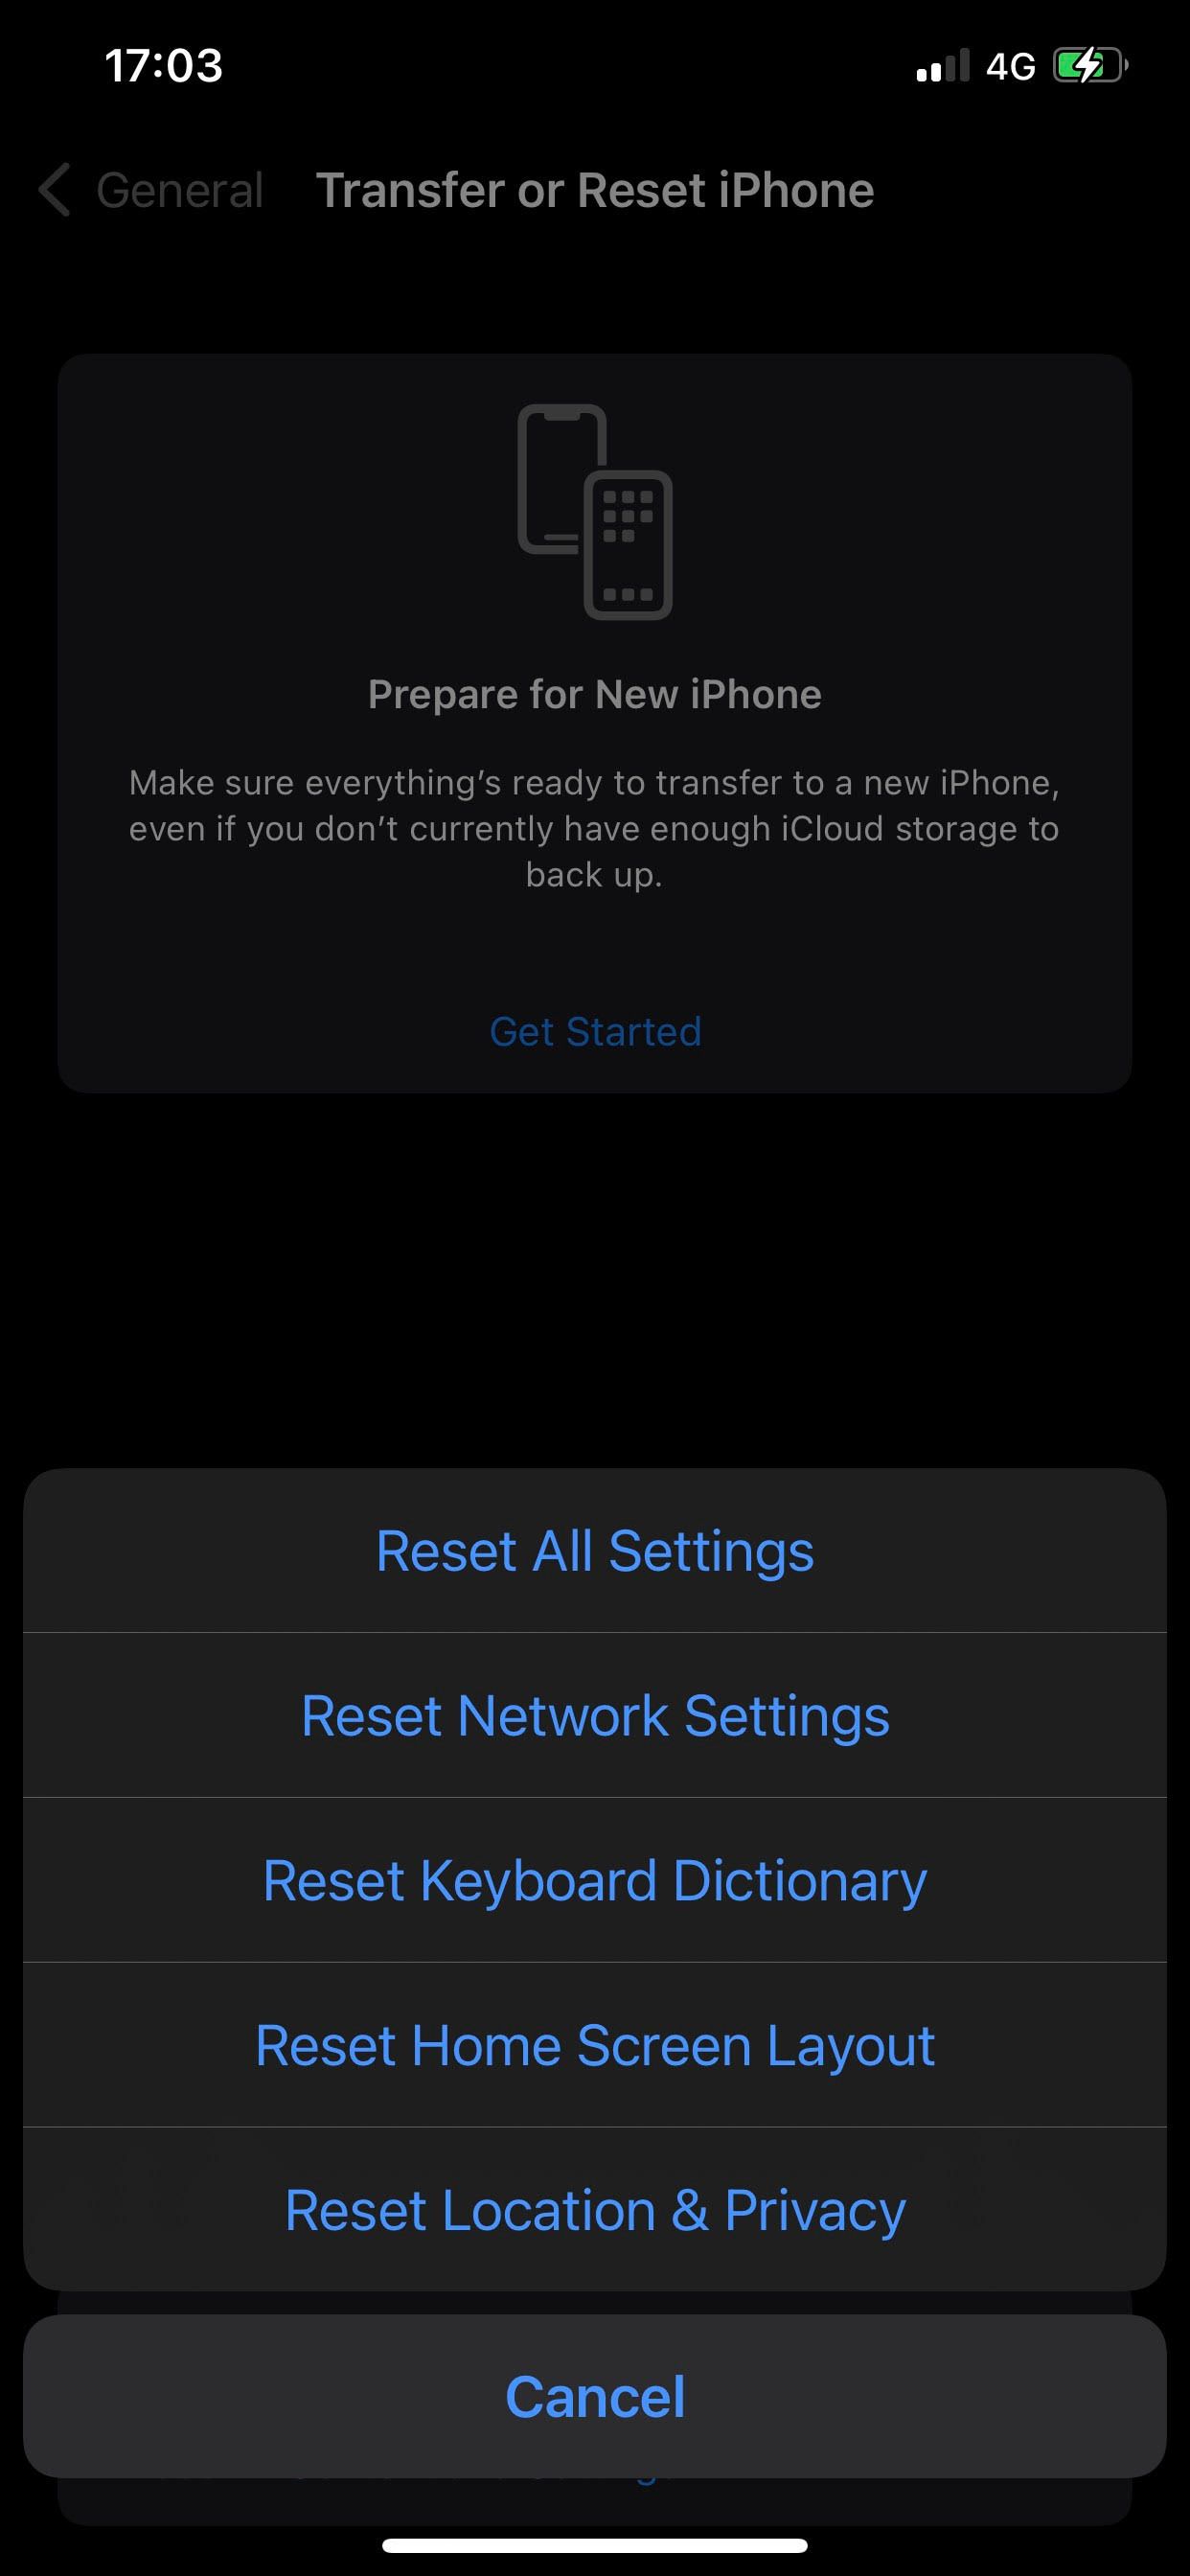


Afterward, enter your iPhone passcode and follow the on-screen instructions. After resetting the iPhone location and privacy settings, try restarting both of your devices and connect your iPhone to your computer again. When the "Trust This Computer?" notification appears, tap on Trust to proceed. If this doesn't work, make sure the Apple services are running.
4. Set the Apple Service on Windows to Automatic
When Apple services aren't running on your computer, you won't be able to pair or connect your iPhone. To ensure these services are running, press CTRL + R and type "services.msc" in the Run command window and hit OK.
If you see Apple Mobile Device Service running in the Services window, it means your services are running. Don't stop here; make sure it is set to Automatic to avoid any future problems caused by disabled services.
Double tapping the service will bring up the Properties window and allow you to navigate to its General tab. Make sure the Startup tab is set to Automatic if it isn't already. If the service was not running initially, you could tap Start to restart it. Then click OK.

5. Update Your iPhones Driver
It is also possible for outdated drivers to be the cause of the iPhone not connecting to Windows. If the above fixes do not solve the problem, it is time to update the driver. To do so, plug your iPhone into your computer and open Device Manager.
Expand the Universal Serial Bus Devices category and then right-click on the Apple Mobile Device USB Device option. Then, click on the Update driver. Afterward, follow the on-screen instructions and let Windows automatically find and update the driver.

Reboot your system, and then reconnect your iPhone. At this point, if an outdated driver was the cause of the connection issue, it will be resolved. If not, continue with the remaining steps.
6. Update or Reinstall iTunes
You might have a mismatch between iOS and iTunes on your computer. If either of them does not support the other, you are likely to experience connectivity issues. To rule out this possibility, you should update both your phone and iTunes. If the problem persists, you can also reinstall iTunes.
In case reinstalling iTunes does not resolve the issue, use another iTunes alternative. Among the many popular options are CopyTrans, SynciOS, MediaMonkey, AnyTrans, etc. Before doing so, update your Windows and iPhone to ensure that an outdated operating system isn't causing the issues.
7. Update Your Copy of Windows
Even though the problem may be on your iPhone's end, the outdated OS can also cause the phone not to connect. This is why it is also imperative to update Windows.
To do that, follow these steps:
- Open the Windows Settings app.
- Go to the Update & Security settings.
- Click Windows Update in the left sidebar.
-
Click on Check for Updates.
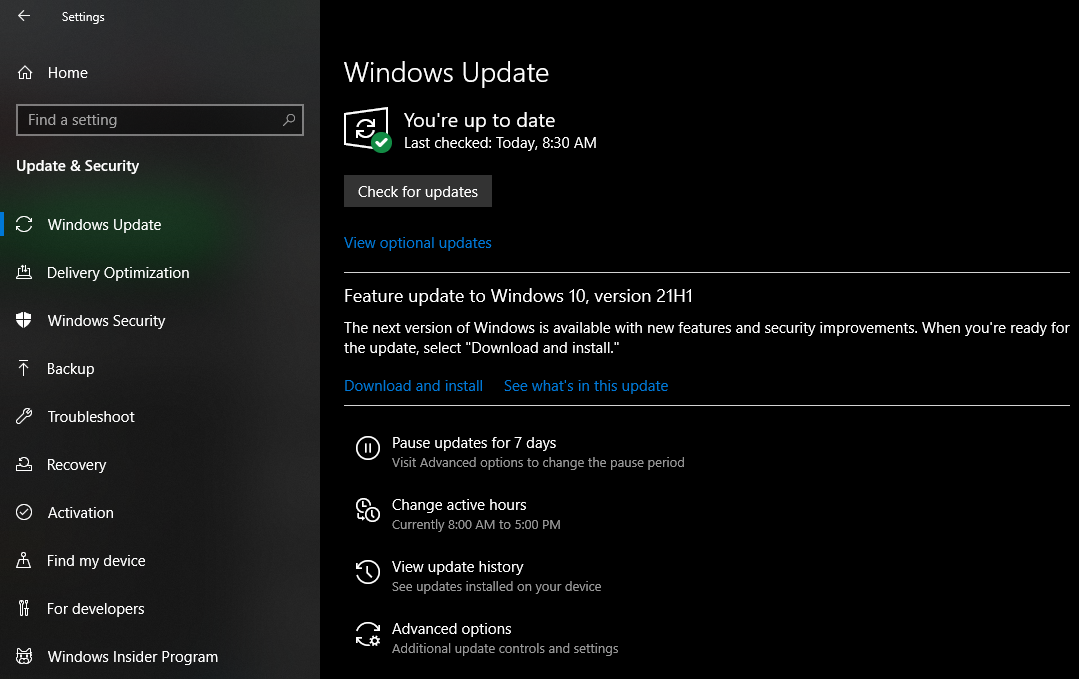

Windows will check for available updates and update to the latest version.
8. Update Your iPhone
It is equally important to update your iOS after updating Windows. If you keep the Automatic Updates settings turned on, your iPhone might already be updated. You can, however, manually update your iPhone if you wish to make sure it is always up-to-date.
To do that, go to your phone's Settings and tap on General to open the general settings. Then, tap on Software Update in General settings. If your iPhone is already updated, you'll see a message saying, "iOS is up to date".


If not, as your phone searches for updates, you'll see your iPhone's update information with its version, and you'll find the Download and Install button right below it. Click on this button and then Install. That will update your iOS to the most recent version.
Connect Your iPhone and Transfer Your Files Once More
Hopefully, the fixes in the list will help you connect your iPhone and your Windows. Problems can also arise when your phone is low on power. Keep your cell phone charged while connecting it to your computer to prevent this from happening.
Can't connect your cell phone to your computer? There are a few more things you can try, including resetting both devices, checking your phone's and computer's hardware and connected cables, using a third-party iTunes alternative, and if this does not work, contacting Apple customer support.