The Witcher 3: Wild Hunt is one of the best-ever RPGs for Windows platforms. So, it’s a bit of a bummer when that game doesn’t start. Some players have posted on Microsoft, Steam, and CD Projekt Red forums about The Witcher 3 not launching.
Are you among those players who need to fix The Witcher 3 not starting on Windows PCs? If so, there are various ways you might be able to resolve that issue. These are some Windows 11/10 resolutions that can feasibly fix The Witcher 3 when it doesn’t launch.
1. Download and Install the Visual Studio 2012 Update 4
Some players have reported a vcomp110.dll error occurs when they try to start The Witcher 3. An error message pops up that says, “The program can’t start because vcomp110.dll is missing.” Installing the Visual C++ Redistributable for Visual Studio 2012 package is a widely confirmed fix for The Witcher 3's launch error. You can download and install that package as follows.
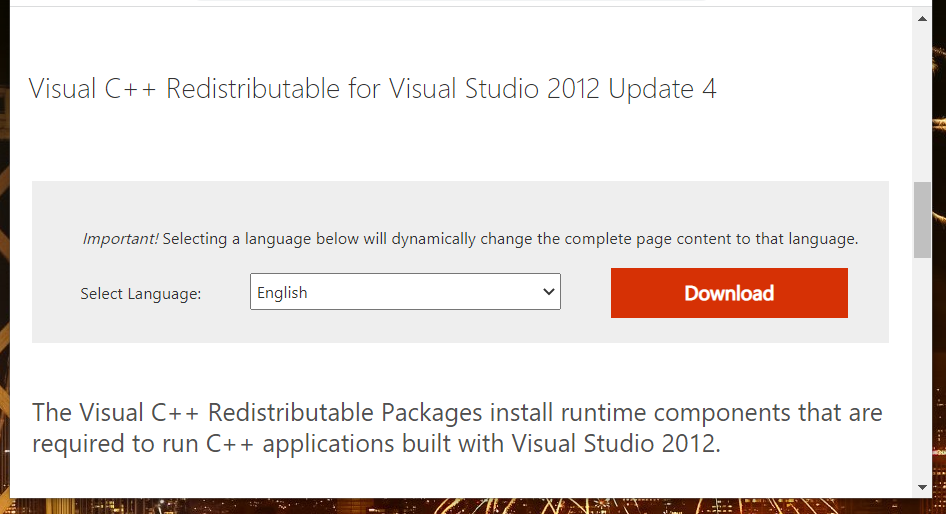
- Open the Visual C++ Redistributable for Visual Studio 2012 download page in your browser.
-
Click the Download button on that page.
-
Next, select the VSU_4\vcredist_x64.exe (64-bit) or VSU_4\vcredist_x86.exe (32-bit) option.
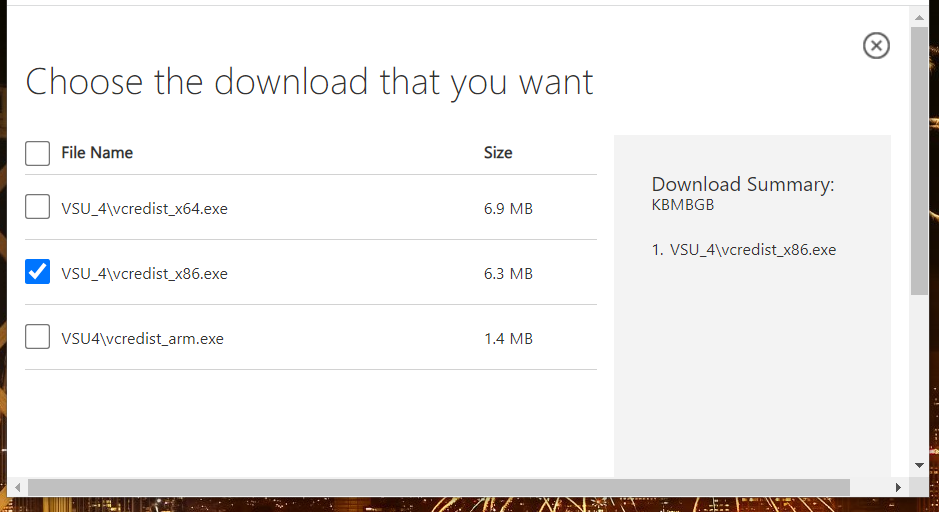
- Click Next to download the package.
- Launch the File Explorer utility (it has a Windows + E keyboard shortcut).
- Open the folder you saved the Visual C++ package, and double-click the vcredist Visual Basic package.
- Select the I agree to the license terms checkbox on the Visual C++ 2012 window.
- Click the Install option.


2. Run The Witcher 3 in Compatibility Mode and as an Administrator
Players have also confirmed they’ve been able to fix Witcher 3 not starting by selecting to run the game as administrator and in compatibility mode. So, maybe you should try that potential resolution too. To do so, select the compatibility mode and administrator settings like this.
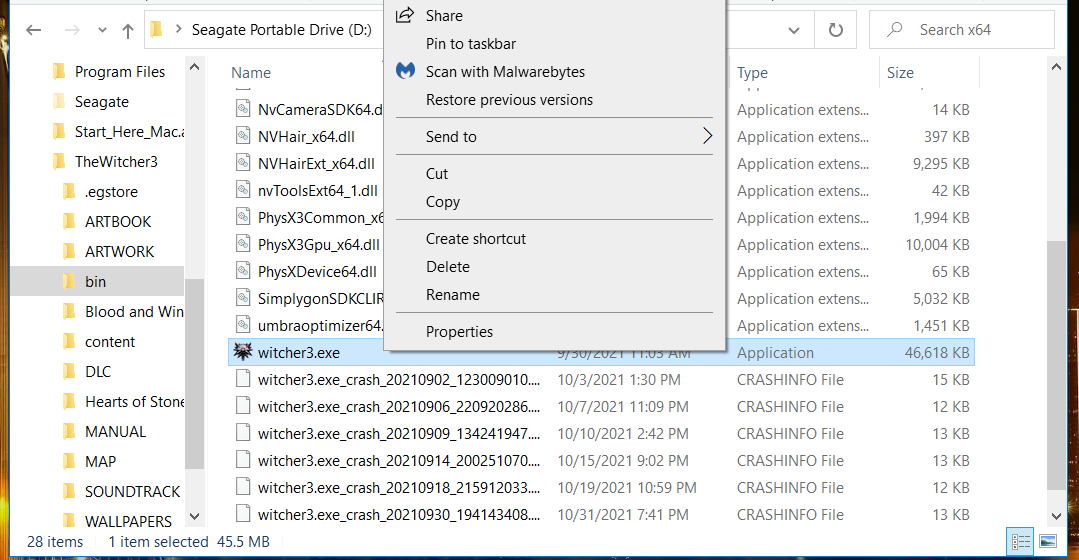
- Open your Witcher 3 game folder in File Explorer.
-
Right-click the witcher3.exe (in the Bin subfolder) to select Properties.
- Then click the Compatibility tab.
- Press the Change settings for all users button.
-
Select the Run this program in compatibility mode for option. Then choose Windows 7 on the drop-down menu.
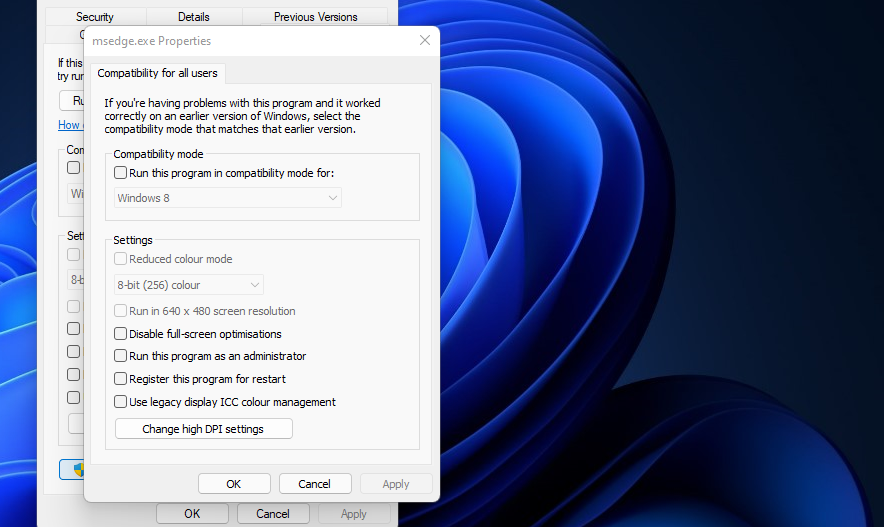
- Click the Run this program as administrator checkbox to select that option.
- Press the Apply button, and click OK to exit.


3. Disable the Steam Overlay
In-game overlays can cause The Witcher 3 startup issues. If you’re a Steam user, disabling the overlay that software has might fix The Witcher 3.
Here is how you can disable Steam’s overlay:
- Open Steam’s window.
- Click Steam at the top left of the window.
- Select Settings to open that window.
- Then select the In-Game tab.
-
Deselect (or uncheck) the Enable the Steam Overlay while in-game checkbox.
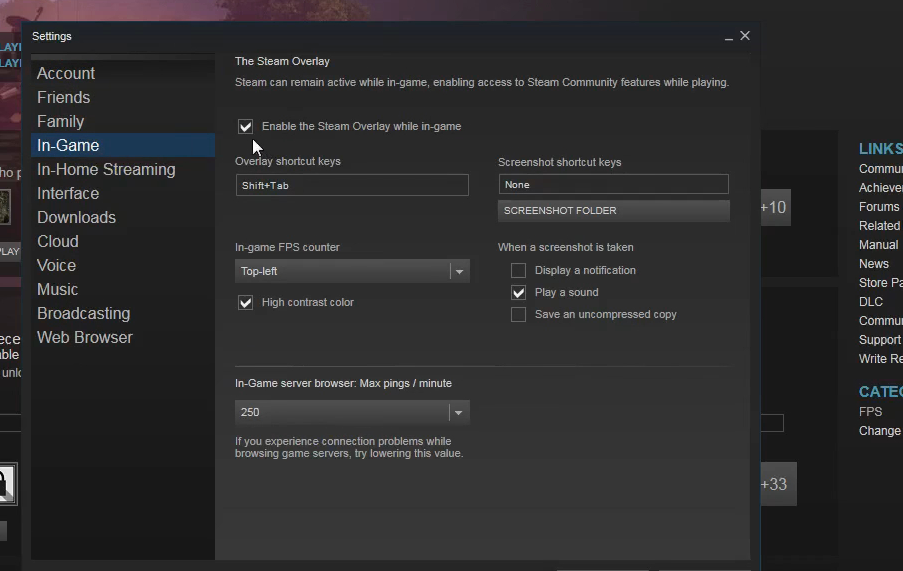
- Press the OK button to apply options.

The GOG and Origin game launchers for The Witcher 3 also have overlay features. So, it’s also recommended that you disable the in-game overlays for those software packages. Open the GOG and Origin settings windows to find and deselect their overlay options.
4. Verify the Integrity of Game Files
The Witcher 3 launch issues can occur because of corrupted game files. Verifying the integrity of The Witcher 3’s files will likely repair them. This is how you can verify game files in the Epic Games launcher.
- Open the Epic Games software.
- Select Library on the left side of Epic Games.
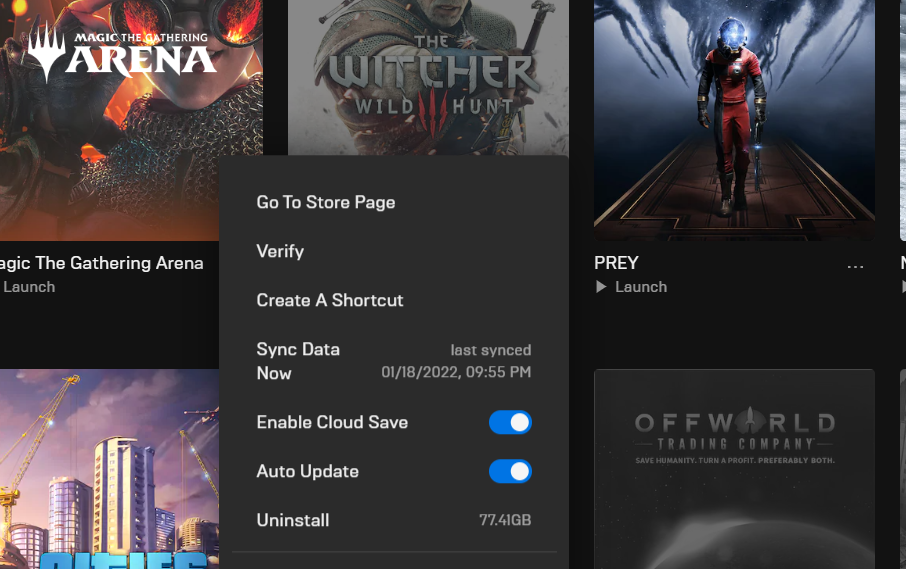
- Click the three-dot (Toggle Settings Menu) button just under The Witcher 3 in your library.
-
Then select the Verify option on the menu.

- Wait for the verification process to finish.

You can also verify The Witcher 3's game files in Steam, GOG, and Origin launchers much the same. In Steam, you’ll need to right-click The Witcher 3 on the Library tab and select Properties. You can select the Verify Integrity of Game option on the Local Files tab.
5. Run a System File Scan Check
If verifying The Witcher 3’s game files doesn’t do the trick, consider running a system file scan. A System File Checker (SFC) scan will verify the integrity of Windows files. You can run an SFC scan with the Command Prompt like this.
- Press Win + S at the same time to bring up the "type here to search" box.
- Enter the keyword cmd within the search tool.
- Select the Run as administrator option for the Command Prompt search result.
-
Input this System File Checker command and hit Enter.
sfc /scannow - Wait for the SFC scan to reach 100 percent and display an outcome.

6. Disable Your Antivirus Software
If there’s a third-party antivirus utility installed on your PC, that might be interfering with The Witcher 3. For example, a security program might block the game from accessing required DLL files. To ensure that’s not happening, temporarily disable your antivirus utility’s shield before launching The Witcher 3.
You can disable most antivirus software packages from their system tray context menus. Right-click a system tray icon for your antivirus software and select an option to disable (or turn off) its shield from there. Select to temporarily disable the antivirus protection for a few hours if you can.
7. Update the Driver for Your PC’s Graphics Card
Then Witcher 3 might now be a relatively old game, but it still has a lot of fancy graphical effects. Therefore, it’s important your graphics card has an up-to-date driver. It’s not uncommon for gaming issues to arise because of outdated or corrupted graphics card drivers.
You can update your graphics card’s driver by downloading the latest one from the NVIDIA or AMD websites. To do so, you’ll need to find out what your graphics card model is so you can select it on the device menus. When you’ve downloaded the latest driver for your video adapter, open the folder you saved its package in. Then double-click the NVIDIA or AMD driver package to install it.

Alternatively, you can update a video card’s driver with driver updater software. However, such software will update device drivers with the newest ones from their databases, which might not always be the very latest ones. Manually downloading GPU drivers from the NVIDIA or AMD websites will ensure you’re getting the latest ones.

8. Clean-Boot Windows 11
CD Projekt Red recommends that players disable superfluous background software and apps to resolve The Witcher 3 launch issues. That potential resolution might stop certain programs from conflicting with The Witcher 3 on your PC. You can remove non-essential third-party apps and services from the Windows 11/10 startup by clean booting the platform as follows.
- Press the Win + X key combo, and select the Run shortcut on the menu that opens.
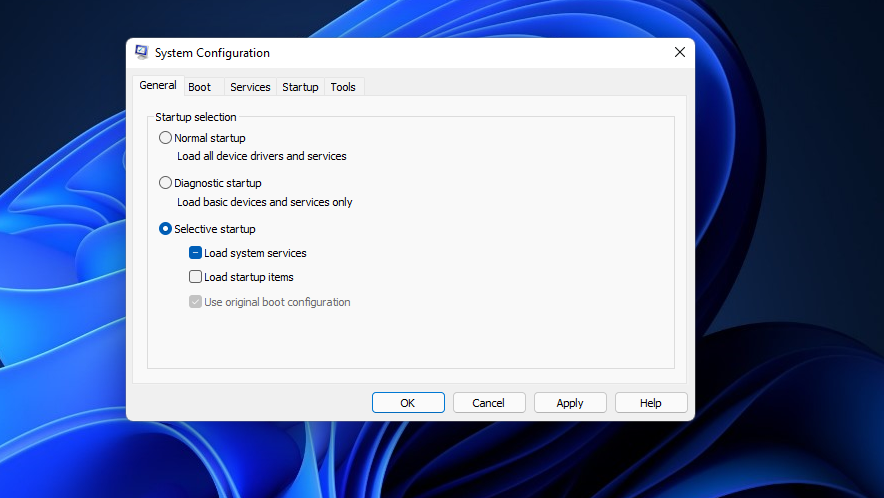
- Input msconfig in the Open box, and press the Enter keyboard key.
-
On the General tab, deselect the Load startup items checkbox. Select the checkboxes for the Load system services and Use original boot configuration options if those settings aren't already selected.
- Click Services to view that tab.
-
Select Hide all Microsoft services to exclude those services.
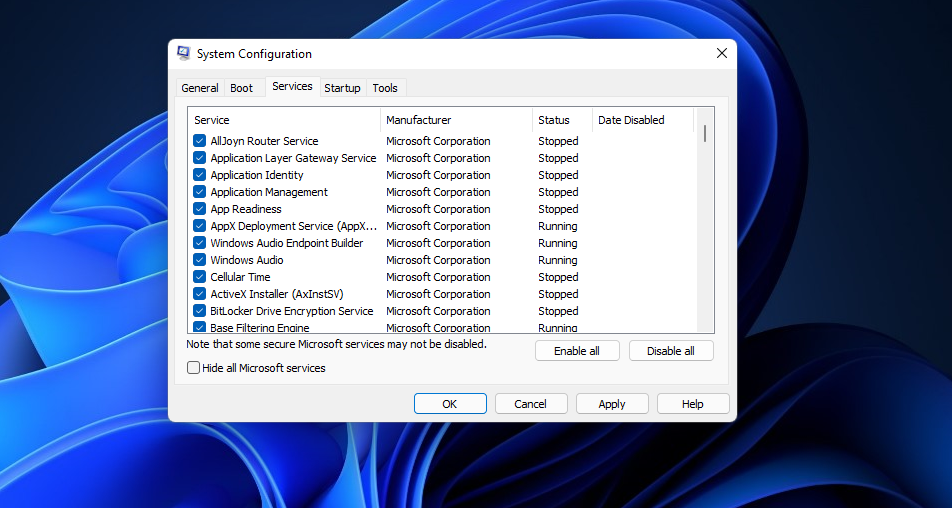
- Press the Disable all button to deactivate all other services.
- Click Apply to save the new boot options.
- Select OK to exit System Configuration.
- Press the Restart button on the dialog box prompt.
- Then try launching The Witcher 3 after the restart.


9. Reinstall The Witcher 3
Reinstalling The Witcher 3 is a last resort potential resolution if nothing else fixes it. Uninstalling it doesn’t necessarily mean you’ll lose your saved games because the likes of Epic Games and Steam have a cloud save feature. If you haven’t enabled cloud save for the game, however, back up saved data before uninstalling The Witcher 3.
Here is how you can reinstall The Witcher 3 in Epic Games:
- Launch Epic Games.
- Select the Library tab.
- Click the Toggle Settings Menu button for The Witcher 3.
-
Select the Uninstall option.
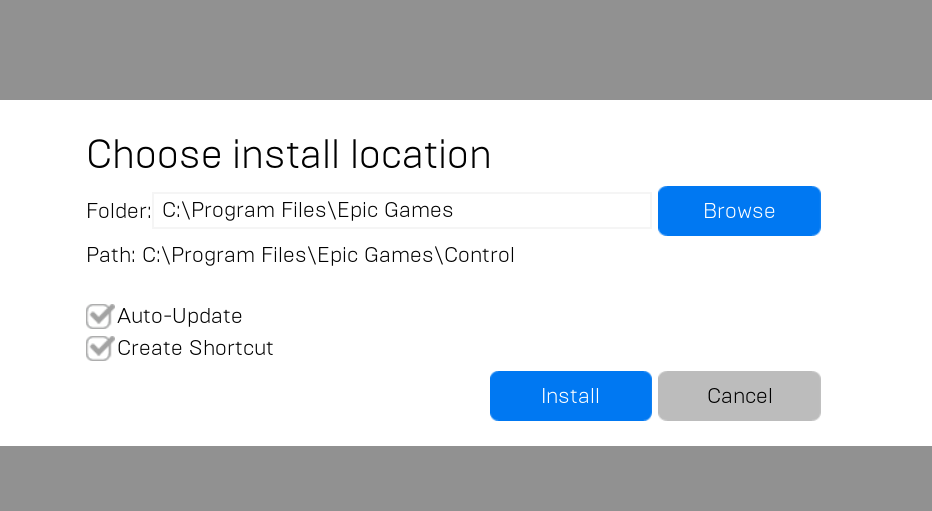
-
Click the uninstalled The Witcher 3 entry on the Library tab. Select the Install option to reinstall it.


You can reinstall The Witcher 3 within the Steam, GOG, and Origin game launchers much the same. Find The Witcher 3 within the library sections of those game launchers. Then look for and select an uninstall option for that game from there. Thereafter, you can select to reinstall the game within the launcher software.
Now You Can Enjoy The Witcher 3 Wild Hunt
There’s a pretty good chance the above resolutions will kick-start The Witcher 3: Wild Hunt on your Windows 11/10 PC. Try applying all those potential fixes in the order specified to get the game up and running again. Then, hopefully, you can get on with playing The Witcher 3.
Yet, those potential resolutions might not be enough to fix Witcher 3 not launching for everybody. You can get further troubleshooting guidance from Witcher 3’s support service if needed. To do so, open, fill out, and submit the technical support form for Witcher 3: Wild Hunt on the CD Projeckt Red help website.