
Key Takeaways
- Schedule a shutdown in Windows 11 and 10 using Task Scheduler for daily, weekly, or monthly tasks. Customize the start date and time.
- Add a trigger condition to your shutdown task to run it after a specified period of inactivity using Task Scheduler.
- Use Command Prompt to schedule a system shutdown with a specific timer or define a shutdown time. Customize with shutdown parameters.
By default, Windows is configured to put your computer to sleep after a few minutes of inactivity. But if you prefer to shut down your computer every day or when idle for a long time, you can use the Task Scheduler to schedule an automatic system shutdown instead.
Here we show you how to schedule a shutdown in Windows 11 and 10 computers.
How to Schedule a Windows 11 Shutdown Using Task Scheduler
Task Scheduler is a job scheduling utility available on the Windows operating system. You can use Task Scheduler to run programs automatically on Windows.
You can also use it to create a scheduled task to shut down your PC daily at a specified time. Scheduling a task via Task Scheduler is preferred if you need to repeat a task daily, weekly, or once a month.
To create a shutdown task:
- Press the Win key to open the Windows search bar.
- Type Task scheduler and click on the app from the search result to open it.
-
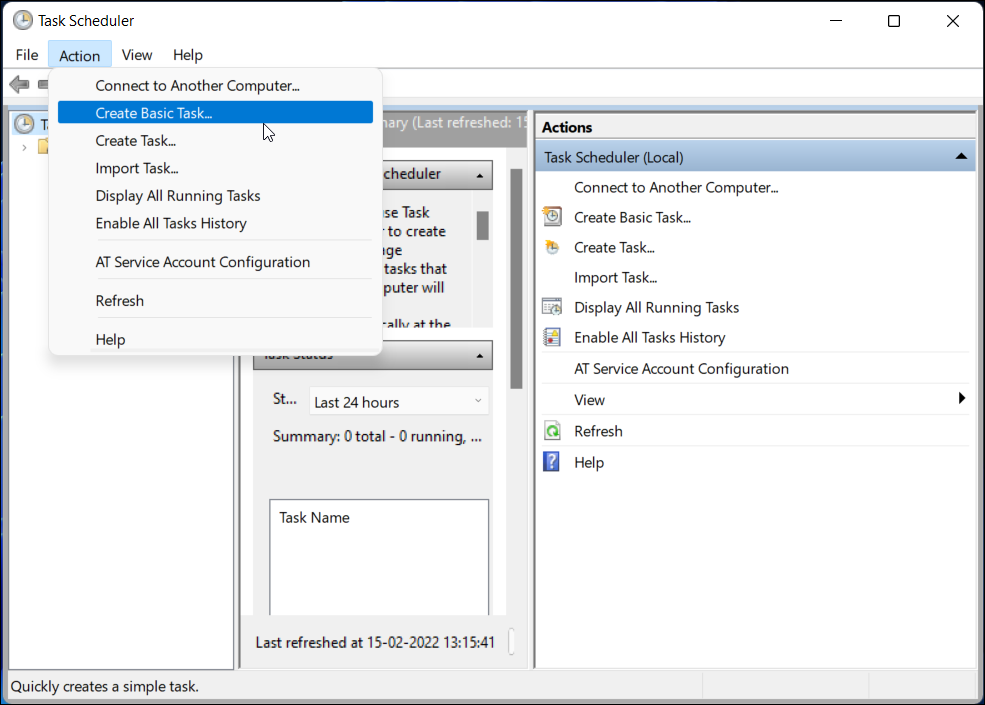
In the Task Scheduler window, click on Action and select Create Basic Task.
-
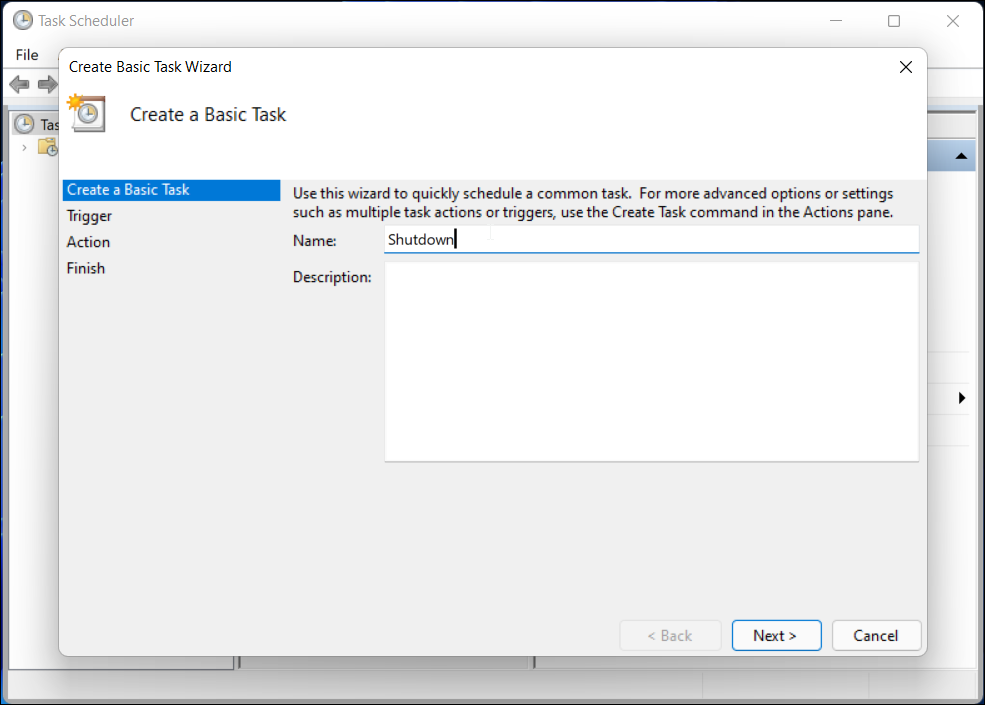
In the Basic Task window, type a name for the task. For example, type Shutdown as the name. You can also provide a description of the task.
-
Click Next.
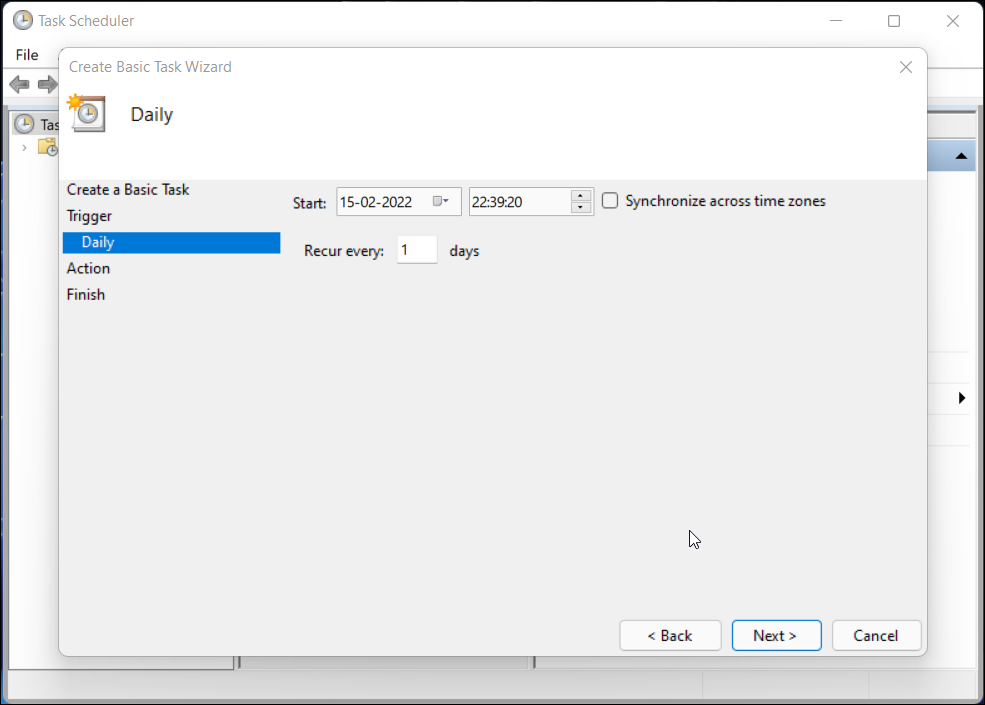
- Next, select a trigger point. You can choose from Daily, Weekly, Monthly, One Time, etc. For this guide, we will select the Daily trigger to schedule a daily shut down at a specific time.
- So, select Daily and click Next.
-
Next, set the Start date and time for the recurring shut down and click Next.
-
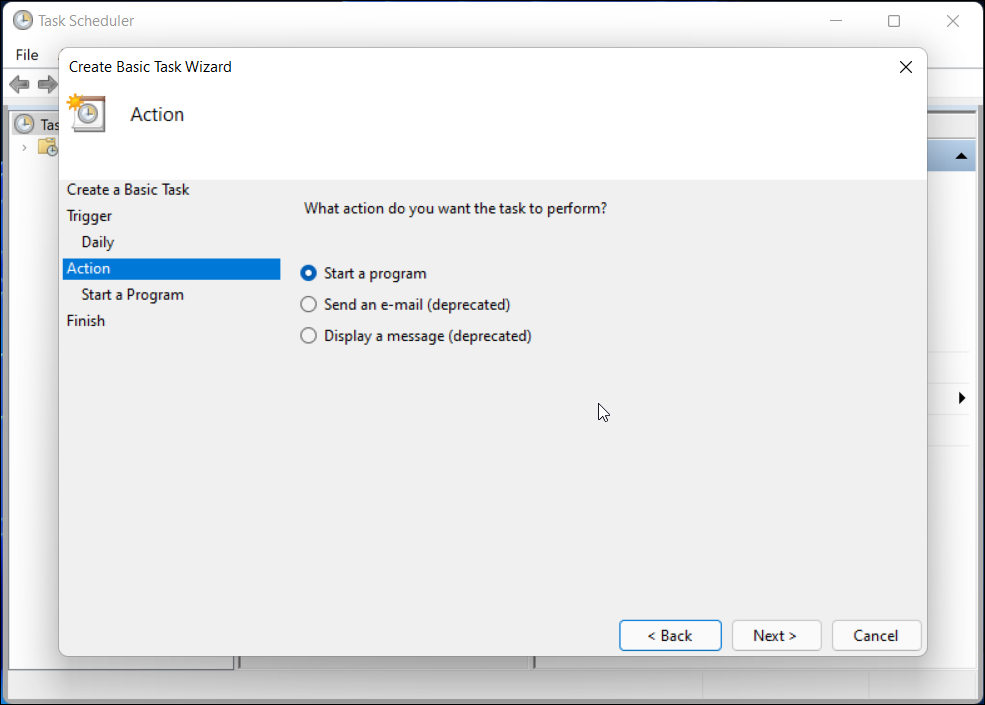
In the Action tab, select Start a program and click Next.
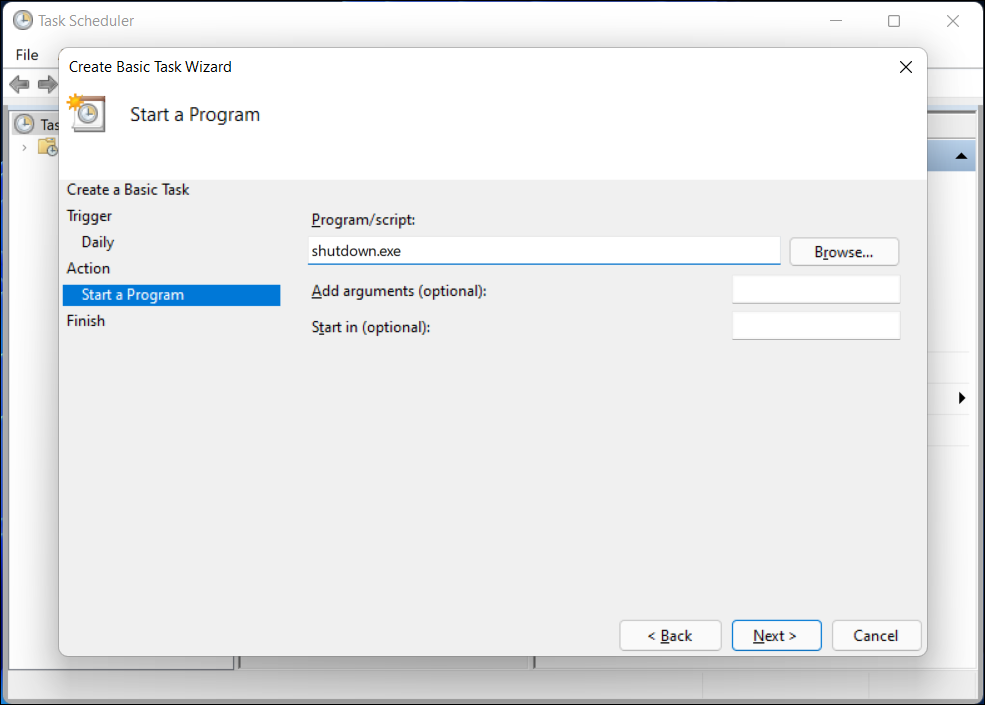
- Type shutdown.exe in the Program/Script field and click Next.
- Review the changes and click Finish to create and add the new task to your Windows schedule.


That’s it. The Task Scheduler will trigger the shutdown action daily at your specified time and power off your PC.
How to Automatically Shut Down Windows on Idle via Task Scheduler
If you want, you can add a trigger condition to your shutdown task to determine when the task should run. This is helpful if you want to run the shutdown task after a specified period of inactivity.
For this guide, we will modify the shutdown task created earlier. If you want, you can create a new task as well.
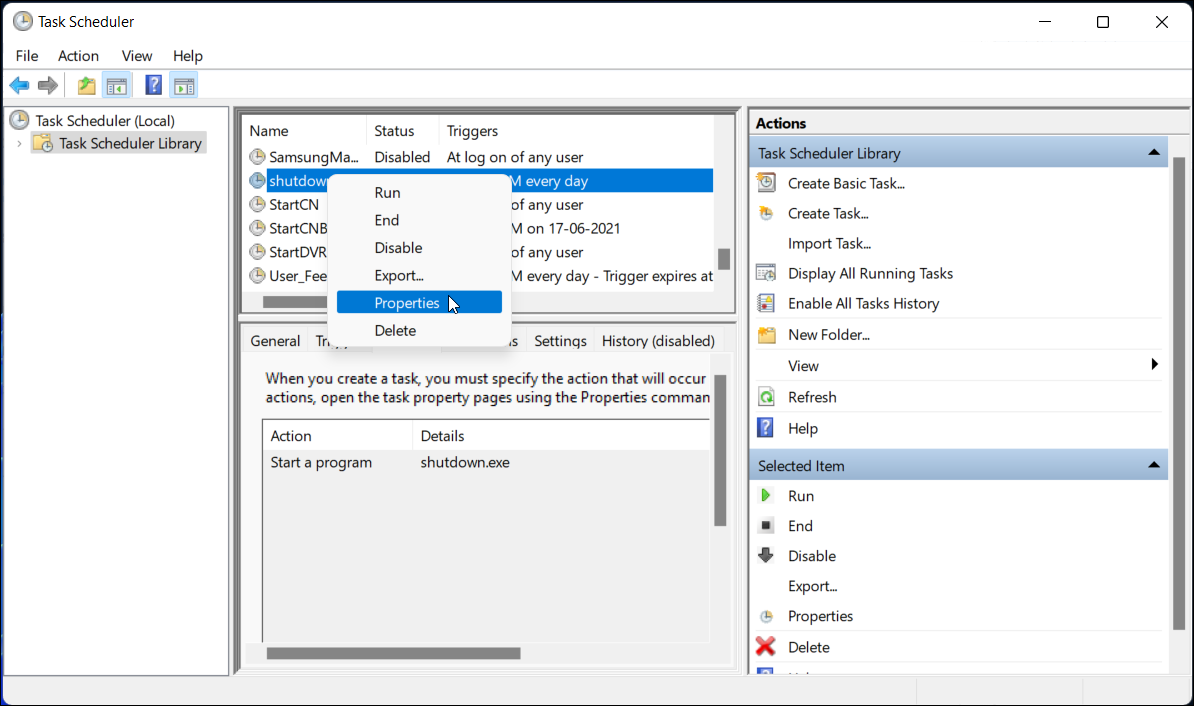
- Select your existing shutdown task in the Task Scheduler.
-
Right-click on the task and select Properties.
-
Open the Conditions tab in the Properties window.
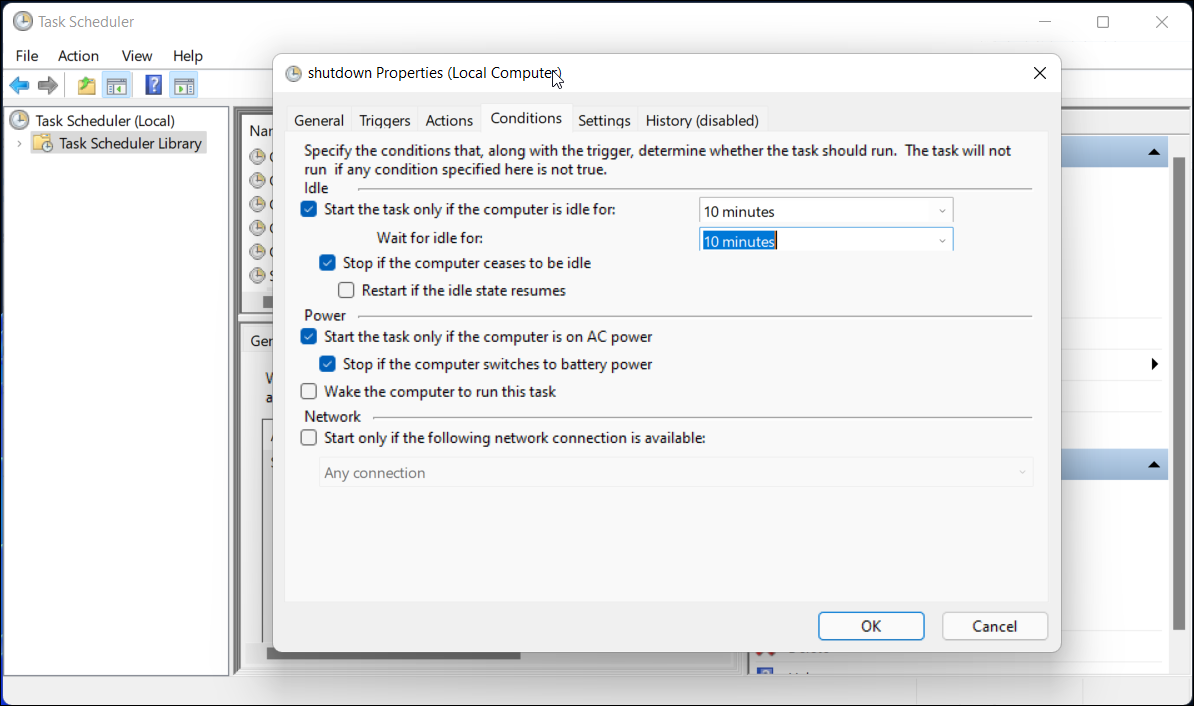
- Select Start the task only if the computer is idle for the option.
- In both the time fields, enter the same time. For example, if you enter 10 minutes, the Task Scheduler will wait for the system to be idle for 10 minutes before triggering the Shut down task. You can choose anywhere from a few minutes to two hours.
- Click OK to save the changes.


How to Stop an Automatic Shutdown via Task Scheduler

To stop automatic Windows shutdown, you'll need to delete or disable the scheduled task in Windows Task Scheduler. Disabling it is best if you only want to stop it for a temporary amount of time, but if you're tired of your PC turning off by itself, it's best to delete it instead.
How to Schedule a Windows 11 Shutdown Using Command Prompt or PowerShell
Task Scheduler is an excellent utility but may feel a little complicated for those who don’t use it often. Maybe you want to make your computer turn off after inactivity, but occasionally. In this instance, creating a scheduled task is unnecessary and tedious.
If you don’t want to go through the learning curve, you can use the shutdown command in Command Prompt. The shutdown command lets you set a shutdown timer to power off and restart your Windows computer automatically.
To schedule a system shutdown using Command Prompt:
-
Press the Win + X to open the WinX menu.

- Click on Windows Terminal (Admin) to open the elevated terminal.
-
In the Windows Terminal window, type the following command and press Enter:
Shutdown /s -t Nseconds -
In the above command, replace Nseconds with the number of seconds. For example, if you want to set a timer for 5 minutes (300 seconds), then the complete command will look like this:
Shutdown /s -t 300 - The above command will trigger the Windows logoff action and shutdown your PC after 5 minutes.
-
If you want to perform a scheduled restart, type the following command and press Enter:
Shutdown -r -t Nseconds -
In the above command, replace Nseconds with the number of seconds to set a timer for a restart.
-
If you want to define a specific shutdown time instead, use the at time shutdown /s command. For example, to schedule a shutdown at 12:30 AM, use the following command:
at 00:30 shutdown /s -
To cancel the shutdown or restart the timer, type the following command and press Enter:
Shutdown -a - You will see a logoff is canceled notification indicating the shutdown has been canceled.


You can further customize the shutdown task by using the shutdown parameters. For example, use the -f parameter to force close the running application without warning. Additionally, type shutdown and press Enter to view all the available parameters for the shutdown command.
How to Schedule Auto Shut Down Using a Desktop Shortcut
You can create a desktop shortcut with a shutdown timer to turn off your PC. This is useful if you don’t want to run the Command Prompt each time to set a timer.
To create a shutdown timer desktop shortcut:
-
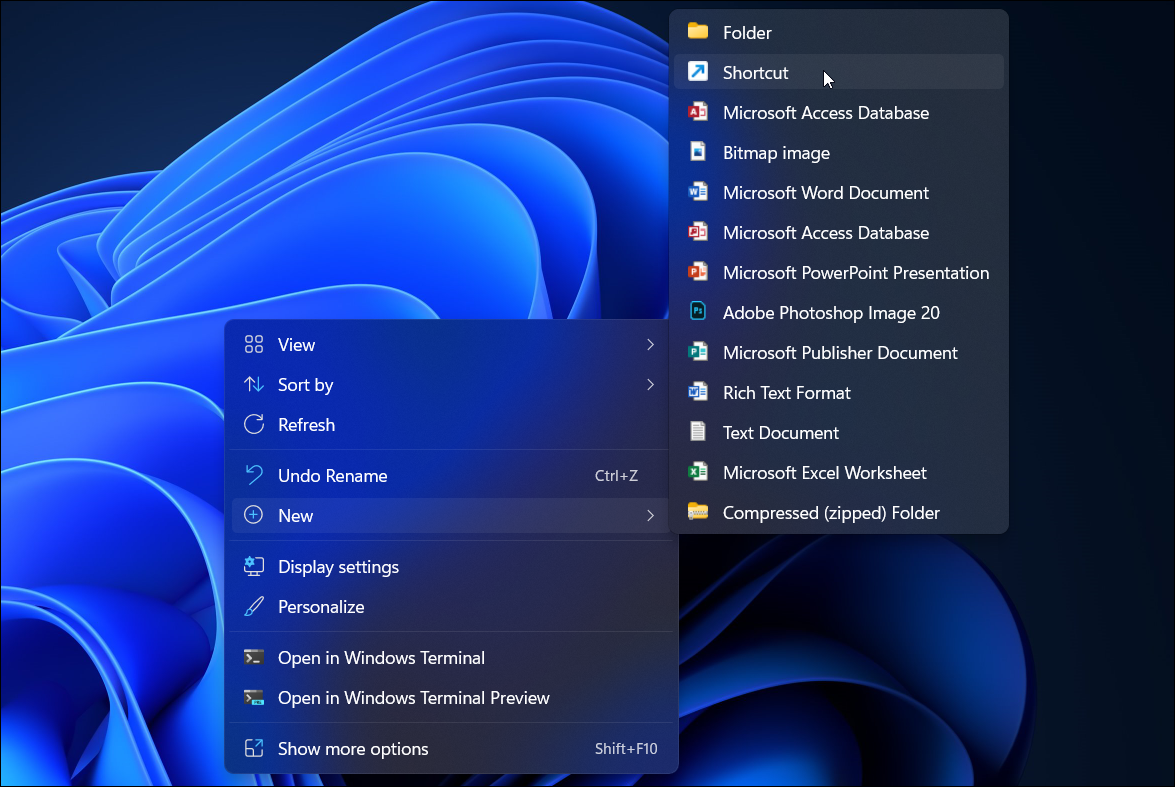
Right-click on your Windows desktop and select New > Shortcut.
-
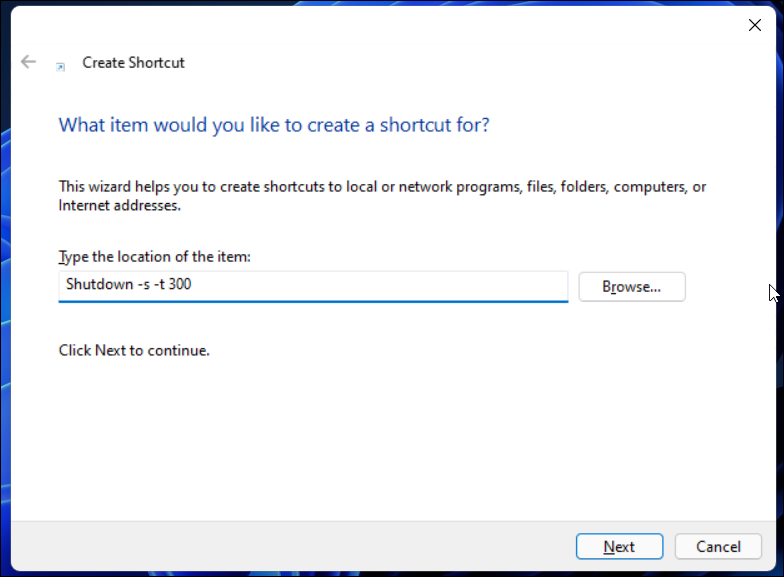
In the shortcut wizard, type the following command in the Type the location of the item field:
Shutdown -s -t 300 -
In the above command, 300 seconds (5 minutes) represents the number of seconds for the timer. You can change the seconds as per your need.
- Click Next.
-
Next, type a name for your shortcut. For example, type ShutDownTimer.
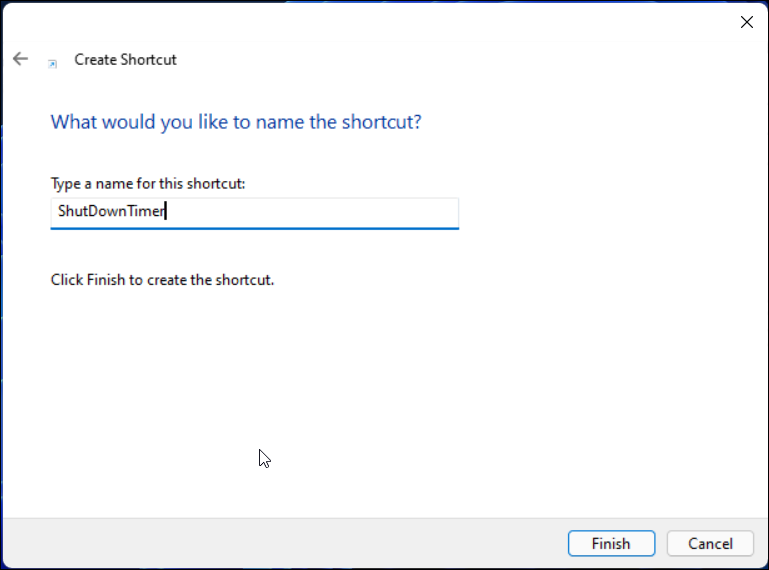
- Click the Finish button to add the shortcut to your desktop.
- Next, right-click on the ShutDownTimer desktop shortcut and select Properties.
-
In the shortcut tab, click on the Change icon.
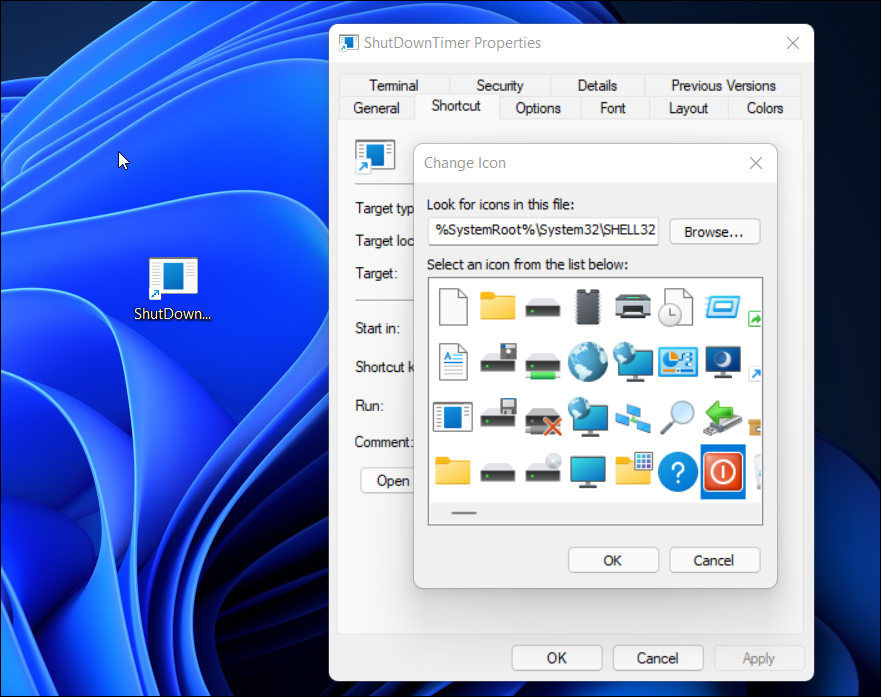
- Select an icon that represents the shortcut best. For this guide, we will select the Power icon.
- Click OK to make a selection.
- Then, click Apply and OK to save changes.


You can double-click on the ShutDownTimer shortcut to initiate a shutdown. To cancel the shutdown, use the shutdown -a command in Command Prompt.
Automate a Windows Shut Down When It Goes Idle
You can use Command Prompt and Task Scheduler to automate system shutdown in Windows 11 and 10 computers. However, unlike Command Prompt, Task Scheduler offers better task automation and supports more conditions. You can also configure it to automate Windows start-up.