Windows 11 and 10 include some restricted access folders by default. When you try to open such folders, a message pops up that denies you permission to access them. Those restricted access folders are even closed off from admin-level users.
Such folders are usually restricted for good reason, but at any rate, you can still access them. To do so, you’ll need to take ownership of them. Taking ownership of a folder enables you to change the object permissions for it. You can take ownership of folders in Windows 11 and 10 with the alternative methods below.
How to Manually Take Ownership of Folders on Windows
The WindowsApps folder is a good example of a restricted access folder. That folder includes installed Universal Windows Platform apps on your PC. You’ll see the usual access (or permission) denied message when you try to open it.
You can manually take ownership of that folder, and others, to open it by changing its permissions via the Security tab. That tab includes the advanced security settings you’ll need to tweak to take ownership of folders. This is how you can take ownership of the WindowsApps folder within Windows 11.
- Open File Explorer (the Win + E keyboard shortcut launches it).
- Click View and Show to open more Explorer options.
- Select Hidden Items on the menu.
- Bring up the C:\Program Files folder path.
- Right-click WindowsApps to select Properties.
-
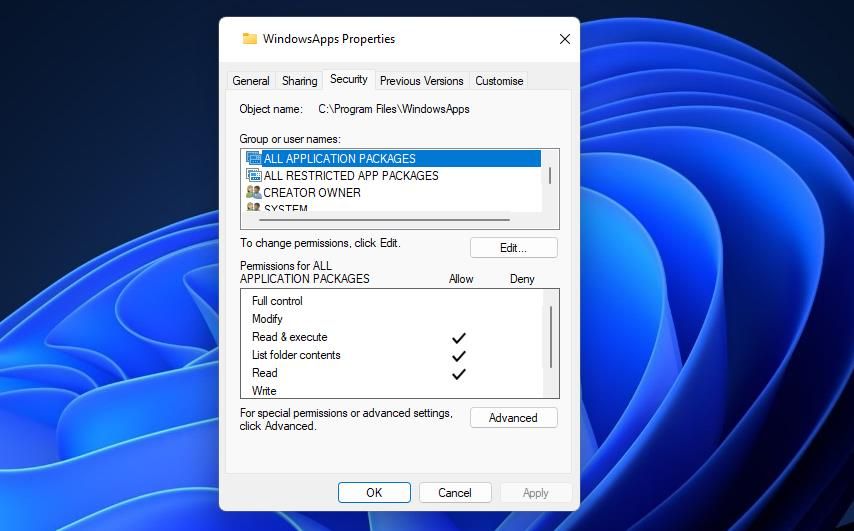
Select the Security tab shown in the snapshot directly below.
-
Click Advanced to view the Security Settings for WindowsApps window.
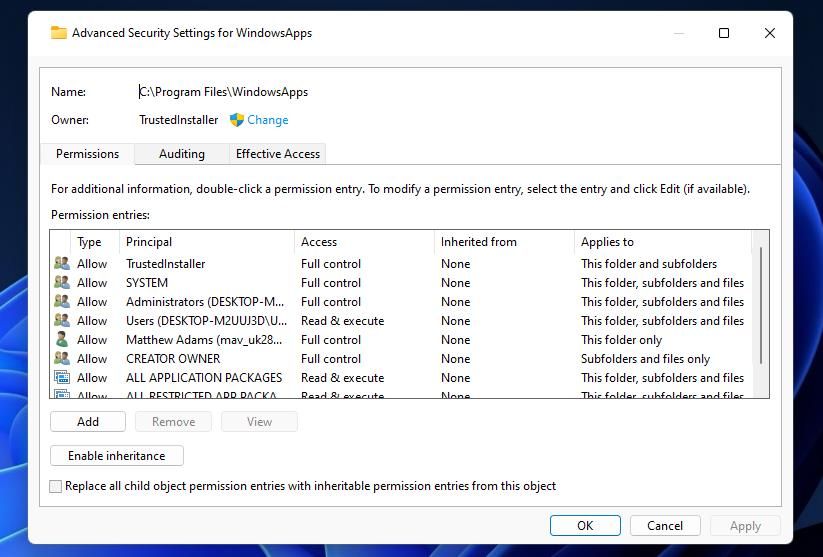
- Then click Change to open a Select User or Group window.
-
Enter Administrator in the object name box. Alternatively, you can enter your target user account there.

- Press the Check Names button, and click the OK option.
- Click the Replace owner on subcontainers and objects checkbox to select it.
- Then select Apply > OK to change the folder permission as configured.
- Click OK on the prompt that confirms you’ve taken ownership of the folder.


Now go ahead and try opening WindowsApps again. That folder will now open for you after taking ownership of it. You can take ownership of other folders much the same.
How to Take Ownership of a Folder With the Command Prompt
The Command Prompt gives us another way to take ownership of folders. It’s a bit simpler and faster to take ownership of a folder by entering a quick command. You can take ownership of WindowsApps in the Command Prompt as follows:
- Click inside the Type here to search box on the Start menu, or you can press the Windows + S keys at the same time.
- Input cmd in your search box and open Command Prompt with elevated rights by selecting Run as administrator.
-
Type in this takeown command:
takeown /F "C:\Program Files\WindowsApps” - Press the Enter keyboard key to take ownership of the folder.

The above command will assign ownership to the currently logged-in user. You can further modify that command by adding extra switches to it. For example, adding an /A and /R switch to it will assign ownership to the admin group and apply ownership to all subfolders included in the primary directory. That command for the WindowsApp folder would look like this:
takeown /F C:\Program Files\WindowsApps /A /R
How to Add a Take Ownership Option to the Context Menu
If you would prefer an even simpler way to take ownership of folders, set up a Take Ownership context menu option. You can add a Take Ownership shortcut to Windows 11’s desktop context menu with the freeware Winaero Tweaker. Then you can simply select that context menu option to take ownership of whatever folder you fancy. These are the steps for adding a Take Ownership option to the Context Menu with Winaero Tweaker:
- First, go to the Winaero Tweaker download page in a web browser.
- Click Download Winaero Tweaker on that webpage to save a ZIP archive for the software.
- Launch File Explorer to open the folder that includes Winaero Tweaker’s ZIP file.
-
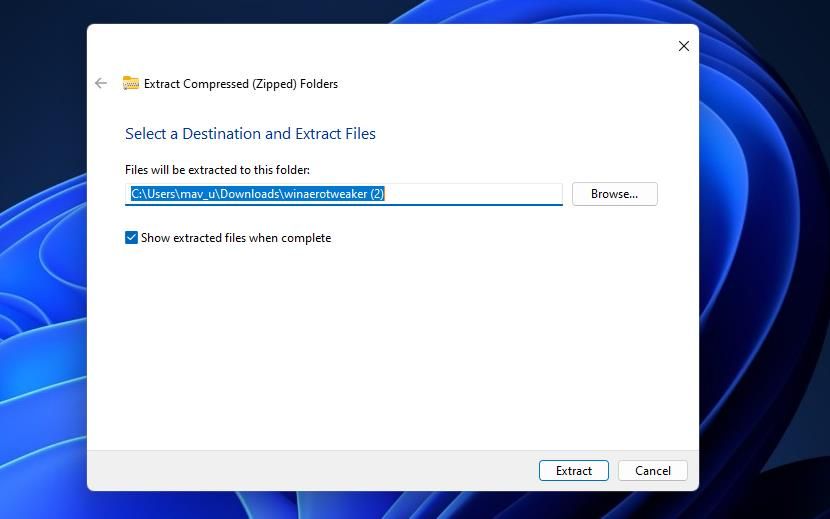
Click the winaerotweaker ZIP archive with your right mouse button and select Extract All.
-
Select Show extracted files and Extract.
- Double-click the setup file for Winaero Tweaker.
- Click Next to reach the agreement options.
- Select the I accept agreement radio button and click Next again.
- If you don’t want to install the software in a default directory, select Browse to choose another one.
- Keep clicking Next until you reach the final Install option.
- Click Install to do that.
- Select Run Winaero Tweaker to start the software after exiting the setup wizard.
- Press Finish to exit the installer and bring up Winaero Tweaker.
- Double-click Context Menu in Winaero Tweaker to view that category’s options.
-
Select the Take Ownership option.
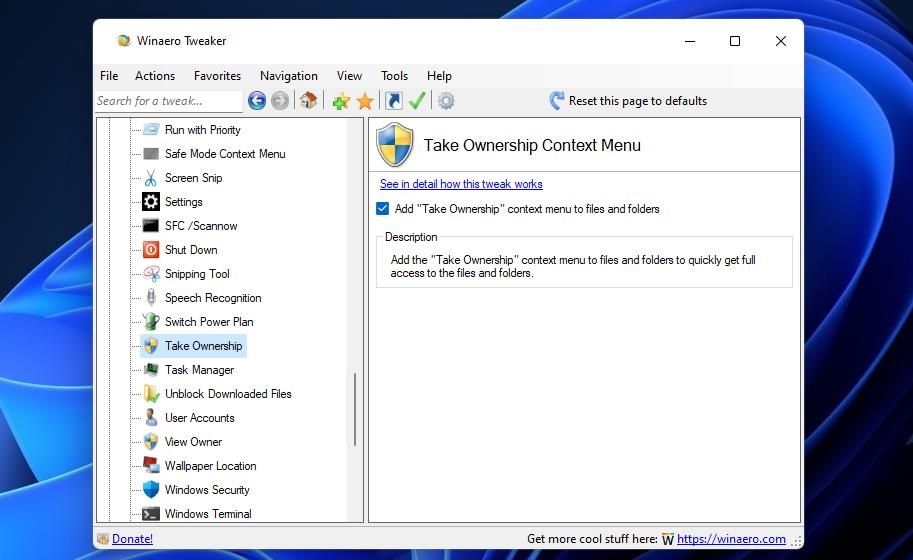
- Click the Add “Take Ownership” context menu to files and folders checkbox to select it.


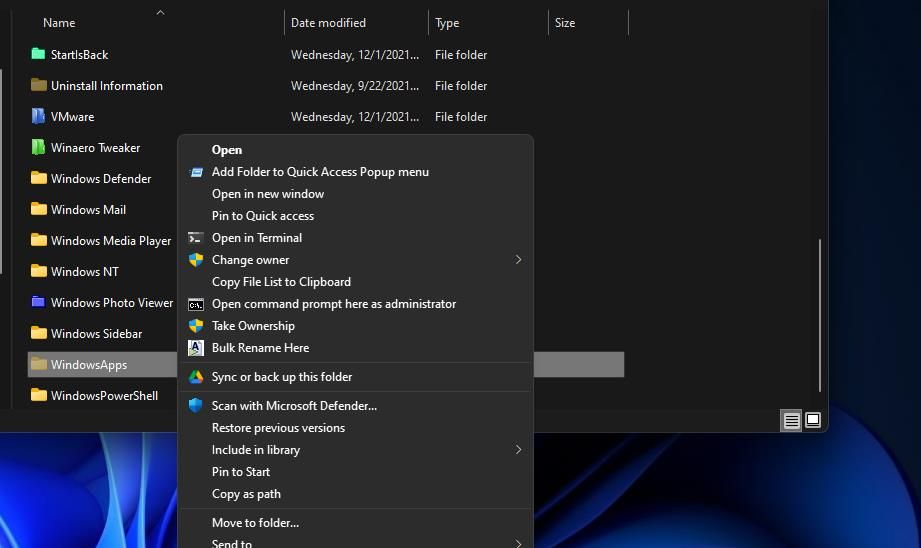
Now you can try out your new Take Ownership context menu shortcut. Open the C:\Program Files folder in File Explorer and make sure Hidden Items is selected as outlined in steps one to four of the first method. Right-click the WindowsApps folder and select Show more options at the bottom of the context menu. Click the new Take Ownership option in the classic menu, and select Yes in UAC prompts.
A cmd.exe window will then pop up. Wait for the Command Prompt to apply your ownership of the selected folder (it will tell you to press any key when done). Thereafter, you can go ahead and open WindowsApps to see what’s inside.

You can also remove the Take Ownership option from the context menu with Winaero Tweaker. To do so, uncheck the Add Take Ownership context menu to files and folders to deselect that option in Winaero Tweaker. Or you can click Reset this page to defaults instead.
Expand Your System Access by Taking Ownership of Folders
When you’ve taken ownership of some folders, you’ll be able to view exactly what’s inside them. In the case of WindowsApps, you’ll be able to open installation subfolders for Windows apps from there. Thus, taking ownership of folders effectively gives you greater access to everything on your PC. However, it’s recommended that you don’t try to delete the contents of such folders unless you’re clear about exactly what you’re erasing.