
You'll sometimes encounter an installer error in Windows when you try to install a program. There are different kinds of installer errors, but if your one gives you the code "2203," it means the user account does not have sufficient permission to install the software. Another common reason is your antivirus is acting up and blocking the installer.
In this article, we look at a few troubleshooting steps you can try to fix this problem on your Windows system.
What Causes the Windows Installer Error Code 2203?
Like we mentioned above, the installer error code 2202 indicates that you do not have sufficient permission to run the installer. The full error reads:
The installer has encountered an unexpected error installing this package. This may indicate a problem with this package. The error code is 2203
In many cases, you can simply run the installer as administrator to fix the problem.
If that does not work, try to take ownership of the temp folder. Additionally, temporarily disabling your security software can also help.
1. Run the Installer as Administrator

Some programs require explicit permission to run the installer or programs that can modify the system files. So, try to run the installer with administrative privilege to provide the required permission. In most cases, this should work and allow you to complete the installation.
To run the installer as administrator:
- Locate and right-click on the installer you want to run.
- Click on the Run as administrator option from the context menu.
- Click Yes when prompted by UAC (User Account Control).
2. Take Ownership of the Temp Folder
Issues with the Windows Installer service and missing permission for the temp folder can also cause the installer error 2203.
You can end the Windows Installer service and then take ownership of the temp folder to fix this problem. Here’s how to do it.
Before you proceed with the step below, create a restore point. System Restore allows you to undo any changes if you incorrectly remove or modify an essential file.
2.1 End the Windows Installer Service

- Press the Win + R to open Run.
- Type services.msc and click OK to open the Services Snap-in.
- Locate and right-click on the Windows Installer service.
- Select Stop to end the service.
-
Next, open File Explorer and navigate to the following location:
C:\Windows\Temp - Click Yes if prompted by UAC.
- Press Ctrl + A to select all and delete all the contents of the folder. Skip any file that is undeletable for any reason.
Next, follow the steps below to take ownership of the temp folder.
2.2 Take Ownership of the Temp Folder

-
Open File Explorer and navigate to the following location:
C:\Users\Username\AppData\Local - In the above path, replace the Username with your user account name.
- Right-click on the Temp folder and select Properties.
- In the Temp Properties window, open the Security tab.
-
Click the Advanced button under the Permissions for System section.
-
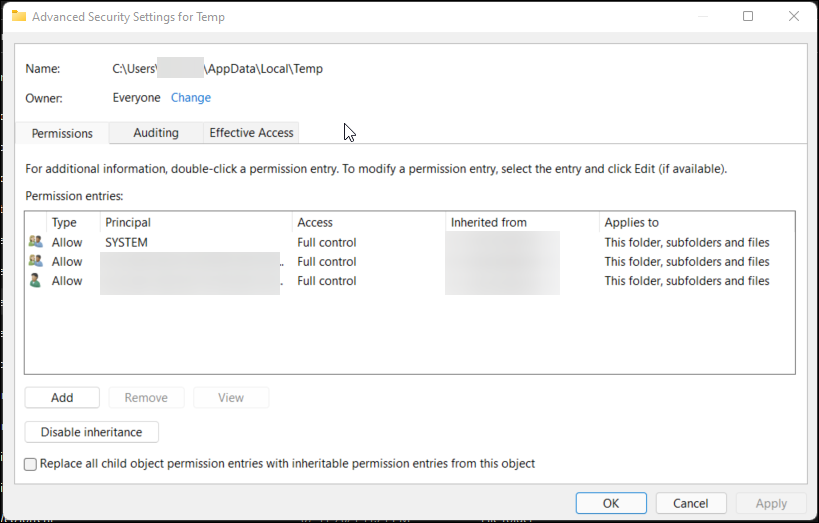
In the Advanced Security Settings for Temp window, click the Change link for Owner. Click Yes if prompted by UAC.
- Nex, type Everyone in the Enter the object names to select box and click Check Names.
- If an underline appears under Everyone, click OK. Then, click Apply to save the changes.
- In the Temp Properties window, click the Edit button.
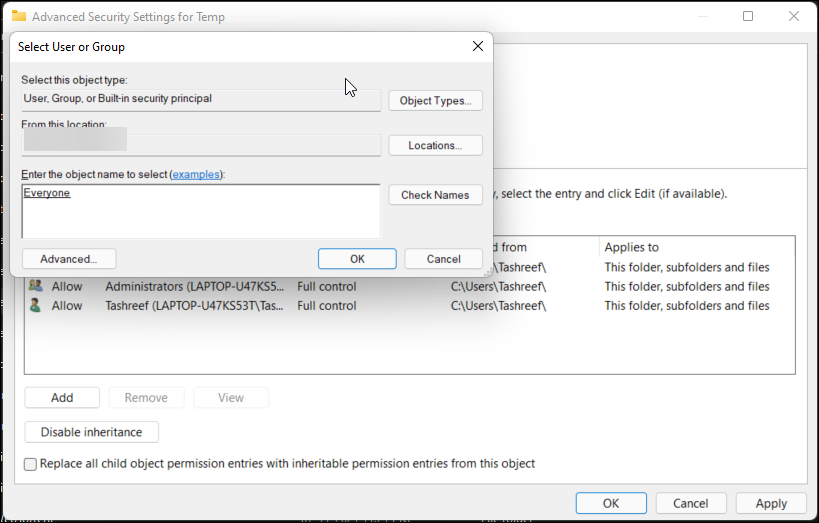
- In the Permission for Temp window, click the Add button.
- Next, type Everyone in the Enter the object names to select box, and click Check Names.
- Click OK to save the changes.
-
Next, under Permissions for Everyone, check the Allow box for Full Control.
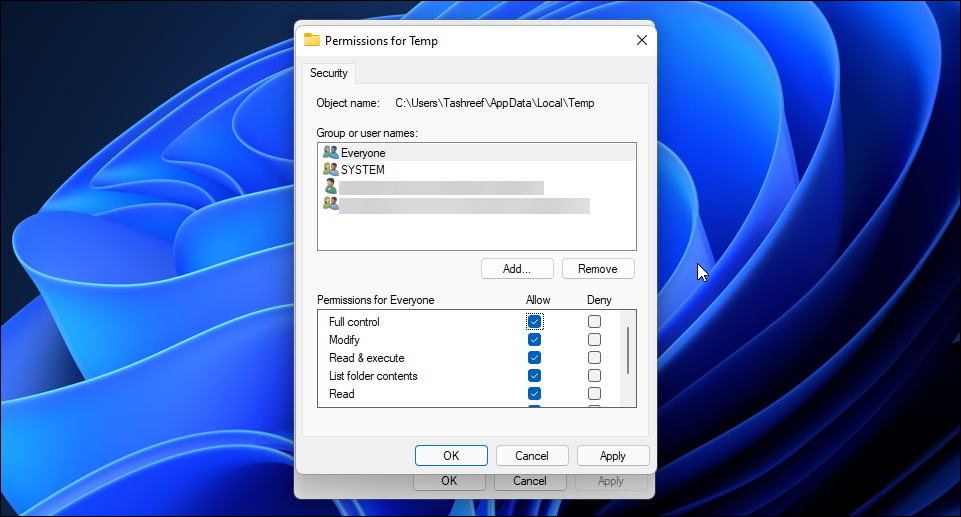
- Click Apply and OK to save the changes. When prompted by the UAC, click Yes to confirm the action.
- Next, press the Windows key + R to open Run.
- Type services.msc and click OK.
- Right-click on Windows Installer and select Start.


Close the Services snap-in window and restart your PC. After the restart, run the installer and check if the error is resolved.
If you still have trouble taking ownership, try these third-party tools to take ownership of files and folders on Windows.
3. Temporarily Disable Your Antivirus and Firewall

Your security program can, at times, flag a harmless program as malware and block it from working or connecting to the internet. To determine if your security solution is crying wolf, temporarily disable your antivirus solution and firewall and then run the installer.
If you are using a third-party antivirus, the steps to disable the tool may vary. For example, if you use Avast antivirus, click on the system tray icon, and right-click on the Avast icon. Then, go to Avast shields control > Disable until computer is restarted.
For any other antivirus, check the knowledge base on the developer’s website to disable your antivirus. Once disabled, run the installer and check if it runs without any error. Don’t forget to enable your antivirus once the job is done.
If you use Windows security, then follow these steps to disable Real-Time Threat Protection and Windows Defender Firewall.
- Press the Win + I to open Settings.
- In the left pane, open the Privacy and Security tab.
- Click on Windows Security in the right pane.
- Next, click on Virus & threat protection.
-
In the Windows Security window, scroll down to Virus & threat protection. Then, click on Manage Settings.
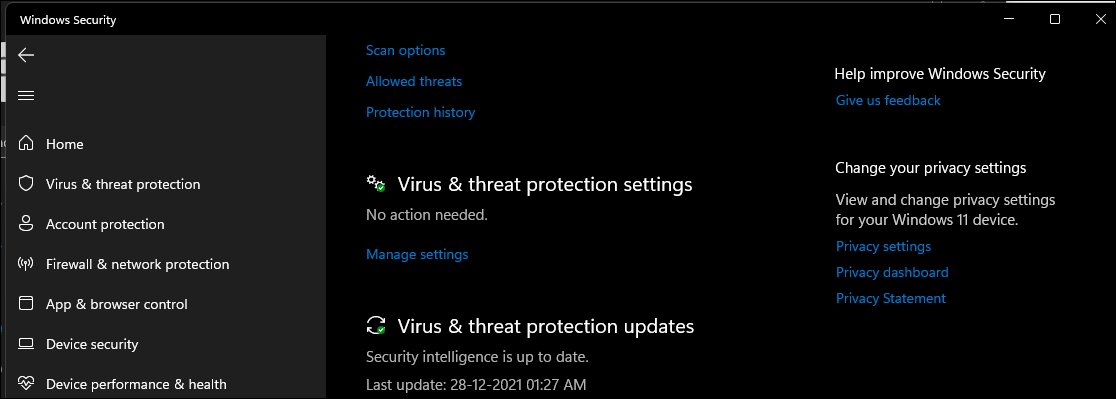
- Toggle the switch for Real-time protection to turn it off. Click Yes if prompted by UAC.
-
Next, in the Windows Security window, click on Firewall and network protection tab (left pane).
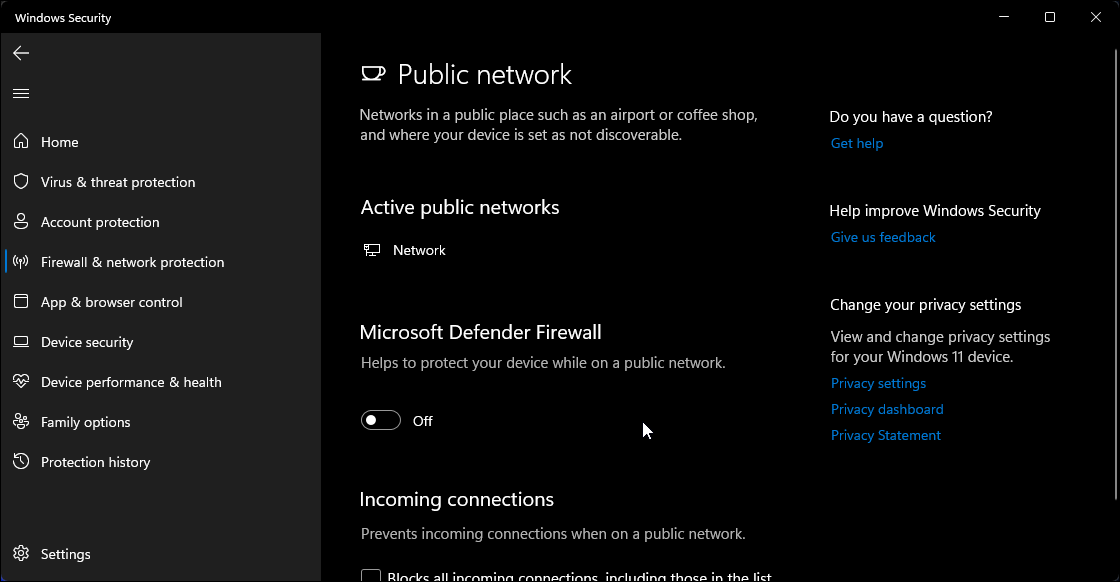
- Click on Public Network. Then, toggle the switch for Microsoft Defender Firewall and set it to Off.


Do the same for any other active Windows defender firewall profile.
Now that you have disabled the security on your computer, restart your PC to apply the changes. Next, run the installer, and it should install without any error.
Note that running installers from untrusted sources or publishers can be harmful. If the installation is successful, turn on Real-Time Protection and Windows Defender Firewall to protect your data and device.
Fixing the Windows Installer Error Code 2203
Not being able to install a program on your PC can quickly become frustrating. Fortunately, you can fix the Windows installer error code 2203 by executing the installer with administrative privilege. If that does not, take ownership of the temp folder to fix the error.
If the issue persists, turn off your antivirus program and firewall and run the installer to identify any false positive issues.