There are various ways you can take screenshots in Windows 10 and 11. However, your captured snapshots won’t usually include bordered outlines unless configured to do so. Applying borders to your screenshots will give them clearer outlines on web pages and documents.
This is how you can set Windows 11’s built-in Snipping Tool and ShareX to apply custom borders to your captured screenshots.
How to Add Borders to Screenshots With the Snipping Tool
Windows 11’s Snipping Tool might be a relatively basic utility to take screenshots with, but it does include some useful additional settings. Among them is a Snip outline option that automatically applies a color border to captured snapshots when enabled. This is how you can enable that Snipping Tool setting to capture screenshots with borders:
- Press Win + S, and type Snipping Tool in the search text box.
- Then select Snipping Tool to utilize that app.
-
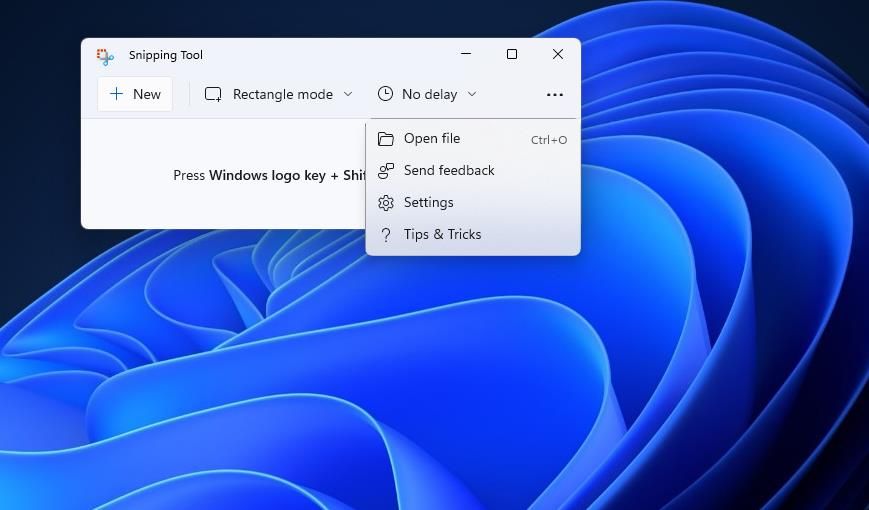
Click the See more button.
-
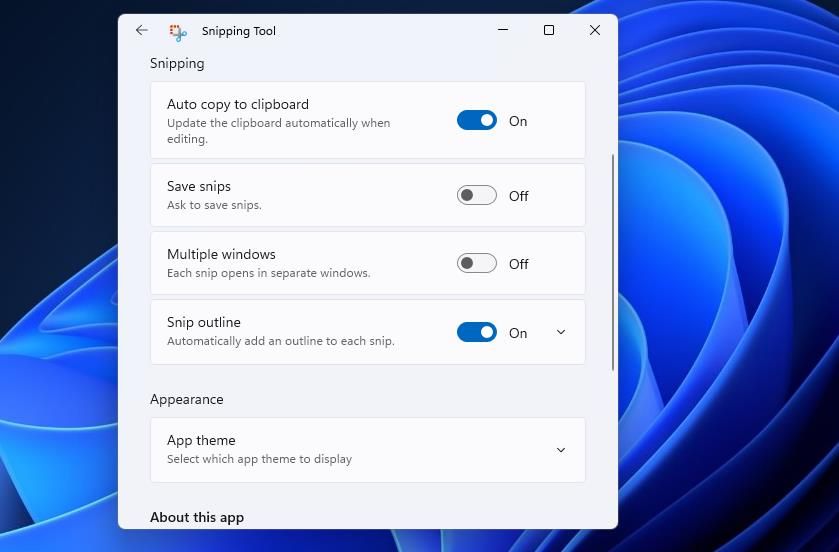
Turn on the Snip outline setting.
-
Click Snip outline to expand that option.
-
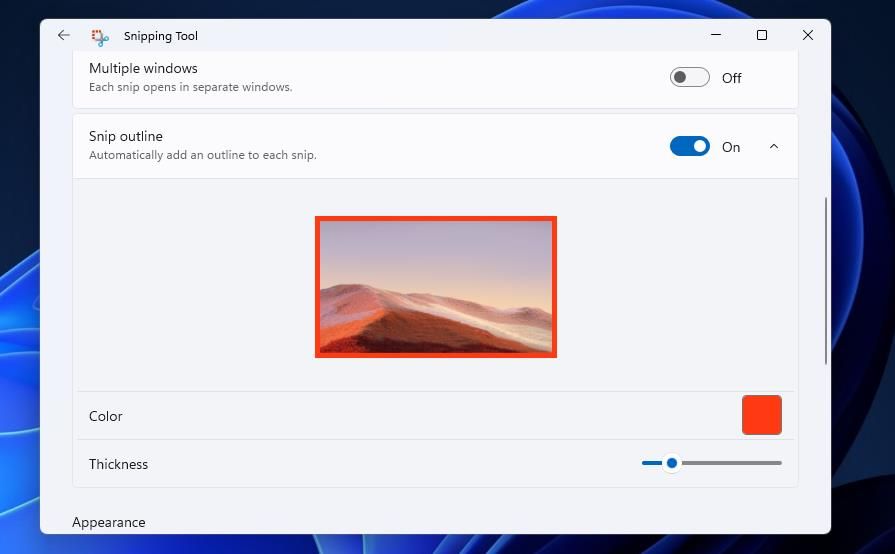
Next, click the Color box to open a palette.
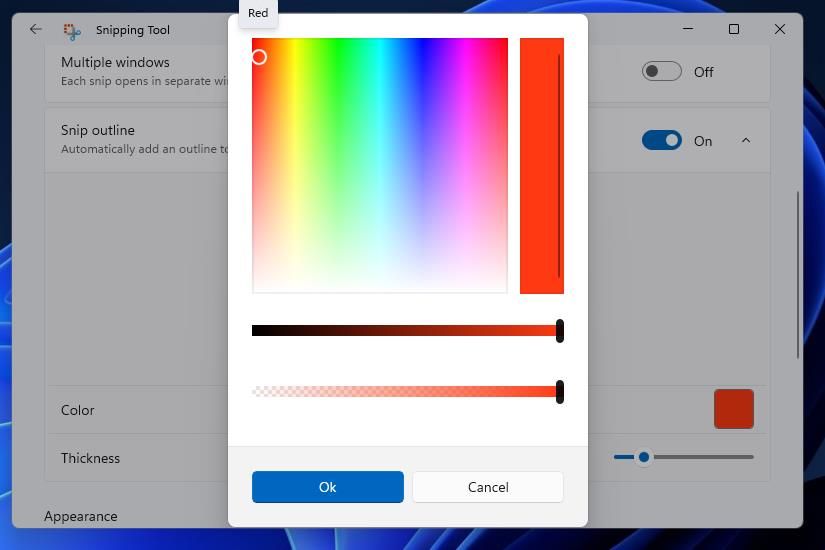
- Choose a border color within the palette, and select the OK option.
- Drag the Thickness bar’s slider to adjust the border’s width.


Now try capturing some screenshots with the Snipping Tool. Click the Back button at the top left of the Snipping Tool to exit its settings. Then press New, select Rectangular Snip, and drag the mouse cursor to capture a snapshot area. You’ll see the captured screenshot now includes a border as you configured.

How to Add Borders to Screenshots With ShareX
ShareX is a freeware screen-capturing tool that blows Windows 11’s Snipping Tool away in terms of features and options. You can set that software to automatically apply border-image effects to captured snapshots in two ways. This is how to add basic border outlines to snapshots captured with ShareX:
- Open the ShareX website, and click Download there.
- Right-click the taskbar button that opens the Start menu to select File Explorer.
- Open the folder ShareX’s downloaded setup file is in. Double-click ShareX’s installer file from there.
- Go through and select the required options in the Setup – ShareX window to install the software.
- Then launch ShareX software.
-
Click Task settings in the ShareX window.

- Select the Effects tab.
- Press the Image effects configuration button.
- Click the + New option.
- Input Screenshot Border in the Preset name box.
- Press the Add button for effects.
-
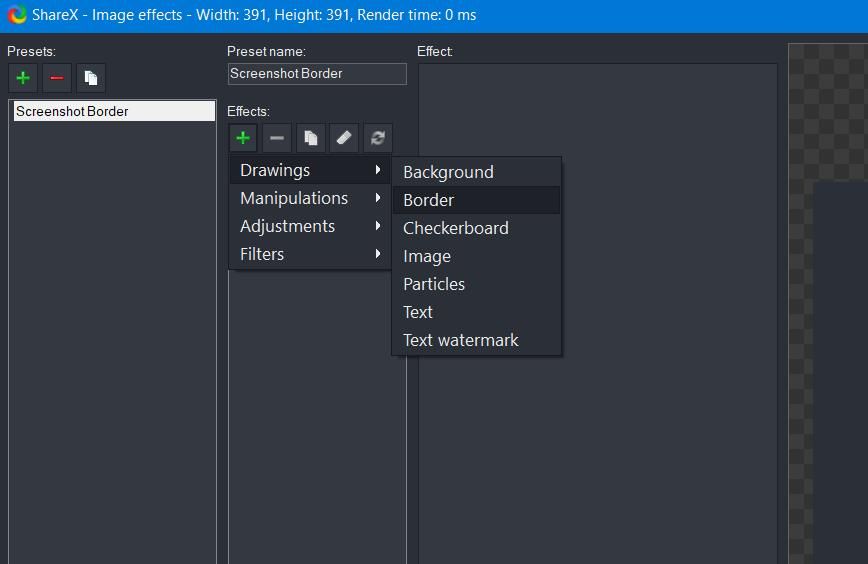
Select the Drawings > Border options.
-
Then click the Color box and the … button.
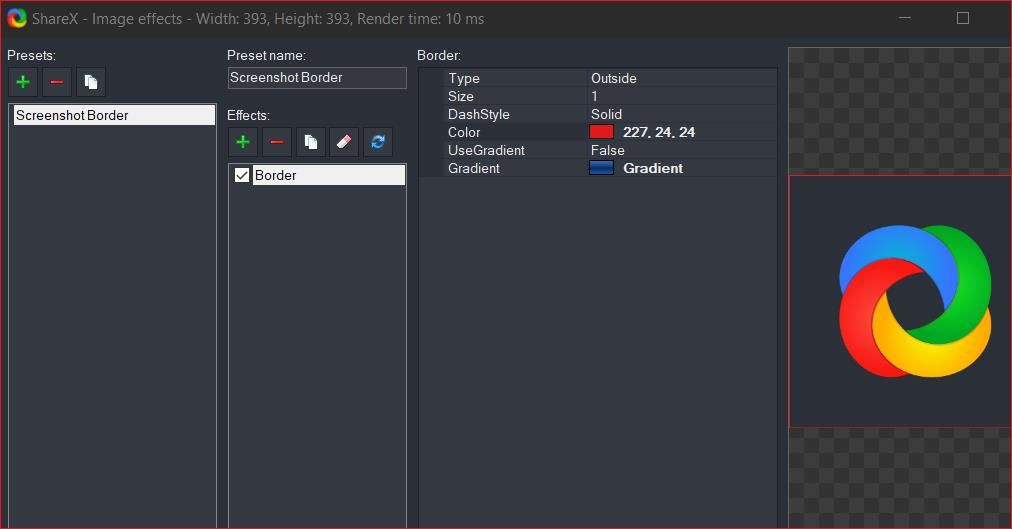
- Choose a border color in the Color picker window, and click the OK option.
- To apply a border style, click the DashStyle drop-down menu and select an option.
- You can extend the border’s width by entering a higher number in the Size box.
- Press the Close option.


All screenshots you now take with ShareX will include the border outline as you configured with the image effect settings. To take a screenshot, click Capture > Region in ShareX. Then drag a rectangle across an area to include in the snapshot with the mouse’s cursor. You can view your captured image output by selecting History in ShareX.

The other way you can add borders to screenshots taken with ShareX is to download image effect templates. To do so, click Task settings > Effects > Image effects configuration in ShareX. Press the Image effects button to open a ShareX image effects page in your default browser.
The ShareX image effects page includes a variety of preset border templates you can add to your captured snapshots. There you choose some snazzy multicolored border effect styles for your screenshots. Click a border template on that page to download it.

Then go to the folder that includes the downloaded SXIE border file in File Explorer. Double-clicking the downloaded SXIE border file from there will add it to your ShareX image effect presets. Select to apply the new border template from the ShareX Image effects window, and click OK.

Make Your Captured Screenshots Shine With Custom Border Outlines
It’s straightforward to configure both the Snipping Tool and ShareX to automatically add custom borders to your captured screenshots. If you only need to add basic outlines, the Snipping Tool will probably be sufficient. However, ShareX is a better utility for applying more advanced border effects to captured snapshots.