Many people recommend upgrading from GarageBand to Logic Pro X, but with a price tag of $199, is it worth it? While both DAWs share a lot in common, Logic Pro X has some incredibly powerful features that are guaranteed to make you want to switch. If you're not convinced just yet, take a look at our top reasons for upgrading.
If you are ready to take your music, podcasting, or songwriting to the next level, it's time to graduate from GarageBand and make the move to Logic Pro X.
A Smooth Transition
GarageBand and Logic Pro X are both owned and maintained by Apple. Over time, many of the features from the more advanced Logic Pro software have been ported down to GarageBand, which is why they are often referred to as siblings.
Both DAWs have a lot in common, including a near-identical interface. But what helps most people seamlessly transition from one to the other is a familiar interface design and file compatibility. You can easily take any GarageBand project and open it in Logic without a hitch.
Logic Pro comes with an expansive set of professional features that can take years to fully master, but if you are familiar with GarageBand, that learning curve is significantly reduced. In return, you'll be in audio production heaven with all the extra creative tools and controls that Logic has to offer.
Here's why you should consider making the switch...
1. Expand Your Mixing Options
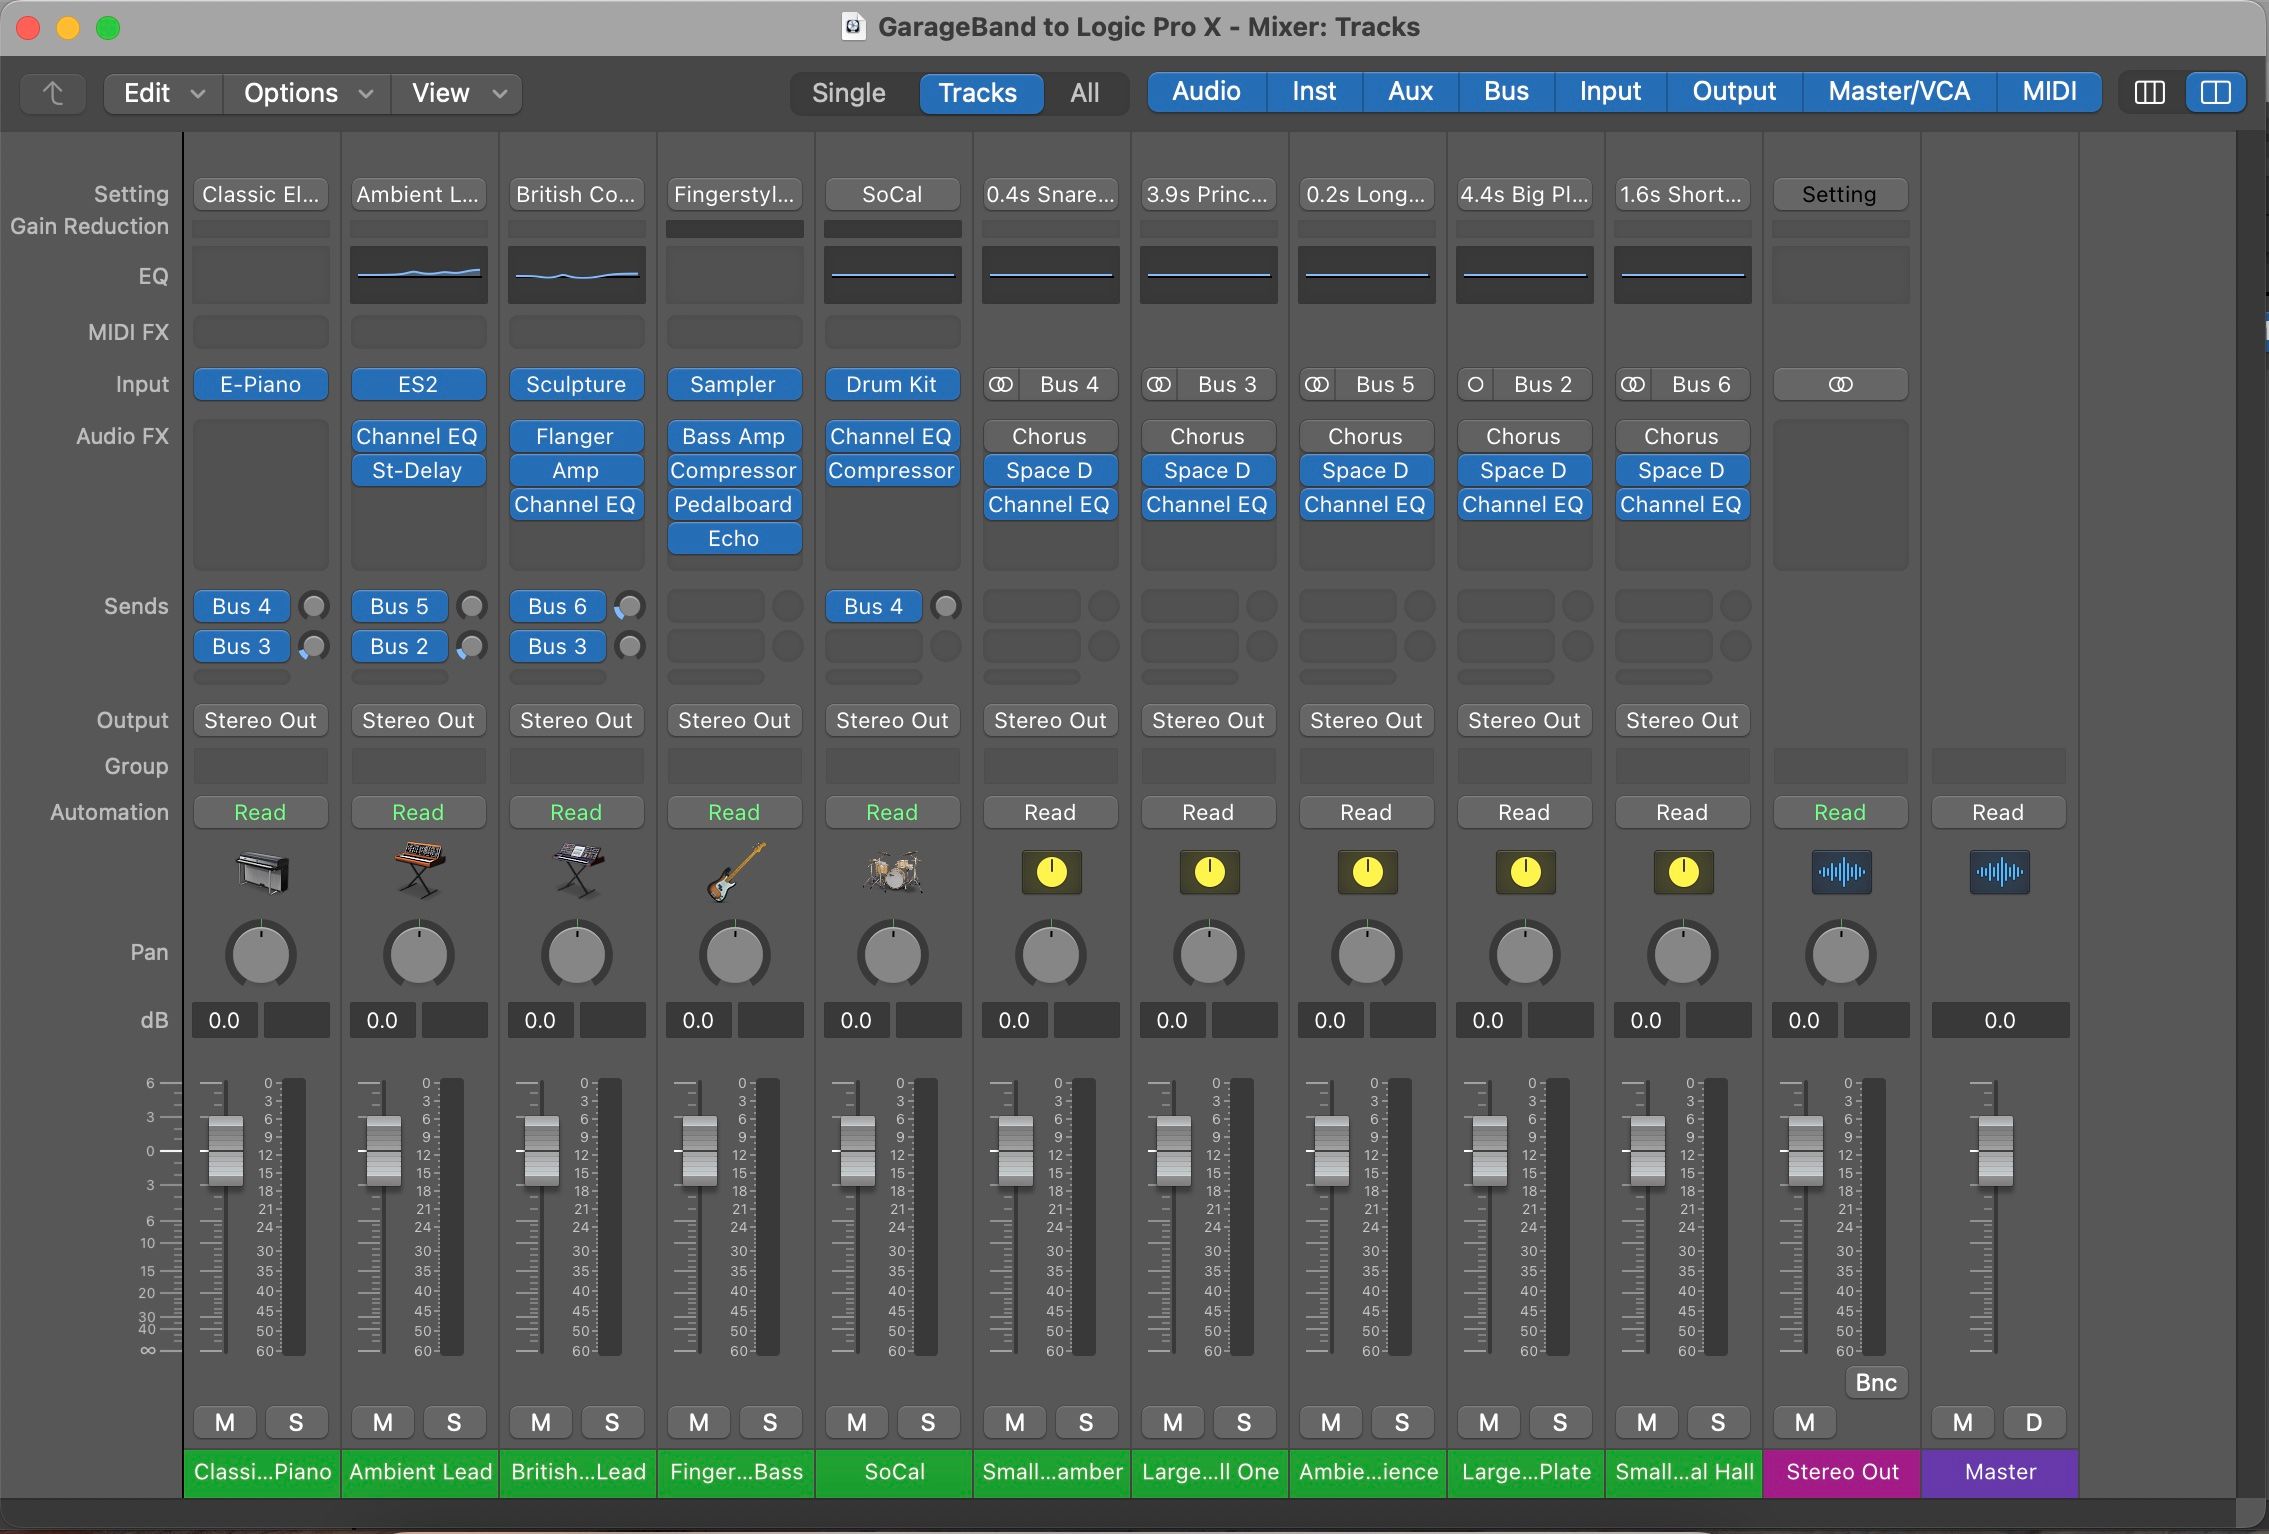
You don't have to be an expert to take advantage of a full audio mixer like the one you get in Logic. If you already play with things like volume and effects in GarageBand, then a mixer simply brings all those processes together in one place.
Audio tracks are displayed side by side in a dedicated mix window, and on each channel strip, you can change the volume and add effects, plus much more. With a mixer, it's far quicker to make changes on the go while listening to your audio in real-time.
Automation also becomes easier with the ability to record effect changes as the audio is playing using the "write" and "latch" functions that can be accessed in the mixer. Furthermore, once you learn how to navigate Logic's mixer, then you can essentially navigate any other mixer in a professional DAW.
Besides gaining more control over your audio, learning to use a mixer is essential to becoming an audio engineer or producer.
2. Fix Vocals With Flex Pitch
As you get better at recording and editing music in GarageBand, there will come a time when you want to make more precise and detailed changes. Vocal recordings are the perfect example. No matter how good a singer is, there are always going to be moments when they sing out of tune.
Of course, there are third-party tools available to fix this, but they can be expensive, which is why it's incredible that Logic offers a tool like this as part of its native controls. Because it also uses the familiar midi piano roll display, Flex Time is intuitive to understand and easy to navigate.
Making changes to the tuning, the vocal quality, and vibrato is really simple; just grab any of the nodes attached to a vocal line/block and move them up or down.
You won't find any tool like this in GarageBand, so if you want to make high-quality music, then it's worth upgrading to Logic.
3. Compose New Songs With Live Loops
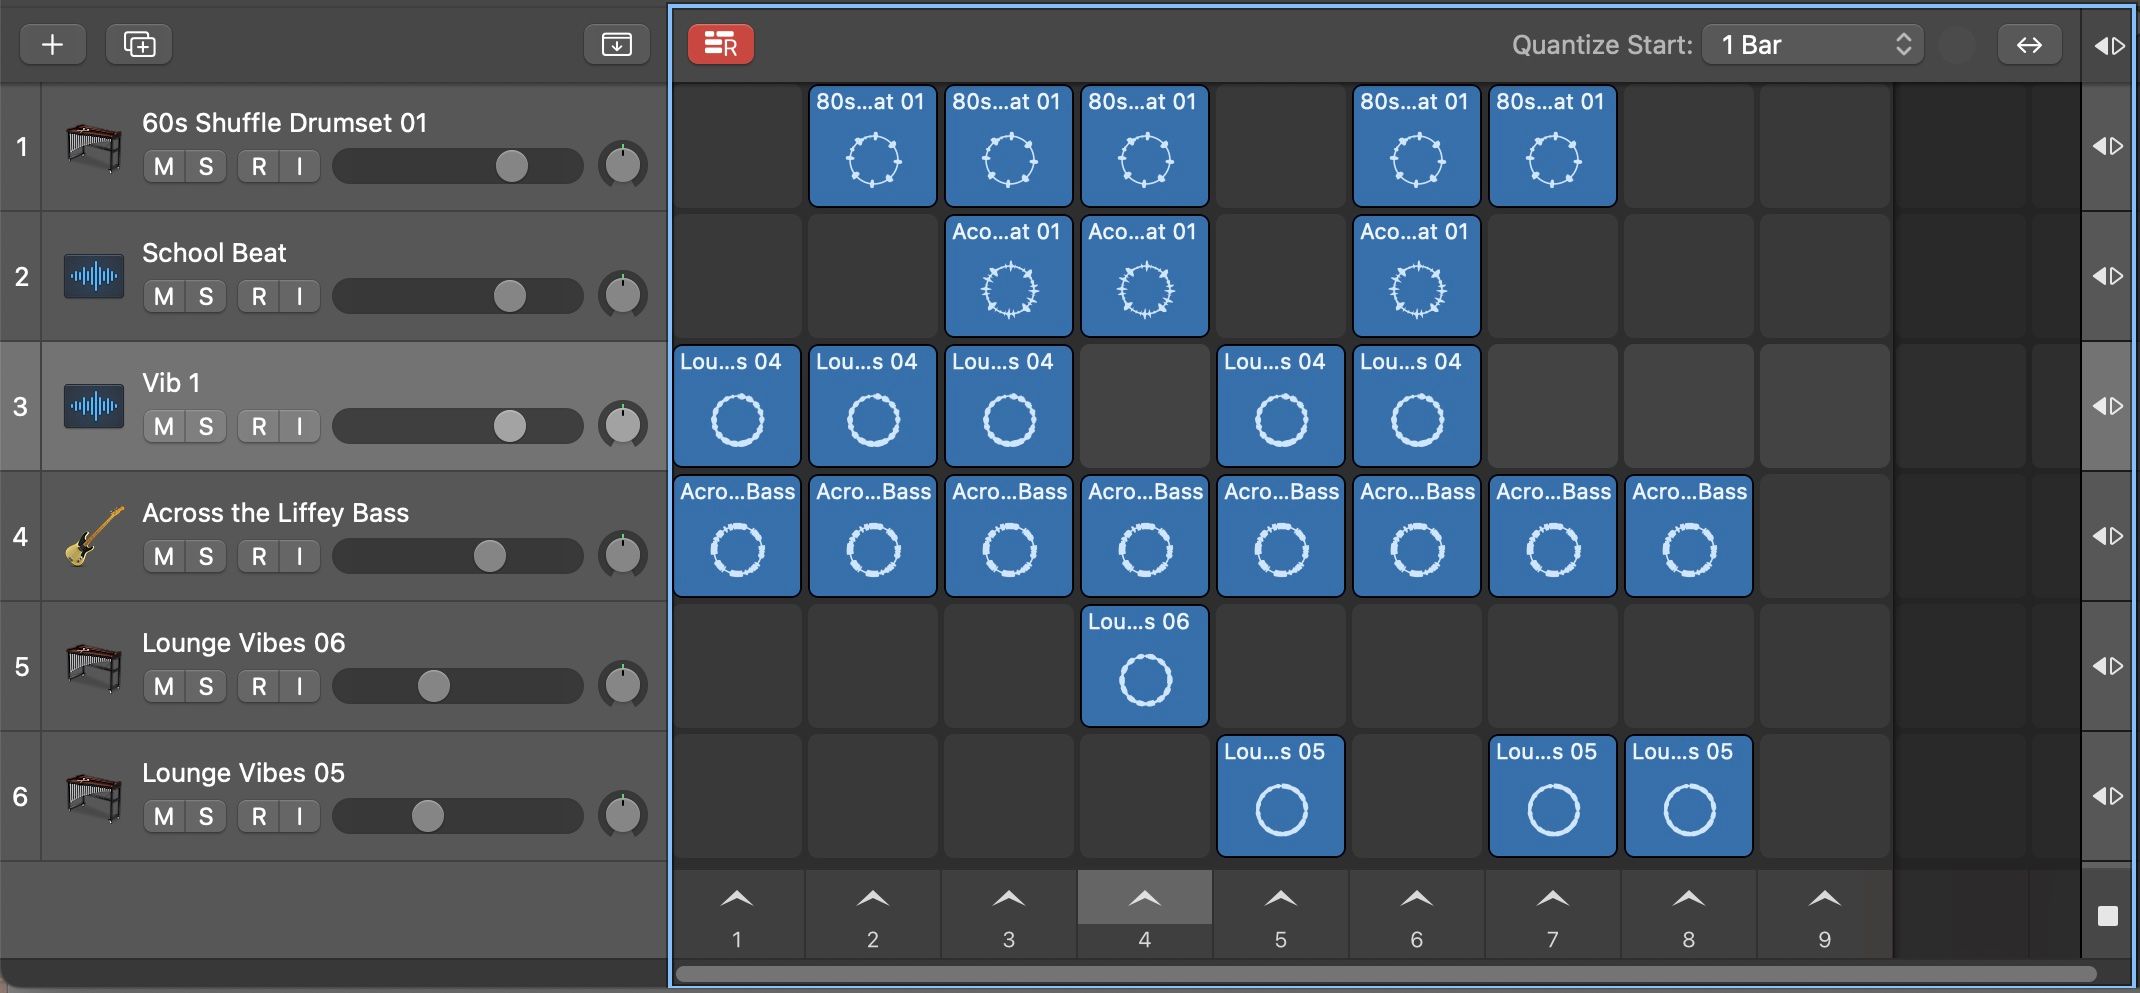
If you love using Apple loops in GarageBand to create your own tracks, then Live Loops will open up a whole new world of creative possibilities. In fact, it's more than just a sample library, it's a new way of playing loops using a modular interface.
With Live Loops, you can record audio, software instruments, or drummer loops directly into a block anywhere on the display grid. The beauty of this feature is that you can play back each loop on its own, or as a whole section, and move between blocks in a non-linear way.
In other words, Live Loops lets you play snippets of audio like an instrument. You can test out new ideas, or have fun mixing up the arrangement of sounds. Then, when you are ready, you can record your song directly into the timeline window in the traditional linear way.
Live Loops is not a feature that every professional DAW has either, making it a compelling reason why you should upgrade to Logic.
4. Create Your Own Sound With Alchemy
Alchemy is an amazingly creative, fun, and powerful software synthesizer, and when upgrading to Logic Pro, you get to unlock the full set of features.
A lot of people may not even realize that they are using a stripped-down version of this synth in GarageBand because there isn't an option to use Alchemy as a stand-alone instrument. Instead, the Alchemy control panel only appears once you've selected one of GarageBand's software instruments.
It's only when you open the midi editor window that the Alchemy controls become visible. Here you will see a curated selection of effects, EQ controls, and sound presets which change depending on the instrument you are using.
The full version of Alchemy in Logic allows you to create completely original synth sounds because almost every kind of parameter is available to change—nothing is off-limits. While overwhelming at first, there is an option to hide advanced features, so you can get up to speed quickly.
If you could only have one synth in your toolbox, Alchemy would be it. With four separate sound layers, a complete set of effects options, and performance features, it's well worth upgrading to Logic to gain the full set of features that Alchemy has to offer.
5. Organize Your Session With Track Stacks
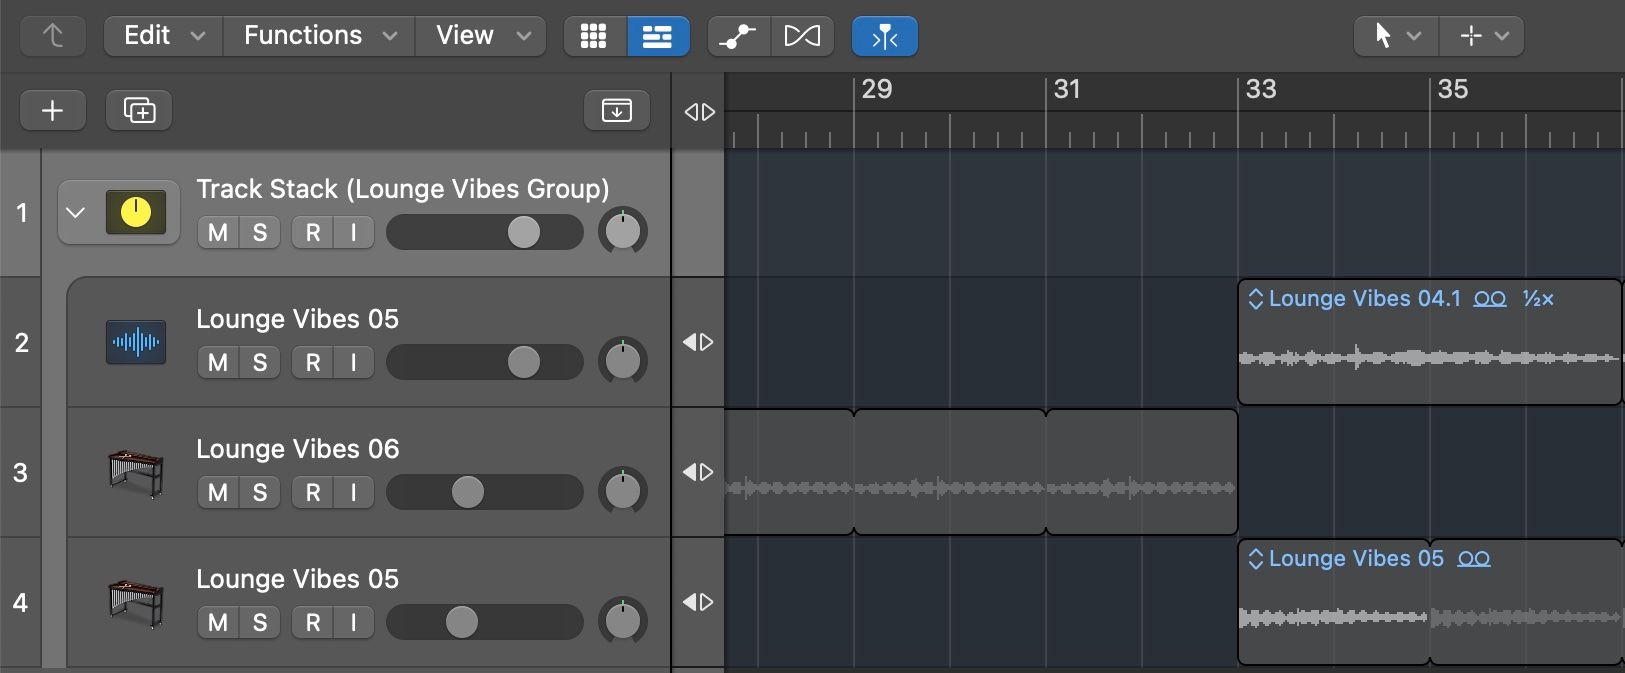
Track Stacks in Logic Pro is a feature that lets you select different tracks and place them together in a container—or a stack, as Apple has called it.
Once grouped together, you can apply effects to the stack that in turn apply to each individual track. The old way to do this involved creating a bus track and individually routing tracks to it. Now, you can simply right-click on selected tracks to create a stack.
Another trick of Track Stacks is controlling multiple software instruments at the same time. That means you can layer, for example, electric bass with an electric guitar, and play both at the same time. If you write instrument parts that double each other, then this speeds up the process a lot.
It's a serious tool for organizing lots of different instruments together, making your session easier to navigate and boosting your workflow. Once you start using more and more tracks in your GarageBand project, you might find that Logic's Track Stack feature is essential.
If you want to organize your Logic Pro session like a pro, this feature seems like a no-brainer. But it's taken decades before a function like this was made available, and furthermore, it's not a feature that all professional DAWs have.
Should You Make the Switch to Logic Pro?
While many parts of Logic are often handed down to GarageBand over time, the best is still reserved for Logic. Any of these features would be reason enough to upgrade, from fixing vocals with Flex Pitch to composing new songs with Live Loops. Add in a familiar interface and options for simplified controls, and transitioning to Logic is well worth the price.


