Windows comes with a number of troubleshooting utilities that detect and fix errors automatically when they occur. Among these utilities is Startup repair, which deals with issues that arise when you launch your operating system.
Despite its ability to work usually, this utility can stop working at times, leaving users unsure of what to do next. In this guide, we will show you what you can do when this utility fails to fix the startup issues for you.
1. Troubleshoot the Issue in Safe Mode
There might be an active background process interfering with the system's operation, which may explain why you're facing the problem. Since this is one of the main reasons why the startup repair utility fails to do its job, we recommend that the first thing you do after facing the issue is boot the system in Safe Mode.
Safe Mode launches the system with only the basic set of drivers and applications, so if there is a background process acting up, launching Windows in this state should be able to fix the problem.
In this method, we will first be launching the system in Safe Mode, and then run SFC and DISM scans to fix the issue. System File Checker (SFC) utility scans the protected operating system files for inconsistencies, while DISM repairs a corrupt system image. If the problem is being caused due to a corruption error within the system, running these two tools should help you fix the problem.
- Click on the Advanced options button in the Startup repair window.
- Choose Startup Settings from the list of options available.
-
In the following window, hit Restart to launch Safe Mode.

- If this does not work, then you can also try launching the Safe Mode by restarting your PC. When it is rebooting, repeatedly press the F5 key on your keyboard.
- Inside the Advanced options screen, head over to Startup settings and then press the F6 key.
- Once you are inside the Safe Mode, launch Command Prompt like you normally would in Windows.
-
Type the commands mentioned below one by one and press Enter after each to execute them.
        DISM /Online /Cleanup-Image /RestoreHealth

sfc /scannow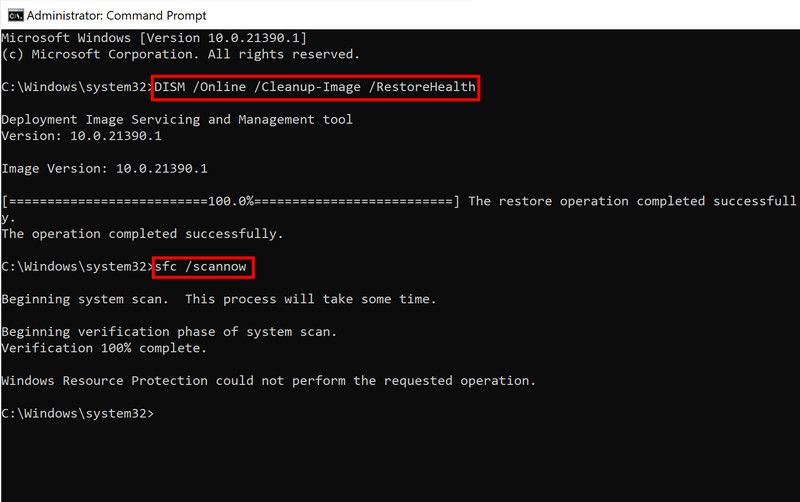
- Wait for the commands to execute successfully, and then check if the issue is resolved. Make sure you do not restart or turn your computer off while the Command Prompt is working.


While you are at it, we also recommend uninstalling your anti-malware program if the error started occurring after you installed it. While these programs typically work fine in the background, they also have a bad reputation for causing issues like the one at hand. This is why we suggest you uninstall it and see if it makes any difference.
2. Rebuild BCD and Run CHKDSK
There might also be a problem with your Boot Configuration Data file and the Master Boot Record file, which is preventing the startup repair tool from performing its task.
To fix issues related to these, we will first rebuild both files. Then, we will scan the disk for any potential errors that might also be contributing to the problem. This fix involves using the Command Prompt as well.
- Type "cmd" into Windows Search and click Run as administrator to launch Command Prompt with administrative privileges. If you cannot log into Windows at all, then try launching the system into Safe Mode by following the steps we described above and then open Command Prompt.
-
In Command Prompt, type the commands mentioned below one by one and hit Enter after each for execution.
        bootrec.exe /rebuildbcd

bootrec.exe /fixmbr

bootrec.exe /fixboot -
Once these commands are executed, proceed with executing the following commands. If your drive letters are other than c or d, make sure to replace these with them before executing the command.
        chkdsk /r c:

chkdsk /r d: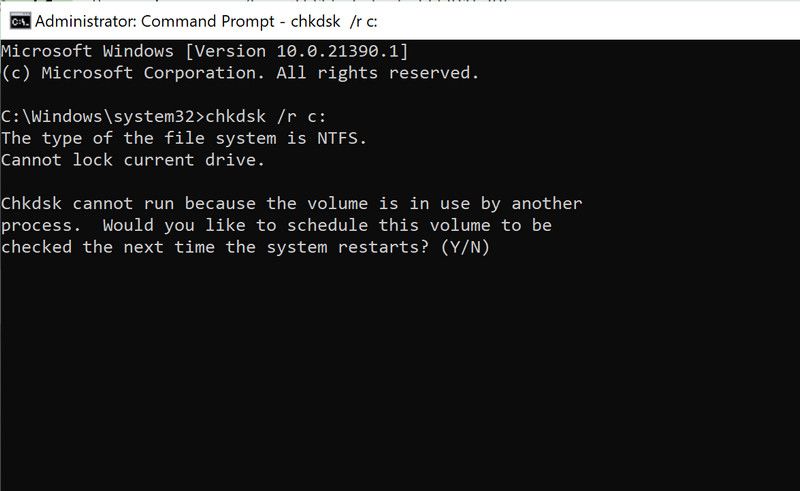

After the commands execute successfully, you can restart your PC and see if the error is resolved.
3. Restore the Registry Editor
In some cases, some Registry values were also causing the problem. Windows Registry creates new values and keys every time you install something on the system. There is a chance that one of the new or old keys has gotten corrupt, causing the startup repair tool to fail.
In this case, it is best to restore the Registry configuration of your system. Here is what you need to do:
-
Launch Command Prompt again by following the steps above and this time, execute the following command:
copy c:windowssystem32configRegBack* c:windowssystem32config - If cmd asks you about which files to overwrite, type All and click Enter.
- Next, type exit to close the window.
Alternatively, you can also try to restore the Registry back to one of its recent states as well. However, this will not work for you if you have not created a Registry backup in the past.
4. Reset Your PC
If the troubleshooting methods are not working for you, then you can try resetting the PC as the last resort. Windows offers you to keep your files and data while resetting, so you do not have to worry about losing your data in the process.
Hopefully, resetting the system will fix the issue once and for all. You also have the option to go for a clean installation of Windows, if you think resetting will not work. However, that process will take longer to finish, so we only recommend proceeding with it when you have some free time on your hands.
Manually Fix Your Startup Issues
Despite the fact that the built-in Windows troubleshooting utilities usually fix most issues, it's a good idea to have a backup plan in case they don't. In this article, we discussed methods that can help you fix startup issues that you may be experiencing, manually.
To prevent future crashes, we recommend looking for the cause of the issue and eliminating it once you have booted into Windows successfully. Make sure you update all the device drivers and install any pending system updates that are available as well.