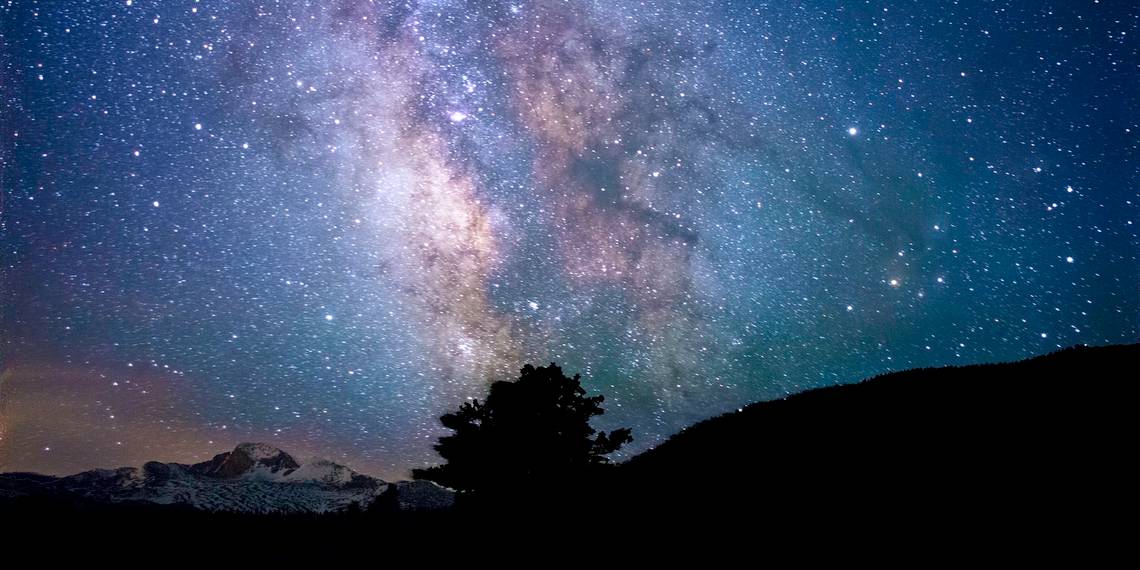
Landscape astrophotography is a type of night photography that involves capturing land and sky. It might seem daunting to beginners given the obstacles a photographer faces when shooting in low-light, let alone capturing the Milky Way.
However, we're here to tell you that those majestic photographs of celestial objects aren't as daunting as they first appear. Let's discuss what landscape astrophotography entails and give you some tips to get started with this genre.
What Is Landscape Astrophotography?

Astrophotography is an umbrella term that includes subgenres such as landscape, planetary, solar, and lunar astrophotography; all of which capture the contents of the sky. Landscape photography is also an umbrella term that hosts subgenres such as storm photography and seascapes; it involves capturing nature scenes.
Put astrophotography and landscape photography together, and you've got landscape astrophotography. It's an amalgamation of land and sky, capturing scenic outdoor shots with the sky being the main element of the composition.
Landscape astrophotography is the most accessible genre of astrophotography—you'll need more in-depth knowledge and expensive equipment to snap detailed and deep astrophotos. Landscape astrophotography typically doesn't go beyond capturing what we can already see with the naked eye.
As with any genre of photography, there are certain techniques you can employ in order to get the best results. Your main goal will be letting as much light into the camera as possible without compromising the shot, but that's not all there is to it.
1. Find a Suitable Location
Getting a shot of the sky isn't as easy as going outside and snapping away. You need to find a location away from suburbs and cities without too much light pollution, and with some natural landscapes. If you happen to have a mountainous view from your backyard, this might suffice.
If you live far away from a nature spot or don't frequently go on camping trips, unfortunately, your landscape astro shots will look a little empty when taken near a city. You might still be able to get some nice shots of the moon, but it's unlikely that you'll capture many stars.
If you have the opportunity to travel, use a tool like Light Pollution Map to find the best location away from light pollution. If you plan to include the moon in your shot, you can download a moon phase app like My Moon Phase that lets you know where the moon will be at which time, as well as its condition.
2. Prepare for the Night

Astrophotography is about capturing celestial objects, and they're usually not visible in the daytime. This means that your shoot is going to happen at night.
Bring gloves and a heat pack to keep your hands warm so that you don't have any difficulty operating the equipment in the cold of the night. And, perhaps more importantly, ensure you will be in a safe location, especially if you're going out at night alone—stay close to your car.
Lastly, it's always a good idea to check what the weather will be like in your chosen location. No point in driving somewhere for an hour only for the sky to be covered in clouds.
3. A Full-Frame Camera Is Preferable, but Use What You Have
If you're new to landscape astrophotography, or photography in general, you might worry about having the right camera. While full-frame cameras do perform better in low-light conditions, crop-sensor cameras will get the job done just fine, especially if you're still uncertain about pursuing this genre of photography.
Chances are you already own a crop-sensor DSLR, so there's no need to go out and splurge on an expensive full-frame one—you'll just need to pay extra attention to the exposure settings. Even your smartphone might suffice if it lets you control the exposure; if not, you can always download a camera app that lets you do this.
4. Use a Wide-Angle Lens

There's no need to splurge on a new lens for a genre you've never tried before. So, use the widest lens you have. And if the kit lens happens to be the only one you own, that's fine too—most kit lenses are moderately wide-angled.
However, wide-angle lenses that fall within 14-35mm are ideal for landscape astrophotography. They allow you to fit more of the scene into the shot, making them perfect for landscape astrophotography since the sky stretches beyond the landscape—you want to capture as much of it as possible.
It might be worth investing in a wide-angle lens even if it turns out landscape astrophotography isn't your jam—they're versatile pieces of equipment.
As for using a zoom vs. a prime lens, both come with benefits and drawbacks for astrophotography. Prime lenses will give you a sharper image, but a zoom will give you more control over the field of view and composition without needing to swap out lenses.
5. Use a Fast Lens
A fast lens is preferable for shooting in low-light conditions since it lets more light into the camera. "Fast" lens means it has a high maximum aperture, and the higher the aperture, the wider the pupil of the lens opens, letting more light in. For any type of night photography, an f/2.8 lens or lower is ideal.
Again, don't splurge on a new lens if the kit lens is all you own; you might have to rely more on ISO to get the right exposure, but it'll make do.
You can always rent a fast, wide-angle lens if you're serious about your first landscape astrophotography shoot. Check out these second-hand photography sites, some of them let you rent camera gear.
6. Set a High ISO (but Not Too High)

A lower ISO means darker images, while a higher ISO will result in brighter images. This might entice you to set the ISO as high as possible for astrophotos, but there's a trade-off; the image will be noisy/grainy. You can boost the ISO to 3200, but it's safer to stick to 1600.
7. Use a Long Shutter Speed (but Not Too Long)
A longer (or rather, slower) shutter speed lets more light into the camera. This will allow you to turn down the ISO a bit and avoid grain. But you need to be careful with this—remember, the earth rotates, so if you leave the shutter open for longer than about 30 seconds, the objects in the sky will start looking blurred.
You can always use a very long shutter speed intentionally for creative effect, but this steps into star trailing territory—a different genre that requires specific know-how.
So, if you want the perfect shutter speed and are not after star trails, use the 500 Rule. You can read more about it in this photography rules and formulas guide.
8. Do Exposure Blending
If you're struggling to get the right shot with your exposure settings, do exposure blending. This involves taking bracketed shots at different exposures and blending them together manually. You can always automate the blending process with HDR software, but manual blending gives you more control.
As a rule of thumb, take one underexposed photo, one near-correctly-exposed photo, and one overexposed photo. If you're still a beginner, you'll want to check this exposure bracketing guide for how to take bracketed shots automatically.
Then, merge the shots in your photo editing software. The goal is to get the same image that you saw with your eyes while taking the shot; so removing grain, enhancing the contents of the sky, and improving the image quality overall.
9. Stabilize Your Camera
A slow shutter speed requires the camera to be completely still for the entire duration because the slightest movement can result in a blurred image. This is where a tripod will save the day. It's pretty much an essential piece of equipment for any type of low-light photography.
We also recommend getting a remote shutter release. They're relatively affordable and there's a variety of wired and wireless remotes that are compatible with most cameras. This will avoid further camera shake since you wouldn't need to touch the camera to take the shot.
Shoot Into the Night
Shooting in low-light conditions requires settings that let as much light into the camera as possible. You might not get it right on the first go, but the more you shoot at night, the faster you'll become familiar with the settings mentioned above.
That's really all you need to know before you give landscape astrophotography a try. And if you follow our tips, you should be able to capture some stunning shots.