There’s no doubt that when it comes to a computer's performance, one of the most important roles is played by RAM (or Random Access Memory). However, Windows can’t use the amount of RAM mentioned in your computer specifications. This is because some of it is “reserved” by your system.
But what is Hardware Reserved Memory? Can you check how much memory is reserved on your computer and can you adjust the value?
What Is Hardware Reserved Memory?
Windows saves a part of the available RAM, so your hardware components have enough resources to work properly. This is known as Hardware Reserved Memory, and Windows allocates it to hardware devices such as the network adapter, Bluetooth devices, sound card, and GPU, among other hardware devices.
This way, Windows makes sure these components function as expected when you need them.
How to Check Your Hardware Reserved Memory
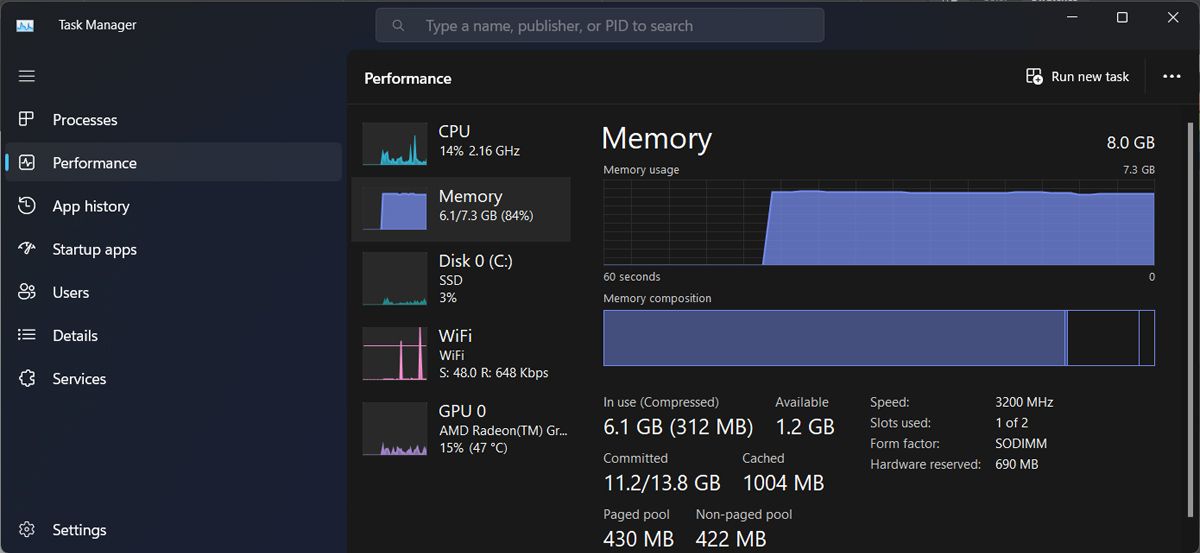
Windows makes it quite easy to check the amount of hardware reserved memory. Press Ctrl + Shift + Esc to bring up Task Manager. There, open the Performance tab and select Memory. Check the value next to Hardware reserved.
How Your PC's Hardware Reserved Memory Impacts Performance
If your system allocates too much of the RAM to the Hardware Reserved Memory, it will negatively impact your computer performance. Especially if you don’t have a lot of RAM to start with.
Also, certain hardware components, such as high-end Graphics Processing Units or sound cards, need more memory to manage their assigned tasks. Moreover, Windows uses reserved memory to store drivers for peripheral devices, even if you don’t use them that often.
If Windows reserves too much of your RAM, you might deal with longer boot-up times or even Windows crashing and freezing as it doesn’t have enough resources to keep all processes running.
How to Adjust the Hardware Reserved Memory on Windows
In general, the value for Hardware Reserved Memory should be a few hundred megabytes. The 32-bit version of Windows can reserve up to 3.5 GB of RAM, while the 64-bit system usually needs around 1GB. If the value is around a couple of GB, or even more, you’ll have to adjust the value. Fortunately, Windows has a few ways you can do it.
1. Update Your Drivers
Outdated or corrupt computer drivers will increase the amount of memory Windows reserves to keep your hardware devices running smoothly. Updating the drivers, especially the GPU drivers, might help Windows reduce the amount of reserved memory.
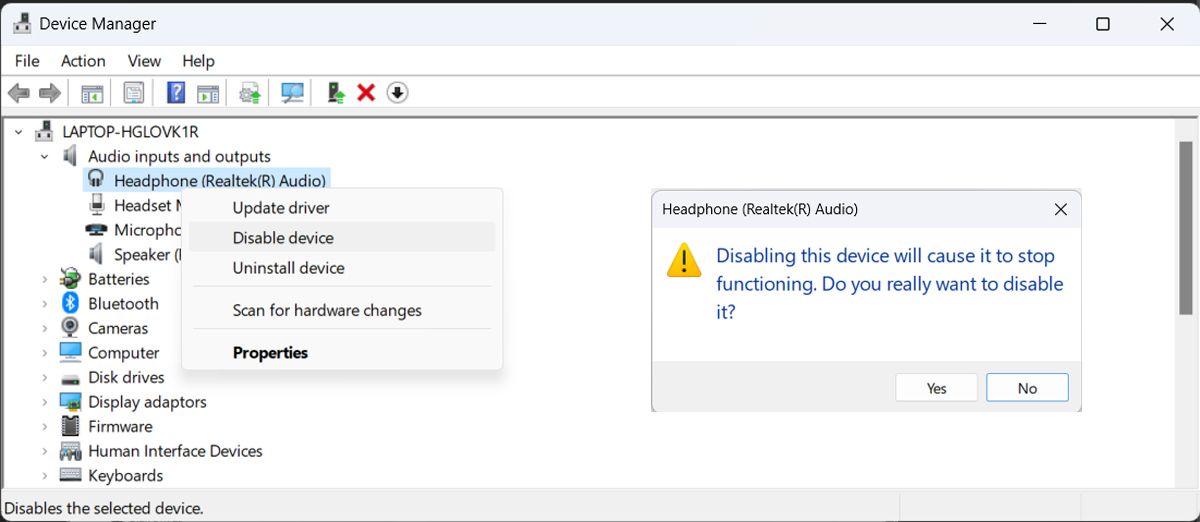
Additionally, it might help to disable drivers for devices that you no longer use, as Windows will keep managing them. Launch Device Manager, go through the list, then locate any unneeded drivers. Click them and select Disable device.
When disabling hardware devices, make sure you no longer need them, as you might be causing issues within your system.
2. Install 64-Bit Windows
There are a few differences between 32-bit and 64-bit Windows, including the amount of Hardware Reserved Memory. As we’ve mentioned, a 64-bit Windows assigns less RAM to the Hardware Reserved Memory, so updating from 32-bit to the 64-bit Windows version should reduce the amount of reserved memory.
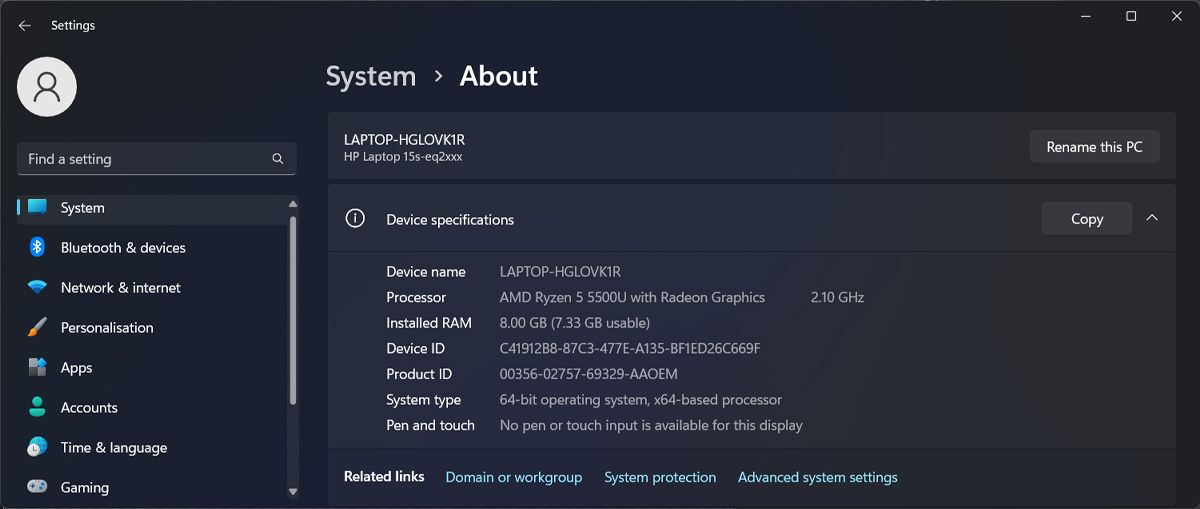
If you’re not sure which version you’re currently running, press Windows key + I to bring up the Settings menu. There, head to System, scroll to the bottom of the page, and click About. Check the value next to System type to check if your system is 32 or 64-bit.
3. Set a Preferred GPU
There’s a chance your computer has two GPUs, and one of them is better when managing high-intensive graphics tasks. Instead of using the integrated graphics card to process complex tasks, you should choose a preferred GPU for games or editing software to reduce the memory reserved by Windows.
4. Run the Hardware and Devices Troubleshooter
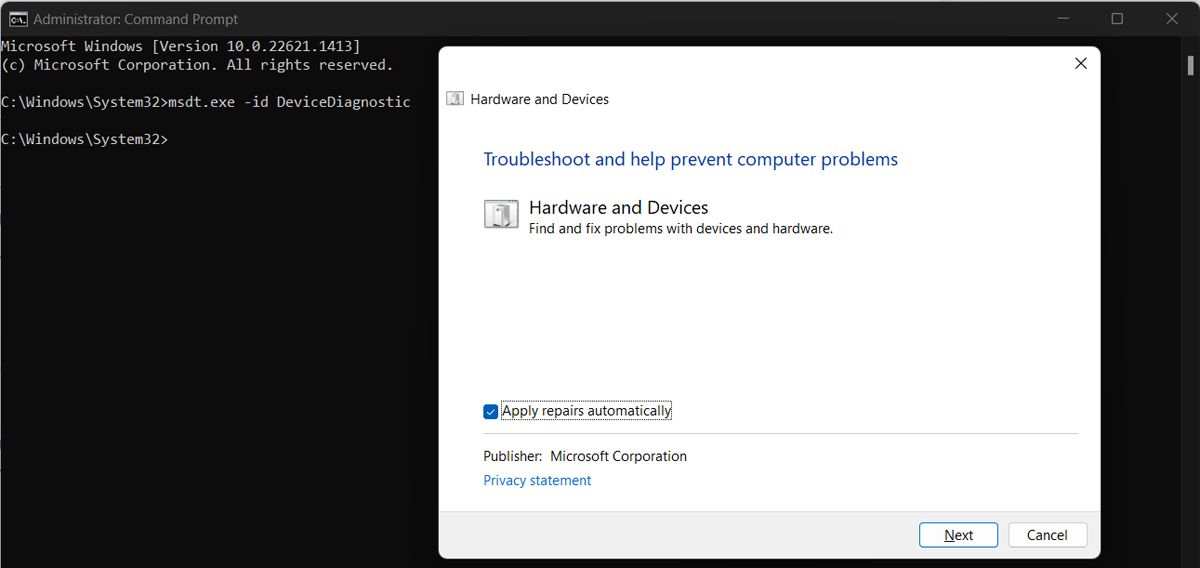
If one of your connected devices isn’t working properly, Windows might reserve more of your system memory. To fix it, you should run Windows’ Hardware and Devices troubleshooter. Here’s how you can do it:
- Launch Command Prompt with administrative rights.
- Type msdt.exe -id DeviceDiagnostic and press Enter.
- In the Hardware and Devices window, click Advanced, and check the Apply repairs automatically option.
- Click Next to start the process.
4. Edit Your System Configuration
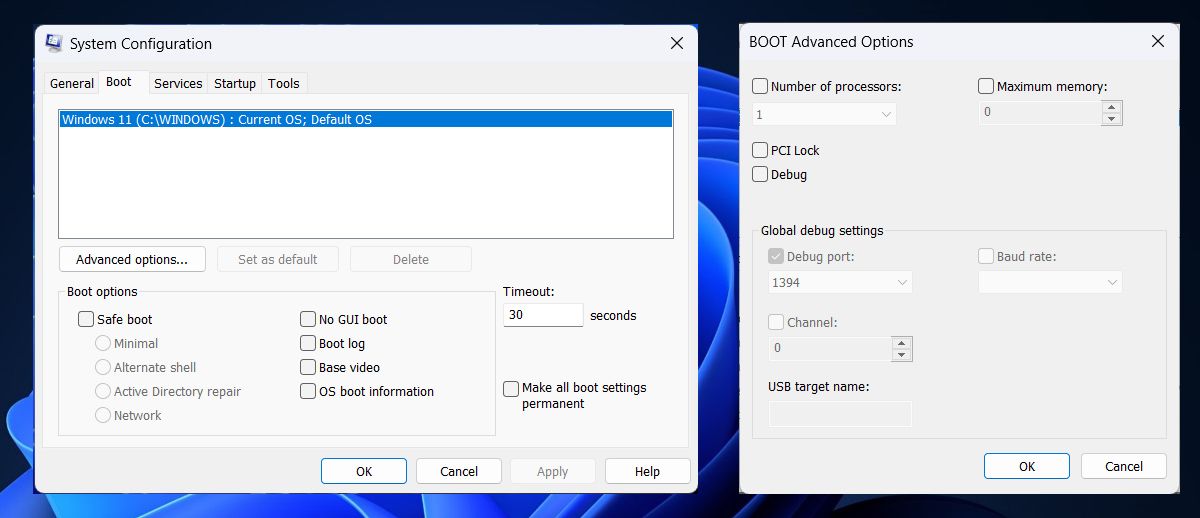
In general, Windows is the only one deciding how much of your system memory it reserves. However, you can control the maximum amount of reserved memory through System Configuration. Here’s how you can do it:
- Press Win + R to bring up a Run box.
- Type msconfig and press Enter.
- In the System Configuration window, open the Boot tab.
- Click Advanced options.
- Check Maximum memory and edit the value.
- Click OK.
Keep in mind this will have a direct impact on how much memory Windows reserves to keep your system running properly. Don’t set a value too low to make sure Windows has enough resources.
5. Restore the BIOS to Its Default Settings
You can use your computer for years without thinking of BIOS. But it plays an important role in your computer’s stability. If you notice your system assigns too many resources to the Hardware Reserved Memory, the problem might be caused by improper BIOS settings. In this case, reverting it to its default settings should fix the issue.
First, press Del or F2 to enter BIOS during the Windows startup screen. From the bottom of the page, click Load Defaults (or Restore Settings) and confirm the action. Then, exit BIOS, restart your computer, and check the Hardware Reserved Memory value.
If you can’t access BIOS during the startup screen, there are more methods you could try to enter BIOS and reset it.
Manage the Hardware Reserved Memory on Windows
Hopefully, our guide helped you know more about your computer’s hardware reserved memory. The truth is, you may not even think about it until it negatively impacts your system’s performance, but if this happens, the tips above should help you manage the situation.
But there are so many system tricks that you could use to avoid having Windows take too much of your resources. If you’re looking for a permanent fix, you might have to upgrade your computer’s hardware.

